
.NET (1273)
Children categories
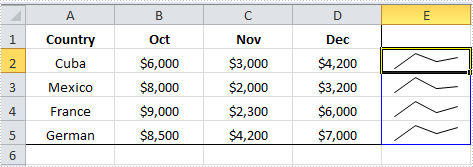
Sparkline is a tiny chart that can be inserted in cells to represent the trends in a series of values. Spire.XLS enables programmers to select a data cell range and display sparkline in another cell, usually next to data range. This article gives an example in C# and VB.NET to show how this purpose is achieved with a few lines of code.
Code Snippet:
Step 1: Create a new Workbook and load the sample file.
Workbook wb = new Workbook();
wb.LoadFromFile("sample.xlsx");
Step 2: Get the Worksheet from Workbook.
Worksheet ws = wb.Worksheets[0];
Step 3: Set SparklineType as line and apply line sparkline to SparklineCollection.
SparklineGroup sparklineGroup = ws.SparklineGroups.AddGroup(SparklineType.Line);
SparklineCollection sparklines = sparklineGroup.Add();
Step 4: Call SparklineCollection.Add(DateRange, ReferenceRange) mothed get data from a range of cells and display sparkline chart inside another cell, e.g., a sparkline in E2 shows the trend of values from A2 to D2.
sparklines.Add(ws["A2:D2"], ws["E2"]);
sparklines.Add(ws["A3:D3"], ws["E3"]);
sparklines.Add(ws["A4:D4"], ws["E4"]);
sparklines.Add(ws["A5:D5"], ws["E5"]);
Step 5: Save the file.
wb.SaveToFile("output.xlsx",ExcelVersion.Version2010);
Output:
Full Code:
using Spire.Xls;
namespace InsertSparkline
{
    class Program
    {

        static void Main(string[] args)
        {

            Workbook wb = new Workbook();
            wb.LoadFromFile("sample.xlsx");
            Worksheet ws = wb.Worksheets[0];

            SparklineGroup sparklineGroup = ws.SparklineGroups.AddGroup(SparklineType.Line);
            SparklineCollection sparklines = sparklineGroup.Add();
            sparklines.Add(ws["A2:D2"], ws["E2"]);
            sparklines.Add(ws["A3:D3"], ws["E3"]);
            sparklines.Add(ws["A4:D4"], ws["E4"]);
            sparklines.Add(ws["A5:D5"], ws["E5"]);

            wb.SaveToFile("output.xlsx", ExcelVersion.Version2010);

        }
    }
}
Imports Spire.Xls
Namespace InsertSparkline
	Class Program

		Private Shared Sub Main(args As String())

			Dim wb As New Workbook()
			wb.LoadFromFile("sample.xlsx")
			Dim ws As Worksheet = wb.Worksheets(0)

			Dim sparklineGroup As SparklineGroup = ws.SparklineGroups.AddGroup(SparklineType.Line)
			Dim sparklines As SparklineCollection = sparklineGroup.Add()
			sparklines.Add(ws("A2:D2"), ws("E2"))
			sparklines.Add(ws("A3:D3"), ws("E3"))
			sparklines.Add(ws("A4:D4"), ws("E4"))
			sparklines.Add(ws("A5:D5"), ws("E5"))

			wb.SaveToFile("output.xlsx", ExcelVersion.Version2010)

		End Sub
	End Class
End Namespace
In PDF documents, the functionality to expand or collapse bookmarks helps provide a more organized and easier to navigate layout. When bookmarks are expanded, the entire hierarchy of bookmarks is visible at once, giving a comprehensive view of the document's structure and aiding in comprehension of its flow. Conversely, the option to collapse bookmarks is beneficial for users who prefer a less detailed view, as it allows them to focus on a specific part of the document without being distracted by the entire hierarchy. This article will introduce how to expand or collapse bookmarks in PDF in C# using Spire.PDF for .NET.
Install Spire.PDF for .NET
To begin with, you need to add the DLL files included in the Spire.PDF for.NET package as references in your .NET project. The DLL files can be either downloaded from this link or installed via NuGet.
PM> Install-Package Spire.PDF
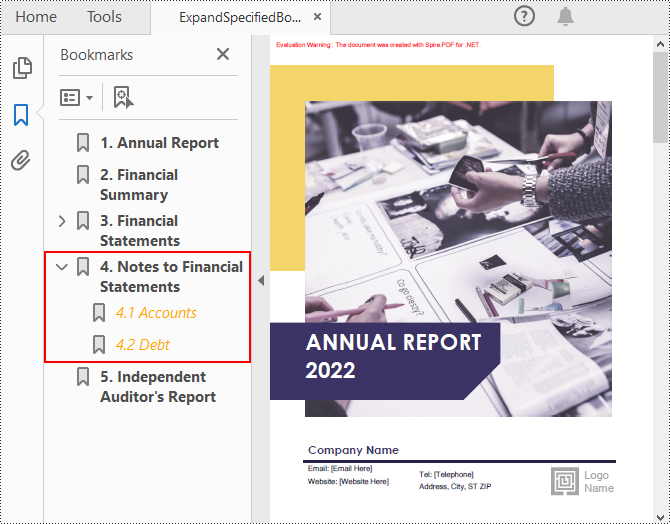
Expand or Collapse a Specific Bookmark in PDF in C#
Spire.PDF for .NET provides the PdfBookmark.ExpandBookmark property to expand or collapse a specified bookmark in PDF. The following are the detailed steps.
- Create a PdfDocument object.
- Load a PDF file using PdfDocument.LoadFromFile() method.
- Get a specified bookmark in the PDF file using PdfDocument.Bookmarks[] property.
- Expand the bookmark by setting the PdfBookmark.ExpandBookmark property to true. Or set it to false to collapses the bookmark.
- Save the result PDF file using PdfDocument.SaveToFile() method.
- C#
using Spire.Pdf;
using Spire.Pdf.Bookmarks;

namespace ExpandOrCollapseABookmark
{
    class Program
    {
        static void Main(string[] args)
        {
            //Create a PdfDocument object
            PdfDocument pdf = new PdfDocument();

            //Load a PDF file
            pdf.LoadFromFile("AnnualReport.pdf");

            //Get a specified bookmark
            PdfBookmark bookmarks = pdf.Bookmarks[3];

            //Expand the bookmark
            bookmarks.ExpandBookmark = true;
            //collapse the bookmark
            //bookmarks.ExpandBookmark = false;


            //Save the result file
            pdf.SaveToFile("ExpandSpecifiedBookmark.pdf");
        }
    }
}
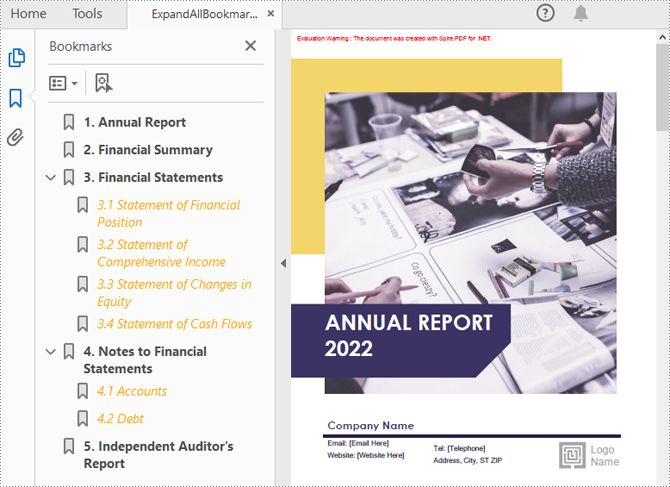
Expand or Collapse All Bookmarks in PDF in C#
You can also iterate through all the bookmarks in a PDF file, and then expand or collapse each bookmark through the PdfBookmark.ExpandBookmark property. The following are the detailed steps.
- Create a PdfDocument object.
- Load a PDF file using PdfDocument.LoadFromFile() method.
- Iterate through all bookmarks in the PDF file.
- Expand each bookmark by setting the PdfBookmark.ExpandBookmark property to true. Or set it to false to collapses each bookmark.
- Save the result PDF file using PdfDocument.SaveToFile() method.
- C#
using Spire.Pdf;
using Spire.Pdf.Bookmarks;

namespace ExpandOrCollapsePDFBookmarks
{
    class Program
    {
        static void Main(string[] args)
        {
            //Create a PdfDocument object
            PdfDocument pdf = new PdfDocument();

            //Load a PDF file
            pdf.LoadFromFile("AnnualReport.pdf");

            //Loop through all bookmarks and expand them
            foreach (PdfBookmark bookmark in pdf.Bookmarks)
            {
               bookmark.ExpandBookmark = true;
            }
            //Save the result file
            pdf.SaveToFile("ExpandAllBookmarks.pdf");
        }
    }
}
Apply for a Temporary License
If you'd like to remove the evaluation message from the generated documents, or to get rid of the function limitations, please request a 30-day trial license for yourself.
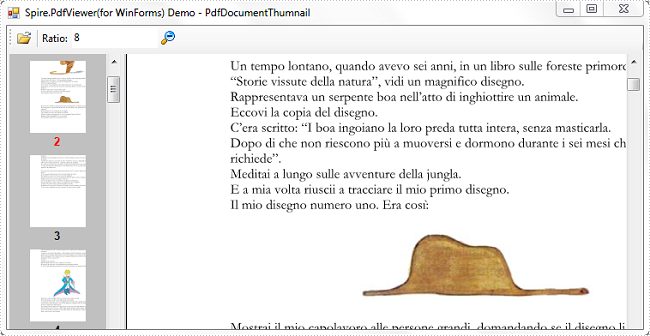
PDF document thumbnails, appearing in the left-hand corner of a PDF reader, provide miniature previews of document pages. The 'Thumbnail View' pane allows you to view page thumbnails of all the pages included in the PDF document and you can simply click on the thumbnail to quickly travel to that page.
This article presents how to create a PDF document thumbnail view in your own .NET PDF viewer via Spire.PDFViewer. Detailed steps are as below:
Step 1: Create a new project in Windows Forms Application.
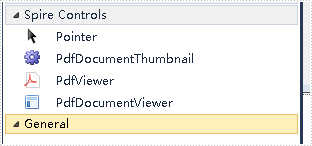
Step 2: Add Spire.PDFViewer control to VS Toolbox.
Step 3: Design Form1.
- Add a ToolStrip to Form1. Insert two Buttons, one TextBox and one Label to ToolStrip.
- Drag PdfDocumentThumbnail and PdfDocumentViewer control from Toolbox to Form1.
- Set properties of the Buttons, Labels, TextBox, PdfDocumentThumbnail and PdfDocumentViewer as below.
Tools |
Properties |
As |
| ToolStripButton1 | Name | btnOpen |
| DisplayStyle | Image | |
| ToolStripButton2 | Name | btnThumbnailRatio |
| DisplayStyle | Image | |
| ToolStripLabel1 | Name | toolStripLabel1 |
| DisplayStyle | Text | |
| Text | Ratio | |
| ToolStripTextBox | Name | txtThumbnailRatio |
| PdfDocumentThumbnail | Name | pdfDocumentThumbnail1 |
| Dock | Fill | |
| PdfDocumentViewer | Name | pdfDocumentViewer1 |
| Dock | Full |
Step 4: Set code for btnOpen and btnThumbnailRatio.
1) Create a OpenFileDailog in btnOpen click event which enables you to open a file with correct type.
    private void btnOpen_Click(object sender, EventArgs e)
 {
     OpenFileDialog dialog = new OpenFileDialog();
     dialog.Filter = "PDF document(*.pdf)|*.pdf";
     DialogResult result = dialog.ShowDialog();
     if (result == DialogResult.OK)
     {
         string pdfDocument = dialog.FileName;
         this.pdfDocumentViewer1.LoadFromFile(pdfDocument);
     }

 }
2) Set zoom ratio for thumbnail view mode.
  private void btnThumbnailRatio_Click(object sender, EventArgs e)
  {
      if (this.pdfDocumentViewer1.IsDocumentLoaded)
     {
          int percent = 0;
          bool isNumeric = int.TryParse(this.txtThumbnailRatio.Text, out percent);
          if (isNumeric)
          {
              this.pdfDocumentThumbnail1.ZoomPercent =Math.Abs(percent);
          }
      }
  }
Run this program and open an existing PDF document, you'll get following output:
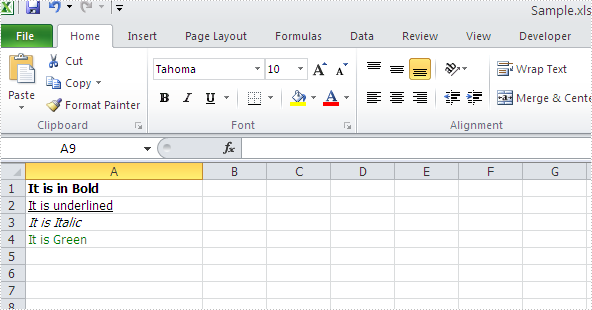
Spire.XLS can help developers to write rich text into the spreadsheet easily, such as set the text in bold, italic, and set the colour and font for them. We have already shown you how to set Subscript and Superscript in Excel files by using Spire.XLS. This article will focus on demonstrate how to formatting text in Excel sheet in C#.
Spire.Xls offers ExcelFont class and developers can format the text of cells easily. By using RichText, we can add the text into cells and set font for it. Here comes to the steps of how to write rich text into excel cells.
Step 1: Create an excel document and get its first worksheet.
Workbook workbook = new Workbook();
Worksheet sheet = workbook.Worksheets[0];
Step 2: Create the fonts and sent the format for each font.
//create a font and set the format to bold.
ExcelFont fontBold = workbook.CreateFont();
fontBold.IsBold = true;

//create a font and set the format to underline.
ExcelFont fontUnderline = workbook.CreateFont();
fontUnderline.Underline = FontUnderlineType.Single;

//create a font and set the format to italic.
ExcelFont fontItalic = workbook.CreateFont();
fontItalic.IsItalic = true;

//create a font and set the color to green.
ExcelFont fontColor = workbook.CreateFont();
fontColor.KnownColor = ExcelColors.Green;
Step 3: Set the font for specified cell range.
RichText richText = sheet.Range["A1"].RichText;
richText.Text="It is in Bold";
richText.SetFont(0, richText.Text.Length-1, fontBold);

richText = sheet.Range["A2"].RichText;
richText.Text = "It is underlined";
richText.SetFont(0, richText.Text.Length-1, fontUnderline);

richText = sheet.Range["A3"].RichText;
richText.Text = "It is Italic";
richText.SetFont(0, richText.Text.Length - 1, fontItalic);

richText = sheet.Range["A4"].RichText;
richText.Text = "It is Green";
richText.SetFont(0, richText.Text.Length - 1, fontColor);
Step 4: Save the document to file.
workbook.SaveToFile("Sample.xls",ExcelVersion.Version97to2003);
Effective screenshot of writing rich text into excel worksheet:
Full codes:
using Spire.Xls;
namespace WriteRichtextinExcel
{
    class Program
    {
        static void Main(string[] args)
        {
            Workbook workbook = new Workbook();
            Worksheet sheet = workbook.Worksheets[0];

            ExcelFont fontBold = workbook.CreateFont();
            fontBold.IsBold = true;

            ExcelFont fontUnderline = workbook.CreateFont();
            fontUnderline.Underline = FontUnderlineType.Single;

            ExcelFont fontItalic = workbook.CreateFont();
            fontItalic.IsItalic = true;

            ExcelFont fontColor = workbook.CreateFont();
            fontColor.KnownColor = ExcelColors.Green;

            RichText richText = sheet.Range["A1"].RichText;
            richText.Text = "It is in Bold";
            richText.SetFont(0, richText.Text.Length - 1, fontBold);

            richText = sheet.Range["A2"].RichText;
            richText.Text = "It is underlined";
            richText.SetFont(0, richText.Text.Length - 1, fontUnderline);

            richText = sheet.Range["A3"].RichText;
            richText.Text = "It is Italic";
            richText.SetFont(0, richText.Text.Length - 1, fontItalic);

            richText = sheet.Range["A4"].RichText;
            richText.Text = "It is Green";
            richText.SetFont(0, richText.Text.Length - 1, fontColor);

            workbook.SaveToFile("Sample.xls", ExcelVersion.Version97to2003);

        }
    }
}
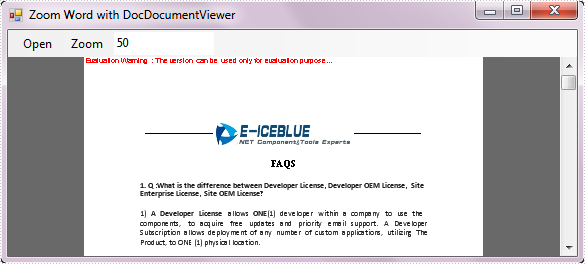
Zoom is a basic as well useful function in any text file reader. Users can chose to zoom out or zoom in of a document depending on how small the font is, or on their own view preference. In this article, I’ll introduce two ways to zoom Word file using Spire.DocViewer:
- Zoom with a particular zoom mode
- Zoom by entering a percentage
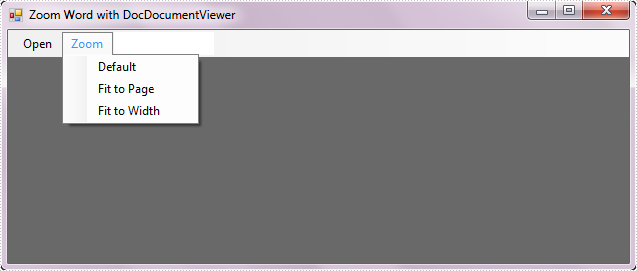
Now, I will explain more by creating a Windows Forms Application. Some steps about how to add DocVierwer control to toolbox and how to open Word file using Spire.DocViewer have been demonstrated previously. In the following section, I only add a MenuItem and a TextBox to Form1.
In the MenuItem, named Zoom, I create three sub-items which are used to save three particular zoom modes.
- Default: View page in its original size.
- Fit to page: When this option is selected, the document will be resized to match the dimensions of your view window.
- Fit to width: When this option is selected, the document will best fit to width of window.
Code behind:
        private void defaultToolStripMenuItem_Click(object sender, EventArgs e)
        {
            this.docDocumentViewer1.ZoomMode = ZoomMode.Default;
        }
        private void fitToPageToolStripMenuItem_Click(object sender, EventArgs e)
        {
            this.docDocumentViewer1.ZoomMode = ZoomMode.FitPage;
        }
        private void fitToWidthToolStripMenuItem_Click(object sender, EventArgs e)
        {
            this.docDocumentViewer1.ZoomMode = ZoomMode.FitWidth;
        }
Another way to zoom in or out of Word document is enter a desired percentage in TextBox.
Code for TextBox:
      private void toolStripTextBox1_KeyDown(object sender, KeyEventArgs e)
        {
            if (Keys.Enter == e.KeyCode)
            {
                int p;
                if (int.TryParse(this.toolStripTextBox1.Text, out p))
                {
                    this.docDocumentViewer1.ZoomTo(p);
                }
            }
        }
Run the program, you can get following windows application.
Fit to Width:
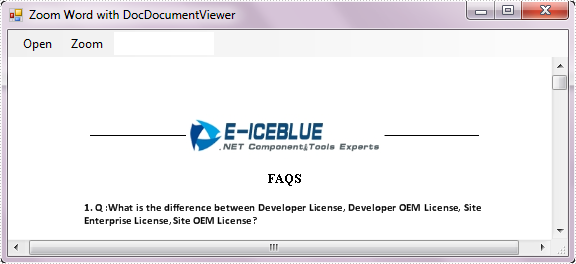
Zoom with 50 percentages:
Adding text into the PDF files is one of the most important requirements for developers. With the help of Spire.PDF, developer can draw transform text, alignment text and rotate text in PDF files easily. This tutorial will show you how to add underline text in C#.
By using the method canvas.drawstring offered by Spire.PDF, developers can set the position, font, brush and style for the adding texts. With the PdfFontStyle, developers can set the style to underline, bold, italic, regular and strikeout. Here comes to the code snippet of how to add underline text in PDF.
Step 1: Create a new PDF document.
PdfDocument pdf = new PdfDocument();
Step 2: Add a new page to the PDF file.
PdfPageBase page = pdf.Pages.Add();
Step 3: Create a true type font with size 20f, underline style.
PdfTrueTypeFont font = new PdfTrueTypeFont(@"C:\WINDOWS\Fonts\CONSOLA.TTF", 20f, PdfFontStyle.Underline);
Step 4: Create a blue brush.
PdfSolidBrush brush = new PdfSolidBrush(Color.Blue);
Step 5: Draw the text string at the specified location with the specified Brush and Font objects.
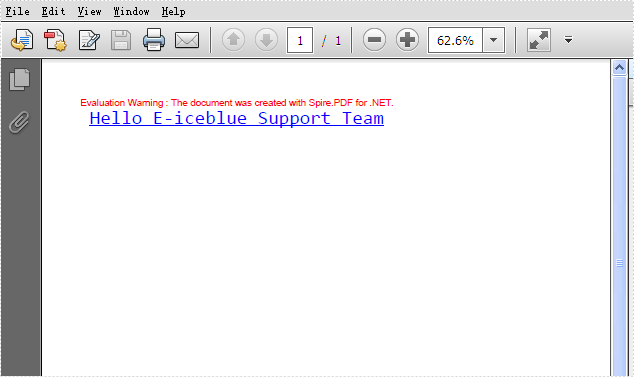
page.Canvas.DrawString("Hello E-iceblue Support Team", font, brush, new PointF(10, 10));
Step 6: Save the PDF file.
pdf.SaveToFile("Result.pdf", FileFormat.PDF);
Effective screenshot:
Full codes:
using Spire.Pdf;
using Spire.Pdf.Graphics;
using System.Drawing;


namespace AddUnderlinetext
{
    class Program
    {
        static void Main(string[] args)
        {
            PdfDocument pdf = new PdfDocument();
            PdfPageBase page = pdf.Pages.Add();
            PdfTrueTypeFont font = new PdfTrueTypeFont(@"C:\WINDOWS\Fonts\CONSOLA.TTF", 20f, PdfFontStyle.Underline);
            PdfSolidBrush brush = new PdfSolidBrush(Color.Blue);
            page.Canvas.DrawString("Hello E-iceblue Support Team", font, brush, new PointF(10, 10));
            pdf.SaveToFile("Result.pdf", FileFormat.PDF);
        }
    }
}
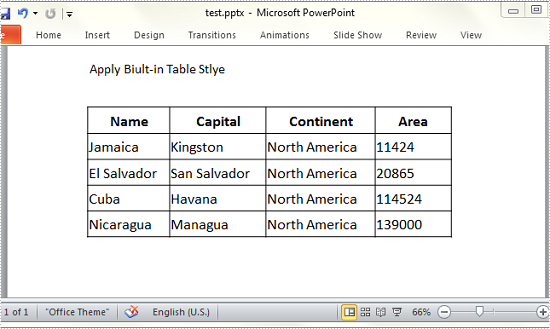
How to Apply Built-in Style to PowerPoint Table in C#, VB.NET
2014-12-18 07:38:23 Written by support iceblueBuilt-in table styles are predefined formatting options that can be quickly applied to any table, greatly enhancing its appearance and readability. As same as MS PowerPoint, Spire.Presentation provides such a feature to give your table a professional look by applying a certain built-in table style. This article presents how this purpose can be achieved using Spire.Presentation with C#, VB.NET.
As we can see from below picture, plain tale is not that attractive before applying any style.
Code Snippet for Applying Table Style:
Step 1: Create an instance of presentation and load the test file.
Presentation ppt = new Presentation("test.pptx", FileFormat.Pptx2010);
Step 2: Get the table from presentation slide.
ITable table = ppt.Slides[0].Shapes[1] as ITable;
Step 3: Choose one table style from TableStylePreset and apply it to selected table.
table.StylePreset = TableStylePreset.MediumStyle2Accent2;
Step 4: Save the file.
ppt.SaveToFile("Result.pptx", FileFormat.Pptx2010);
Output:

Full Code:
using Spire.Presentation;

namespace Apply_Built_in_Style
{

    class Program
    {

        static void Main(string[] args)
        {
            Presentation ppt = new Presentation("test.pptx", FileFormat.Pptx2010);
            ITable table = ppt.Slides[0].Shapes[1] as ITable;
            table.StylePreset = TableStylePreset.MediumStyle2Accent2;
            ppt.SaveToFile("Result.pptx", FileFormat.Pptx2010);

        }

    }
}
Imports Spire.Presentation

Namespace Apply_Built_in_Style

	Class Program

		Private Shared Sub Main(args As String())
			Dim ppt As New Presentation("test.pptx", FileFormat.Pptx2010)
			Dim table As ITable = TryCast(ppt.Slides(0).Shapes(1), ITable)
			table.StylePreset = TableStylePreset.MediumStyle2Accent2
			ppt.SaveToFile("Result.pptx", FileFormat.Pptx2010)

		End Sub

	End Class
End Namespace
We have already shown you how to use the method ListObjects to filter the data and format it as a table. This article will focus on demonstrate how to remove the auto filters with the method AutoFilters offered by Spire.XLS. Developer can also use the method sheet.AutoFilters.Range to create the auto filters.
Step 1: Create an excel document and load the Excel with auto filers from file.
Workbook workbook = new Workbook();
workbook.LoadFromFile("Filter.xlsx ");
Step 2: Gets the first worksheet in the Excel file.
Worksheet sheet = workbook.Worksheets[0];
Step 3: Remove the auto filters.
sheet.AutoFilters.Clear();
Step 4: Save the document to file.
workbook.SaveToFile("Result.xlsx", ExcelVersion.Version2010);
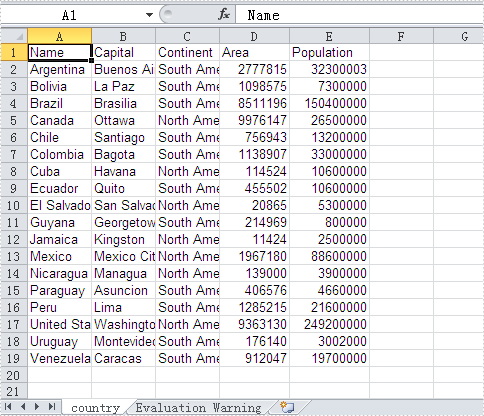
Screenshot for the Excel files with auto filters:
The effective screenshot of removing the auto filters:
Full codes:
using Spire.Xls;
namespace RemoveAutoFilter
{
    class Program
    {

      static void Main(string[] args)
        {
            Workbook workbook = new Workbook();
            workbook.LoadFromFile("Filter.xlsx");

            Worksheet sheet = workbook.Worksheets[0];
            sheet.AutoFilters.Clear();

            workbook.SaveToFile("result.xlsx", ExcelVersion.Version2010);
        }


        }
    }
This article has demonstrated how to create a Windows Forms Application to open and close Word file using Spire.DocViewer. Now, we are adding a print button to Form1 to fulfill the print feature for this Word document viewer.
Detailed Steps
Step 1: Add another button to Form1, and set the following properties for it in the Properties Window:
- Name: btnPrint
- DisplayStyle: Image
- Image: Print.Properties.Resources.Print
Step 2: Double click the button to write code. In this button code, we firstly instantiate an object of System.Windows.Forms.PrintDialog and set some of its relative properties. Call ShowDialog method to make the print dialog visible.
    private void btnPrint_Click(object sender, EventArgs e)
        {
            //Show a Print Dialog
            PrintDialog dialog = new PrintDialog();
            dialog.AllowCurrentPage = true;
            dialog.AllowSomePages = true;
            dialog.UseEXDialog = true;
            DialogResult result = dialog.ShowDialog();
            //...
         }
Step 3: Set print parameters of DocDocumentViewer.PrintDialog and print the document.
            //...
                 if (result == DialogResult.OK)
            {
                try
                {
                    //Set print parameters.
                    this.docDocumentViewer1.PrintDialog = dialog;
                    //Gets the PrintDocument.
                    dialog.Document = docDocumentViewer1.PrintDocument;
                    dialog.Document.Print();
                }
                catch (Exception ex)
                {
                    MessageBox.Show(ex.Message, "Error", MessageBoxButtons.OK, MessageBoxIcon.Error);
                }
            }
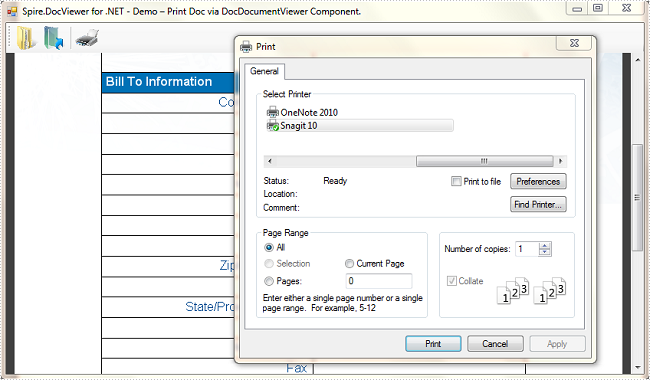
Run the program, open an existing Word file and click 'Print' button, you'll get a dialog as below:
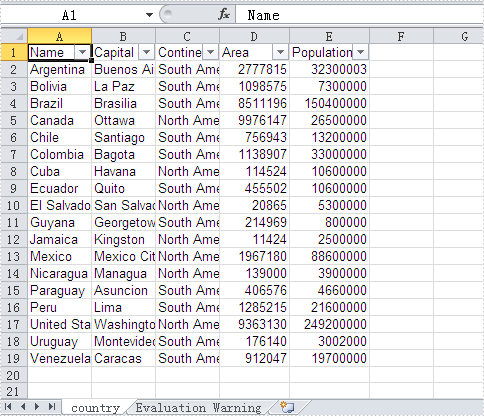
Auto Filter is the most convenient way to select the data we want from a large amount of the data in an excel data table. With the help of Spire.XLS for .NET, developers can use the method ListObjects to filter the data and format it as a table. This article will focus on show you how to add table with filter in Excel.
Step 1: Create an excel document and load the Excel from file:
Workbook workbook = new Workbook();
workbook.LoadFromFile("DataTable.xlsx");
Step 2: Gets the first worksheet in the Excel file
Worksheet sheet = workbook.Worksheets[0];
Step 3: Create a List Object named in Table
sheet.ListObjects.Create("Table", sheet.Range[1, 1, sheet.LastRow, sheet.LastColumn]);
Step 4: Set the BuiltInTableStyle for List object.
sheet.ListObjects[0].BuiltInTableStyle = TableBuiltInStyles.TableStyleLight9;
Step 5: Save the document to file.
workbook.SaveToFile("Filter.xlsx", ExcelVersion.Version2010);
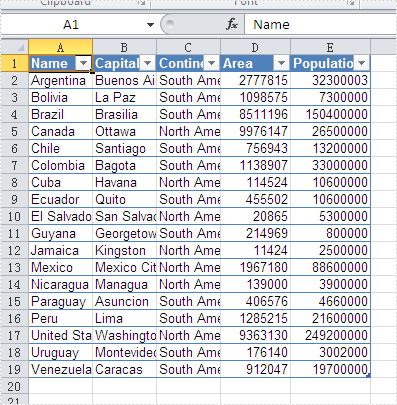
Effective screenshot after the date has been auto filtered:
Full codes:
namespace Excelfilter
{
    class Program
    {
        static void Main(string[] args)
        {
            Workbook workbook = new Workbook();
            workbook.LoadFromFile("DataTable.xlsx");

            Worksheet sheet = workbook.Worksheets[0];

            sheet.ListObjects.Create("Table", sheet.Range[1, 1, sheet.LastRow, sheet.LastColumn]);

            sheet.ListObjects[0].BuiltInTableStyle = TableBuiltInStyles.TableStyleLight9;

            workbook.SaveToFile("Filter.xlsx", ExcelVersion.Version2010);
        }
    }
}
