
.NET (1273)
Children categories
An Excel chart is a graphical representation of numbers, which visualizes your data in selected data table. Sometimes, we create a chart with MS Excel, but we don't really want to share the whole Excel file except for the chart. In such a case, we can export charts as image files for easy sharing. In the following section, you will learn how to save your Excel chart as an image in C# and VB.NET via Spire.XLS.
In the test file, I have created four different type of charts based on a same data table. Then, let’s see how each chart can be saved as an image with code.
Test File:

Code Snippet:
Step 1: Create a new workbook and load the test file.
Workbook workbook = new Workbook();
workbook.LoadFromFile("chart.xlsx", ExcelVersion.Version2010);
Step 2: Get the worksheet that contains the chart from workbook.
Worksheet sheet=workbook.Worksheets[0];
Step 3: Initialize a new instance of image array to store the Bitmap images which are converted from charts.
Image[] imgs = workbook.SaveChartAsImage(sheet);
Step 4: Traverse every item in image array and save them to specified image format.
for (int i = 0; i < imgs.Length; i++)
       {
           imgs[i].Save(string.Format("img-{0}.png", i), ImageFormat.Png);
       }
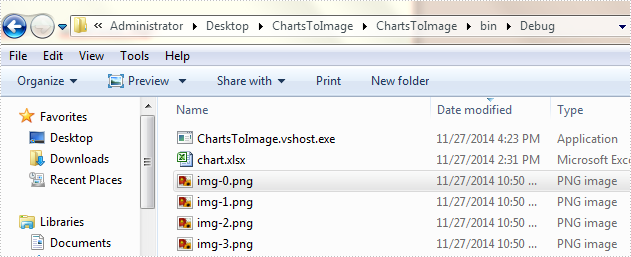
Output:
Charts have been saved as images in bin folder.
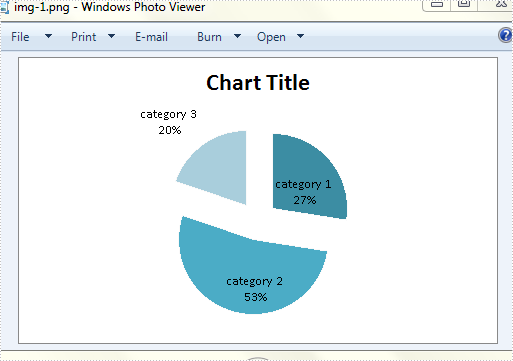
The second chart looks like:
Full Code:
using Spire.Xls;
using System.Drawing;
using System.Drawing.Imaging;
namespace SaveExcelCharts
{
    class Program
    {

        static void Main(string[] args)
        {

            Workbook workbook = new Workbook();
            workbook.LoadFromFile("chart.xlsx", ExcelVersion.Version2010);
            Worksheet sheet = workbook.Worksheets[0];
            Image[] imgs = workbook.SaveChartAsImage(sheet);
            for (int i = 0; i < imgs.Length; i++)
            {
                imgs[i].Save(string.Format("img-{0}.png", i), ImageFormat.Png);
            }

        }
    }
}
Imports Spire.Xls
Imports System.Drawing
Imports System.Drawing.Imaging
Namespace SaveExcelCharts
	Class Program

		Private Shared Sub Main(args As String())

			Dim workbook As New Workbook()
			workbook.LoadFromFile("chart.xlsx", ExcelVersion.Version2010)
			Dim sheet As Worksheet = workbook.Worksheets(0)
			Dim imgs As Image() = workbook.SaveChartAsImage(sheet)
			For i As Integer = 0 To imgs.Length - 1
				imgs(i).Save(String.Format("img-{0}.png", i), ImageFormat.Png)
			Next

		End Sub
	End Class
End Namespace
Add Secondary Value Axis to PowerPoint Chart in C#, VB.NET
2014-11-25 06:20:54 Written by support iceblueSometimes, the values in a chart vary widely from data series to data series, so it is difficult for us to compare the data only based on the primary vertical axis. To make the chart easier to read, you can plot one or more data series on a secondary axis. This article presents how to add secondary value axis to PowerPoint chart using Spire.Presentation in C# and VB.NET.
As is shown in the following combination chart, we can hardly learn the information of Series 3 since it contains different type of data compared with Series 1 and Series 2. In such cases, it is necessary to add a secondary axis to display the value of Series 3.
Test File:

Code Snippet:
Step 1: Create a new PowerPoint document and load the test file.
Presentation ppt = new Presentation("Test.pptx", FileFormat.Pptx2010);
Step 2: Get the chat from the PowerPoint file.
IChart chart = ppt.Slides[0].Shapes[0] as IChart;
Step 3: Add a secondary axis to display the value of Series 3.
chart.Series[2].UseSecondAxis = true;
Step 4: Set the grid line of secondary axis as invisible.
chart.SecondaryValueAxis.MajorGridTextLines.FillType=FillFormatType.None;
Step 5: Save the file.
ppt.SaveToFile("Result.pptx", FileFormat.Pptx2010);
Result:

Entire Code:
using Spire.Presentation;
using Spire.Presentation.Charts;
using Spire.Presentation.Drawing;

namespace AddValue
{

    class Program
    {
        static void Main(string[] args)
        {

            Presentation ppt = new Presentation("Test.pptx", FileFormat.Pptx2010);
            IChart chart = ppt.Slides[0].Shapes[0] as IChart;
            chart.Series[2].UseSecondAxis = true;
            chart.SecondaryValueAxis.MajorGridTextLines.FillType = FillFormatType.None;
            ppt.SaveToFile("Result.pptx", FileFormat.Pptx2010);

        }
    }
}
Imports Spire.Presentation
Imports Spire.Presentation.Charts
Imports Spire.Presentation.Drawing

Namespace AddValue

	Class Program
		Private Shared Sub Main(args As String())

			Dim ppt As New Presentation("Test.pptx", FileFormat.Pptx2010)
			Dim chart As IChart = TryCast(ppt.Slides(0).Shapes(0), IChart)
			chart.Series(2).UseSecondAxis = True
			chart.SecondaryValueAxis.MajorGridTextLines.FillType = FillFormatType.None
			ppt.SaveToFile("Result.pptx", FileFormat.Pptx2010)

		End Sub
	End Class
End Namespace
A table of contents, usually shorten as 'Contents' and abbreviated as TOC, is one of the most common function used in the professional documents. It gives readers clear and brief information of the document. This How To Guide for developers will explain the steps of create table of contents in C# with the help of a .NET word API Spire.Doc for .NET.
Firstly, view the screenshot of the table of contents created by the Spire.Doc in C#.
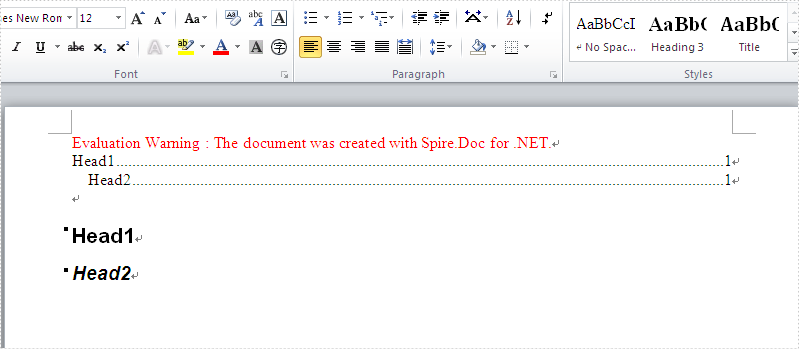
In this example, we call the method of AppendTOC to add the table of contents directly and use ApplyStyle to set the styles. Here comes to the steps of how to create TOC in C#.
Name Space we will use:
using Spire.Doc;
using Spire.Doc.Documents;
Step 1: Create a new document and add section and paragraph to the document.
Document doc = new Document();
Section section = doc.AddSection();
Paragraph para = section.AddParagraph();
Step 2: Add the Table of Contents and add the text that you want to appear in the table of contents.
para.AppendTOC(1, 3);
//Add a new paragraph to the section
Paragraph para1 = section.AddParagraph();
//Add text to the paragraph
para1.AppendText("Head1");
Step 3: Set the style for the paragraph.
para1.ApplyStyle(BuiltinStyle.Heading1);
Step 4: Add the second paragraph and set the style.
Paragraph para2 = section.AddParagraph();
para2.AppendText("Head2");
para2.ApplyStyle(BuiltinStyle.Heading2);
Step 5: Update the table of contents and save the document to file.
doc.UpdateTableOfContents();
doc.SaveToFile("CreateTableOfContent.docx", FileFormat.Docx);
Full codes:
using Spire.Doc;
using Spire.Doc.Documents;

namespace TableofContents
{
    class Program
    {
        static void Main(string[] args)
        {
            Document doc = new Document();
            Section section = doc.AddSection();
            Paragraph para = section.AddParagraph();

            para.AppendTOC(1, 3);
            Paragraph para1 = section.AddParagraph();
            para1.AppendText("Head1");

            para1.ApplyStyle(BuiltinStyle.Heading1);

            Paragraph para2 = section.AddParagraph();
            para2.AppendText("Head2");
            para2.ApplyStyle(BuiltinStyle.Heading2);

            doc.UpdateTableOfContents();
            doc.SaveToFile("CreateTableOfContent.docx", FileFormat.Docx);

        }
    }
}
Optimizing the order of slides in a PowerPoint presentation is a simple skill. By rearranging slides, you can refine the logic and flow of your presentation, group related points together, or move slides to more impactful locations. This flexibility enables you to create a cohesive, engaging narrative that captivates your audience.
This article demonstrates how to programmatically change the slide order in a PowerPoint document in C# by using the Spire.Presentation for .NET library.
Install Spire.Presentation for .NET
To begin with, you need to add the DLL files included in the Spire.Presentation for .NET package as references in your .NET project. The DLL files can be either downloaded from this link or installed via NuGet.
PM> Install-Package Spire.Presentation
Change the Slide Order in a PowerPoint Document in C#
To reorder slides in a PowerPoint presentation, create two Presentation objects - one to load the original document and another to create a new document. By copying the slides from the original document to the new one in the desired sequence, you can easily rearrange the slide order.
The steps to rearrange slides in a PowerPoint document using C# are as follows.
- Create a Presentation object.
- Load a PowerPoint document using Presentation.LoadFromFile() method.
- Specify the slide order within an array.
- Create another Presentation object for creating a new presentation.
- Add the slides from the original document to the new presentation in the specified order using Presentation.Slides.Append() method.
- Save the new presentation to a PPTX file using Presentation.SaveToFile() method.
- C#
using Spire.Presentation;
namespace ChangeSlideOrder
{
class Program
{
static void Main(string[] args)
{
// Create a Presentation object
Presentation presentation = new Presentation();
// Load a PowerPoint file
presentation.LoadFromFile("C:\\Users\\Administrator\\Desktop\\input.pptx");
// Specify the new slide order within an array
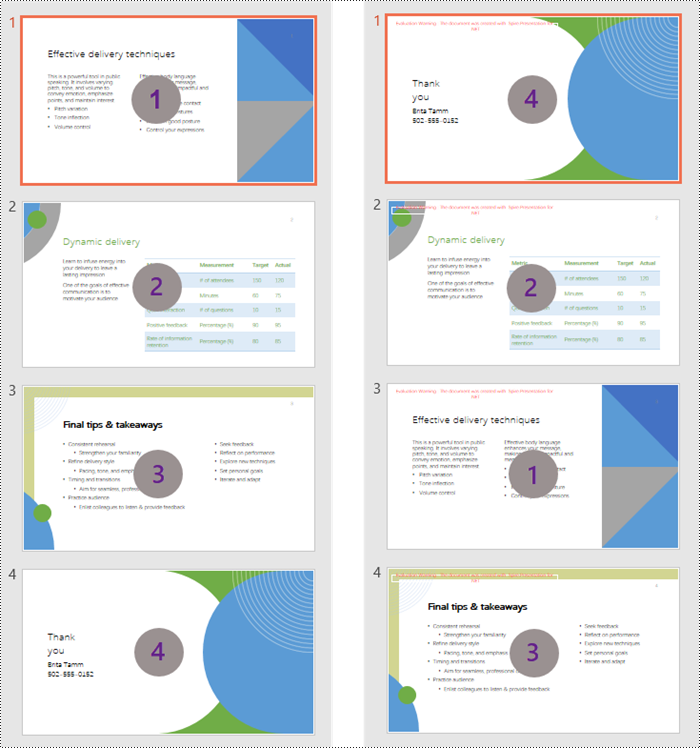
int[] newSlideOrder = new int[] { 4, 2, 1, 3 };
// Create another Presentation object
Presentation new_presentation = new Presentation();
// Remove the default slide
new_presentation.Slides.RemoveAt(0);
// Iterate through the array
for (int i = 0; i < newSlideOrder.Length; i++)
{
// Add the slides from the original PowerPoint file to the new PowerPoint document in the new order
new_presentation.Slides.Append(presentation.Slides[newSlideOrder[i] - 1]);
}
// Save the new presentation to file
new_presentation.SaveToFile("NewOrder.pptx", FileFormat.Pptx2019);
// Dispose resources
presentation.Dispose();
new_presentation.Dispose();
}
}
}
Apply for a Temporary License
If you'd like to remove the evaluation message from the generated documents, or to get rid of the function limitations, please request a 30-day trial license for yourself.
Spire.Presentation supports to work with multiple functions in chart, such as set number format and remove tick marks, format data labels of series. This article will focus on demonstrate how to set the color for datapoints of series in the PowerPoint document in C#.
In the class of ChartDataPoint, it represents a data point on the chart. Developers can access it to set the color, fill type and set the line property, etc. Now let's access to the datapoints to set color for datapoints of series with following code snippet:
Step 1: Create a new instance of Presentation class and load the file that contains the column chart.
Presentation ppt = new Presentation();
ppt.LoadFromFile("sample.pptx ");
Step 2: Get the chart in the document
IChart chart = ppt.Slides[0].Shapes[3] as IChart;
chart.Categories.CategoryLabels = chart.ChartData["A2", "A5"];
chart.Series.SeriesLabel = chart.ChartData["B1", "C1"];
chart.Series[0].Values = chart.ChartData["B2", "B5"];
Step 3: Access datapoints to set the property
ChartDataPoint cdp = new ChartDataPoint(chart.Series[0]);
chart.Series[1].Values = chart.ChartData["C2", "C5"];
cdp.Index = 1;
//set the type of filling
cdp.Fill.FillType = FillFormatType.Solid;
//set the fill color
cdp.Fill.SolidColor.KnownColor = KnownColors.Red;
chart.Series[0].DataPoints.Add(cdp);
Step 4: Save and Launch to view the resulted PPTX file.
ppt.SaveToFile("Accessdatapoint.pptx", FileFormat.Pptx2007);
System.Diagnostics.Process.Start("Accessdatapoint.pptx");
Effective screenshot:

Full codes:
using Spire.Presentation;
using Spire.Presentation.Charts;
using Spire.Presentation.Drawing;

namespace FormatData
{

    class Program
    {
        static void Main(string[] args)
        {

            Presentation ppt = new Presentation();
            ppt.LoadFromFile("sample.pptx ");
            IChart chart = ppt.Slides[0].Shapes[3] as IChart;
            chart.Categories.CategoryLabels = chart.ChartData["A2", "A5"];
            chart.Series.SeriesLabel = chart.ChartData["B1", "C1"];
            chart.Series[0].Values = chart.ChartData["B2", "B5"];

            ChartDataPoint cdp = new ChartDataPoint(chart.Series[0]);
            chart.Series[1].Values = chart.ChartData["C2", "C5"];
            cdp.Index = 1;
            cdp.Fill.FillType = FillFormatType.Solid;
            cdp.Fill.SolidColor.KnownColor = KnownColors.Red;
            chart.Series[0].DataPoints.Add(cdp);

            ppt.SaveToFile("Accessdatapoint.pptx", FileFormat.Pptx2007);
            System.Diagnostics.Process.Start("Accessdatapoint.pptx");

        }
    }
}
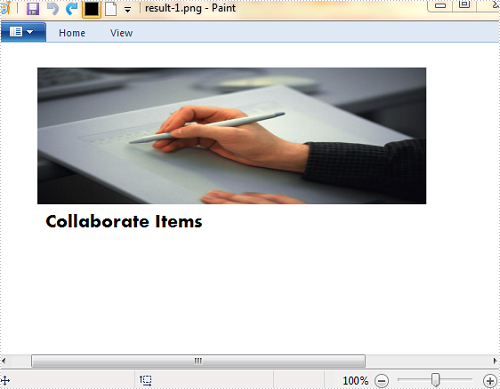
Since Excel spreadsheets or diagrams are difficult to distribute, it is reasonable that we frequently convert our Excel files to a web-friendly format, such as image. Plus, if we convert Excel to image, the data cannot be formatted and modified directly. In this article, I’ll introduce how to save each worksheet in an Excel file as an image to local folder in WPF using Spire.XLS for WPF.
The sample file for test contains three worksheets, sheet 1 and sheet 2 have some contents in them. What we need is to convert each worksheet that contains contents to image respectively.

Detailed Steps:
Step 1: Create a new project by choosing WPF Application in Visual Studio, add a button in MainWindow, double click the button to write code.
Step 2: Create a new instance of Spire.Xls.Workbook class and load the sample Excel file.
Workbook workbook = new Workbook();
workbook.LoadFromFile("sample.xlsx", ExcelVersion.Version2010);
Step 3: Use for sentence to traverse each worksheet in the Excel. Call Worksheet.SaveToImage() to save worksheet as image, set image format as png.
for (int i = 0; i < workbook.Worksheets.Count; i++)
{
    workbook.Worksheets[i].SaveToImage(string.Format("result-{0}.png", i));
}
Result:
Image 1
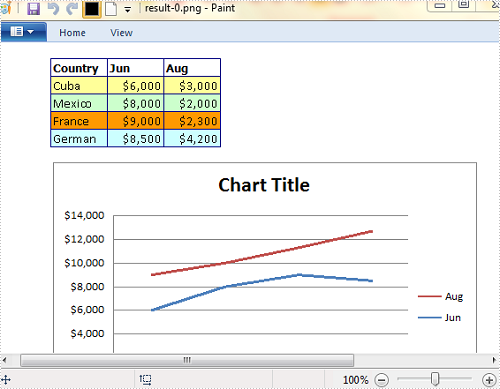
Image 2
Full Code:
using Spire.Xls;

namespace WpfApplication
{
    ///
    /// Interaction logic for MainWindow.xaml
    ///
    public partial class MainWindow : Window
    {
        public MainWindow()
        {
            InitializeComponent();
        }

        private void button1_Click(object sender, RoutedEventArgs e)
        {
            Workbook workbook = new Workbook();
            workbook.LoadFromFile("sample.xlsx", ExcelVersion.Version2010);
            for (int i = 0; i < workbook.Worksheets.Count; i++)
            {
                workbook.Worksheets[i].SaveToImage(string.Format("result-{0}.png", i));
            }
        }
    }
}
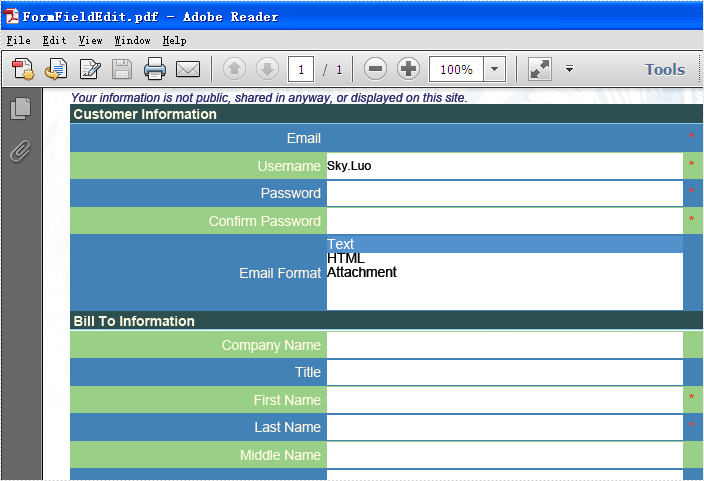
Form field has been widely used by developers to display, catch and edit data. Developers may create a form to let others to fill the data and then save the form as a non-fillable file and set it to read only. Spire.PDF supports to create and fill form field; this article will focus on show you how to change the field's value and set all the fields on a form to read only.
By using the PdfFormWidget class, we can get the PDF field collection on the form and then update the values on it. Here comes to the code snippet of how to change the form field's value and set it to read only:
Step 1: Create PDFDocument and load from file.
PdfDocument doc = new PdfDocument();
doc.LoadFromFile("FormField.pdf");
Step 2: Get the PDF field collection on the Form.
PdfFormWidget widget = doc.Form as PdfFormWidget;
Step 3: Traverse each PDF field in pdf field collection.
for (int i = 0; i < widget.FieldsWidget.List.Count; i++)
  {
    PdfField f = widget.FieldsWidget.List[i] as PdfField;
Step 4: Find a PDF field named username and set the value for it.
if (f.Name == "username")
{
  //Convert the pdf field to PdfTextBoxFieldWidget
PdfTextBoxFieldWidget textboxField = f as PdfTextBoxFieldWidget;
  //Change its text
textboxField.Text = "Sky.Luo";
                }
Step 5: Set the field to read-only.
f.Flatten = true;
f.ReadOnly = true;
Step 6: Save the document to file and launch to view it.
doc.SaveToFile("FormFieldEdit.pdf");
System.Diagnostics.Process.Start("FormFieldEdit.pdf");
Effective screenshot of the read only form field:
Full codes:
using Spire.Pdf;
using Spire.Pdf.Fields;
using Spire.Pdf.Widget;

namespace ReadOnlyField
{
    class Program
    {
        static void Main(string []args)
        {
            PdfDocument doc = new PdfDocument();
            doc.LoadFromFile("FormField.pdf");

            PdfFormWidget widget = doc.Form as PdfFormWidget;

            for (int i = 0; i < widget.FieldsWidget.List.Count; i++)
            {
                PdfField f = widget.FieldsWidget.List[i] as PdfField;
                if (f.Name == "username")
                {
                    PdfTextBoxFieldWidget textboxField = f as PdfTextBoxFieldWidget;
                    textboxField.Text = "Sky.Luo";
                }
                f.Flatten = true;
                f.ReadOnly = true;
            }
            doc.SaveToFile("FormFieldEdit.pdf");
            System.Diagnostics.Process.Start("FormFieldEdit.pdf");

        }
    }
}
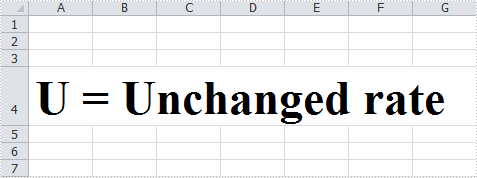
Some time back, one of registered members on our Forum had a requirement to display the value of HTML code in Excel cell. This article is aimed to provide a fine way to manage this issue using Spire.Doc and Spire.XLS.
Main Method:
At present, we have to use Document.LoadHTML() method which is available in Spire.Doc.Document class to load HTML string to a Word document, this way, HTML formatted text will be save in specific paragraphs. Then, get the paragraph with rich text style and return a RichTextString object, save RichText to a specified CellRange. Besides, the paragraph text style must be applied to this CellRange.
Detailed Steps:
Step 1: Create a new Workbook and Word document.
Workbook workbook = new Workbook();
Document doc = new Document();
Step 2: Save the HTML code to StringReader and load the HTML string to Word document.
StringReader sr = new StringReader("<span style=\"border-width:thin;border-color:#FFFFFF;\"><font color=#000000 size=8><b>U = Unchanged rate</b></font></span>");
doc.LoadHTML(sr, XHTMLValidationType.None);
Step 3: Get the formatted text from Word document and save to cell 'A4' in the first worksheet.
foreach (Section section in doc.Sections)
{
    foreach (Paragraph paragraph in section.Paragraphs)
    {
        if (paragraph.Items.Count > 0)
        {
           workbook.Worksheets[0].Range["A4"].RichText.Text += paragraph.Text;
        }
     }
}
Step 4: Apply text style including font color and font size to cell 'A4'.
int index = 0;

foreach (var item in paragraph.Items)
{
    if (item is Spire.Doc.Fields.TextRange)
    {
        for (int i = index; i < (item as Spire.Doc.Fields.TextRange).Text.Length + index; i++)
        {
            ExcelFont excelFont = workbook.CreateFont();
            excelFont.FontName = (item as Spire.Doc.Fields.TextRange).CharacterFormat.FontName;
            excelFont.Size = (item as Spire.Doc.Fields.TextRange).CharacterFormat.FontSize;
            excelFont.IsBold = (item as Spire.Doc.Fields.TextRange).CharacterFormat.Bold;
            excelFont.IsItalic = (item as Spire.Doc.Fields.TextRange).CharacterFormat.Italic;
            excelFont.Underline = (FontUnderlineType)(item as Spire.Doc.Fields.TextRange).CharacterFormat.UnderlineStyle; excelFont.Color = (item as Spire.Doc.Fields.TextRange).CharacterFormat.TextColor;
            workbook.Worksheets[0].Range["A4"].RichText.SetFont(i, i, excelFont);
        }
    }
    index += (item as Spire.Doc.Fields.TextRange).Text.Length;

}
Step 5: Change the width and height of the row to achieve the best fit.
workbook.Worksheets[0].Range["A4"].AutoFitRows();
Step 6: Save changes to the workbook in a new file.
workbook.SaveToFile("result.xlsx", ExcelVersion.Version2010);
HTML-Formatted Text in Excel would be shown as:
Full Code:
Workbook workbook = new Workbook();
Document doc = new Document();

StringReader sr = new StringReader("<span style=\"border-width:thin;border-color:#FFFFFF;\"><font color=#000000 size=8><b>U = Unchanged rate</b></font></span>");
doc.LoadHTML(sr, XHTMLValidationType.None);

int index = 0;

foreach (Section section in doc.Sections)
{
    foreach (Paragraph paragraph in section.Paragraphs)
    {
        if (paragraph.Items.Count > 0)
        {
            workbook.Worksheets[0].Range["A4"].RichText.Text += paragraph.Text;
            foreach (var item in paragraph.Items)
            {
                if (item is Spire.Doc.Fields.TextRange)
                {
for (int i = index; i < (item as Spire.Doc.Fields.TextRange).Text.Length + index; i++)
{
    ExcelFont excelFont = workbook.CreateFont();
    excelFont.FontName = (item as Spire.Doc.Fields.TextRange).CharacterFormat.FontName;
    excelFont.Size = (item as Spire.Doc.Fields.TextRange).CharacterFormat.FontSize;
    excelFont.IsBold = (item as Spire.Doc.Fields.TextRange).CharacterFormat.Bold;
    excelFont.IsItalic = (item as Spire.Doc.Fields.TextRange).CharacterFormat.Italic;
    excelFont.Underline = (FontUnderlineType)(item as Spire.Doc.Fields.TextRange).CharacterFormat.UnderlineStyle;
    excelFont.Color = (item as Spire.Doc.Fields.TextRange).CharacterFormat.TextColor;
    workbook.Worksheets[0].Range["A4"].RichText.SetFont(i, i, excelFont);
}
                }
                index += (item as Spire.Doc.Fields.TextRange).Text.Length;
            }
        }
    }
}
workbook.Worksheets[0].Range["A4"].AutoFitRows();
workbook.SaveToFile("result.xlsx", ExcelVersion.Version2010);
In our daily work, we may have the requirement to add custom properties with fields to a Word document. As is shown in the following Word document, I have created three custom property fields for easily inserting or updating information.
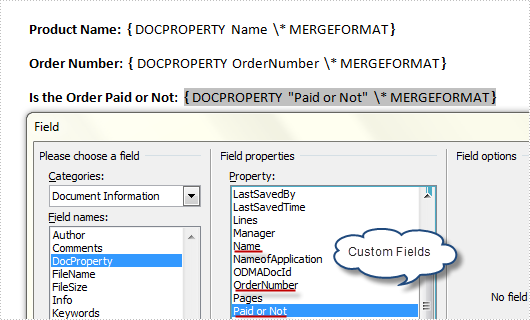
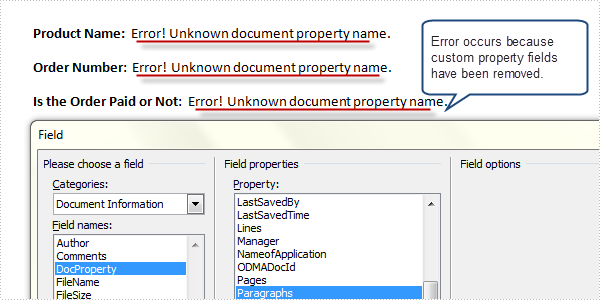
However, a custom property field may lose its value if we don’t want to use it any more, or a custom field might be created with wrong information, in such cases, we can choose to delete these fields manually and programmatically. In this article, I’ll introduce a C# and VB.NET solution to remove custom property fields using Spire.Doc.
Detailed Steps
Step 1: Create a new instance of Spire.Doc.Document class and load the sample file with specified path.
Document doc = new Document();
doc.LoadFromFile("FieldSample.docx", FileFormat.Docx);
Step 2: Get custom document properties object.
CustomDocumentProperties cdp = doc.CustomDocumentProperties;
Step 3: Use a for sentence and CustomDocumentProperties.Remove(string name) method to remove all custom property fields in the document.
for (int i = 0; i < cdp.Count; )
{
  cdp.Remove(cdp[i].Name);
}
doc.IsUpdateFields = true;
Step 4: Save the file.
doc.SaveToFile("Result.docx", FileFormat.Docx);
Output:
Full Code:
using Spire.Doc;
namespace RemoveProperties
{
    class Program
    {
        static void Main(string[] args)
        {
            Document doc = new Document();
            doc.LoadFromFile("FieldSample.docx", FileFormat.Docx);
            CustomDocumentProperties cdp = doc.CustomDocumentProperties;
            for (int i = 0; i < cdp.Count; )
            {
                cdp.Remove(cdp[i].Name);
            }
            doc.IsUpdateFields = true;
            doc.SaveToFile("Result.docx", FileFormat.Docx);
        }
    }
}
Imports Spire.Doc
Namespace RemoveProperties
	Class Program
		Private Shared Sub Main(args As String())
			Dim doc As New Document()
			doc.LoadFromFile("FieldSample.docx", FileFormat.Docx)
			Dim cdp As CustomDocumentProperties = doc.CustomDocumentProperties
			Dim i As Integer = 0
			While i < cdp.Count
				cdp.Remove(cdp(i).Name)
			End While
			doc.IsUpdateFields = True
			doc.SaveToFile("Result.docx", FileFormat.Docx)
		End Sub
	End Class
End Namespace
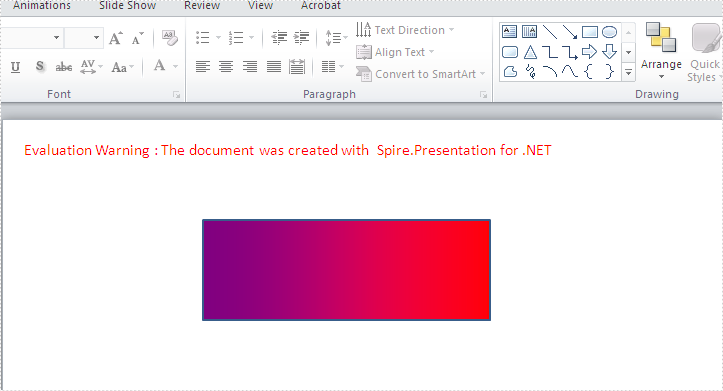
A gradient is a smooth transition from one color to another, and the gradient backgrounds make your presentation very cool. This article will show you how to create a shape with gradient effects by using Spire.Presentation. With the help of Spire.Presentation, you can not only insert gradient shapes into the slides, but also insert solid shapes in PowerPoint in C# easily.
The following steps will give you clear information of how to fill a shape with gradient effects. We will use rectangle shape in this example.
Step 1: Create an instance of presentation.
Presentation ppt = new Presentation();
Step 2: Add a rectangle to the slide.
IAutoShape GradientShape = (IAutoShape)ppt.Slides[0].Shapes.AppendShape(ShapeType.Rectangle, new RectangleF(200, 100, 287, 100));
Step 3: Set the Fill Type of the Shape to Gradient.
GradientShape.Fill.FillType = FillFormatType.Gradient;
Step 4: Set the start and end color for the gradient effects.
GradientShape.Fill.Gradient.GradientStops.Append(0, Color.Purple);
GradientShape.Fill.Gradient.GradientStops.Append(1, Color.Red);
Step 5: Save and Launch to view the resulted PPTX file.
ppt.SaveToFile("CreateGradientShape.pptx", FileFormat.Pptx2010);
System.Diagnostics.Process.Start("CreateGradientShape.pptx");
Effective screenshot of the resulted gradient shape:
Full codes:
using Spire.Presentation;
using Spire.Presentation.Drawing;
using System.Drawing;

namespace createGradientshape
{
    class Program
    {
        static void Main(string[] args)
        {
            Presentation ppt = new Presentation();
            IAutoShape GradientShape = (IAutoShape)ppt.Slides[0].Shapes.AppendShape(ShapeType.Rectangle, new RectangleF(200, 100, 287, 100));

            GradientShape.Fill.FillType = FillFormatType.Gradient;
            GradientShape.Fill.Gradient.GradientStops.Append(0, Color.Purple);
            GradientShape.Fill.Gradient.GradientStops.Append(1, Color.Red);
            ppt.SaveToFile("CreateGradientShape.pptx", FileFormat.Pptx2010);
            System.Diagnostics.Process.Start("CreateGradientShape.pptx");
        }
    }
}
