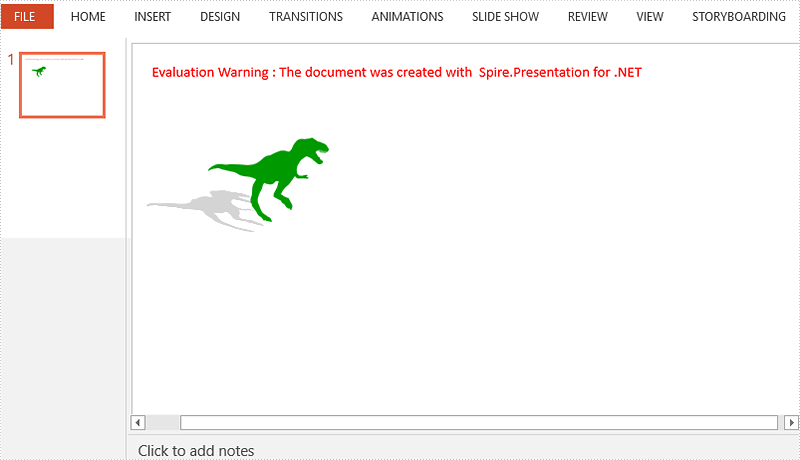
Image and Shapes (29)
This article demonstrates how to ungroup grouped shapes in a PowerPoint document using Spire.Presentation for .NET.
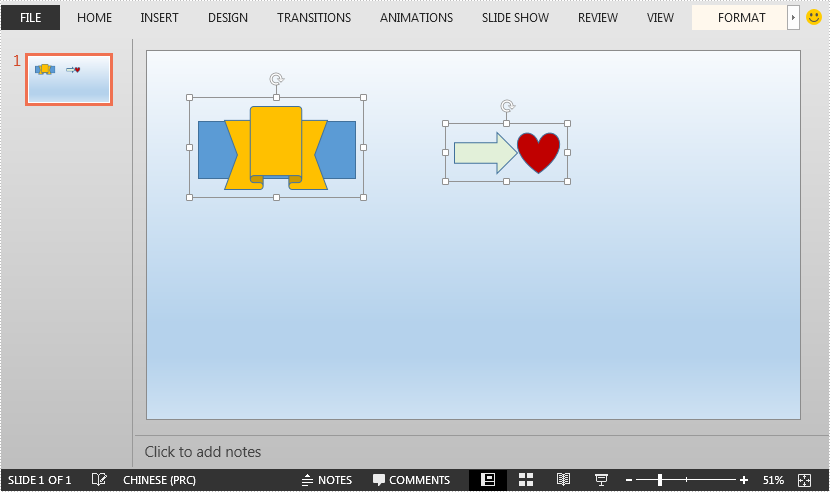
The input PowerPoint document:
using Spire.Presentation;

namespace UngroupShapes
{
    class Program
    {
        static void Main(string[] args)
        {
            //Create a Presentation instance
            Presentation ppt = new Presentation();
            //Load the PowerPoint document
            ppt.LoadFromFile("Sample.pptx");

            //Get the first slide
            ISlide slide = ppt.Slides[0];

            //Loop through the shapes in the slide
            for(int i = 0; i< slide.Shapes.Count;i++)
            {
                IShape shape = slide.Shapes[i];
                //Detect if the shape is a grouped shape
                if (shape is GroupShape)
                {
                    GroupShape groupShape = shape as GroupShape;
                    //Ungroup the grouped shape
                    slide.Ungroup(groupShape);
                }
            }

            //Save the resultant document
            ppt.SaveToFile("UngroupShapes.pptx", FileFormat.Pptx2013);
        }
    }
}
Imports Spire.Presentation

Namespace UngroupShapes
    Class Program
        Private Shared Sub Main(ByVal args As String())
            Dim ppt As Presentation = New Presentation()
            ppt.LoadFromFile("Sample.pptx")
            Dim slide As ISlide = ppt.Slides(0)

            For i As Integer = 0 To slide.Shapes.Count - 1
                Dim shape As IShape = slide.Shapes(i)

                If TypeOf shape Is GroupShape Then
                    Dim groupShape As GroupShape = TryCast(shape, GroupShape)
                    slide.Ungroup(groupShape)
                End If
            Next

            ppt.SaveToFile("UngroupShapes.pptx", FileFormat.Pptx2013)
        End Sub
    End Class
End Namespace
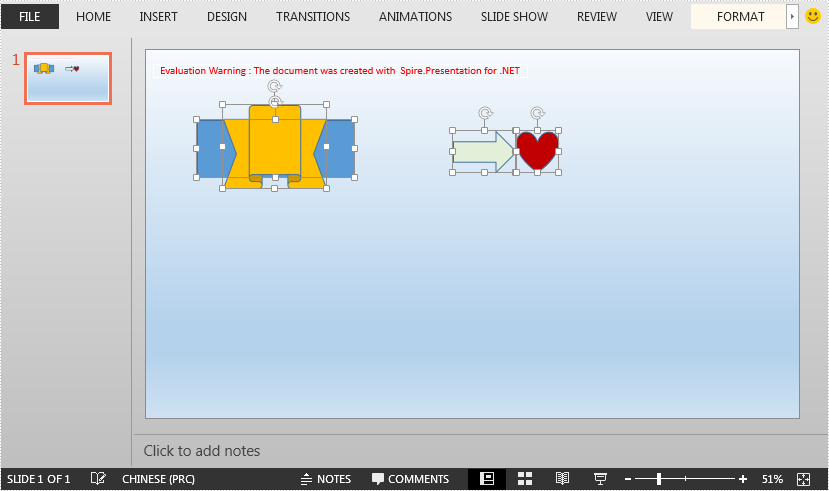
The output PowerPoint document after ungrouping shapes:
Add a round corner rectangle to presentation slide in C#
2019-08-13 08:08:48 Written by support iceblueWith the help of Spire.Presentation, we can add shapes to the presentation slides easily. This example shows you how to add a round corner rectangle to presentation slide and set the radius of the round corner rectangle in C#.
using Spire.Presentation;
using Spire.Presentation.Drawing;
using System.Drawing;

namespace RoundRectangle
{
    class Program
    {
        static void Main(string[] args)
        {
            Presentation presentation = new Presentation();

            //Insert a round corner rectangle and set its radious
            presentation.Slides[0].Shapes.InsertRoundRectangle(0, 60, 90, 100, 200, 36);

            //Append a round corner rectangle and set its radious
            IAutoShape shape = presentation.Slides[0].Shapes.AppendRoundRectangle(260, 90, 100, 200, 80);
            //Set the color and fill style of shape
            shape.Fill.FillType = FillFormatType.Solid;
            shape.Fill.SolidColor.Color = Color.SeaGreen;
            shape.ShapeStyle.LineColor.Color = Color.White;
            //Rotate the shape to 90 degree
            shape.Rotation = 90;

            //Save the document to file
            presentation.SaveToFile("Result.pptx", FileFormat.Pptx2013);

        }
    }
}
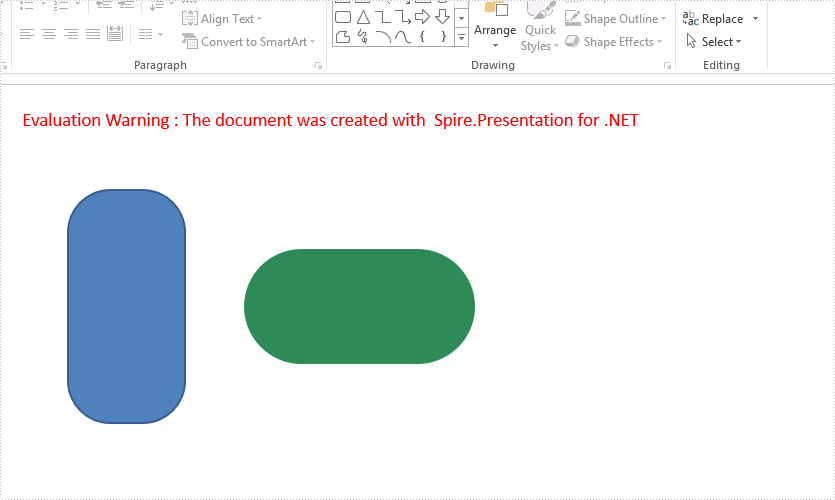
Effective screenshot of the round corner rectangle on presentation slide:
When there are overlapping shapes/images in your presentation slide, you can control which shape is under or above which shape by bring a shape forward or to front, or sending a shape backward or to back. The following example shows you how to bring a shape forward using Spire.Presentation with C# and VB.NET.
Code Snippets
//load the sample PowerPoint file
Presentation presentation = new Presentation();
presentation.LoadFromFile(@"C:\Users\Administrator\Desktop\input.pptx");

//get the specified shape
IShape shape = presentation.Slides[0].Shapes[0];

//bring the shape forward through SetShapeArrange method
shape.SetShapeArrange(ShapeArrange.BringForward);

//save to file
presentation.SaveToFile("output.pptx", FileFormat.Pptx2013);
'load the sample PowerPoint file
Dim presentation As Presentation =  New Presentation()
presentation.LoadFromFile("C:\Users\Administrator\Desktop\input.pptx")

'get the specified shape
Dim shape As IShape =  presentation.Slides(0).Shapes(0)

'bring the shape forward through SetShapeArrange method
shape.SetShapeArrange(ShapeArrange.BringForward)

'save to file
presentation.SaveToFile("output.pptx", FileFormat.Pptx2013)
Output

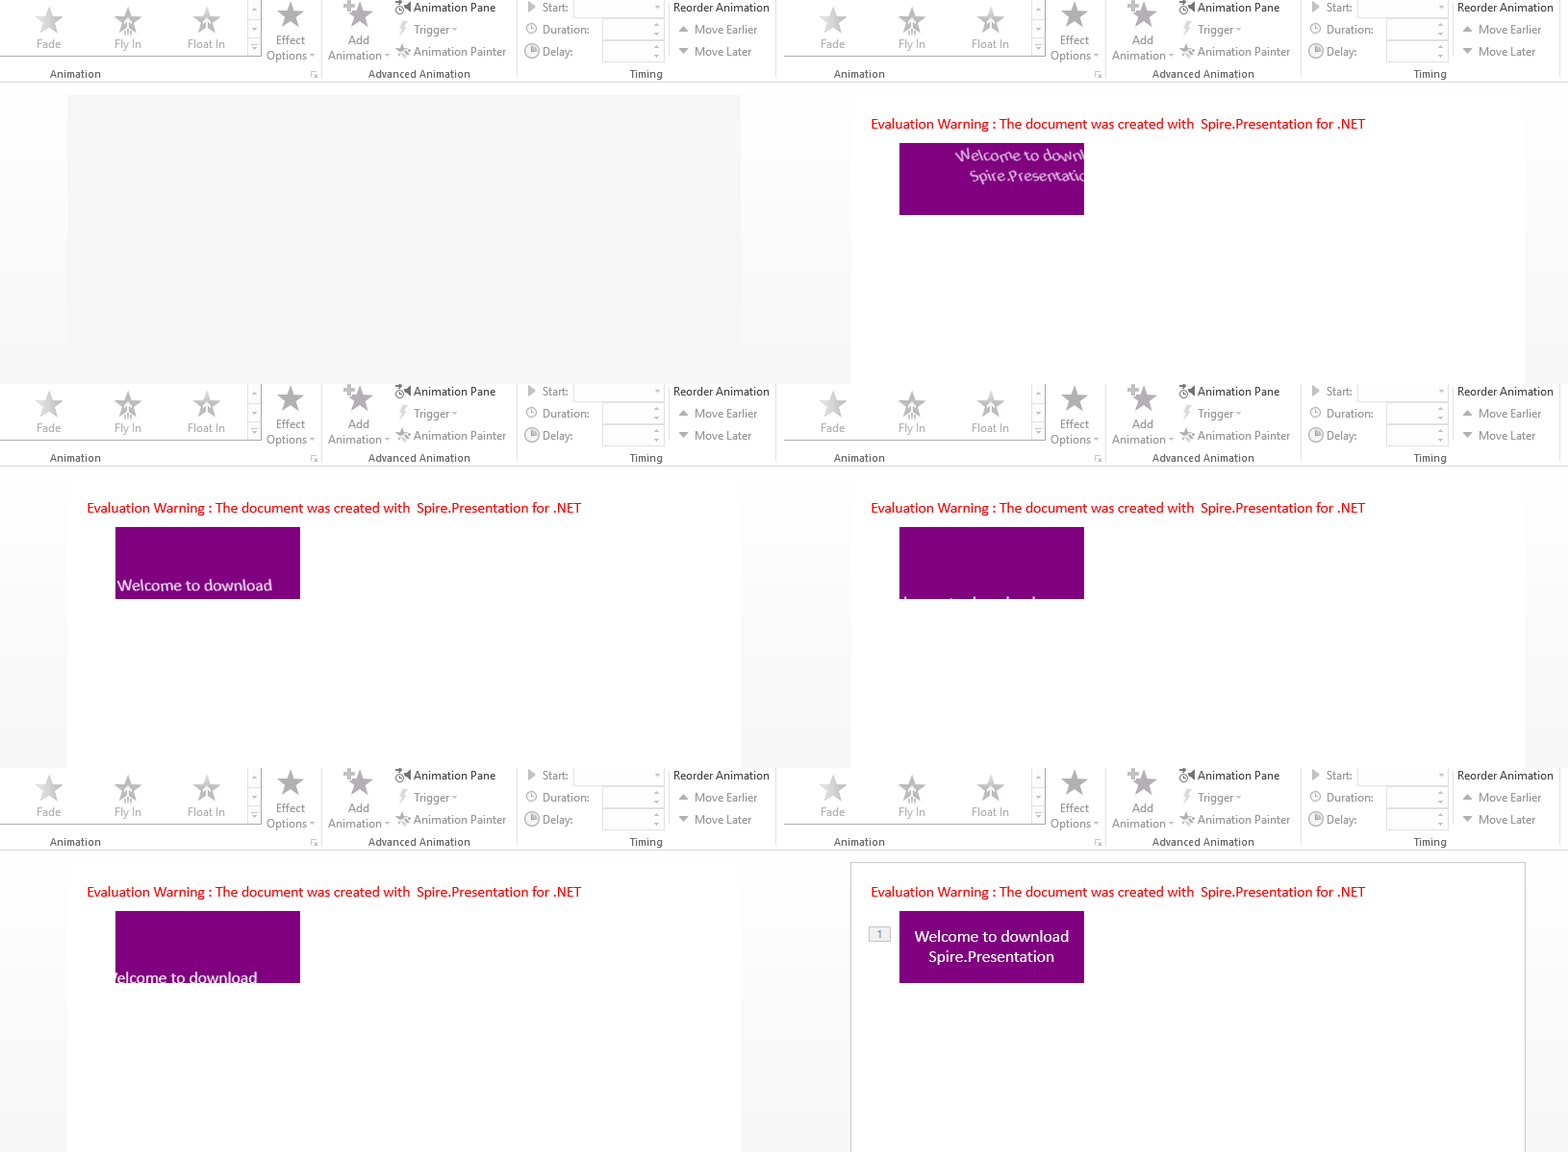
To emphasize the text on a shape, we can only animate text instead of the whole shape. This article demonstrates how to apply animations to text in PowerPoint using Spire.Presenstation with C# and VB.NET.
Code Snippets
//create a PowerPoint document
Presentation ppt = new Presentation();

//get the first slide
ISlide slide = ppt.Slides[0];

//add a shape to the slide
IAutoShape shape = slide.Shapes.AppendShape(ShapeType.Rectangle, new RectangleF(50, 50, 200, 80));
shape.Fill.FillType = FillFormatType.Solid;
shape.Fill.SolidColor.Color = Color.Purple;
shape.ShapeStyle.LineColor.Color = Color.White;
shape.AppendTextFrame("Welcome to download Spire.Presentation");

//apply animation to the text in shape
AnimationEffect animation = shape.Slide.Timeline.MainSequence.AddEffect(shape, AnimationEffectType.Float);
animation.SetStartEndParagraphs(0, 0);

//save to file
ppt.SaveToFile("result.pptx", FileFormat.Pptx2013);
ppt.Dispose();
'create a PowerPoint document
Dim ppt As Presentation =  New Presentation()

'get the first slide
Dim slide As ISlide =  ppt.Slides(0)

'add a shape to the slide
Dim shape As IAutoShape =  slide.Shapes.AppendShape(ShapeType.Rectangle,New RectangleF(50,50,200,80))
shape.Fill.FillType = FillFormatType.Solid
shape.Fill.SolidColor.Color = Color.Purple
shape.ShapeStyle.LineColor.Color = Color.White
shape.AppendTextFrame("Welcome to download Spire.Presentation")

'apply animation to the text in shape
Dim animation As AnimationEffect =  shape.Slide.Timeline.MainSequence.AddEffect(shape,AnimationEffectType.Float)
animation.SetStartEndParagraphs(0, 0)

'save to file
ppt.SaveToFile("result.pptx", FileFormat.Pptx2013)
ppt.Dispose()
Output
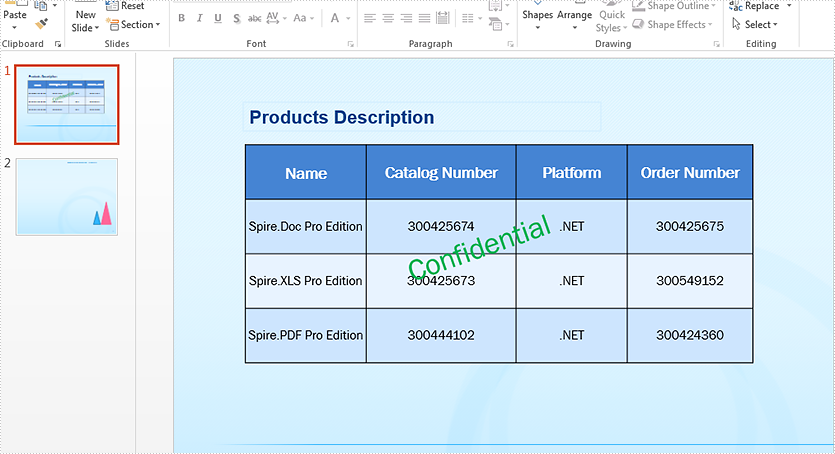
In this article, we will explain how to copy a shapes or all shapes from one slide into another within the same PowerPoint document by using Spire.Presentation.
Firstly, view the sample PowerPoint document:
Copy a single shape from the first slide to the second slide:
//Load the sample document
Presentation ppt = new Presentation();
ppt.LoadFromFile("Sample.pptx");


//define the source slide and target slide
ISlide sourceSlide = ppt.Slides[0];
ISlide targetSlide = ppt.Slides[1];

//copy the second shape from the source slide to the target slide
targetSlide.Shapes.AddShape((Shape)sourceSlide.Shapes[1]);

//save the document to file
ppt.SaveToFile("Copyshape.pptx", FileFormat.Pptx2013);
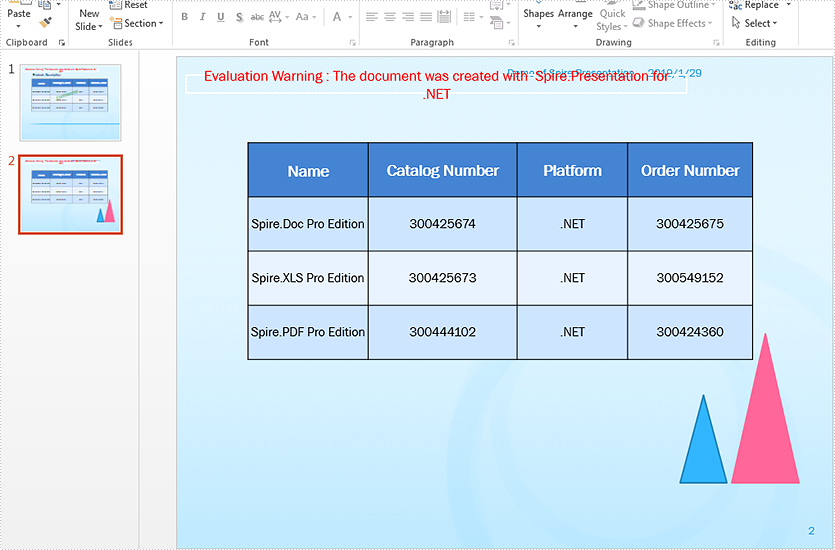
Effective screenshot after copy a single shape from the first slide to second slide:
Copy all shapes from the first slide to the second slide:
//Load the sample document
Presentation ppt = new Presentation();
ppt.LoadFromFile("Sample.pptx");


//copy all the shapes from the source slide to the target slide
for (int i = 0; i < ppt.Slides.Count - 1; i++)
{
    ISlide sourceSlide = ppt.Slides[i];
    ISlide targetSlide = ppt.Slides[ppt.Slides.Count - 1];
    for (int j = 0; j < sourceSlide.Shapes.Count; j++)
    {
        targetSlide.Shapes.AddShape((Shape)sourceSlide.Shapes[j]);
    }
}

//save the document to file
ppt.SaveToFile("Copyshapes.pptx", FileFormat.Pptx2013);
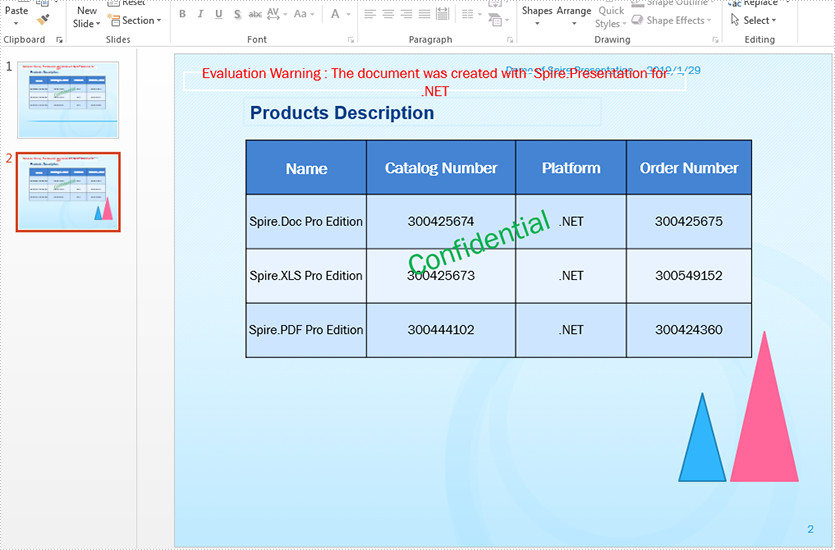
Effective screenshot after copy all shapes from the first slide to second slide:
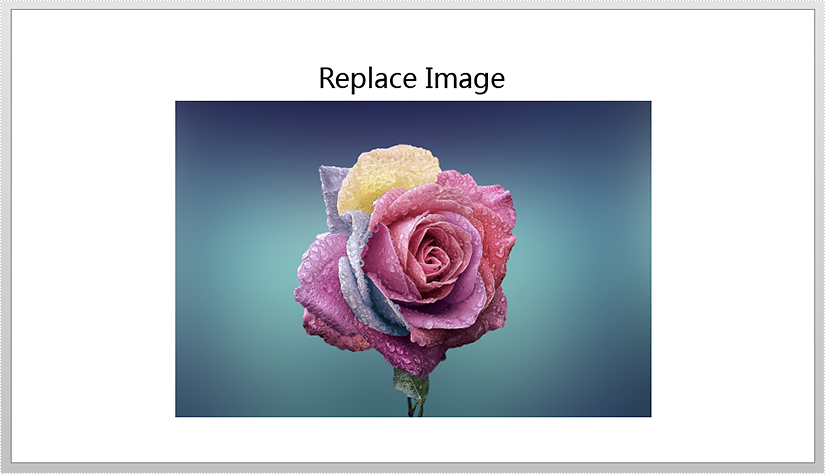
This article demonstrates how to replace an existing image with a new image in a PowerPoint document using Spire.Presentation.
The original image:
Detail steps:
Step 1: Instantiate a Presentation object and load the PowerPoint file.
Presentation ppt = new Presentation();
ppt.LoadFromFile("Input.pptx");
Step 2: Get the first slide.
ISlide slide = ppt.Slides[0];
Step 3: Append a new image to replace an existing image.
IImageData image = ppt.Images.Append(Image.FromFile("timg.jpg"));
Step 4: Replace the image which title is "image1" with the new image.
foreach (IShape shape in slide.Shapes)
{
    if (shape is SlidePicture)
    {
        if (shape.AlternativeTitle == "image1")
        {
            (shape as SlidePicture).PictureFill.Picture.EmbedImage = image;
        }
    }
}
Step 5: Save the file.
ppt.SaveToFile("Output.pptx", FileFormat.Pptx2013);
Screenshot after replacing image:

Full code:
using Spire.Presentation;
using Spire.Presentation.Drawing;
using System.Drawing;

namespace ReplaceImage
{

    class Program
    {

        static void Main(string[] args)
        {
            {
                Presentation ppt = new Presentation();
                ppt.LoadFromFile("Input.pptx");

                ISlide slide = ppt.Slides[0];

                IImageData image = ppt.Images.Append(Image.FromFile("timg.jpg"));

                foreach (IShape shape in slide.Shapes)
                {
                    if (shape is SlidePicture)
                    {
                        if (shape.AlternativeTitle == "image1")
                        {
                            (shape as SlidePicture).PictureFill.Picture.EmbedImage = image;
                        }
                    }
                }

                ppt.SaveToFile("Output.pptx", FileFormat.Pptx2013);


            }
        }

    }
}
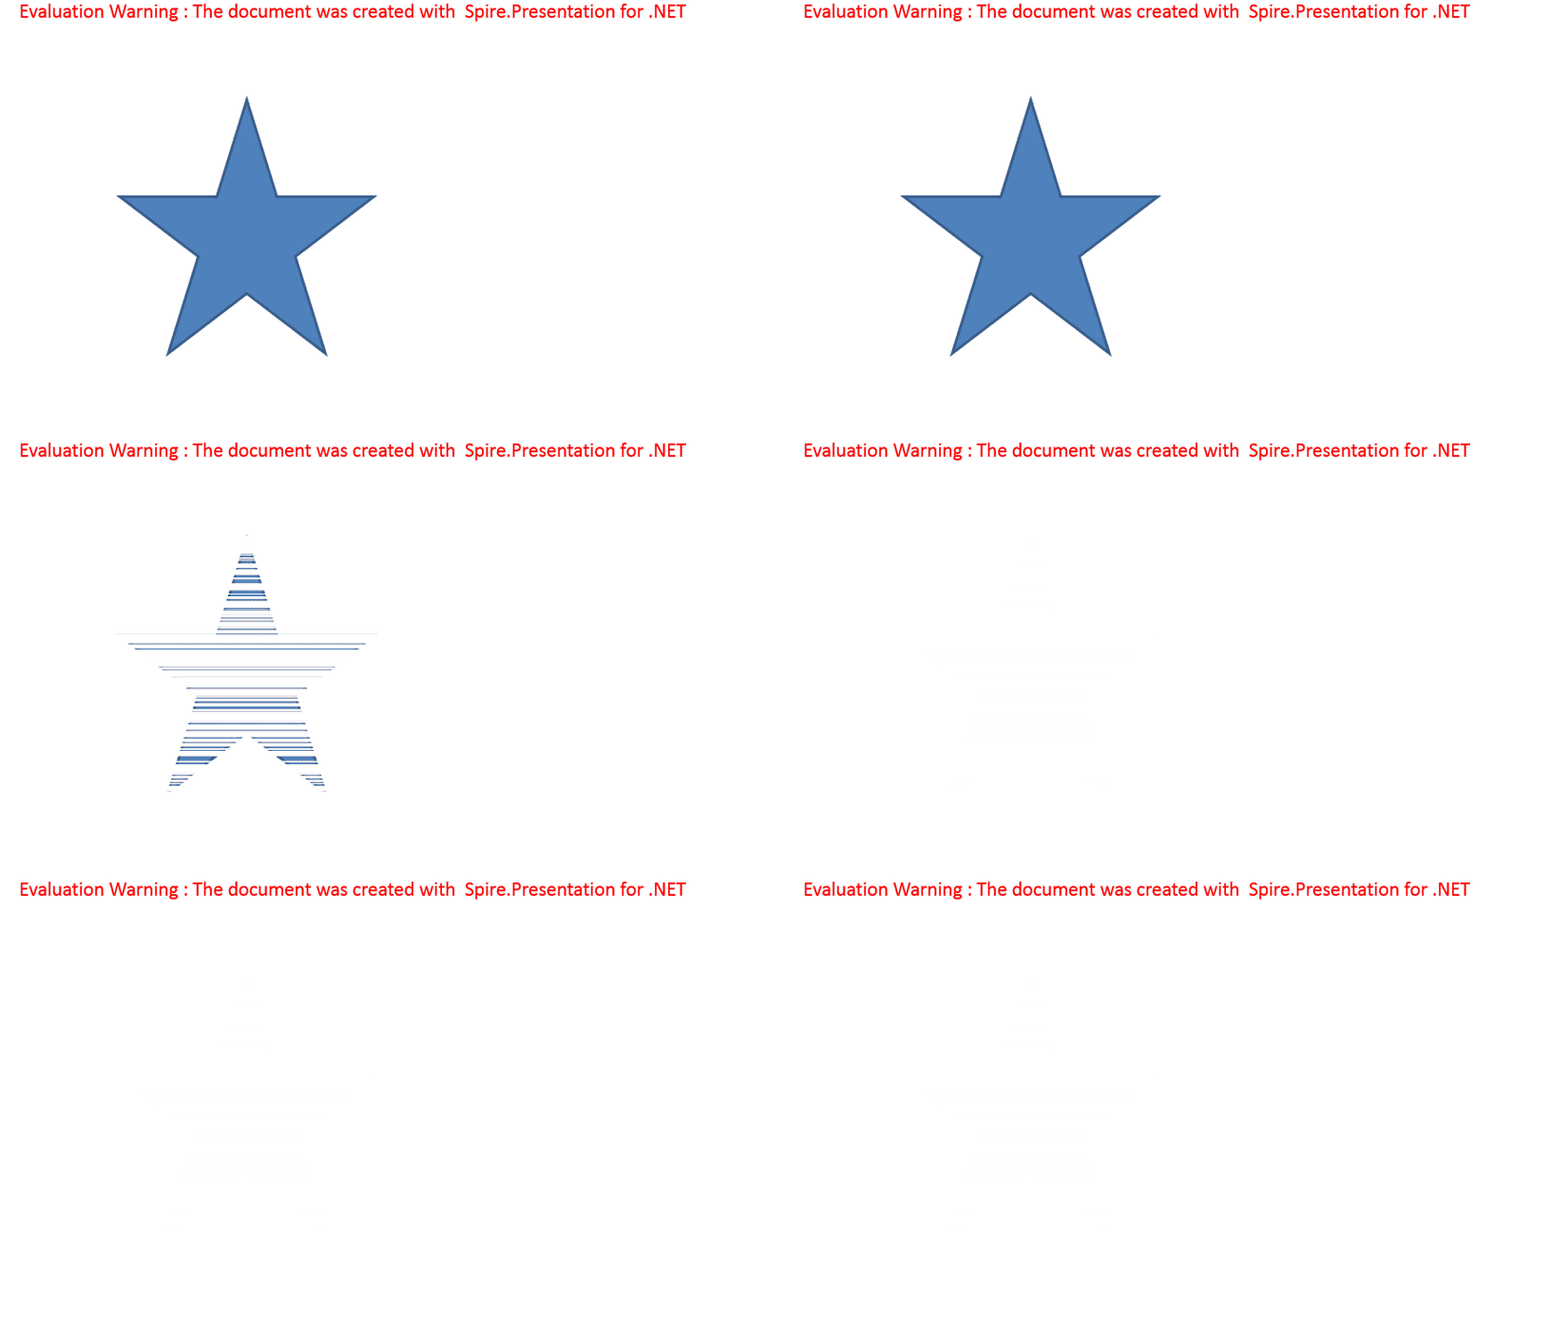
Add Exit Animation Effect to a Shape in PowerPoint in C#
2018-08-02 08:28:43 Written by support iceblueIn Spire.Presentation, when we add a common animation effect that belongs to both entrance and exit types, it’s applied as entrance effect by default. This article is going to show you how to add exit animation effect to a shape in PowerPoint using Spire.Presentation.
Detail steps:
Step 1: Create a Presentation instance and get the first slide.
Presentation ppt = new Presentation();
ISlide slide = ppt.Slides[0];
Step 2: Add a shape to the slide.
IShape starShape = slide.Shapes.AppendShape(ShapeType.FivePointedStar, new RectangleF(100, 100, 200, 200));
Step 3: Add random bars effect to the shape.
AnimationEffect effect = slide.Timeline.MainSequence.AddEffect(starShape, AnimationEffectType.RandomBars);
Step 4: Change the type of the effect from entrance to exit.
effect.PresetClassType = TimeNodePresetClassType.Exit;
Step 5: Save the file.
ppt.SaveToFile("ExitAnimationEffect.pptx", FileFormat.Pptx2013);
Screenshot:
Full code:
using Spire.Presentation;
using Spire.Presentation.Drawing.Animation;
using System.Drawing;

namespace AddExitAnimationEffect
{

    class Program
    {

        static void Main(string[] args)
        {
            {
                //Create a Presentation instance
                Presentation ppt = new Presentation();

                //Get the first slide
                ISlide slide = ppt.Slides[0];

                //Add a shape to the slide
                IShape starShape = slide.Shapes.AppendShape(ShapeType.FivePointedStar, new RectangleF(100, 100, 200, 200));

                //Add random bars effect to the shape
                AnimationEffect effect = slide.Timeline.MainSequence.AddEffect(starShape, AnimationEffectType.RandomBars);

                //Change effect type from entrance to exit
                effect.PresetClassType = TimeNodePresetClassType.Exit;

                //Save the file
                ppt.SaveToFile("ExitAnimationEffect.pptx", FileFormat.Pptx2013);


            }
        }

    }
}
Grouping and ungrouping in PowerPoint are two useful features when working with shapes. Grouping allows you to join multiple shapes together so you can move, format, resize, and rotate them at once as if they were a single shape. Ungrouping lets you break the connection between grouped shapes so you can work on them individually again. In this article, you will learn how to use Spire.Presentation for .NET to group or ungroup shapes in PowerPoint in C# and VB.NET.
Install Spire.Presentation for .NET
To begin with, you need to add the DLL files included in the Spire.Presentation for.NET package as references in your .NET project. The DLL files can be either downloaded from this link or installed via NuGet.
PM> Install-Package Spire.Presentation
Group Shapes in PowerPoint in C# and VB.NET
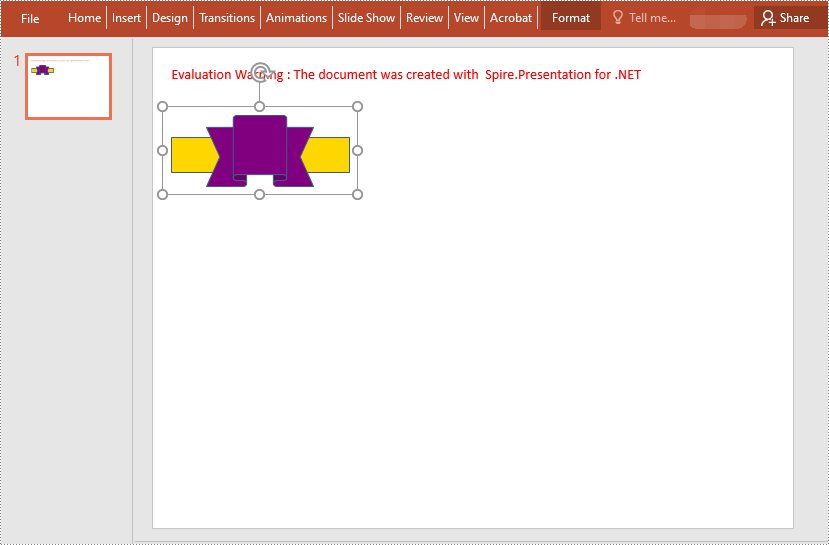
Spire.Presentation for .NET provides the ISlide.GroupShapes(ArrayList shapeList) method to group two or more shapes on a specific slide. The following are the detailed steps:
- Initialize an instance of the Presentation class.
- Get the first slide by its index through Presentation.Slides[0] property.
- Add two shapes to the slide using ISlide.Shapes.AppendShape() method.
- Initialize an instance of the ArrayList class.
- Add the two shapes to the ArrayList.
- Group the two shapes in the ArrayList using ISlide.GroupShapes(ArrayList shapeList) method.
- Save the result document using Presentation.SaveToFile() method.
- C#
- VB.NET
using Spire.Presentation;
using Spire.Presentation.Drawing;
using System.Collections;
using System.Drawing;

namespace GroupShapes
{
    internal class Program
    {
        static void Main(string[] args)
        {
            //Initialize an instance of the Presentation class
            Presentation ppt = new Presentation();
            //Get the first slide
            ISlide slide = ppt.Slides[0];

            //Add two shapes to the slide
            IShape rectangle = slide.Shapes.AppendShape(ShapeType.Rectangle, new RectangleF(20, 100, 200, 40));
            rectangle.Fill.FillType = FillFormatType.Solid;
            rectangle.Fill.SolidColor.KnownColor = KnownColors.Gold;
            rectangle.Line.Width = 0.1f;
            IShape ribbon = slide.Shapes.AppendShape(ShapeType.Ribbon2, new RectangleF(60, 75, 120, 80));
            ribbon.Fill.FillType = FillFormatType.Solid;
            ribbon.Fill.SolidColor.KnownColor = KnownColors.Purple;
            ribbon.Line.Width = 0.1f;

            //Initialize an instance of the ArrayList class
            ArrayList list = new ArrayList();
            //Add the two shapes to the ArrayList
            list.Add(rectangle);
            list.Add(ribbon);

            //Group the two shapes
            slide.GroupShapes(list);

            //Save the result document
            ppt.SaveToFile("GroupShapes.pptx", FileFormat.Pptx2010);
            ppt.Dispose();
        }
    }
}
Ungroup Shapes in PowerPoint in C# and VB.NET
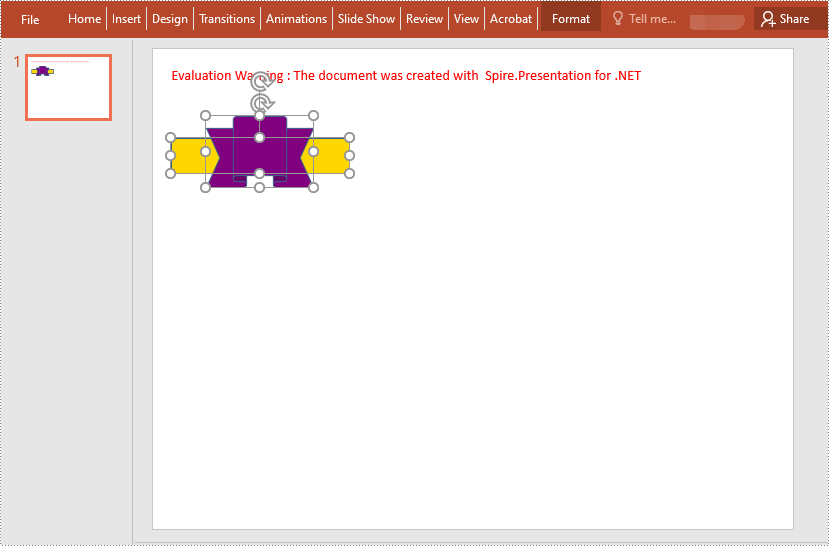
To ungroup the grouped shapes in a PowerPoint document, you need to iterate through all slides in the document and all shapes on each slide, find the grouped shapes and then ungroup them using ISlide.Ungroup(GroupShape) method. The following are the detailed steps:
- Initialize an instance of the Presentation class.
- Load the PowerPoint document using Presentation.LoadFromFile() method.
- Iterate through all slides in the document.
- Iterate through all shapes on each slide.
- Check if the current shape is of GroupShape type. If the result is true, ungroup it using ISlide.Ungroup(GroupShape) method.
- Save the result document using Presentation.SaveToFile() method.
- C#
- VB.NET
using Spire.Presentation;
using Spire.Presentation.Drawing;
using System.Collections;
using System.Drawing;

namespace UngroupShapes
{
    internal class Program
    {
        static void Main(string[] args)
        {
            //Initialize an instance of the Presentation class
            Presentation ppt = new Presentation();
            //Load the PowerPoint document
            ppt.LoadFromFile("GroupShapes.pptx");

            //Iterate through all slides in the document
            for (int i = 0; i < ppt.Slides.Count; i++)
            {
                ISlide slide = ppt.Slides[i];
                //Iterate through all shapes on each slide
                for (int j = 0; j < slide.Shapes.Count; j++)
                {
                    IShape shape = slide.Shapes[j];
                    //Detect if the shape is a grouped shape
                    if (shape is GroupShape)
                    {
                        GroupShape groupShape = shape as GroupShape;
                        //Ungroup the grouped shape
                        slide.Ungroup(groupShape);
                    }
                }
            }

            //Save the result document
            ppt.SaveToFile("UngroupShapes.pptx", FileFormat.Pptx2013);
            ppt.Dispose();
        }
    }
}
Apply for a Temporary License
If you'd like to remove the evaluation message from the generated documents, or to get rid of the function limitations, please request a 30-day trial license for yourself.
Set and Get Alternative Text (Title and Description) of PowerPoint Shapes in C#
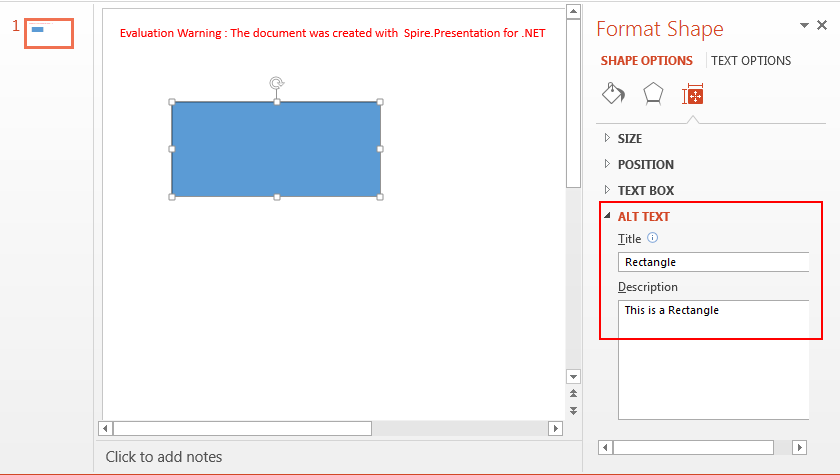
2018-04-23 06:23:31 Written by jie zouWith Spire.Presentation, we can programmatically set the Alternative Text for PowerPoint shapes along with get the Alternative Text of PowerPoint shapes. This article demonstrates how we can use Spire.Presentation to accomplish this function.
Detail steps:
Step 1: Instantiate a Presentation object and load the PowerPoint file.
Presentation ppt = new Presentation();
ppt.LoadFromFile("Input.pptx");
Step 2: Get the first slide.
ISlide slide = ppt.Slides[0];
Step 3: Set or get the alternative text of the first Shape in the slide.
//Set the alternative text (title and description)
slide.Shapes[0].AlternativeTitle = "Rectangle";
slide.Shapes[0].AlternativeText = "This is a Rectangle";

//Get the alternative text (title and description)
//string title = slide.Shapes[0].AlternativeTitle;
//string description = slide.Shapes[0].AlternativeText;
Step 4: Save the file.
ppt.SaveToFile("Output.pptx", FileFormat.Pptx2013);
Screenshot after setting alternative text:
Full code:
using Spire.Presentation;

namespace Set_and_Get_Alternative_Text_of_Shape
{
    class Program
    {
        static void Main(string[] args)
        {
            //Instantiate a Presentation object
            Presentation ppt = new Presentation();
            //Load the PowerPoint file
            ppt.LoadFromFile("Input.pptx");

            //Get the first slide
            ISlide slide = ppt.Slides[0];

            //Set the alternative text (title and description)
            slide.Shapes[0].AlternativeTitle = "Rectangle";
            slide.Shapes[0].AlternativeText = "This is a Rectangle";

            //Get the alternative text (title and description)
            //string title = slide.Shapes[0].AlternativeTitle;
            //string description = slide.Shapes[0].AlternativeText;

            //Save the file
            ppt.SaveToFile("Output.pptx", FileFormat.Pptx2013);
        }
    }
}
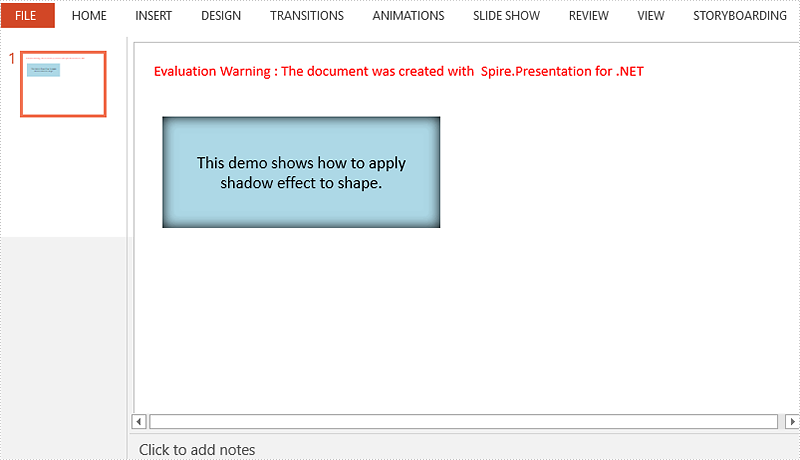
Shadows make your shapes or pictures especially with transparent background pop out of your slide. They make flat 2 dimensional graphics look like 3 dimensional graphics. This article will show you how we can apply shadow effects to shapes and pictures in PowerPoint using Spire.Presentation.
Apply Shadow Effect to Shape
using Spire.Presentation;
using Spire.Presentation.Drawing;
using System.Drawing;

namespace ApplyShadoweffect
{

    class Program
    {

        static void Main(string[] args)
        {
            {
                //Create a Presentation object and get the first slide.
                Presentation ppt = new Presentation();
                ISlide slide = ppt.Slides[0];

                //Add a shape to slide.
                RectangleF rect = new RectangleF(30, 80, 300, 120);
                IAutoShape shape = slide.Shapes.AppendShape(ShapeType.Rectangle, rect);
                shape.Fill.FillType = FillFormatType.Solid;
                shape.Fill.SolidColor.Color = Color.LightBlue;
                shape.Line.FillType = FillFormatType.None;
                shape.TextFrame.Text = "This demo shows how to apply shadow effect to shape.";
                shape.TextFrame.TextRange.Fill.FillType = FillFormatType.Solid;
                shape.TextFrame.TextRange.Fill.SolidColor.Color = Color.Black;

                //Create an inner shadow effect through InnerShadowEffect object.
                InnerShadowEffect innerShadow = new InnerShadowEffect();
                innerShadow.BlurRadius = 20;
                innerShadow.Direction = 0;
                innerShadow.Distance = 0;
                innerShadow.ColorFormat.Color = Color.Black;

                //Apply the shadow effect to shape.
                shape.EffectDag.InnerShadowEffect = innerShadow;

                //Save to file.
                ppt.SaveToFile("ShadowOnShape.pptx", FileFormat.Pptx2010);

            }
        }

    }
}
Apply Shadow Effect to Picture
using Spire.Presentation;
using Spire.Presentation.Drawing;
using System.Drawing;

namespace ApplyShadoweffect
{

    class Program
    {

        static void Main(string[] args)
        {
            {
                //Create a Presentation object and get the first slide.
                Presentation ppt = new Presentation();
                ISlide slide = ppt.Slides[0];

                //Get the picture path.
                string imagePath = "dinosaur.png";
                Image image = Image.FromFile(imagePath);
                float width = (float)image.Width / 3;
                float height = (float)image.Height / 3;

                //Add a shape to slide and fill the shape with picture.
                RectangleF rect = new RectangleF(80, 80, width, height);
                IAutoShape shape = slide.Shapes.AppendShape(ShapeType.Rectangle, rect);
                shape.Fill.FillType = FillFormatType.Picture;
                shape.Fill.PictureFill.Picture.Url = imagePath;
                shape.Fill.PictureFill.FillType = PictureFillType.Stretch;
                shape.Line.FillType = FillFormatType.None;

                //Choose a preset shadow effect.
                PresetShadow presetShadow = new PresetShadow();
                presetShadow.Preset = PresetShadowValue.BackLeftPerspective;
                presetShadow.ColorFormat.Color = Color.LightGray;

                //Apply the shadow effect to shape.
                shape.EffectDag.PresetShadowEffect = presetShadow;

                //Save to file.
                ppt.SaveToFile("ShadowOnPicture.pptx", FileFormat.Pptx2010);

            }
        }

    }
}
