
.NET (1273)
Children categories
XLS and XLSX are two different file formats for Microsoft Excel spreadsheets. XLS is the default file format for Microsoft Excel 2003 and earlier versions, while XLSX is the default file format for Microsoft Excel 2007 and later versions. In some cases, developers may need to convert between Excel XLS and XLSX file formats. In this article, we will explain how to convert XLS to XLSX or XLSX to XLS in C# and VB.NET using Spire.XLS for .NET.
Install Spire.XLS for .NET
To begin with, you need to add the DLL files included in the Spire.XLS for .NET package as references in your .NET project. The DLL files can be either downloaded from this link or installed via NuGet.
PM> Install-Package Spire.XLS
Convert XLS to XLSX in C# and VB.NET
The following are the steps to convert an XLS file to XLSX format using Spire.XLS for .NET:
- Create a Workbook instance.
- Load the XLS file using Workbook.LoadFromFile() method.
- Save the XLS file to XLSX format using Workbook.SaveToFile(string, ExcelVersion) method.
- C#
- VB.NET
using Spire.Xls;

namespace ConvertXlsToXlsx
{
    class Program
    {
        static void Main(string[] args)
        {
            //Create a Workbook instance
            Workbook workbook = new Workbook();
            //Load an XLS file
            workbook.LoadFromFile("Input.xls");

            //Convert the file to XLSX format
            workbook.SaveToFile("ToXlsx.xlsx", ExcelVersion.Version2016);
        }
    }
}
Convert XLSX to XLS in C# and VB.NET
The following are the steps to convert an XLSX file to XLS format using Spire.XLS for .NET:
- Create a Workbook instance.
- Load the XLSX file using Workbook.LoadFromFile() method.
- Save the XLSX file to XLS format using Workbook.SaveToFile(string, ExcelVersion) method.
- C#
- VB.NET
using Spire.Xls;

namespace ConvertXlsxToXls
{
    class Program
    {
        static void Main(string[] args)
        {
            //Create a Workbook instance
            Workbook workbook = new Workbook();
            //Load an XLSX file
            workbook.LoadFromFile("Input.xlsx");

            //Convert the file to XLS format
            workbook.SaveToFile("ToXls.xls", ExcelVersion.Version97to2003);
        }
    }
}
Apply for a Temporary License
If you'd like to remove the evaluation message from the generated documents, or to get rid of the function limitations, please request a 30-day trial license for yourself.
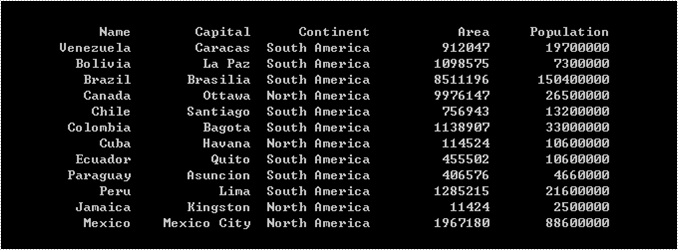
Spire.Presentation is a powerful and easy-to-use .NET component, especially designed for developers. Using Spire.Presentation you can generate, modify, convert, render, and print documents without installing Microsoft PowerPoint on your machine. There are documents on our site introducing how to insert table and edit table in PowerPoint file. In this document, I will introduce you how to traverse through the cells of table.
It is very easy to traverse through the cells of table using Spire.Presentation. Just get the row collection using the property - TableRows of Table. Then traverse through each cell of each row. Or you can get the column collection using the property – ColumnsList of Table. Then traverse through each cell of each column.
Step 1: Create Presentation instance and load file.
Presentation presentation = new Presentation();
presentation.LoadFromFile("table.pptx");
Step 2: Get the table in PowerPoint file.
foreach (IShape shape in presentation.Slides[0].Shapes)
{
    if (shape is ITable)
    {
        table = (ITable)shape;
    }
}
Step 3: Traverse through the rows in row collection and traverse through each cell in each row.
foreach (TableRow row in table.TableRows)
{
    foreach (Cell cell in row)
    {
        //print the data in cell
        Console.Write("{0,15}", cell.TextFrame.Text);
    }
    Console.WriteLine();
}
Download and install Spire.Presentation for .NET and refer to below code to traverse through the cells in PowerPoint document.
Screenshots and Full code:
using Spire.Presentation;
using System;

namespace Trasverse
{

    class Program
    {

        static void Main(string[] args)
        {
            //create Presentation instance and load file
            Presentation presentation = new Presentation();
            presentation.LoadFromFile("table.pptx");

            ITable table = null;

            //get the table
            foreach (IShape shape in presentation.Slides[0].Shapes)
            {
                if (shape is ITable)
                {
                    table = (ITable)shape;

                    //traverse through the cells of table
                    foreach (TableRow row in table.TableRows)
                    {
                        foreach (Cell cell in row)
                        {
                            //print the data in cell
                            Console.Write("{0,15}", cell.TextFrame.Text);
                        }
                        Console.WriteLine();
                    }
                }
            }
            Console.ReadLine();

        }

    }
}
If you couldn't successfully use Spire.Presentation, please refer Spire.Presentation Quick Start which can guide you quickly use Spire.Presentation.
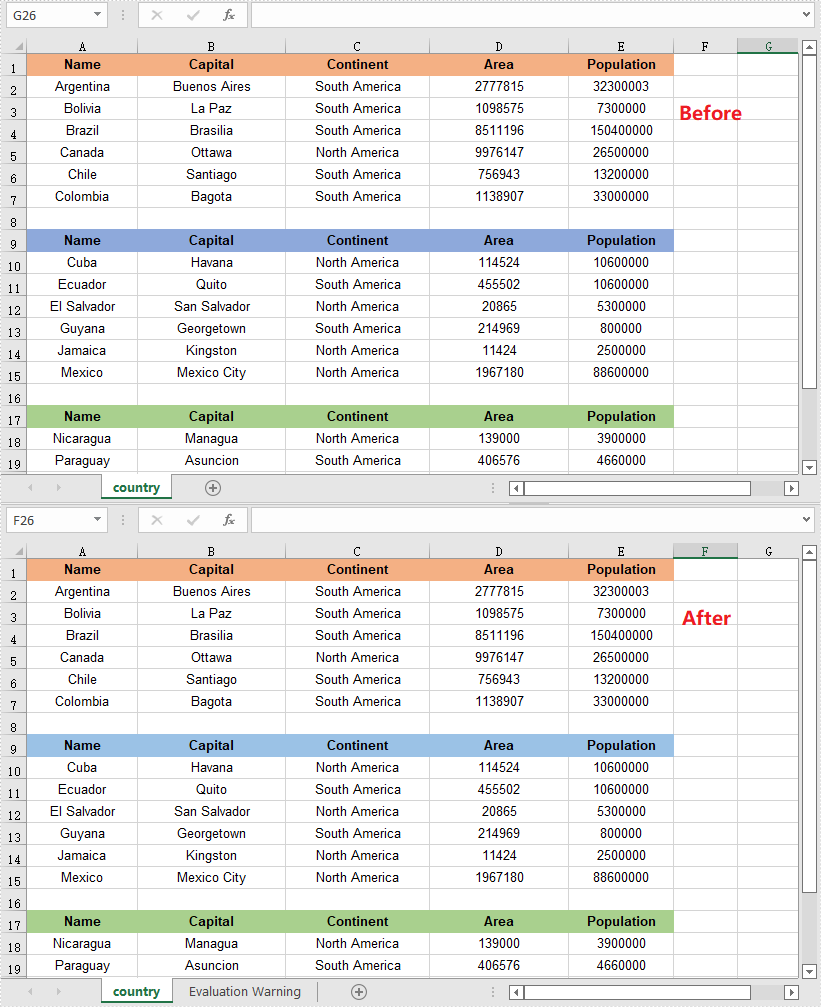
We have previously introduced how to insert a custom table and how to edit a table in PowerPoint documents. Now, we are going to make a brief introduction about how to remove the rows or columns that belong to an existing table.
Spire.Presentation for .NET, built to provide flexible PowerPoint document handling capabilities, allows developers to add a table to a slide and perform some basic operations as removing rows and columns in the table in an easy way.
Step 1: Create a PowerPoint instance and load a sample file.
Presentation presentation = new Presentation();
presentation.LoadFromFile("table.pptx");
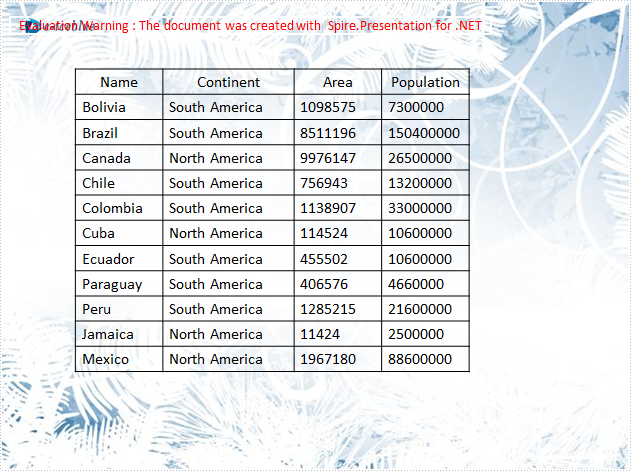
Step 2: Find the table and remove the second column and second row.
ITable table = null;
foreach (IShape shape in presentation.Slides[0].Shapes)
{
  if (shape is ITable)
  {
    table = (ITable)shape;
    table.ColumnsList.RemoveAt(1, false)
    table.TableRows.RemoveAt(1, false);
  }
}
Step 3: Save the document.
presentation.SaveToFile("result.pptx", FileFormat.Pptx2010);
System.Diagnostics.Process.Start("result.pptx");
The sample table with the second row and second column highlighted.
Result:
Full C# code:
using Spire.Presentation;

namespace RemoveRow
{

    class Program
    {

        static void Main(string[] args)
        {
            //create a PPT document
            Presentation presentation = new Presentation();
            presentation.LoadFromFile("table.pptx");

            //get the table in PPT document
            ITable table = null;
            foreach (IShape shape in presentation.Slides[0].Shapes)
            {
                if (shape is ITable)
                {
                    table = (ITable)shape;

                    //remove the second column
                    table.ColumnsList.RemoveAt(1, false);

                    //remove the second row
                    table.TableRows.RemoveAt(1, false);
                }
            }
            //save the document
            presentation.SaveToFile("result.pptx", FileFormat.Pptx2010);
            System.Diagnostics.Process.Start("result.pptx");

        }

    }
}
Save PowerPoint file to Stream and Load PowerPoint file from Stream
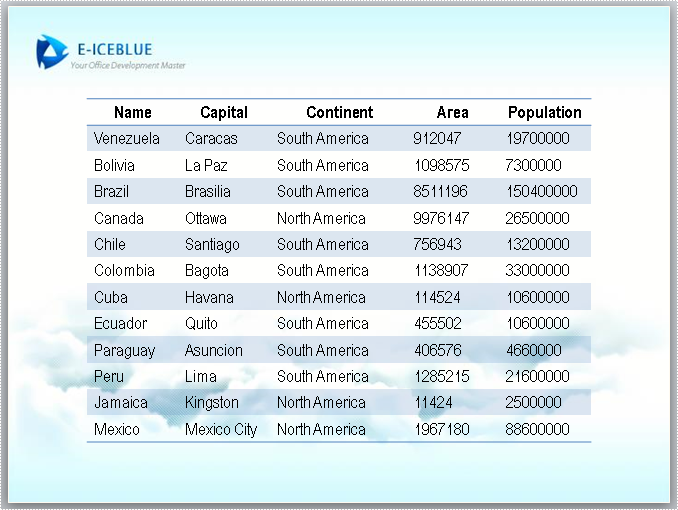
2014-06-12 02:48:45 Written by support iceblueSpire.Presentation is a powerful and easy-to-use .NET component, especially designed for developers. Using Spire.Presentation you can generate, modify, convert, render, and print documents without installing Microsoft PowerPoint on your machine. In this document, I will introduce you how to create PowerPoint file and save it to stream. I also introduce you how to load PowerPoint file from stream. Check it below.
Create PowerPoint file and save it to Stream
Step 1: Create Presentation instance.
Presentation presentation = new Presentation();
Step 2: Set background image.
string ImageFile = "bg.png";
RectangleF rect = new RectangleF(0, 0, presentation.SlideSize.Size.Width, presentation.SlideSize.Size.Height);
presentation.Slides[0].Shapes.AppendEmbedImage(ShapeType.Rectangle, ImageFile, rect);
presentation.Slides[0].Shapes[0].Line.FillFormat.SolidFillColor.Color = Color.FloralWhite;
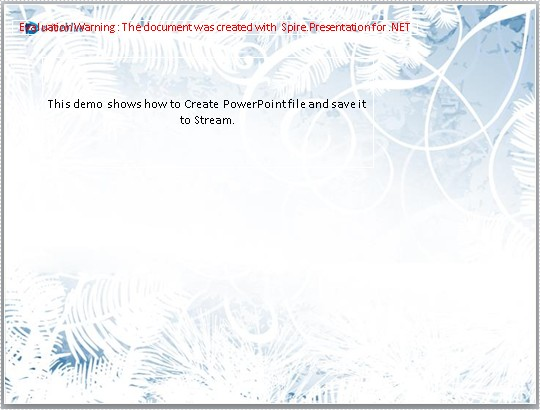
Step 3: Add text to PowerPoint document.
IAutoShape shape = presentation.Slides[0].Shapes.AppendShape(ShapeType.Rectangle, new RectangleF(50, 70, 450, 150));
shape.Fill.FillType = FillFormatType.None;
shape.ShapeStyle.LineColor.Color = Color.White;

//add text to shape
shape.TextFrame.Text = "This demo shows how to Create PowerPoint file and save it to Stream.";
shape.TextFrame.Paragraphs[0].TextRanges[0].Fill.FillType = FillFormatType.Solid;
shape.TextFrame.Paragraphs[0].TextRanges[0].Fill.SolidColor.Color = Color.Black;
Step 4: Save document to stream.
FileStream to_stream = new FileStream("To_stream.pptx", FileMode.Create);
presentation.SaveToFile(to_stream, FileFormat.Pptx2010);
to_stream.Close();
Preview the generated PowerPoint file:
Load PowerPoint file from stream.
Step 1: Create Presentation instance.
Presentation presentationLoad = new Presentation();
Step 2: Load PowerPoint file from stream.
FileStream from_stream = File.OpenRead("sample.pptx");
presentationLoad.LoadFromStream(from_stream, FileFormat.Pptx2010);
Step 3: Save the document.
presentationLoad.SaveToFile("From_stream.pptx",FileFormat.Pptx2010);
from_stream.Dispose();
Preview the PowerPoint file:
Full code:
using Spire.Presentation;
using Spire.Presentation.Drawing;
using System.Drawing;
using System.IO;
namespace SavePPTtoStream
{
    class Program
    {
        static void Main(string[] args)
        {

            //A: create PowerPoint file and save it to stream
            Presentation presentation = new Presentation();

            //set background Image
            string ImageFile = "bg.png";
            RectangleF rect = new RectangleF(0, 0, presentation.SlideSize.Size.Width, presentation.SlideSize.Size.Height);
            presentation.Slides[0].Shapes.AppendEmbedImage(ShapeType.Rectangle, ImageFile, rect);
            presentation.Slides[0].Shapes[0].Line.FillFormat.SolidFillColor.Color = Color.FloralWhite;

            //append new shape
            IAutoShape shape = presentation.Slides[0].Shapes.AppendShape(ShapeType.Rectangle, new RectangleF(50, 70, 450, 150));
            shape.Fill.FillType = FillFormatType.None;
            shape.ShapeStyle.LineColor.Color = Color.White;

            //add text to shape
            shape.TextFrame.Text = "This demo shows how to Create PowerPoint file and save it to Stream.";
            shape.TextFrame.Paragraphs[0].TextRanges[0].Fill.FillType = FillFormatType.Solid;
            shape.TextFrame.Paragraphs[0].TextRanges[0].Fill.SolidColor.Color = Color.Black;

            //save to Stream
            FileStream to_stream = new FileStream("To_stream.pptx", FileMode.Create);
            presentation.SaveToFile(to_stream, FileFormat.Pptx2010);
            to_stream.Close();

            System.Diagnostics.Process.Start("To_stream.pptx");


            //B: Load PowerPoint file from Stream
            Presentation presentationLoad = new Presentation();

            //load PowerPoint file from stream
            FileStream from_stream = File.OpenRead("sample.pptx");
            presentationLoad.LoadFromStream(from_stream, FileFormat.Pptx2010);

            //save the document
            presentationLoad.SaveToFile("From_stream.pptx", FileFormat.Pptx2010);
            from_stream.Dispose();

            System.Diagnostics.Process.Start("From_stream.pptx");


        }
    }
}
If you couldn't successfully use Spire.Presentation, please refer Spire.Presentation Quick Start which can guide you quickly use Spire.Presentation.
In Word document, users can add new page break or remove existing page breaks. This sample shows how to remove page breaks from the word document by using Spire.Doc. Spire.Doc supports to remove the page breaks from the word document from the format of .docx, .doc, and RTF etc.
Firstly make sure Spire.Doc for .NET has been installed correctly and then add Spire.Doc.dll as reference in the downloaded Bin folder though the below path: ".. \Spire.Doc\Bin\NET4.0\ Spire.Doc.dll". Here comes to the details of how to remove page breaks in C#.
//Create a new word document and load from the file.
Document document = new Document();
document.LoadFromFile("sample.docx");

// Traverse every paragraph of the first section of the document
for (int j = 0; j < document.Sections[0].Paragraphs.Count; j++)
  {
   Paragraph p = document.Sections[0].Paragraphs[j];

// Traverse every child object of a paragraph
for (int i = 0; i < p.ChildObjects.Count; i++)
    {
     DocumentObject obj = p.ChildObjects[i];

//Find the page break object
 if (obj.DocumentObjectType == DocumentObjectType.Break)
    {
     Break b = obj as Break;

// Remove the page break object from paragraph
p.ChildObjects.Remove(b);

//save the document to file.
document.SaveToFile("result.docx");
Please check the effective screenshot:

Full codes:
using Spire.Doc;
using Spire.Doc.Documents;
namespace RemovePageBreak
{
    class Program
    {
        static void Main(string[] args)
        {
            Document document = new Document();
            document.LoadFromFile("sample.docx", FileFormat.Docx);
            for (int j = 0; j < document.Sections[0].Paragraphs.Count; j++)
            {
                Paragraph p = document.Sections[0].Paragraphs[j];
                for (int i = 0; i < p.ChildObjects.Count; i++)
                {
                    DocumentObject obj = p.ChildObjects[i];
                    if (obj.DocumentObjectType == DocumentObjectType.Break)
                    {
                        Break b = obj as Break;
                        p.ChildObjects.Remove(b);
                    }
                }
            }
            document.SaveToFile("result.docx", FileFormat.Docx);
            System.Diagnostics.Process.Start("result.docx");
        }
    }
}
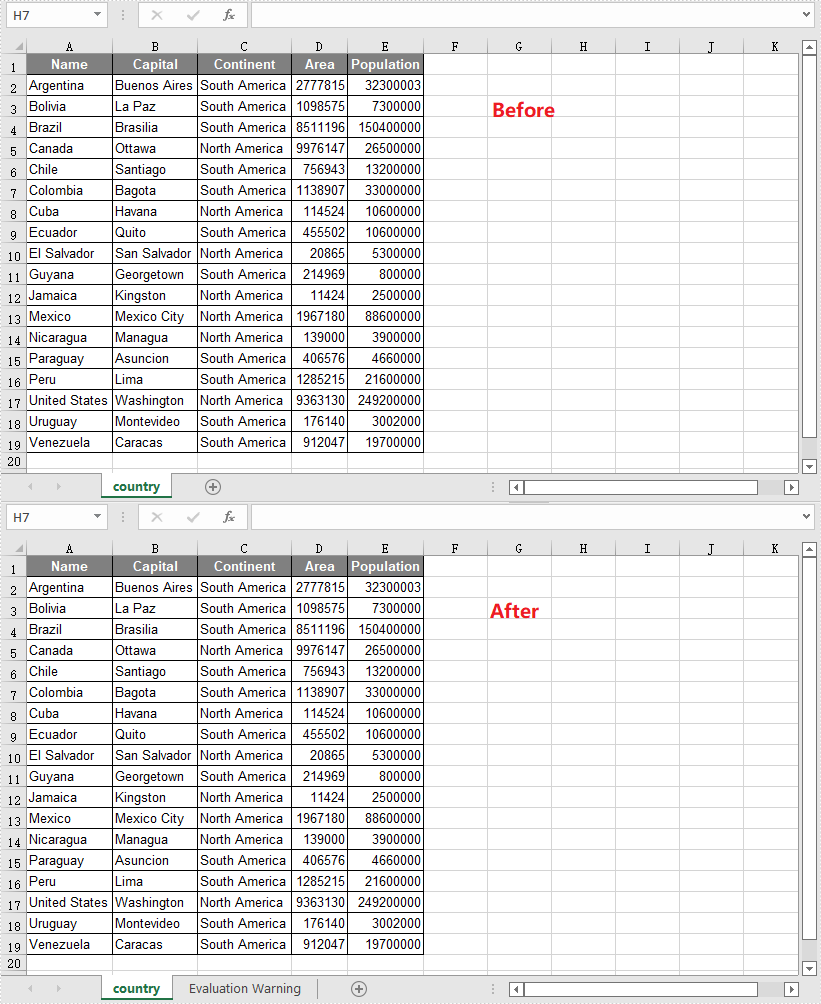
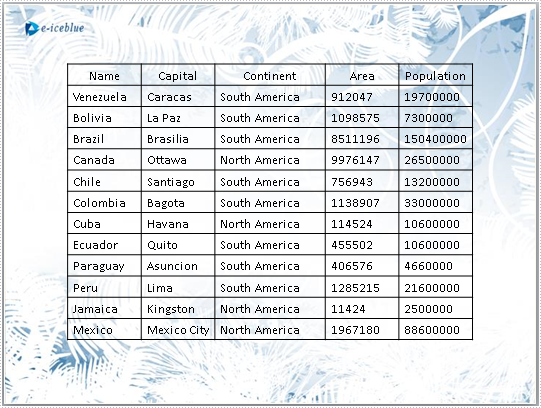
Spire.Presentation is a powerful and easy-to-use .NET component, especially designed for developers. Using Spire.Presentation you can generate, modify, convert, render, and print documents without installing Microsoft PowerPoint on your machine. There is a document in our website introducing you how to insert table. And in this document, you will be introduced how to edit a table within a PPT document.
Step 1: Create a Presentation instance and load the file.
Presentation presentation = new Presentation();
presentation.LoadFromFile("table.pptx");
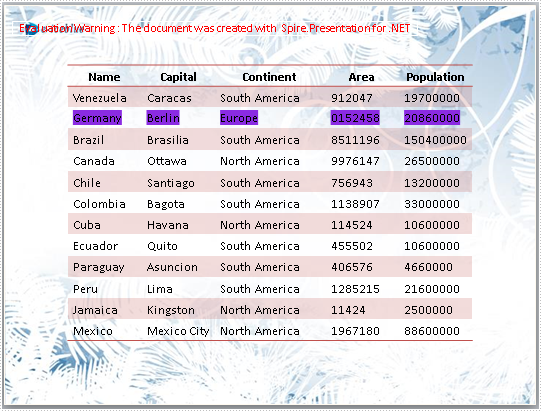
Step 2: Store the data used in replacement in string [].
string[] str = new string[] { "Germany", "Berlin", "Europe", "0152458", "20860000" };
Step 3: Get the table within the PPT document.
ITable table = null;
foreach (IShape shape in presentation.Slides[0].Shapes)
{
    if (shape is ITable)
    {
        table = (ITable) shape;
    }
}
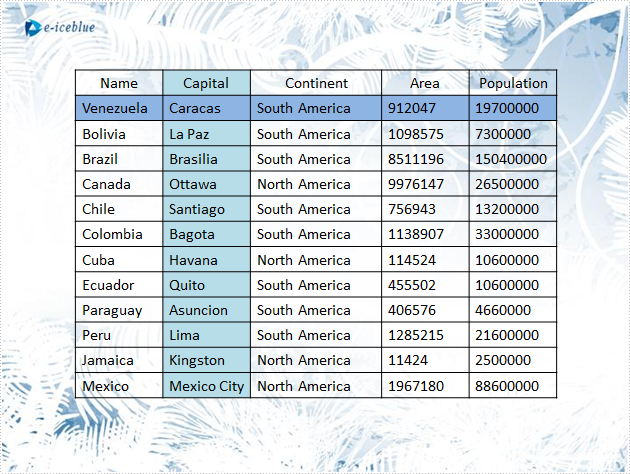
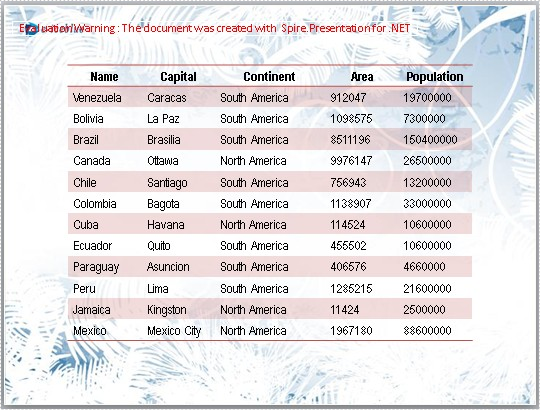
Step 4: Fill in the third row with new data and set the HighlightColor.
for (int i = 0; i < table.ColumnsList.Count;i++ )
{
    //replace the data in cell
    table[i, 2].TextFrame.Text = str[i];

    //set the highlightcolor
    table[i, 2].TextFrame.TextRange.HighlightColor.Color = Color.BlueViolet;
}
Step 5: Set the style of the table.
table.StylePreset = TableStylePreset.LightStyle1Accent2;
Step 6: Save the document.
presentation.SaveToFile("result.pptx", FileFormat.Pptx2010);
Download and install Spire.Presentation for .NET and refer to below code to edit table within PPT document.
Screenshots and full code:
Before:
After:
using Spire.Presentation;
using System.Drawing;

namespace EditTable
{

    class Program
    {

        static void Main(string[] args)
        {
            //create a PPT document
            Presentation presentation = new Presentation();

            presentation.LoadFromFile("table.pptx");

            //the data used in replacement
            string[] str = new string[] { "Germany", "Berlin", "Europe", "0152458", "20860000" };

            ITable table = null;

            //get the table in PPT document
            foreach (IShape shape in presentation.Slides[0].Shapes)
            {
                if (shape is ITable)
                {
                    table = (ITable)shape;

                    //change the style of table
                    table.StylePreset = TableStylePreset.LightStyle1Accent2;

                    for (int i = 0; i < table.ColumnsList.Count; i++)
                    {
                        //replace the data in cell
                        table[i, 2].TextFrame.Text = str[i];

                        //set the highlightcolor
                        table[i, 2].TextFrame.TextRange.HighlightColor.Color = Color.BlueViolet;
                    }
                }
            }

            //save the document
            presentation.SaveToFile("result.pptx", FileFormat.Pptx2010);
            System.Diagnostics.Process.Start("result.pptx");

        }

    }
}
Imports Spire.Presentation
Imports System.Drawing

Namespace EditTbale

	Class Program

		Private Shared Sub Main(args As String())
			'create a PPT document
			Dim presentation As New Presentation()

			presentation.LoadFromFile("table.pptx")

			'the data used in replacement
			Dim str As String() = New String() {"Germany", "Berlin", "Europe", "0152458", "20860000"}

			Dim table As ITable = Nothing

			'get the table in PPT document
			For Each shape As IShape In presentation.Slides(0).Shapes
				If TypeOf shape Is ITable Then
					table = DirectCast(shape, ITable)

					'change the style of table
					table.StylePreset = TableStylePreset.LightStyle1Accent2

					For i As Integer = 0 To table.ColumnsList.Count - 1
						'replace the data in cell
						table(i, 2).TextFrame.Text = str(i)

						'set the highlightcolor
						table(i, 2).TextFrame.TextRange.HighlightColor.Color = Color.BlueViolet
					Next
				End If
			Next

			'save the document
			presentation.SaveToFile("result.pptx", FileFormat.Pptx2010)
			System.Diagnostics.Process.Start("result.pptx")

		End Sub

	End Class
End Namespace
If you couldn't successfully use Spire.Presentation, please refer Spire.Presentation Quick Start which can guide you quickly use Spire.Presentation.
Spire.Barcode is a free .NET component specially designed for developers. It can generate many kinds of barcode such as EAN128, Codabar, DataMatrix, PostNet and so on. It can also scan the barcode images. X dimension is the measure of the narrowest bar in a barcode. Barcodes and scanners have different X dimensions, so they must be matched. Using Spire.Barcode, it is quiet an easy job to do this.
In this document, I will introduce you how to so.
Step 1: Create a BarcodeSettings instance.
BarcodeSettings setting = new BarcodeSettings();
Step 2: Set the data to render.
setting.Data = "58465157484";
setting.Data2D = "58465157484";
Step 3: Set the type of barcode to generate.
setting.Type = BarCodeType.UPCA;
Step 4: Set the value of X dimension.
setting.Unit = GraphicsUnit.Millimeter;
setting.X = 0.8F;
The property Unit specifies the measurement unit. In this sample, the measurement unit is millimeter.
Step 5: Generate barcode image using BarCodeGenerator.
BarCodeGenerator gen = new BarCodeGenerator(setting);
Image img = gen.GenerateImage();
img.Save("barcode.png");
Screenshot and Full Code:

using Spire.Barcode;
using System.Drawing;


namespace SetXDimension
{
    class Program
    {
        static void Main(string[] args)
        {
            BarcodeSettings barsetting = new BarcodeSettings();

            //set the x dimension
            barsetting.X = 0.8f;
            barsetting.Unit = GraphicsUnit.Millimeter;

            barsetting.HasBorder = true;
            barsetting.BorderWidth = 0.5F;

            //set the data
            barsetting.Data = "58465157484";
            barsetting.Data2D = "58465157484";

            //generate UPCA barcode
            barsetting.Type = BarCodeType.UPCA;

            BarCodeGenerator bargenerator = new BarCodeGenerator(barsetting);
            Image barcodeimage = bargenerator.GenerateImage();
            barcodeimage.Save("barcode.png");

            System.Diagnostics.Process.Start("barcode.png");
        }
    }
}
Imports Spire.Barcode
Imports System.Drawing


Namespace SetXDimension
	Class Program
		Private Shared Sub Main(args As String())
			Dim barsetting As New BarcodeSettings()

			'set the x dimension
			barsetting.X = 0.8F
			barsetting.Unit = GraphicsUnit.Millimeter

			barsetting.HasBorder = True
			barsetting.BorderWidth = 0.5F

			'set the data
			barsetting.Data = "58465157484"
			barsetting.Data2D = "58465157484"

			'generate UPCA barcode
			barsetting.Type = BarCodeType.UPCA

			Dim bargenerator As New BarCodeGenerator(barsetting)
			Dim barcodeimage As Image = bargenerator.GenerateImage()
			barcodeimage.Save("barcode.png")

			System.Diagnostics.Process.Start("barcode.png")
		End Sub
	End Class
End Namespace
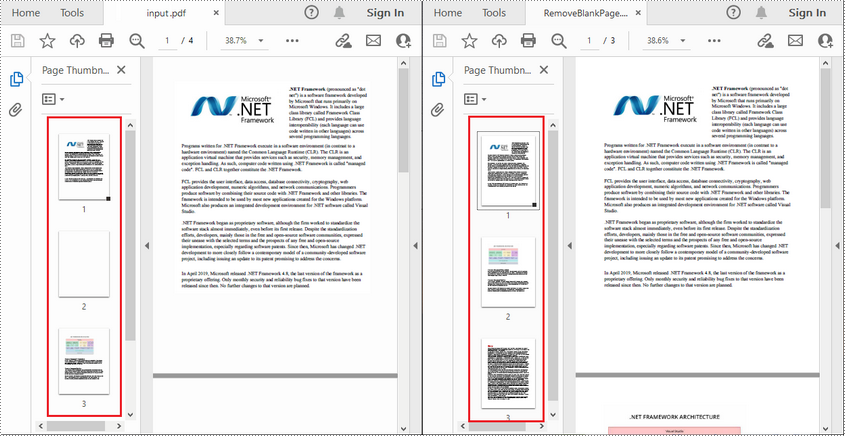
Blank pages in PDFs are not uncommon to find because they may have been left intentionally by the author or added accidentally when manipulating documents. These blank pages can be annoying when you are reading or printing the document, so it may be quite necessary to remove them. In this article you will learn how to programmatically find and remove blank pages from PDF documents using Spire.PDF for .NET.
Install Spire.PDF for .NET
To begin with, you need to add the DLL files included in the Spire.PDF for.NET package as references in your .NET project. The DLLs files can be either downloaded from this link or installed via NuGet.
PM> Install-Package Spire.PDF
Find and Delete Blank Pages from a PDF Document
Spire.PDF for .NET provides a method PdfPageBase.IsBlank() to detect if a PDF page is absolutely blank. But some pages that look blank actually contain white images, these pages won't be deemed as blank using the PdfPageBase.IsBlank() method. Therefore, it is necessary to create a custom method IsImageBlank() to be used in conjunction with PdfPageBase.IsBlank() method to detect these white but non-blank pages.
Note: This solution will convert PDF pages into images and detect if an image is blank. It is necessary to apply a license to remove the evaluation message in the converted images. Otherwise, this method won't work properly. If you do not have a license, contact sales@e-iceblue.com for a temporary one for evaluation purpose.
The detailed steps are as follows:
- Create a PdfDocument instance.
- Load a PDF document using PdfDocument.LoadFromFile() method.
- Loop through the pages in the PDF document to detect if the pages are blank using PdfPageBase.IsBlank() method.
- For absolutely blank pages, delete them using PdfDocument.Pages.RemoveAt() method.
- For pages that are not absolutely blank, save them as images using PdfDocument.SaveAsImage() method. Then detect if the converted images are blank using custom method IsImageBlank() and remove the pages that are "blank" using PdfDocument.Pages.RemoveAt() method.
- Save the result document using PdfDocument.SaveToFile() method.
- C#
- VB.NET
using Spire.Pdf;
using Spire.Pdf.Graphics;
using System.Drawing;

namespace DeleteBlankPage
{
    class Program
    {
        static void Main(string[] args)
        {
            //Apply license by license key
            Spire.License.LicenseProvider.SetLicenseKey("your license key");

            //Create a PdfDocument instance
            PdfDocument document = new PdfDocument();

            //Load a sample PDF document
            document.LoadFromFile("input.pdf");

            //Loop through all pages in the PDF
            for (int i = document.Pages.Count - 1; i >= 0; i--)
            {
                //Detect if a page is blank
                if (document.Pages[i].IsBlank())
                {
                    //Remove the absolutely blank page
                    document.Pages.RemoveAt(i);
                }
                else
                {
                    //Save PDF page as image
                    Image image = document.SaveAsImage(i, PdfImageType.Bitmap);

                    //Detect if the converted image is blank
                    if (IsImageBlank(image))
                    {
                        //Remove the page
                        document.Pages.RemoveAt(i);
                    }
                }
            }

            //Save the result document
            document.SaveToFile("RemoveBlankPage.pdf", FileFormat.PDF);
        }

        //Detect if an image is blank
        public static bool IsImageBlank(Image image)
        {
            Bitmap bitmap = new Bitmap(image);
            for (int i = 0; i < bitmap.Width; i++)
            {
                for (int j = 0; j < bitmap.Height; j++)
                {
                    Color pixel = bitmap.GetPixel(i, j);
                    if (pixel.R < 240 || pixel.G < 240 || pixel.B < 240)
                    {
                        return false;
                    }
                }
            }
            return true;
        }
    }
}
Apply for a Temporary License
If you'd like to remove the evaluation message from the generated documents, or to get rid of the function limitations, please request a 30-day trial license for yourself.
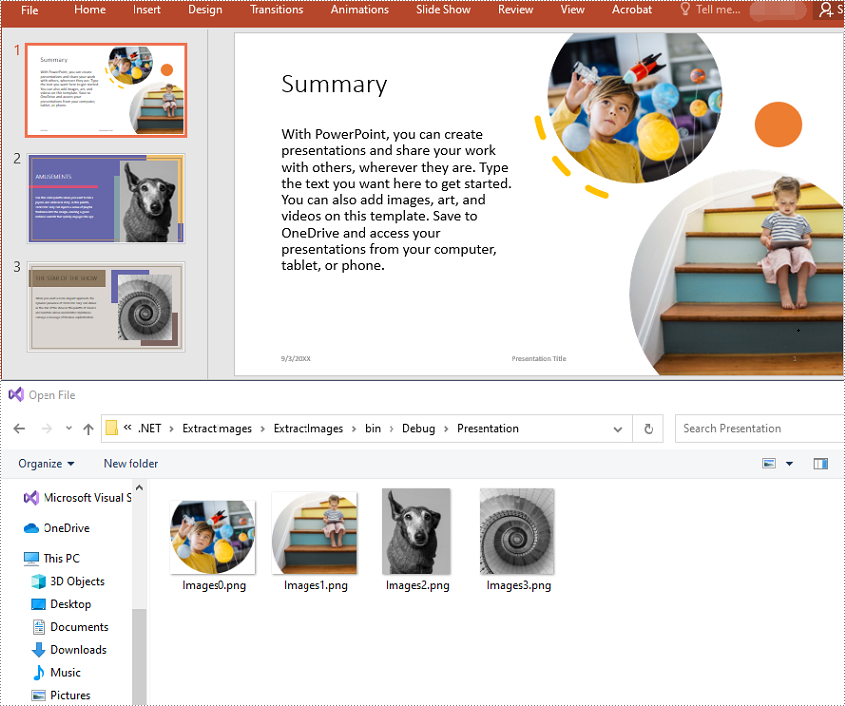
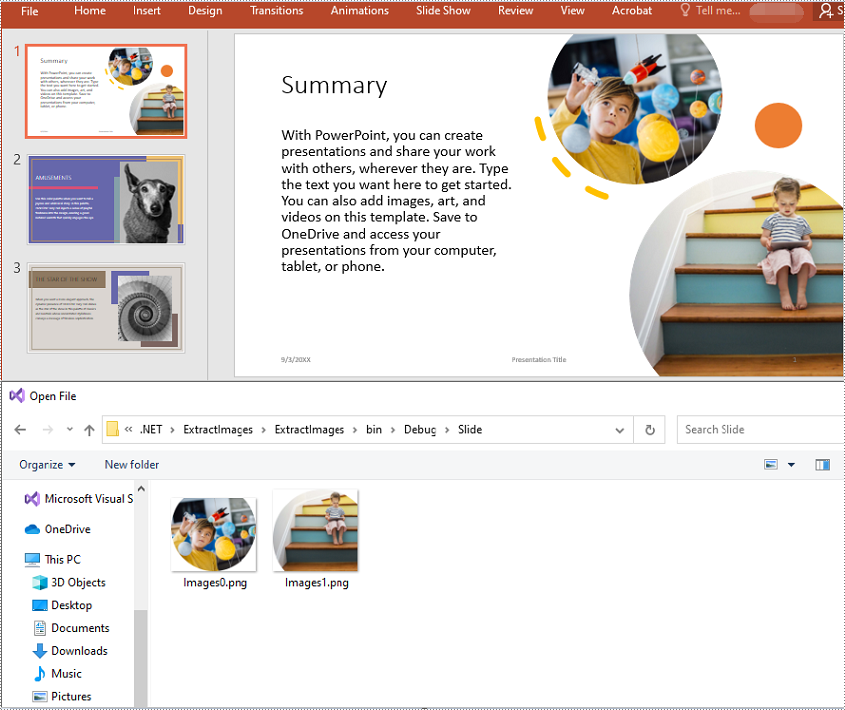
C#/VB.NET: Extract Images from PowerPoint Presentations
2023-03-09 07:53:00 Written by support iceblueImages are one of the most common elements in PowerPoint presentations. There may be times when you need to extract images from specific presentation slides or from an entire presentation, for example, when you want to reuse those images in another presentation. In this article, you will learn how to extract images from PowerPoint presentations in C# and VB.NET using Spire.Presentation for .NET library.
- Extract Images from an Entire Presentation in C# and VB.NET
- Extract Images from a Specific Presentation Slide in C# and VB.NET
Install Spire.Presentation for .NET
To begin with, you need to add the DLL files included in the Spire.Presentation for.NET package as references in your .NET project. The DLL files can be either downloaded from this link or installed via NuGet.
PM> Install-Package Spire.Presentation
Extract Images from an Entire Presentation in C# and VB.NET
To extract images from an entire PowerPoint presentation, you need to use the Presentation.Images property to get the collection of all the images in the presentation, then iterate through the collection and call ImageCollection[int].Image.Save() method to save each image to an image file. The following are the detailed steps:
- Initialize an instance of the Presentation class.
- Load a PowerPoint presentation using Presentation.LoadFromFile() method.
- Get the collection of all the images in the presentation through Presentation.Images property.
- Iterate through the collection, and call ImageCollection[int].Image.Save() method to save the images in the collection to image files.
- C#
- VB.NET
using Spire.Presentation;
using Spire.Presentation.Collections;
using System.Drawing;

namespace ExtractImagesFromPresentation
{
    internal class Program
    {
        static void Main(string[] args)
        {
            //Initialize an instance of the Presentation class
            Presentation ppt = new Presentation();
            //Load a PowerPoint presentation
            ppt.LoadFromFile(@"Template.pptx");

            //Get the image collection of the presentation
            ImageCollection imageCollection = ppt.Images;

            //Iterate through the images in the collection
            for (int i = 0; i < imageCollection.Count; i++)
            {
                //Extract the images
                imageCollection[i].Image.Save(string.Format(@"Presentation\Images{0}.png", i));
            }

            ppt.Dispose();
        }
    }
}
Extract Images from a Specific Presentation Slide in C# and VB.NET
To extract images from a specific slide, you need to iterate through all shapes on the slide, find the shapes that are of SlidePicture or PictureShape type, then use the SlidePicture.PictureFill.Picture.EmbedImage.Image.Save() or PictureShape.EmbedImage.Image.Save() method to save the images to image files. The following are the detailed steps:
- Initialize an instance of the Presentation class.
- Load a PowerPoint presentation using Presentation.LoadFromFile() method.
- Get a specific slide by its index through Presentation.Slides[int] property.
- Iterate through all shapes on the slide.
- Check if the shapes are of SlidePicture or PictureShape type. If the result is true, save the images to image files using SlidePicture.PictureFill.Picture.EmbedImage.Image.Save() or PictureShape.EmbedImage.Image.Save() method.
- C#
- VB.NET
using Spire.Presentation;

namespace ExtractImagesFromSlide
{
    internal class Program
    {
        static void Main(string[] args)
        {
            //Initialize an instance of the Presentation class
            Presentation ppt = new Presentation();
            //Load a PowerPoint presentation
            ppt.LoadFromFile(@"Template4.pptx");

            //Get the first slide
            ISlide slide = ppt.Slides[0];

            int i = 0;
            //Iterate through all shapes on the first slide
            foreach (IShape s in slide.Shapes)
            {
                //Check if the shape is of SlidePicture type
                if (s is SlidePicture)
                {
                    //Extract the image
                    SlidePicture ps = s as SlidePicture;
                    ps.PictureFill.Picture.EmbedImage.Image.Save(string.Format(@"Slide\Images{0}.png", i));
                    i++;
                }
                //Check if the shape is of PictureShape type
                if (s is PictureShape)
                {
                    //Extract the image
                    PictureShape ps = s as PictureShape;
                    ps.EmbedImage.Image.Save(string.Format(@"Slide\Images{0}.png", i));
                    i++;
                }
            }
        }
    }
}
Apply for a Temporary License
If you'd like to remove the evaluation message from the generated documents, or to get rid of the function limitations, please request a 30-day trial license for yourself.
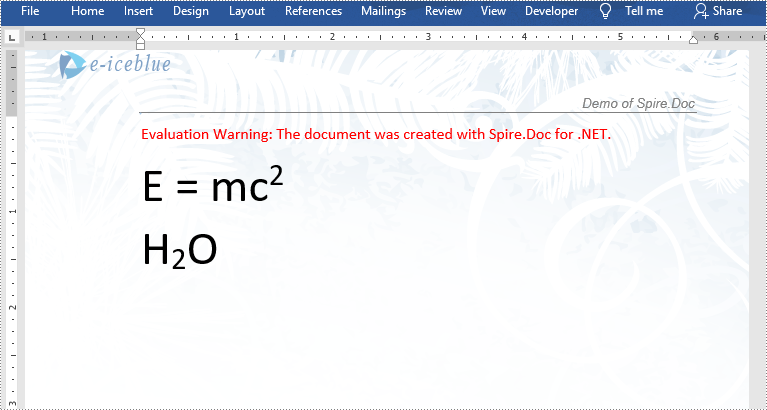
Superscripts or subscripts are characters positioned slightly above or below the normal line of text. They are commonly used in scientific formulas such as mathematical equations or chemical expressions. If you are creating a document containing scientific formulas, you most likely need to insert superscripts or subscripts. In this article, we will demonstrate how to insert superscripts and subscripts into Word in C# and VB.NET using Spire.Doc for .NET library.
Install Spire.Doc for .NET
To begin with, you need to add the DLL files included in the Spire.Doc for.NET package as references in your .NET project. The DLL files can be either downloaded from this link or installed via NuGet.
PM> Install-Package Spire.Doc
Insert Superscripts and Subscripts into Word using C# and VB.NET
The following are the main steps to insert a superscript or subscript into a Word document using Spire.Doc for .NET:
- Create a Document instance.
- Load a Word document using Document.LoadFromFile() method.
- Get the specific section through Document.Sections[sectionIndex] property.
- Add a paragraph to the section using Section.AddParagraph() method.
- Add normal text to the paragraph using Paragraph.AppendText() method.
- Add superscript or subscript text to the paragraph using Paragraph.AppendText() method.
- Apply superscript or subscript formatting to the superscript or subscript text through TextRange.CharacterFormat.SubSuperScript property.
- Save the result document using Document.SaveToFile() method.
- C#
- VB.NET
using Spire.Doc;
using Spire.Doc.Documents;
using Spire.Doc.Fields;

namespace InsertSuperscriptAndSubscript
{
    class Program
    {
        static void Main(string[] args)
        {
            //Create a Document instance
            Document document = new Document();
            //Load a Word document
            document.LoadFromFile("Sample.docx");

            //Get the first section
            Section section = document.Sections[0];

            //Add a paragraph to the section
            Paragraph paragraph = section.AddParagraph();

            //Add normal text to the paragraph
            paragraph.AppendText("E = mc");
            //Add superscript text to the paragraph
            TextRange superscriptText = paragraph.AppendText("2");
            //Apply superscript formatting to the superscript text
            superscriptText.CharacterFormat.SubSuperScript = SubSuperScript.SuperScript;

            //Start a new line
            paragraph.AppendBreak(BreakType.LineBreak);

            //Add normal text to the paragraph
            paragraph.AppendText("H");
            //Add subscript text to the paragraph
            TextRange subscriptText = paragraph.AppendText("2");
            //Apply subscript formatting to the subscript text
            subscriptText.CharacterFormat.SubSuperScript = SubSuperScript.SubScript;
            //Add normal text to the paragraph
            paragraph.AppendText("O");

            //Set font size for the text in the paragraph
            foreach (var item in paragraph.Items)
            {
                if (item is TextRange)
                {
                    TextRange textRange = item as TextRange;
                    textRange.CharacterFormat.FontSize = 36f;
                }
            }

            //Save the result document
            document.SaveToFile("InsertSuperscriptAndSubscript.docx", FileFormat.Docx2013);
        }
    }
}
Apply for a Temporary License
If you'd like to remove the evaluation message from the generated documents, or to get rid of the function limitations, please request a 30-day trial license for yourself.
