Python: Add, Read, or Remove Document Properties in PowerPoint
Managing document properties in PowerPoint is an essential aspect of presentation creation. These properties serve as metadata that provides important information about the file, such as the author, subject, and keywords. By being able to add, retrieve, or remove document properties, users gain control over the organization and customization of their presentations. Whether it's adding relevant tags for easy categorization, accessing authorship details, or removing sensitive data, effectively managing document properties in PowerPoint ensures seamless collaboration and professionalism in your slide decks.
In this article, you will learn how to add, read, and remove document properties in a PowerPoint file in Python by using the Spire.Presentation for Python library.
- Add Document Properties to a PowerPoint File
- Read Document Properties of a PowerPoint File
- Remove Document Properties from a PowerPoint File
Install Spire.Presentation for Python
This scenario requires Spire.Presentation for Python and plum-dispatch v1.7.4. They can be easily installed in your Windows through the following pip commands.
pip install Spire.Presentation
If you are unsure how to install, please refer to this tutorial: How to Install Spire.Presentation for Python on Windows
Prerequisite Knowledge
Document properties can be divided into two types: standard document properties and custom document properties.
- Standard document properties are pre-defined properties that are commonly used across various PowerPoint presentations. Some examples of standard document properties include title, author, subject, keywords and company. Standard document properties are useful for providing general information and metadata about the presentation.
- Custom document properties are user-defined properties that allow you to add specific information to a PowerPoint presentation. Unlike standard document properties, custom properties are not predefined and can be tailored to suit your specific needs. Custom properties usually provide information relevant to your presentation that may not be covered by the default properties.
Spire.Presentation for Python offers the DocumentProperty class to work with both standard document properties and custom document properties. The standard document properties can be accessed using the properties like Title, Subject, Author, Manager, Company, etc. of the DocumentProperty class. To add or retrieve custom properties, you can use the set_Item() method and the GetPropertyName() method of the DocumentProperty class.
Add Document Properties to a PowerPoint File in Python
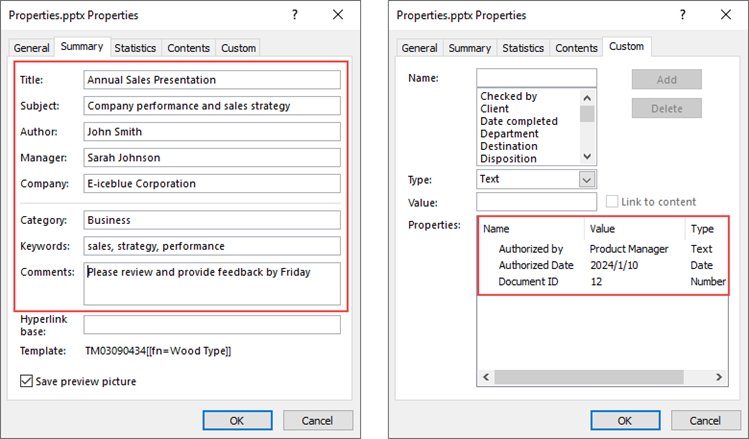
To add or change the standard document properties, you can assign values to the DocumentProperty.Title proerpty, DocumentProperty.Subject property and other similar properties. To add custom properties to a presentation, use the DocumentProperty.set_Item(name: str, value: SpireObject) method. The detailed steps are as follows.
- Create a Presentation object.
- Load a PowerPoint document using Presentation.LoadFromFile() method.
- Get the DocumentProperty object.
- Add standard document properties to the presentation by assigning values to the Title, Subject, Author, Manager, Company and Keywords properties of the object.
- Add custom properties to the presentation using set_Item() of the object.
- Save the presentation to a PPTX file using Presentation.SaveToFile() method.
- Python
from spire.presentation.common import *
from spire.presentation import *

# Create a Presentation object
presentation = Presentation()

# Load a PowerPoint document
presentation.LoadFromFile("C:\\Users\\Administrator\\Desktop\\input.pptx")

# Get the DocumentProperty object
documentProperty = presentation.DocumentProperty

# Set built-in document properties
documentProperty.Title = "Annual Sales Presentation"
documentProperty.Subject = "Company performance and sales strategy"
documentProperty.Author = "John Smith"
documentProperty.Manager = "Sarah Johnson"
documentProperty.Company = "E-iceblue Corporation"
documentProperty.Category = "Business"
documentProperty.Keywords = "sales, strategy, performance"
documentProperty.Comments = "Please review and provide feedback by Friday"

# Add custom document properties
documentProperty.set_Item("Document ID", Int32(12))
documentProperty.set_Item("Authorized by", String("Product Manager"))
documentProperty.set_Item("Authorized Date", DateTime(2024, 1, 10, 0, 0, 0, 0))

# Save to file
presentation.SaveToFile("output/Properties.pptx", FileFormat.Pptx2019)
presentation.Dispose()
Read Document Properties of a PowerPoint File in Python
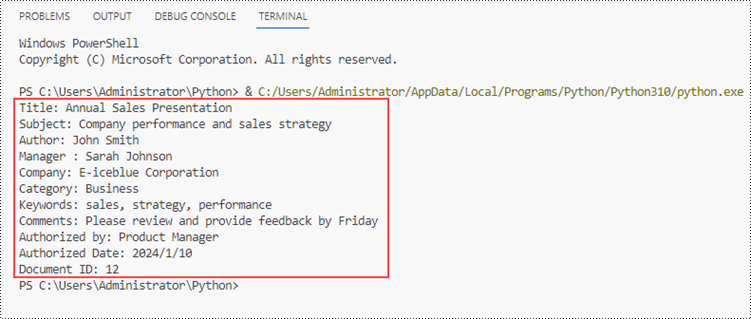
The DocumentProperty.Title and the similar properties are not only used to set standard properties but can return the values of standard properties as well. Since the name of a custom property is not constant, we need to get the name using the DocumentProperty.GetPropertyName(index: int) method. And then, we're able to get the property's value using the DocumentProperty.get_Item(name: str) method.
The steps to read document properties of a PowerPoint file are as follows.
- Create a Presentation object.
- Load a PowerPoint document using Presentation.LoadFromFile() method.
- Get the DocumentProperty object.
- Get the standard document properties by using the Title, Subject, Author, Manager, Company, and Keywords properties of the object.
- Get the count of the custom properties, and iterate through the custom properties.
- Get the name of a specific custom property by its index using DocumentProperty.GetPropertyName() method.
- Get the value of the property using DocumentProperty.get_Item() method.
- Python
from spire.presentation.common import *
from spire.presentation import *

# Create a Presentation object
presentation = Presentation()

# Load a PowerPoint document
presentation.LoadFromFile("C:\\Users\\Administrator\\Desktop\\Properties.pptx")

# Get the DocumentProperty object
documentProperty = presentation.DocumentProperty

# Get the built-in document properties
print("Title: " + documentProperty.Title)
print("Subject: " + documentProperty.Subject)
print("Author: " + documentProperty.Author)
print("Manager : " + documentProperty.Manager)
print("Company: " + documentProperty.Company)
print("Category: " + documentProperty.Category)
print("Keywords: " + documentProperty.Keywords)
print("Comments: " + documentProperty.Comments)

# Get the count of the custom document properties
count = documentProperty.Count

# Iterate through the custom properties
for i in range(count):

    # Get the name of a specific custom property
    customPropertyName = documentProperty.GetPropertyName(i)

    # Get the value of the custom property
    customPropertyValue = documentProperty.get_Item(customPropertyName)

    # Print the result
    print(customPropertyName + ": " + str(customPropertyValue))
Remove Document Properties from a PowerPoint File in Python
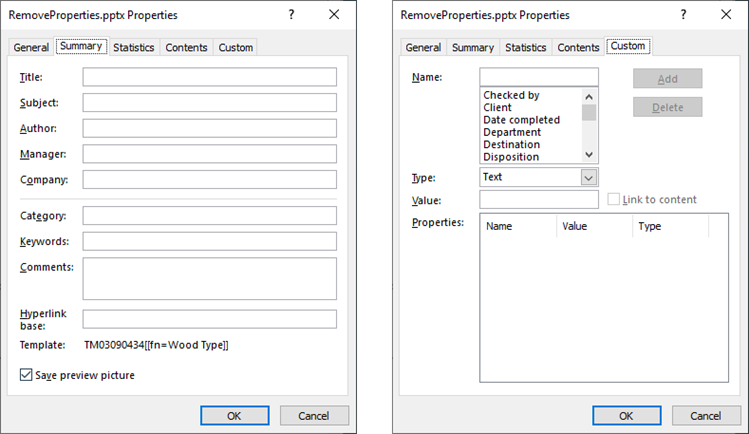
Removing a standard property means assigning an empty string to a property like DocumentProperty.Title. To remove the custom properties, Spire.Presentation provides the DocumentProperty.Remove(name: str) method. The following are the steps to remove document properties from a PowerPoint file in Python.
- Create a Presentation object.
- Load a PowerPoint document using Presentation.LoadFromFile() method.
- Get the DocumentProperty object.
- Set the Title, Subject, Author, Manager, Company, and Keywords properties of the object to empty strings.
- Get the count of the custom properties.
- Get the name of a specific custom property by its index using DocumentProperty.GetPropertyName() method.
- Remove the custom property using DocumentProperty.Remove() method.
- Save the presentation to a PPTX file using Presentation.SaveToFile() method.
- Python
from spire.presentation.common import *
from spire.presentation import *

# Create a Presentation object
presentation = Presentation()

# Load a PowerPoint document
presentation.LoadFromFile("C:\\Users\\Administrator\\Desktop\\Properties.pptx")

# Get the DocumentProperty object
documentProperty = presentation.DocumentProperty

# Set built-in document properties to empty strings
documentProperty.Title = ""
documentProperty.Subject = ""
documentProperty.Author = ""
documentProperty.Manager = ""
documentProperty.Company = ""
documentProperty.Category = ""
documentProperty.Keywords = ""
documentProperty.Comments = ""

# Get the count of the custom document properties
i = documentProperty.Count
while i > 0:

    # Get the name of a specific custom property
    customPropertyName = documentProperty.GetPropertyName(i - 1)

    # Remove the custom property
    documentProperty.Remove(customPropertyName)
    i = i - 1

# Save the presentation to a different pptx file
presentation.SaveToFile("Output/RemoveProperties.pptx",FileFormat.Pptx2019)
Apply for a Temporary License
If you'd like to remove the evaluation message from the generated documents, or to get rid of the function limitations, please request a 30-day trial license for yourself.
Python: Insert or Extract Images in Word Tables
Images are an effective tool for conveying complex information. By inserting images into tables, you can enhance data presentation with charts, graphs, diagrams, illustrations, and more. This not only enables readers to easily comprehend the information being presented but also adds visual appeal to your document. In certain cases, you may also come across situations where you need to extract images from tables for various purposes. For example, you might want to reuse an image in a presentation, website, or another document. Extracting images allows you to repurpose them, streamlining your content creation process and increasing efficiency. In this article, we will explore how to insert and extract images in Word tables in Python using Spire.Doc for Python.
Install Spire.Doc for Python
This scenario requires Spire.Doc for Python and plum-dispatch v1.7.4. They can be easily installed in your Windows through the following pip commands.
pip install Spire.Doc
If you are unsure how to install, please refer to this tutorial: How to Install Spire.Doc for Python on Windows
Insert Images into a Word Table in Python
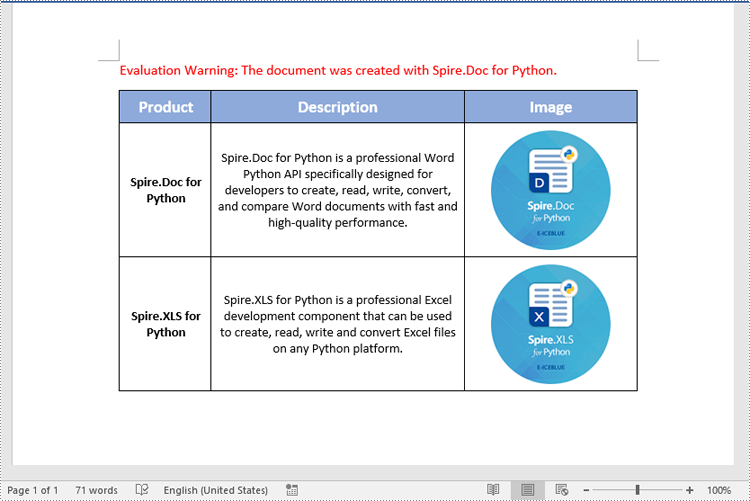
Spire.Doc for Python provides the TableCell.Paragraphs[index].AppendPicture() method to add an image to a specific table cell. The detailed steps are as follows.
- Create an object of the Document class.
- Load a Word document using the Document.LoadFromFile() method.
- Get a specific section in the document using the Document.Sections[index] property.
- Get a specific table in the section using the Section.Tables[index] property.
- Access a specific cell in the table using the Table.Row[index].Cells[index] property.
- Add an image to the cell using the TableCell.Paragraphs[index].AppendPicture() method and set the image width and height.
- Save the result document using the Document.SaveToFile() method.
- Python
from spire.doc import *
from spire.doc.common import *

# Create an object of the Document class
doc = Document()
# Load a Word document
doc.LoadFromFile("Table2.docx")

# Get the first section
section = doc.Sections[0]

# Get the first table in the section
table = section.Tables[0]

# Add an image to the 3rd cell of the second row in the table
cell = table.Rows[1].Cells[2]
picture = cell.Paragraphs[0].AppendPicture("doc.png")
# Set image width and height
picture.Width = 100
picture.Height = 100

# Add an image to the 3rd cell of the 3rd row in the table
cell = table.Rows[2].Cells[2]
picture = cell.Paragraphs[0].AppendPicture("xls.png")
# Set image width and height
picture.Width = 100
picture.Height = 100

# Save the result document
doc.SaveToFile("AddImagesToTable.docx", FileFormat.Docx2013)
doc.Close()
Extract Images from a Word Table in Python
To extract images from a Word table, you need to iterate through all objects in the table and identify the ones of the DocPicture type. Once the DocPicture objects are found, you can access their image bytes using the DocPicture.ImageBytes property, and then save the image bytes to image files. The detailed steps are as follows.
- Create an object of the Document class.
- Load a Word document using the Document.LoadFromFile() method.
- Get a specific section in the document using the Document.Sections[index] property.
- Get a specific table in the section using the Section.Tables[index] property.
- Create a list to store the extracted image data.
- Iterate through all rows in the table.
- Iterate through all cells in each row.
- Iterate through all paragraphs in each cell.
- Iterate through all child objects in each paragraph.
- Check if the current child object is of DocPicture type.
- Get the image bytes of the DocPicture object using the DocPicture.ImageBytes property and append them to the list.
- Save the image bytes in the list to image files.
- Python
from spire.doc import *
from spire.doc.common import *

# Create an object of the Document class
doc = Document()
# Load a Word document
doc.LoadFromFile("AddImagesToTable.docx")

# Get the first section
section = doc.Sections[0]

# Get the first table in the section
table = section.Tables[0]

# Create a list to store image bytes
image_data = []

# Iterate through all rows in the table
for i in range(table.Rows.Count):
    row = table.Rows[i]
    # Iterate through all cells in each row
    for j in range(row.Cells.Count):
        cell = row.Cells[j]
        # Iterate through all paragraphs in each cell
        for k in range(cell.Paragraphs.Count):
            paragraph = cell.Paragraphs[k]
            # Iterate through all child objects in each paragraph
            for o in range(paragraph.ChildObjects.Count):
                child_object = paragraph.ChildObjects[o]
                # Check if the current child object is of DocPicture type
                if isinstance(child_object, DocPicture):
                    picture = child_object
                    # Get the image bytes
                    bytes = picture.ImageBytes
                    # Append the image bytes to the list
                    image_data.append(bytes)

# Save the image bytes in the list to image files
for index, item in enumerate(image_data):
    image_Name = f"Images/Image-{index}.png"
    with open(image_Name, 'wb') as imageFile:
        imageFile.write(item)

doc.Close()

Apply for a Temporary License
If you'd like to remove the evaluation message from the generated documents, or to get rid of the function limitations, please request a 30-day trial license for yourself.
Spire.Doc for Java 12.2.2 enhances the conversion from Word and RTF to PDF
We are delighted to announce the release of Spire.Doc for Java 12.2.2. This version enhances the conversion from Word and RTF to PDF as well as Doc to Docx. Besides, a lot of known issues are fixed successfully in this version, such as the issue that the content of the updated table of contents was incorrect. More details are listed below.
Here is a list of changes made in this release
| Category | ID | Description |
| Bug | SPIREDOC-9689 | Fixes the issue that extra red vertical lines appeared after converting a Word document to a PDF document. |
| Bug | SPIREDOC-9911 | Fixes the issue that text loss occurred after converting an RTF document to a PDF document. |
| Bug | SPIREDOC-10009 | Fixes the issue that the program threw java.lang.NullPointerException when converting the same Word document to PDF document more than once under multi-threading. |
| Bug | SPIREDOC-10018 | Fixes the issue that the content was incorrect after converting a Word document to a PDF document. |
| Bug | SPIREDOC-10031 | Fixes the issue that the size of the PDF file was inconsistent when converting the same Word document to PDF document multiple times under multi-threading. |
| Bug | SPIREDOC-10130 | Fixes the issue that the numbers in the header were displayed incorrectly after converting a Word document to a PDF document. |
| Bug | SPIREDOC-10216 | Fixes the issue that the content of the updated table of contents was incorrect. |
| Bug | SPIREDOC-10236 | Fixes the issue that the program threw java.lang.NullPointerException when converting Word documents to PDF documents. |
| Bug | SPIREDOC-10238 | Fixes the issue that the text was garbled after converting a Doc document to a Docx document. |
| Bug | SPIREDOC-10258 | Fixes the issue that the program threw multiple exceptions when loading multiple files in a folder under multi-threading. |
| Bug | SPIREDOC-10274 | Fixes the issue that extra slashes appeared after converting a Word document to a PDF document. |
| Bug | SPIREDOC-10276 | Fixes the issue that the content of the header was displayed repeatedly after unlinking the header to the previous section. |
Python: Add or Extract Audio and Video from PowerPoint Documents
Adding or extracting audio and video in a PowerPoint document can greatly enrich the presentation content, enhance audience engagement, and improve comprehension. By adding audio, you can include background music, narration, or sound effects to make the content more lively and emotionally engaging. Inserting videos allows you to showcase dynamic visuals, demonstrate processes, or explain complex concepts, helping the audience to understand the content more intuitively. Extracting audio and video can help preserve important information or resources for reuse when needed. This article will introduce how to use Python and Spire.Presentation for Python to add or extract audio and video in PowerPoint.
- Add Audio in PowerPoint Documents in Python
- Extract Audio from PowerPoint Documents in Python
- Add Video in PowerPoint Documents in Python
- Extract Video from PowerPoint Documents in Python
Install Spire.Presentation for Python
This scenario requires Spire.Presentation for Python and plum-dispatch v1.7.4. They can be easily installed in your Windows through the following pip command.
pip install Spire.Presentation
If you are unsure how to install, please refer to this tutorial: How to Install Spire.Presentation for Python on Windows
Add Audio in PowerPoint Documents in Python
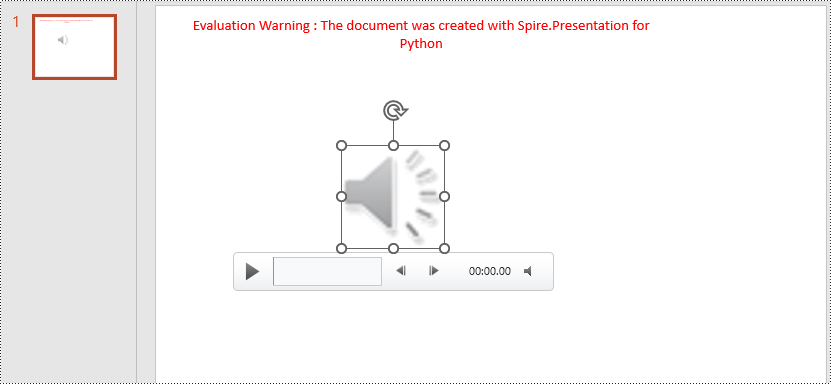
Spire.Presentation for Python provides the Slide.Shapes.AppendAudioMedia() method, which can be used to add audio files to slides. The specific steps are as follows:
- Create an object of the Presentation class.
- Use the RectangleF.FromLTRB() method to create a rectangle.
- In the shapes collection of the first slide, use the Slide.Shapes.AppendAudioMedia() method to add the audio file to the previously created rectangle.
- Use the Presentation.SaveToFile() method to save the document as a PowerPoint file.
- Python
from spire.presentation.common import *
from spire.presentation import *

# Create a presentation object
presentation = Presentation()

# Create an audio rectangle
audioRect = RectangleF.FromLTRB(200, 150, 310, 260)

# Add audio
presentation.Slides[0].Shapes.AppendAudioMedia("data/Music.wav", audioRect)

# Save the presentation to a file
presentation.SaveToFile("AddAudio.pptx", FileFormat.Pptx2016)

# Release resources
presentation.Dispose()
Extract Audio from PowerPoint Documents in Python
To determine if a shape is of audio type, you can check if its type is IAudio. If the shape is of audio type, you can use the IAudio.Data property to retrieve audio data. The specific steps are as follows:
- Create an object of the Presentation class.
- Use the Presentation.LoadFromFile() method to load the PowerPoint document.
- Iterate through the shapes collection on the first slide, checking if each shape is of type IAudio.
- If the shape is of type IAudio, use IAudio.Data property to retrieve the audio data from the audio object.
- Use the AudioData.SaveToFile() method to save the audio data to a file.
- Python
from spire.presentation.common import *
from spire.presentation import *

# Create a presentation object
presentation = Presentation()

# Load a presentation from a file
presentation.LoadFromFile("Audio.pptx")

# Initialize a counter
i = 1

# Iterate through shapes in the first slide
for shape in presentation.Slides[0].Shapes:

    # Check if the shape is of audio type
    if isinstance(shape, IAudio):

        # Get the audio data and save it to a file
        AudioData = shape.Data
        AudioData.SaveToFile("ExtractAudio_"+str(i)+".wav")
        i = i + 1

# Release resources
presentation.Dispose()

Add Video in PowerPoint Documents in Python
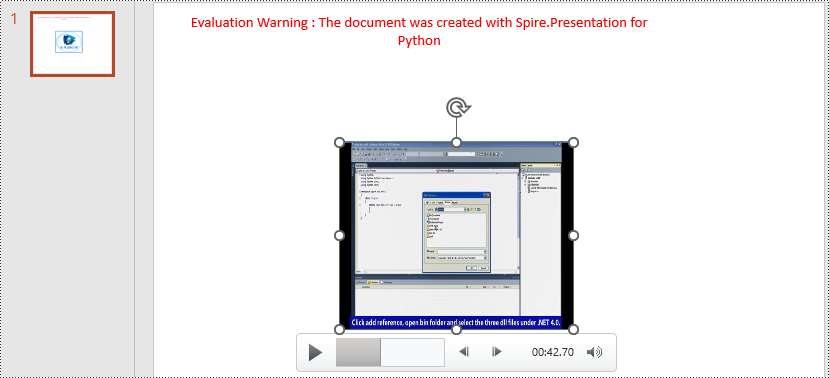
Using the Slide.Shapes.AppendVideoMedia() method, you can add video files to slides. The specific steps are as follows:
- Create an object of the Presentation class.
- Use the RectangleF.FromLTRB() method to create a rectangle.
- In the shapes collection of the first slide, use the Slide.Shapes.AppendVideoMedia() method to add the video file to the previously created rectangle.
- Use the video.PictureFill.Picture.Url property to set the cover image of the video.
- Use the Presentation.SaveToFile() method to save the document as a PowerPoint file.
- Python
from spire.presentation.common import *
from spire.presentation import *

# Create a presentation object
presentation = Presentation()

# Create a video rectangle
videoRect = RectangleF.FromLTRB(200, 150, 450, 350)

# Add video
video = presentation.Slides[0].Shapes.AppendVideoMedia("data/Video.mp4", videoRect)
video.PictureFill.Picture.Url = "data/Video.png"

# Save the presentation to a file
presentation.SaveToFile("AddVideo.pptx", FileFormat.Pptx2016)

# Release resources
presentation.Dispose()
Extract Video from PowerPoint Documents in Python
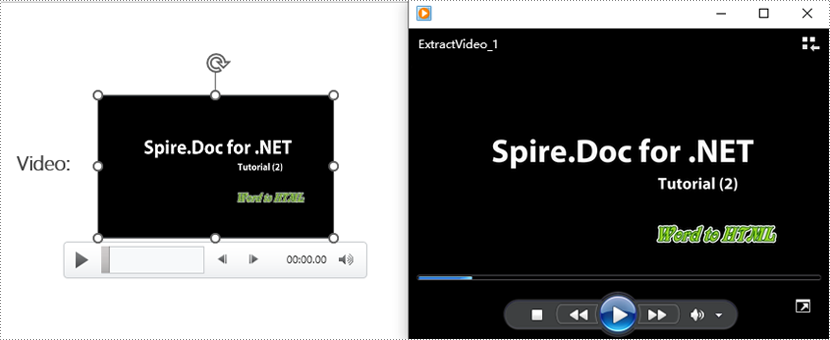
The video type is IVideo. If the shape is of type IVideo, you can use the IVideo.EmbeddedVideoData property to retrieve video data. The specific steps are as follows:
- Create an object of the Presentation class.
- Use the Presentation.LoadFromFile() method to load the PowerPoint presentation.
- Iterate through the shapes collection on the first slide, checking if each shape is of type IVideo.
- If the shape is of type IVideo, use the IVideo.EmbeddedVideoData property to retrieve the video data from the video object.
- Use the VideoData.SaveToFile() method to save the video data to a file.
- Python
from spire.presentation.common import *
from spire.presentation import *

# Create a presentation object
presentation = Presentation()

# Load a presentation from a file
presentation.LoadFromFile("Video.pptx")

# Initialize a counter
i = 1

# Iterate through each slide in the presentation
for slide in presentation.Slides:

    # Iterate through shapes in each slide
    for shape in slide.Shapes:

        # Check if the shape is of video type
        if isinstance(shape, IVideo):

            # Get the video data and save it to a file
            VideoData = shape.EmbeddedVideoData
            VideoData.SaveToFile("ExtractVideo_"+str(i)+".avi")
            i = i + 1

# Release resources
presentation.Dispose()
Apply for a Temporary License
If you'd like to remove the evaluation message from the generated documents, or to get rid of the function limitations, please request a 30-day trial license for yourself.
Python: Insert or Extract OLE Objects in Word
OLE (Object Linking and Embedding) objects in Word are files or data from other applications that can be inserted into a document. These objects can be edited and updated within Word, allowing you to seamlessly integrate content from various programs, such as Excel spreadsheets, PowerPoint presentations, or even multimedia files like images, audio, or video. In this article, we will introduce how to insert and extract OLE objects in a Word document in Python using Spire.Doc for Python.
Install Spire.Doc for Python
This scenario requires Spire.Doc for Python and plum-dispatch v1.7.4. They can be easily installed in your Windows through the following pip command.
pip install Spire.Doc
If you are unsure how to install, please refer to this tutorial: How to Install Spire.Doc for Python on Windows
Insert OLE Objects in Word in Python
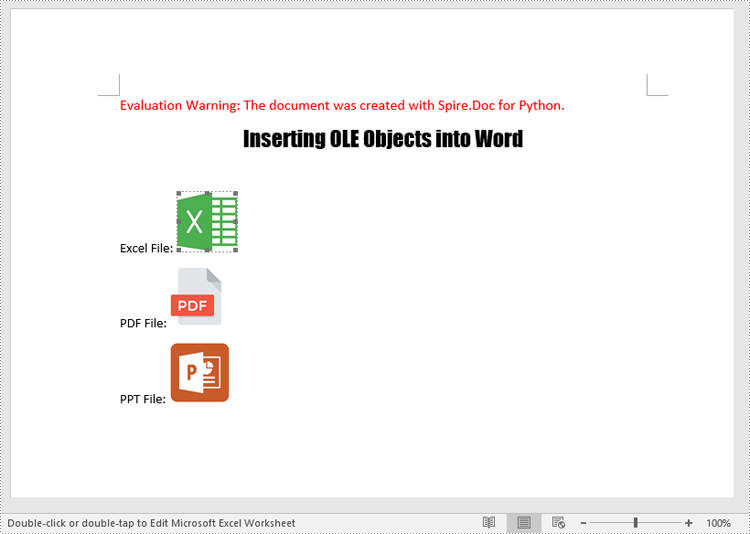
Spire.Doc for Python provides the Paragraph.AppendOleObject(pathToFile:str, olePicture:DocPicture, type:OleObjectType) method to embed OLE objects in a Word document. The detailed steps are as follows.
- Create an object of the Document class.
- Load a Word document using the Document.LoadFromFile() method.
- Get a specific section using the Document.Sections.get_Item(index) method.
- Add a paragraph to the section using the Section.AddParagraph() method.
- Create an object of the DocPicture class.
- Load an image that will be used as the icon of the OLE object using the DocPicture.LoadImage() method and then set image width and height.
- Append an OLE object to the paragraph using the Paragraph.AppendOleObject(pathToFile:str, olePicture:DocPicture, type:OleObjectType) method.
- Save the result file using the Document.SaveToFile() method.
The following code example shows how to embed an Excel spreadsheet, a PDF file, and a PowerPoint presentation in a Word document using Spire.Doc for Python:
- Python
from spire.doc import *
from spire.doc.common import *

# Create an object of the Document class
doc = Document()
# Load a Word document
doc.LoadFromFile("Example.docx")

# Get the first section
section = doc.Sections.get_Item(0)

# Add a paragraph to the section
para1 = section.AddParagraph()
para1.AppendText("Excel File: ")
# Load an image which will be used as the icon of the OLE object
picture1 = DocPicture(doc)
picture1.LoadImage("Excel-Icon.png")
picture1.Width = 50
picture1.Height = 50
# Append an OLE object (an Excel spreadsheet) to the paragraph
para1.AppendOleObject("Budget.xlsx", picture1, OleObjectType.ExcelWorksheet)

# Add a paragraph to the section
para2 = section.AddParagraph()
para2.AppendText("PDF File: ")
# Load an image which will be used as the icon of the OLE object
picture2 = DocPicture(doc)
picture2.LoadImage("PDF-Icon.png")
picture2.Width = 50
picture2.Height = 50
# Append an OLE object (a PDF file) to the paragraph
para2.AppendOleObject("Report.pdf", picture2, OleObjectType.AdobeAcrobatDocument)

# Add a paragraph to the section
para3 = section.AddParagraph()
para3.AppendText("PPT File: ")
# Load an image which will be used as the icon of the OLE object
picture3 = DocPicture(doc)
picture3.LoadImage("PPT-Icon.png")
picture3.Width = 50
picture3.Height = 50
# Append an OLE object (a PowerPoint presentation) to the paragraph
para3.AppendOleObject("Plan.pptx", picture3, OleObjectType.PowerPointPresentation)

doc.SaveToFile("InsertOLE.docx", FileFormat.Docx2013)
doc.Close()
Extract OLE Objects from Word in Python
To extract OLE objects from a Word document, you first need to locate the OLE objects within the document. Once located, you can determine the file format of each OLE object. Finally, you can save the data of each OLE object to a file in its native file format. The detailed steps are as follows.
- Create an instance of the Document class.
- Load a Word document using the Document.LoadFromFile() method.
- Iterate through all sections of the document.
- Iterate through all child objects in the body of each section.
- Identify the paragraphs within each section.
- Iterate through the child objects in each paragraph.
- Locate the OLE object within the paragraph.
- Determine the file format of the OLE object.
- Save the data of the OLE object to a file in its native file format.
The following code example shows how to extract the embedded Excel spreadsheet, PDF file, and PowerPoint presentation from a Word document using Spire.Doc for Python:
- Python
from spire.doc import *
from spire.doc.common import *

# Create an object of the Document class
doc = Document()
# Load a Word document
doc.LoadFromFile("InsertOLE.docx")

i = 1
# Iterate through all sections of the Word document
for k in range(doc.Sections.Count):
    sec = doc.Sections.get_Item(k)
    # Iterate through all child objects in the body of each section
    for j in range(sec.Body.ChildObjects.Count):
        obj = sec.Body.ChildObjects.get_Item(j)
        # Check if the child object is a paragraph
        if isinstance(obj, Paragraph):
            par = obj if isinstance(obj, Paragraph) else None
            # Iterate through the child objects in the paragraph
            for m in range(par.ChildObjects.Count):
                o = par.ChildObjects.get_Item(m)
                # Check if the child object is an OLE object
                if o.DocumentObjectType == DocumentObjectType.OleObject:
                    ole = o if isinstance(o, DocOleObject) else None
                    s = ole.ObjectType
                    # Check if the OLE object is a PDF file
                    if s.startswith("AcroExch.Document"):
                        ext = ".pdf"
                    # Check if the OLE object is an Excel spreadsheet
                    elif s.startswith("Excel.Sheet"):
                        ext = ".xlsx"
                    # Check if the OLE object is a PowerPoint presentation
                    elif s.startswith("PowerPoint.Show"):
                        ext = ".pptx"
                    else:
                        continue
                    # Write the data of OLE into a file in its native format
                    with open(f"Output/OLE{i}{ext}", "wb") as file:
                            file.write(ole.NativeData)
                    i += 1

doc.Close()

Apply for a Temporary License
If you'd like to remove the evaluation message from the generated documents, or to get rid of the function limitations, please request a 30-day trial license for yourself.
Python: Extract Attachments from a PDF Document
In addition to text and images, PDF files can also contain various types of attachments, such as documents, images, audio files, or other multimedia elements. Extracting attachments from PDF files allows users to retrieve and save the embedded content, enabling easy access and manipulation outside of the PDF environment. This process proves especially useful when dealing with PDFs that contain important supplementary materials, such as reports, spreadsheets, or legal documents.
In this article, you will learn how to extract attachments from a PDF document in Python using Spire.PDF for Python.
- Extract Document-Level Attachments from PDF in Python
- Extract Annotation Attachments from PDF in Python
Install Spire.PDF for Python
This scenario requires Spire.PDF for Python and plum-dispatch v1.7.4. They can be easily installed in your Windows through the following pip command.
pip install Spire.PDF
If you are unsure how to install, please refer to this tutorial: How to Install Spire.PDF for Python on Windows
Prerequisite Knowledge
There are generally two categories of attachments in PDF files: document-level attachments and annotation attachments. Below, you can find a table outlining the disparities between these two types of attachments and how they are represented in Spire.PDF.
| Attachment type | Represented by | Definition |
| Document level attachment | PdfAttachment class | A file attached to a PDF at the document level won't appear on a page, but can be viewed in the "Attachments" panel of a PDF reader. |
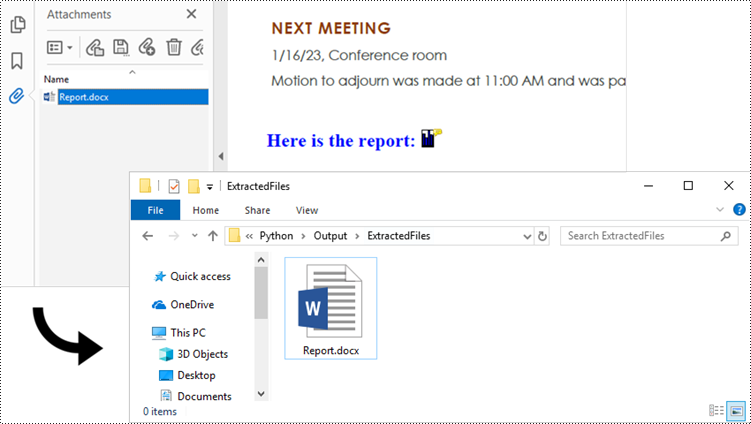
| Annotation attachment | PdfAnnotationAttachment class | A file attached as an annotation can be found on a page or in the "Attachments" panel. An annotation attachment is shown as a paper clip icon on the page; reviewers can double-click the icon to open the file. |
Extract Document-Level Attachments from PDF in Python
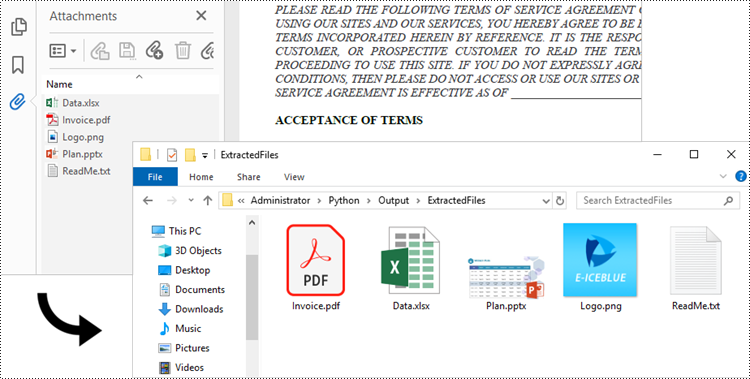
To retrieve document-level attachments in a PDF document, you can use the PdfDocument.Attachments property. Each attachment has a PdfAttachment.FileName property, which provides the name of the specific attachment, including the file extension. Additionally, the PdfAttachment.Data property allows you to access the attachment's data. To save the attachment to a specific folder, you can utilize the PdfAttachment.Data.Save() method.
The steps to extract document-level attachments from a PDF using Python are as follows.
- Create a PdfDocument object.
- Load a PDF file using PdfDocument.LoadFromFile() method.
- Get a collection of attachments using PdfDocument.Attachments property.
- Iterate through the attachments in the collection.
- Get a specific attachment from the collection, and get the file name and data of the attachment using PdfAttachment.FileName property and PdfAttachment.Data property.
- Save the attachment to a specified folder using PdfAttachment.Data.Save() method.
- Python
from spire.pdf import *
from spire.pdf.common import *

# Create a PdfDocument object
doc = PdfDocument()

# Load a PDF file
doc.LoadFromFile("C:\\Users\\Administrator\\Desktop\\Attachments.pdf")

# Get the attachment collection from the document
collection = doc.Attachments

# Loop through the collection
if collection.Count > 0:
    for i in range(collection.Count):

        # Get a specific attachment
        attactment = collection.get_Item(i)

        # Get the file name and data of the attachment
        fileName= attactment.FileName
        data = attactment.Data

        # Save it to a specified folder
        data.Save("Output\\ExtractedFiles\\" + fileName)

doc.Close()
Extract Annotation Attachments from PDF in Python
The Annotations attachment is a page-based element. To retrieve annotations from a specific page, use the PdfPageBase.AnnotationsWidget property. You then need to determine if a particular annotation is an attachment. If it is, save it to the specified folder while retaining its original filename.
The following are the steps to extract annotation attachments from a PDF using Python.
- Create a PdfDocument object.
- Load a PDF file using PdfDocument.LoadFromFile() method.
- Iterate though the pages in the document.
- Get the annotations from a particular page using PdfPageBase.AnnotationsWidget property.
- Iterate though the annotations, and determine if a specific annotation is an attachment annotation.
- If it is, get the file name and data of the annotation using PdfAttachmentAnnotation.FileName property and PdfAttachmentAnnotation.Data property.
- Save the annotated attachment to a specified folder.
- Python
from spire.pdf import *
from spire.pdf.common import *

# Create a PdfDocument object
doc = PdfDocument()

# Load a PDF file
doc.LoadFromFile("C:\\Users\\Administrator\\Desktop\\AnnotationAttachment.pdf")

# Iterate through the pages in the document
for i in range(doc.Pages.Count):

    # Get a specific page
    page = doc.Pages.get_Item(i)

    # Get the annotation collection of the page
    annotationCollection = page.AnnotationsWidget

    # If the page has annotations
    if annotationCollection.Count > 0:

        # Iterate through the annotations
        for j in range(annotationCollection.Count):

            # Get a specific annotation
            annotation = annotationCollection.get_Item(j)

            # Determine if the annotation is an attachment annotation
            if isinstance(annotation, PdfAttachmentAnnotationWidget):

                # Get the file name and data of the attachment
                fileName = annotation.FileName
                byteData = annotation.Data
                streamMs = Stream(byteData)

                # Save the attachment into a specified folder
                streamMs.Save("Output\\ExtractedFiles\\" + fileName)
Apply for a Temporary License
If you'd like to remove the evaluation message from the generated documents, or to get rid of the function limitations, please request a 30-day trial license for yourself.
Python: Draw Shapes in PDF Documents
Shapes play a vital role in PDF documents. By drawing graphics, defining outlines, filling colors, setting border styles, and applying geometric transformations, shapes provide rich visual effects and design options for documents. The properties of shapes such as color, line type, and fill effects can be customized according to requirements to meet personalized design needs. They can be used to create charts, decorations, logos, and other elements that enhance the readability and appeal of the document. This article will introduce how to use Spire.PDF for Python to draw shapes into PDF documents from Python.
- Draw Lines in PDF Documents in Python
- Draw Pies in PDF Documents in Python
- Draw Rectangles in PDF Documents in Python
- Draw Ellipses in PDF Documents in Python
Install Spire.PDF for Python
This scenario requires Spire.PDF for Python and plum-dispatch v1.7.4. They can be easily installed in your Windows through the following pip command.
pip install Spire.PDF
If you are unsure how to install, please refer to this tutorial: How to Install Spire.PDF for Python on Windows
Draw Lines in PDF Documents in Python
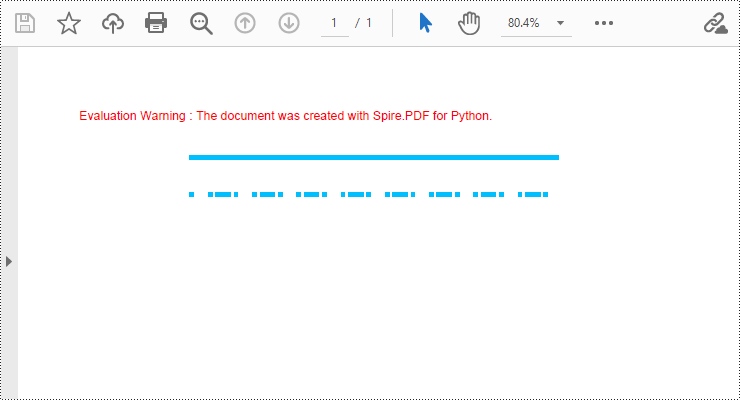
Spire.PDF for Python provides the PdfPageBase.Canvas.DrawLine() method to draw lines by specifying the coordinates of the starting point and end point and a brush object. Here is a detailed step-by-step guide on how to draw lines:
- Create a PdfDocument object.
- Use the PdfDocument.Pages.Add() method to add a blank page to the PDF document.
- Save the current drawing state using the PdfPageBase.Canvas.Save() method so it can be restored later.
- Define the start point coordinate (x, y) and the length of a solid line segment.
- Create a PdfPen object.
- Draw a solid line segment using the PdfPageBase.Canvas.DrawLine() method with the previously created pen object.
- Set the DashStyle property of the pen to PdfDashStyle.Dash to create a dashed line style.
- Draw a dashed line segment using the pen with a dashed line style via the PdfPageBase.Canvas.DrawLine() method.
- Restore the previous drawing state using the PdfPageBase.Canvas.Restore(state) method.
- Save the document to a file using the PdfDocument.SaveToFile() method.
- Python
from spire.pdf.common import *
from spire.pdf import *

# Create PDF Document Object
doc = PdfDocument()

# Add a Page
page = doc.Pages.Add()

# Save the current drawing state
state = page.Canvas.Save()

# The starting X coordinate of the line
x = 100.0

# The starting Y coordinate of the line
y = 50.0

# The length of the line
width = 300.0

# Create a pen object with deep sky blue color and a line width of 3.0
pen = PdfPen(PdfRGBColor(Color.get_DeepSkyBlue()), 3.0)

# Draw a solid line
page.Canvas.DrawLine(pen, x, y, x + width, y)

# Set the pen style to dashed
pen.DashStyle = PdfDashStyle.Dash

# Set the dashed pattern to [1, 4, 1]
pen.DashPattern = [1, 4, 1]

# The Y coordinate for the start of the dashed line
y = 80.0

# Draw a dashed line
page.Canvas.DrawLine(pen, x, y, x + width, y)

# Restore the previously saved drawing state
page.Canvas.Restore(state)

# Save the document to a file
doc.SaveToFile("Drawing Lines.pdf")

# Close the document and release resources
doc.Close()
doc.Dispose()
Draw Pies in PDF Documents in Python
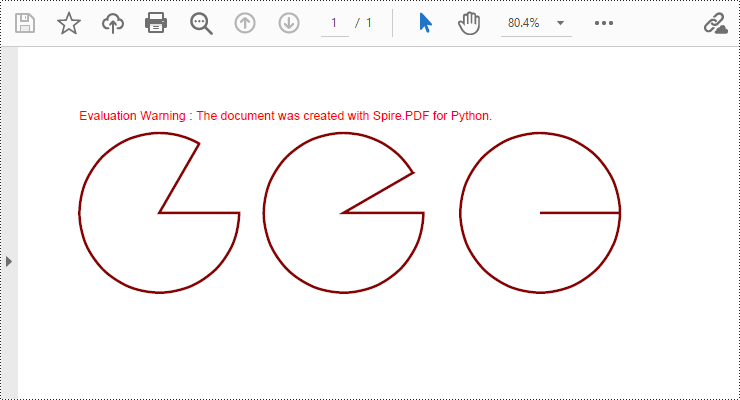
To draw pie charts with different positions, sizes, and angles on a specified page, call the PdfPageBase.Canvas.DrawPie() method and pass appropriate parameters. The detailed steps are as follows:
- Create a PdfDocument object.
- Add a blank page to the PDF document using the PdfDocument.Pages.Add() method.
- Save the current drawing state using the PdfPageBase.Canvas.Save() method so it can be restored later.
- Create a PdfPen object.
- Call the PdfPageBase.Canvas.DrawPie() method and pass various position, size, and angle parameters to draw three pie charts.
- Restore the previous drawing state using the PdfPageBase.Canvas.Restore(state) method.
- Save the document to a file using the PdfDocument.SaveToFile() method.
- Python
from spire.pdf.common import *
from spire.pdf import *

# Create PDF Document Object
doc = PdfDocument()

# Add a Page
page = doc.Pages.Add()

# Save the current drawing state
state = page.Canvas.Save()

# Create a pen object with dark red color and a line width of 2.0
pen = PdfPen(PdfRGBColor(Color.get_DarkRed()), 2.0)

# Draw the first pie chart
page.Canvas.DrawPie(pen, 10.0, 30.0, 130.0, 130.0, 360.0, 300.0)

# Draw the second pie chart
page.Canvas.DrawPie(pen, 160.0, 30.0, 130.0, 130.0, 360.0, 330.0)

# Draw the third pie chart
page.Canvas.DrawPie(pen, 320.0, 30.0, 130.0, 130.0, 360.0, 360.0)

# Restore the previously saved drawing state
page.Canvas.Restore(state)

# Save the document to a file
doc.SaveToFile("Drawing Pie Charts.pdf")

# Close the document and release resources
doc.Close()
doc.Dispose()
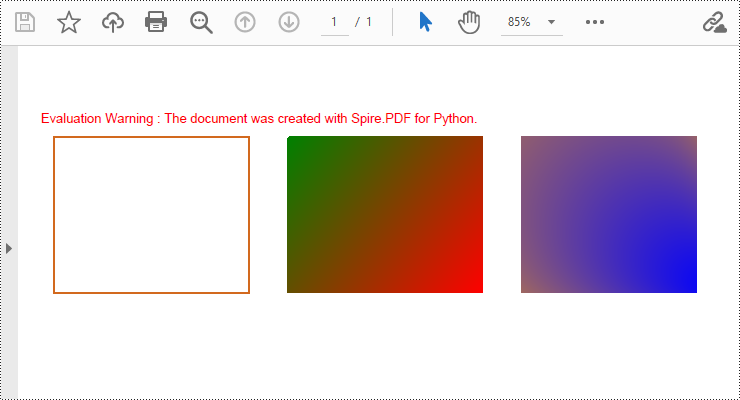
Draw Rectangles in PDF Documents in Python
Spire.PDF for Python provides the PdfPageBase.Canvas.DrawRectangle() method to draw rectangular shapes. By passing position and size parameters, you can define the position and dimensions of the rectangle. Here are the detailed steps for drawing a rectangle:
- Create a PdfDocument object.
- Use the PdfDocument.Pages.Add() method to add a blank page to the PDF document.
- Use the PdfPageBase.Canvas.Save() method to save the current drawing state for later restoration.
- Create a PdfPen object.
- Use the PdfPageBase.Canvas.DrawRectangle() method with the pen to draw the outline of a rectangle.
- Create a PdfLinearGradientBrush object for linear gradient filling.
- Use the PdfPageBase.Canvas.DrawRectangle() method with the linear gradient brush to draw a filled rectangle.
- Create a PdfRadialGradientBrush object for radial gradient filling.
- Use the PdfPageBase.Canvas.DrawRectangle() method with the radial gradient brush to draw a filled rectangle.
- Use the PdfPageBase.Canvas.Restore(state) method to restore the previously saved drawing state.
- Use the PdfDocument.SaveToFile() method to save the document to a file.
- Python
from spire.pdf.common import *
from spire.pdf import *

# Create PDF Document Object
doc = PdfDocument()

# Add a Page
page = doc.Pages.Add()

# Save the current drawing state
state = page.Canvas.Save()

# Create a Pen object with chocolate color and line width of 1.5
pen = PdfPen(PdfRGBColor(Color.get_Chocolate()), 1.5)

# Draw the outline of a rectangle using the pen
page.Canvas.DrawRectangle(pen, RectangleF(PointF(20.0, 30.0), SizeF(150.0, 120.0)))

# Create a linear gradient brush
linearGradientBrush = PdfLinearGradientBrush(PointF(200.0, 30.0), PointF(350.0, 150.0), PdfRGBColor(Color.get_Green()), PdfRGBColor(Color.get_Red()))

# Draw a filled rectangle using the linear gradient brush
page.Canvas.DrawRectangle(linearGradientBrush, RectangleF(PointF(200.0, 30.0), SizeF(150.0, 120.0)))

# Create a radial gradient brush
radialGradientBrush = PdfRadialGradientBrush(PointF(380.0, 30.0), 150.0, PointF(530.0, 150.0), 150.0, PdfRGBColor(Color.get_Orange()) , PdfRGBColor(Color.get_Blue()))

# Draw a filled rectangle using the radial gradient brush
page.Canvas.DrawRectangle(radialGradientBrush, RectangleF(PointF(380.0, 30.0), SizeF(150.0, 120.0)))

# Restore the previously saved drawing state
page.Canvas.Restore(state)

# Save the document to a file
doc.SaveToFile("Drawing Rectangle Shapes.pdf")

# Close the document and release resources
doc.Close()
doc.Dispose()
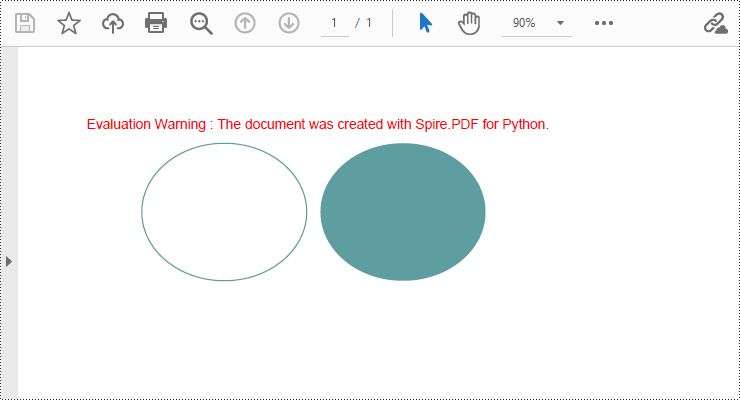
Draw Ellipses in PDF Documents in Python
Spire.PDF for Python provides the PdfPageBase.Canvas.DrawEllipse() method to draw elliptical shapes. You can use either a pen or a fill brush to draw ellipses in different styles. Here are the detailed steps for drawing an ellipse:
- Create a PdfDocument object.
- Use the PdfDocument.Pages.Add() method to add a blank page to the PDF document.
- Use the PdfPageBase.Canvas.Save() method to save the current drawing state for later restoration.
- Create a PdfPen object.
- Use the PdfPageBase.Canvas.DrawEllipse() method with the pen object to draw the outline of an ellipse, specifying the position and size of the ellipse.
- Create a PdfSolidBrush object.
- Use the PdfPageBase.Canvas.DrawEllipse() method with the fill brush object to draw a filled ellipse, specifying the position and size of the ellipse.
- Use the PdfPageBase.Canvas.Restore(state) method to restore the previously saved drawing state.
- Use the PdfDocument.SaveToFile() method to save the document to a file.
- Python
from spire.pdf.common import *
from spire.pdf import *

# Create PDF Document Object
doc = PdfDocument()

# Add a Page
page = doc.Pages.Add()

# Save the current drawing state
state = page.Canvas.Save()

# Create a Pen object
pen = PdfPens.get_CadetBlue()

# Draw the outline of an ellipse shape
page.Canvas.DrawEllipse(pen, 50.0, 30.0, 120.0, 100.0)

# Create a Brush object for filling
brush = PdfSolidBrush(PdfRGBColor(Color.get_CadetBlue()))

# Draw the filled ellipse shape
page.Canvas.DrawEllipse(brush, 180.0, 30.0, 120.0, 100.0)

# Restore the previously saved drawing state
page.Canvas.Restore(state)

# Save the document to a file
doc.SaveToFile("Drawing Ellipse Shape.pdf")

# Close the document and release resources
doc.Close()
doc.Dispose()
Apply for a Temporary License
If you'd like to remove the evaluation message from the generated documents, or to get rid of the function limitations, please request a 30-day trial license for yourself.
E-iceblue has a 9-Day Spring Festival Holiday during 09/02/2024-17/02/2024
As the Chinese New Year approaches, our office will be closed from 09/02/2024 to 17/02/2024 (GMT+8:00).
During the holiday, your emails will be received as usual, and urgent issues will be addressed promptly by our on-duty staff. Please note that standard support may be limited during this time, so we kindly ask for your understanding and patience if you do not receive an immediate response.
Note: Our purchase system is available 24/7 and will automatically send you the license file once you have completed the online order and payment.
If you need a temporary license to evaluate the product, please click "Request a Temporary License" on the download page. If you experience any problems with the request, we will make it available when we return to work on February 18, 2024.
We apologize for any inconvenience this may cause and really appreciate your understanding and support.
Please feel free to contact us via the following emails
- Support Team: support@e-iceblue.com
- Sales Team: sales@e-iceblue.com
Spire.PDF for Python 10.2.0 supports the PdfBitmap class
We are pleased to announce the release of Spire.PDF for Python 10.2.0. This version supports the PdfBitmap class and supports obtaining all custom properties of the document. In addition, the issue that finding text failed has also been fixed. More details are listed below.
Here is a list of changes made in this release
| Category | ID | Description |
| New feature | SPIREPDF-6492 | Supports the PdfBitmap class. |
| New feature | SPIREPDF-6518 | Supports getting all custom properties of the document.
doc = PdfDocument() doc.LoadFromFile(inputFile) docInfo=doc.DocumentInformation customProperties =docInfo.GetAllCustomProperties() |
| New feature | SPIREPDF-6525 | Adds the PdfAttachmentAnnotationWidget.Data property to support obtaining attachment document data. |
| New feature | SPIREPDF-6538 | Adds a new method for converting PDF documents to Word documents.
converter=new PdfToWordConverter("test.pdf");
converter.saveToDocx("res.docx");
|
| Bug | SPIREPDF-6508 | Fixes the issue that finding text failed. |
Python: Find and Replace Text in PDF
Finding and replacing text is a common need in document editing, as it helps users correct minor errors or make adjustments to terms appearing in the document. Although PDF documents have a fixed layout and editing can be challenging, users can still perform small modifications such as replacing text with Python, and achieve a satisfactory editing result. In this article, we will explore how to utilize Spire.PDF for Python to find and replace text in PDF documents within a Python program.
- Find Text and Replace the First Match in PDF with Python
- Find Text and Replace All Matches in PDF with Python
Install Spire.PDF for Python
This scenario requires Spire.PDF for Python and plum-dispatch v1.7.4. They can be easily installed in your Windows through the following pip commands.
pip install Spire.PDF
If you are unsure how to install, please refer to: How to Install Spire.PDF for Python on Windows
Find Text and Replace the First Match in PDF with Python
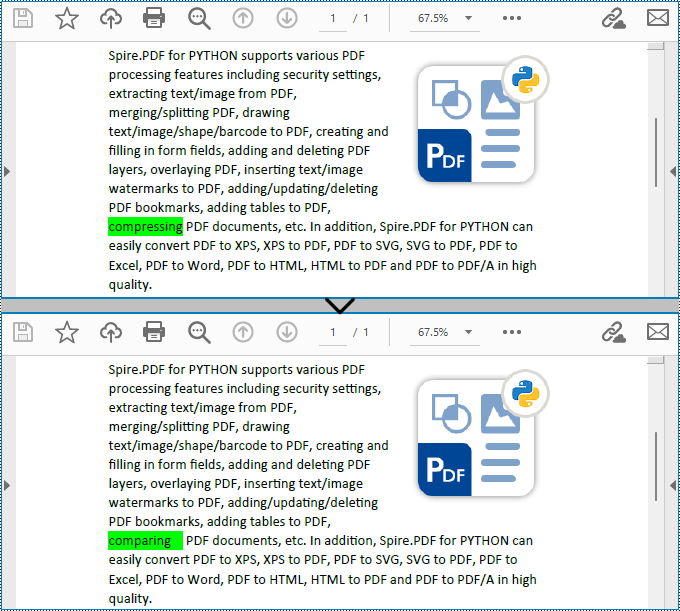
Spire.PDF for Python enables users to find text and replace the first match in PDF documents with the PdfTextReplacer.ReplaceText(string originalText, string newText) method. This replacement method is great for making simple replacements for words or phrases that only appear once on a single page of a document.
The detailed steps for finding text and replacing the first match are as follows:
- Create an object of PdfDocument class and load a PDF document using PdfDocument.LoadFromFile() method.
- Get a page of the document using PdfDocument.Pages.get_Item() method.
- Create an object of PdfTextReplacer class based on the page.
- Find specific text and replace the first match on the page using PdfTextReplacer.ReplaceText() method.
- Save the document using PdfDocument.SaveToFile() method.
- Python
from spire.pdf import *
from spire.pdf.common import *

# Create an object of PdfDocument
pdf = PdfDocument()

# Load a PDF document
pdf.LoadFromFile("Sample.pdf")

# Get a page
page = pdf.Pages.get_Item(0)

# Create an object of PdfTextReplacer class
replacer = PdfTextReplacer(page)

# Find and replace the first matched text
replacer.ReplaceText("compressing", "comparing")

# Save the document
pdf.SaveToFile("output/ReplaceFirstMatch.pdf")
pdf.Close()
Find Text and Replace All Matches in PDF with Python
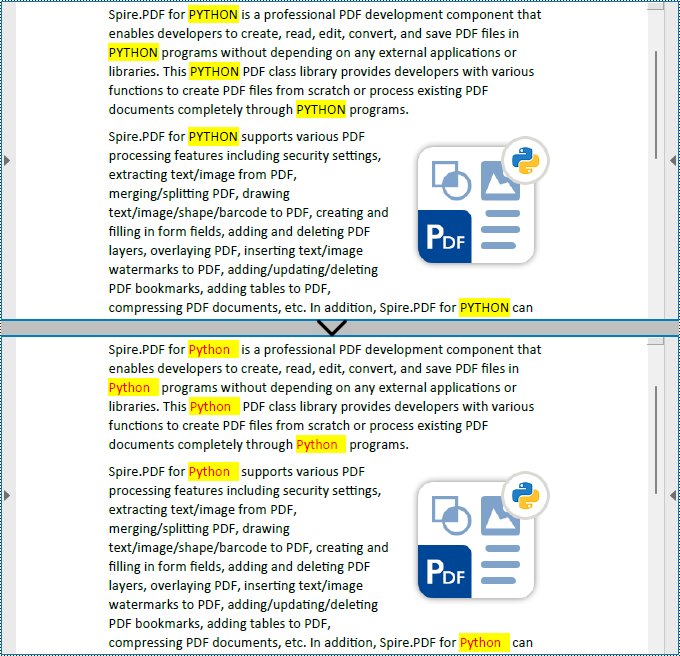
Spire.PDF for Python also provides the PdfTextReplacer.ReplaceAllText(string originalText, string newText, Color textColor) method to find specific text and replace all matches with new text (optionally resetting the text color). The detailed steps are as follows:
- Create an object of PdfDocument class and load a PDF document using PdfDocument.LoadFromFile() method.
- Loop through the pages in the document.
- Get a page using PdfDocument.Pages.get_Item() method.
- Create an object of PdfTextReplacer class based on the page.
- Find specific text and replace all the matches with new text in a new color using PdfTextReplacer.ReplaceAllText() method.
- Save the document using PdfDocument.SaveToFile() method.
- Python
from spire.pdf import *
from spire.pdf.common import *

# Create an object of PdfDocument
pdf = PdfDocument()

# Load a PDF document
pdf.LoadFromFile("Sample.pdf")

# Loop through the pages in the document
for i in range(pdf.Pages.Count):
    # Get a page
    page = pdf.Pages.get_Item(0)
    # Create an object of PdfTextReplacer class based on the page
    replacer = PdfTextReplacer(page)
    # Find and replace all matched text with a new color
    replacer.ReplaceAllText("PYTHON", "Python", Color.get_Red())

# Save the document
pdf.SaveToFile("output/ReplaceAllMatches.pdf")
pdf.Close()
Apply for a Temporary License
If you'd like to remove the evaluation message from the generated documents, or to get rid of the function limitations, please request a 30-day trial license for yourself.