
.NET (1273)
Children categories
Users can change Word view mode according to own reading habit. This guide introduces a solution to set Word view modes in C# and VB.NET.
There are several Word View Modes provided with customers, including Print Layout, Web Layout, Full Screen, Draft, Outline and Zoom in/out with specified percentage. The view mode can be selected when opening to make the document to be presented to match readers’ reading habit. This guide focuses on demonstrating how to set Word view mode in C# and VB.NET via Spire.Doc for .NET. The screenshot presents the result after setting Word view mode.
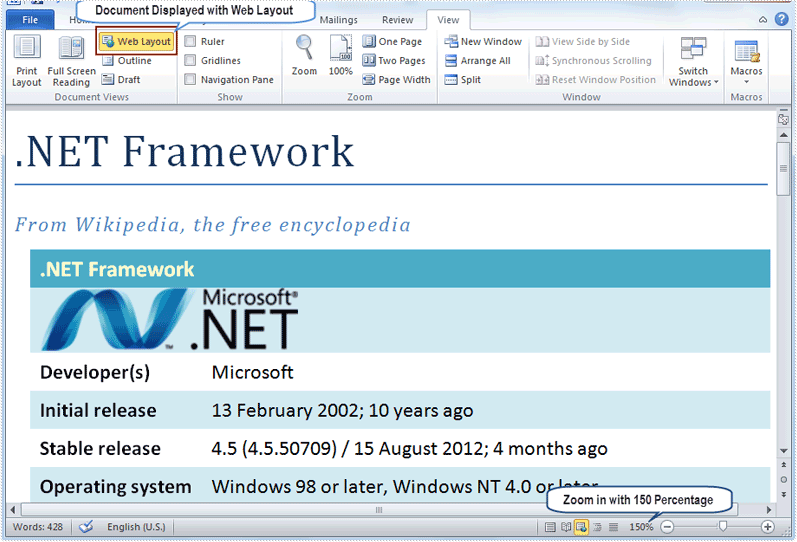
Spire.Doc for .NET, specializing in operating Word in .NET, offers a ViewSetup class to enable users to set Word view modes through assigning specified values for its properties. In this example, the Word view modes will be set as Web Layout with zoom out 150 percent. Therefore, the set properties of ViewSetup class include DocumentViewType, ZoomPercent and ZoomType.
DocumentViewTyp: There are five types provided by Spire.Doc for .NET: None, NormalLayout, OutlineLayout, PrintLayout and WebLayout.
ZoomPercent: The default ZoomPercent is 100. User can set other percent according to requirements. In this example, ZoomPercent is set as 150.
ZoomType: There are four zoom types provided by Spire.Doc for .NET: Full Page to automatically recalculate zoom percentage to fit one full page; None to use the explicit zoom percentage; PageWidth to automatically recalculate zoom percentage to fit page width; TextFit to automatically recalculate zoom percentage to fit text. Because the zoom percentage is set as 150, so the ZoomType is set as None in this example.
Download and install Spire.Doc for .NET and follow the code:
using Spire.Doc;

namespace WordViewMode
{
    class Program
    {
        static void Main(string[] args)
        {
            Document doc = new Document();
            doc.LoadFromFile(@"E:\Work\Documents\WordDocuments\.NET Framework.docx");

            doc.ViewSetup.DocumentViewType = DocumentViewType.WebLayout;
            doc.ViewSetup.ZoomPercent = 150;
            doc.ViewSetup.ZoomType = ZoomType.None;

            doc.SaveToFile("WordViewMode.docx", FileFormat.Docx2010);
            System.Diagnostics.Process.Start("WordViewMode.docx");
        }
    }
}
Imports Spire.Doc

Namespace WordViewMode
    Friend Class Program
        Shared Sub Main(ByVal args() As String)
            Dim doc As New Document()
            doc.LoadFromFile("E:\Work\Documents\WordDocuments\.NET Framework.docx")

            doc.ViewSetup.DocumentViewType = DocumentViewType.WebLayout
            doc.ViewSetup.ZoomPercent = 150
            doc.ViewSetup.ZoomType = ZoomType.None

            doc.SaveToFile("WordViewMode.docx", FileFormat.Docx2010)
            System.Diagnostics.Process.Start("WordViewMode.docx")
        End Sub
    End Class
End Namespace
Spire.Doc, professional Word component, is specially designed for developers to fast generate, write, modify and save Word documents in .NET, Silverlight and WPF with C# and VB.NET. Also, it supports conversion between Word and other popular formats, such as PDF, HTML, Image, Text and so on, in .NET and WPF platform.
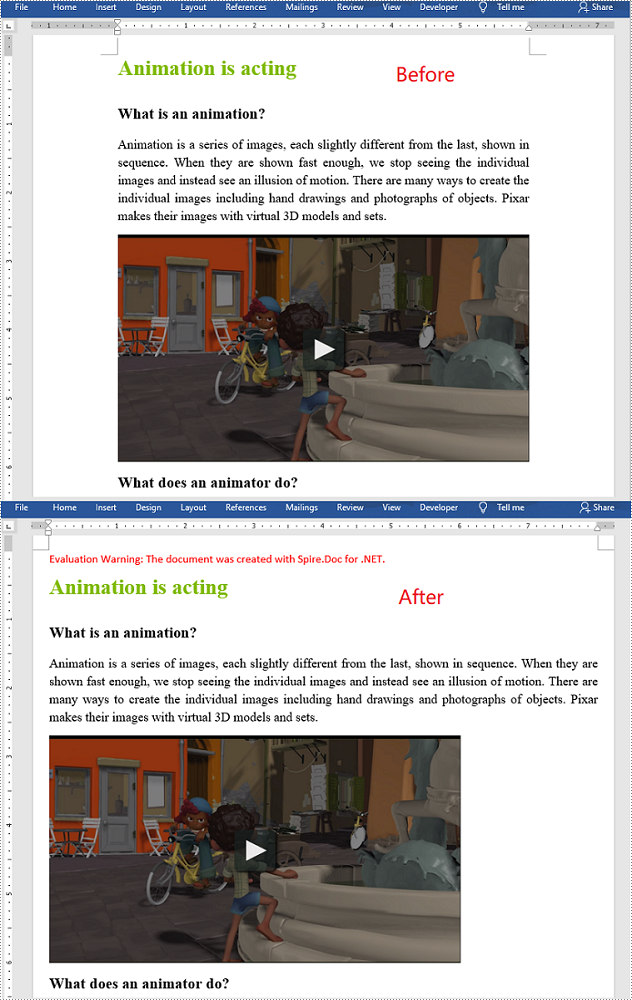
Page margins are the distance from the page edges to the content area. They are helpful in making a document look neat and professional. When generating a document in Microsoft Word, you may need to set page margins to make the document look better. In this article, we will demonstrate how to set page margins for Word documents in C# and VB.NET using Spire.Doc for .NET.
Install Spire.Doc for .NET
To begin with, you need to add the DLL files included in the Spire.Doc for .NET package as references in your .NET project. The DLL files can be either downloaded from this link or installed via NuGet.
PM> Install-Package Spire.Doc
Set Page Margins in Word in C# and VB.NET
The following are the steps to set page margins in Word:
- Initialize an instance of Document class.
- Load a Word document using Document.LoadFromFile() method.
- Get the desired section through Document.Sections[sectionIndex] property.
- Set the top, bottom, left and right margins for the pages in the section through Section.PageSetup.Margins.Top, Section.PageSetup.Margins.Bottom, Section.PageSetup.Margins.Left, Section.PageSetup.Margins.Right properties.
- Save the result document using Document.SaveToFile() method.
- C#
- VB.NET
using Spire.Doc;

namespace PageMargins
{
    class Program
    {
        static void Main(string[] args)
        {
            //Create a Document instance
            Document document = new Document();
            //Load a Word document
            document.LoadFromFile(@"Sample.docx");

            //Get the first section
            Section section = document.Sections[0];

            //Set top, bottom, left and right page margins for the section
            section.PageSetup.Margins.Top = 17.9f;
            section.PageSetup.Margins.Bottom = 17.9f;
            section.PageSetup.Margins.Left = 17.9f;
            section.PageSetup.Margins.Right = 17.9f;

            //Save the result document
            document.SaveToFile("SetMargins.docx", FileFormat.Docx2013);
        }
    }
}
Apply for a Temporary License
If you'd like to remove the evaluation message from the generated documents, or to get rid of the function limitations, please request a 30-day trial license for yourself.
Modifying passwords of PDF file is really a rational choice especially when the passwords are known by someone and your PDF file is no longer safe. Spire.PDF for .NET enables you to modify passwords of your encrypted PDF file in C#, VB.NET. You can modify your owner password as well as user password and set user restrictions when access the PDF file. Now please see the process of modifying encrypted PDF passwords as below picture:
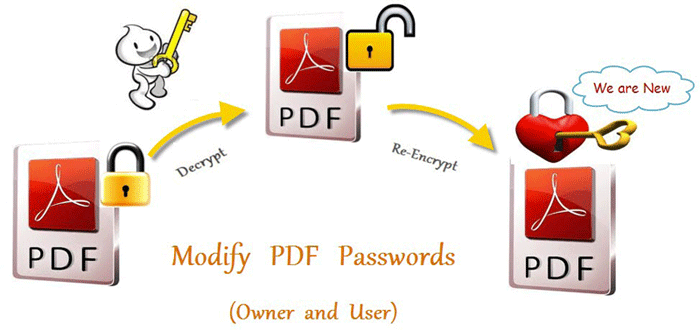
From above picture, you can easily find that the first step is to decrypt PDF file by owner password. So the original owner password is necessary. You can decrypt it by this method: Spire.Pdf.PdfDocument(string filename, string password)
Then, modify passwords by resetting owner password and user password. PDFSecurity class which is in the namespace Spire.PDFDocument.Security can help you not only to set owner password and user password, but also can set user permissions to restrict user access.
Below shows the whole code of modifying passwords of encrypted PDF file, please download Spire.PDF for .NET and install it on system before following the code:
using Spire.Pdf;
using Spire.Pdf.Security;

namespace modify_PDF_passwords
{
    class Program
    {
        static void Main(string[] args)
        {

            //load a encrypted file and decrypt it
            String encryptedPdf = @"..\Encrypt.pdf";
            PdfDocument doc = new PdfDocument(encryptedPdf, "e-iceblue");

            //reset PDF passwords and set user password permission
            doc.Security.OwnerPassword = "Spire.PDF";
            doc.Security.UserPassword = "pdfcomponent";
            doc.Security.Permissions = PdfPermissionsFlags.Print | PdfPermissionsFlags.FillFields;

            //Save pdf file.
            doc.SaveToFile("Encryption.pdf");
            doc.Close();
            //Launching the Pdf file.
            System.Diagnostics.Process.Start("Encryption.pdf");

        }
    }
}
Imports Spire.Pdf
Imports Spire.Pdf.Security

Namespace modify_PDF_passwords
	Class Program
		Private Shared Sub Main(args As String())

			'load a encrypted file and decrypt it
			Dim encryptedPdf As [String] = "..\Encrypt.pdf"
			Dim doc As New PdfDocument(encryptedPdf, "e-iceblue")

			'reset PDF passwords and set user password permission
			doc.Security.OwnerPassword = "Spire.PDF"
			doc.Security.UserPassword = "pdfcomponent"
			doc.Security.Permissions = PdfPermissionsFlags.Print Or PdfPermissionsFlags.FillFields

			'Save pdf file.
			doc.SaveToFile("Encryption.pdf")
			doc.Close()
			'Launching the Pdf file.
			System.Diagnostics.Process.Start("Encryption.pdf")

		End Sub
	End Class
End Namespace
Spire.PDF for .NET is a .NET PDF component that enables you to generate, read, edit and manipulate PDF files in C#, VB.NET.
Remove and Replace Comment in Word Document in C#, VB.NET
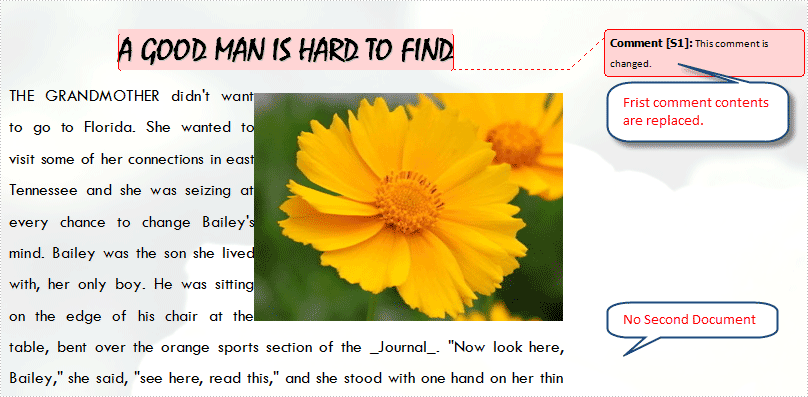
2012-12-26 09:12:10 Written by support iceblueComments in Word are author reviews about specified contents. It can be removed and replaced with other comments for showing different reviews. Spire.Doc for .NET provides several methods with users to remove and replace comments in different situations. The following screenshot is a document with comments without removing and replacing.

Remove
There are three possibilities to remove comments.
- Remove One Comment: Method Document.Comments.RemoveAt enables users to remove one specified comment item. The index number is passed to this method to confirm which comment will be removed.
- Remove All Comments: Method Document.Comments.Clear() enables users to remove all comments in loaded Word document.
- Remove Part of One Comment (Body Paragraph): Firstly, get the specified comment item in document. Secondly, get paragraph collection in comments body. Thirdly, use method ParagraphCollection.RemoveAt method to remove body paragraph. The index number is passed to this method to confirm which paragraph will be removed.
Replace
It means to replace contents of body paragraphs in one specified comments. So at the beginning, the comment item and paragraph item in comment body should be gotten. Method Paragraph.Replace method can be used to replace comments. There are six possibilities this method provides.
- Replace regular expression pattern with replace string (the new comment).
- Replace regular expression pattern with text selection.
- Replace regular expression pattern with text selection taking into consideration of preserving comment formatting.
- Replace given string (original comment contents) with replace string, taking into consideration of case-sensitive and whole word option.
- Replace given string with text selection, taking into consideration of case-sensitive and whole word option.
- Replace give string with text selection, taking into consideration of case-sensitive, whole word options and formatting preservation.
The following example shows how to replace body paragraph of the first comment and remove the whole second comment in the loaded document. Download and install Spire.Doc for .NET and use the following code.
using Spire.Doc;

namespace RemoveandReplace
{
    class Program
    {
        static void Main(string[] args)
        {
            //Load Document
            Document document = new Document();
            document.LoadFromFile(@"E:\work\Documents\WordDocuments\A GOOD MAN IS HARD TO FIND.docx");

            //Replace Contents of The First Comment
            document.Comments[0].Body.Paragraphs[0].Replace("It’s a title with Mistral font style.", "This comment is changed.", false, false);

            //Remove The Second Comment
            document.Comments.RemoveAt(1);

            //Save and Launch
            document.SaveToFile("RemoveandReplace.docx", FileFormat.Docx);
            System.Diagnostics.Process.Start("RemoveandReplace.docx");
        }
    }
}
Imports Spire.Doc

Namespace RemoveandReplace
    Friend Class Program
        Shared Sub Main(ByVal args() As String)
            'Load Document
            Dim document As New Document()
            document.LoadFromFile("E:\work\Documents\WordDocuments\A GOOD MAN IS HARD TO FIND.docx")

            'Replace Contents of The First Comment
            document.Comments(0).Body.Paragraphs(0).Replace("It’s a title with Mistral font style.", "This comment is changed.", False, False)

            'Remove The Second Comment
            document.Comments.RemoveAt(1)

            'Save and Launch
            document.SaveToFile("RemoveandReplace.docx", FileFormat.Docx)
            System.Diagnostics.Process.Start("RemoveandReplace.docx")
        End Sub
    End Class
End Namespace
After running, you can get result below:
Spire.Doc, a professional Word component, enables developers/programmers perform a wide range of processing tasks, such as generate, write, modify and save for their customize .NET, Silverlight and WPF applications.
Besides text and graphics, PDF files can contain entire files inside them as attachments. This makes the exchange of sets of documents much easier and more reliable. Spire.PDF allows you to attach files in two ways:
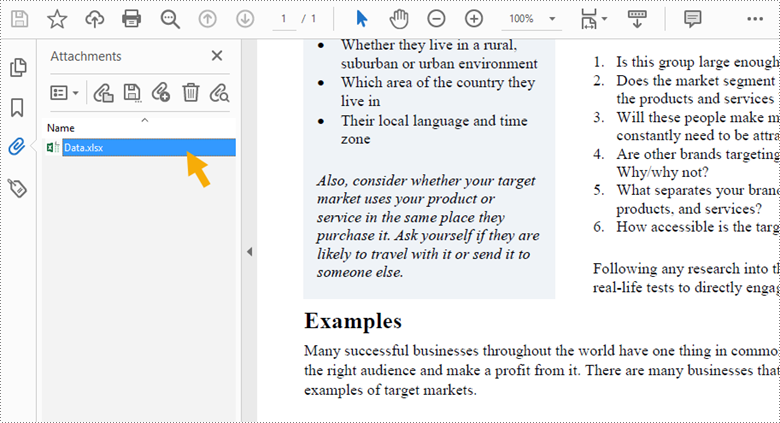
- Document Level Attachment: A file attached to a PDF at the document level won't appear on a page, but can only be viewed in the "Attachments" panel of a PDF reader.
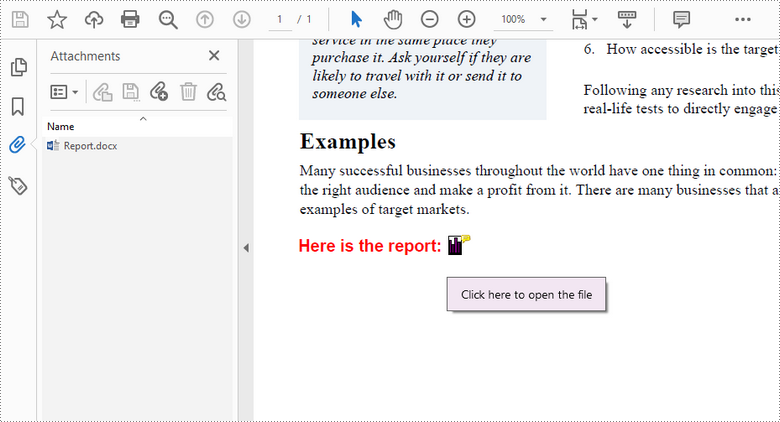
- Annotation Attachment: A file will be added to a specific position of a page. Annotation attachments are shown as a paper clip icon on the page; reviewers can double-click the icon to open the file.
This article demonstrates how to add or remove these two types of attachments in a PDF document in C# and VB.NET using Spire.PDF for .NET.
- Add an Attachment to PDF in C# and VB.NET
- Add an Annotation Attachment to PDF in C# and VB.NET
- Remove Attachments from PDF in C# and VB.NET
- Remove Annotation Attachments from PDF in C# and VB.NET
Install Spire.PDF for .NET
To begin with, you need to add the DLL files included in the Spire.PDF for.NET package as references in your .NET project. The DLLs files can be either downloaded from this link or installed via NuGet.
PM> Install-Package Spire.PDF
Add an Attachment to PDF in C# and VB.NET
Adding an attachment to the "Attachments" panel can be easily done by using PdfDocument.Attachments.Add() method. The following are the detailed steps.
- Create a PdfDocument object.
- Load a PDF document using PdfDocument.LoadFromFile() method.
- Create a PdfAttachment object based on an external file.
- Add the attachment to PDF using PdfDocument.Attachments.Add() method.
- Save the document to another PDF file using PdfDocument.SaveToFile() method.
- C#
- VB.NET
using Spire.Pdf;
using Spire.Pdf.Attachments;

namespace AttachFilesToPDF
{
    class Program
    {
        static void Main(string[] args)
        {
            //Create a PdfDocument object
            PdfDocument doc = new PdfDocument();

            //Load a sample PDF file
            doc.LoadFromFile("C:\\Users\\Administrator\\Desktop\\Sample.pdf");

            //Create a PdfAttachment object based on an external file
            PdfAttachment attachment = new PdfAttachment("C:\\Users\\Administrator\\Desktop\\Data.xlsx");

            //Add the attachment to PDF
            doc.Attachments.Add(attachment);

            //Save to file
            doc.SaveToFile("Attachment.pdf");
        }
    }
}
Add an Annotation Attachment to PDF in C# and VB.NET
An annotation attachment can be found in the "Attachments" panel as well as on a specific page. Below are the steps to add an annotation attachment to PDF using Spire.PDF for .NET.
- Create a PdfDocument object.
- Load a PDF document using PdfDocument.LoadFromFile() method.
- Get a specific page to add annotation through PdfDocument.Pages[] property.
- Create a PdfAttachmentAnnotation object based on an external file.
- Add the annotation attachment to the page using PdfPageBase.AnnotationsWidget.Add() method.
- Save the document to another PDF file using PdfDocument.SaveToFile() method.
- C#
- VB.NET
using Spire.Pdf;
using Spire.Pdf.Annotations;
using Spire.Pdf.Graphics;
using System;
using System.Drawing;
using System.IO;

namespace AnnotationAttachment
{
    class Program
    {
        static void Main(string[] args)
        {
            //Create a PdfDocument object
            PdfDocument doc = new PdfDocument();

            //Load a sample PDF file
            doc.LoadFromFile("C:\\Users\\Administrator\\Desktop\\Sample.pdf");

            //Get a specific page
            PdfPageBase page = doc.Pages[0];

            //Draw a label on PDF
            String label = "Here is the report:";
            PdfTrueTypeFont font = new PdfTrueTypeFont(new Font("Arial", 13f, FontStyle.Bold), true);
            float x = 35;
            float y = doc.Pages[0].ActualSize.Height - 220;
            page.Canvas.DrawString(label, font, PdfBrushes.Red, x, y);

            //Create a PdfAttachmentAnnotation object based on an external file
            String filePath = "C:\\Users\\Administrator\\Desktop\\Report.pptx";
            byte[] data = File.ReadAllBytes(filePath);
            SizeF size = font.MeasureString(label);
            RectangleF bounds = new RectangleF((float)(x + size.Width + 5), (float)y, 10, 15);
            PdfAttachmentAnnotation annotation = new PdfAttachmentAnnotation(bounds, "Report.docx", data);
            annotation.Color = Color.Purple;
            annotation.Flags = PdfAnnotationFlags.Default;
            annotation.Icon = PdfAttachmentIcon.Graph;
            annotation.Text = "Click here to open the file";

            //Add the attachment annotation to PDF
            page.AnnotationsWidget.Add(annotation);

            //Save to file
            doc.SaveToFile("Annotation.pdf");
        }
    }
}
Remove Attachments from PDF in C# and VB.NET
The attachments of a PDF document can be accessed by the PdfDocument.Attachments property, and can be removed by using RemoveAt() method or Clear() method of the PdfAttachmentCollection object. The detailed steps are as follows.
- Create a PdfDocument object.
- Load a PDF document using PdfDocument.LoadFromFile() method.
- Get the attachment collection from the document through PdfDocument.Attachments property.
- Remove a specific attachment using PdfAttachmentCollection.RemoveAt() method. To remove all attachments at once, use PdfAttachmentCollection.Clear() method.
- Save the document to another PDF file using PdfDocument.SaveToFile() method.
- C#
- VB.NET
using Spire.Pdf;
using Spire.Pdf.Attachments;

namespace RemoveAttachments
{
    class Program
    {
        static void Main(string[] args)
        {
            //Create a PdfDocument object
            PdfDocument doc = new PdfDocument();

            //Load a PDF file
            doc.LoadFromFile("C:\\Users\\Administrator\\Desktop\\Attachment.pdf");

            //Get attachment collection
            PdfAttachmentCollection attachments = doc.Attachments;

            //Remove a specific attachment
            attachments.RemoveAt(0);

            //Remove all attachments
            //attachments.Clear();

            //save to file
            doc.SaveToFile("DeleteAttachments.pdf");
        }
    }
}
Remove Annotation Attachments from PDF in C# and VB.NET
Annotation is a page-based element. To get all annotations from a document, we must traverse through the pages and get the annotations from each page. Then determine if a certain annotation is an annotation attachment. Lastly, remove the annotation attachment from the annotation collection using Remove() method. The following are the detailed steps.
- Create a PdfDocument object.
- Load a PDF document using PdfDocument.LoadFromFile() method.
- Loop through the pages in the document, and get the annotation collection from a specific page through PdfDocument.Pages[].AnnotationsWidget property.
- Determine if an annotation is an instance of PdfAttachmentAnnotationWidget. If yes, remove the annotation attachment using PdfAnnotationCollection.Remove() method.
- Save the document to another PDF file using PdfDocument.SaveToFile() method.
- C#
- VB.NET
using Spire.Pdf;
using Spire.Pdf.Annotations;

namespace RemoveAnnotationAttachments
{
    class Program
    {
        static void Main(string[] args)
        {
            //Create a PdfDocument object
            PdfDocument doc = new PdfDocument();

            //Load a PDF file
            doc.LoadFromFile("C:\\Users\\Administrator\\Desktop\\Annotation.pdf");

            //Loop through the pages
            for (int i = 0; i < doc.Pages.Count; i++)
            {
                //Get the annotation collection
                PdfAnnotationCollection annotationCollection = doc.Pages[i].AnnotationsWidget;

                //Loop through the annotations
                for (int j = 0; j < annotationCollection.Count; j++)
                {
                    //Determine if an annotation is an instance of PdfAttachmentAnnotationWidget
                    if (annotationCollection[j] is PdfAttachmentAnnotationWidget)
                    {
                        //Remove the annotation attachment
                        annotationCollection.Remove((PdfAnnotation)annotationCollection[j]);
                    }
                }
            }

            //Save to file
            doc.SaveToFile("DeleteAnnotationAttachments.pdf");
        }
    }
}
Apply for a Temporary License
If you'd like to remove the evaluation message from the generated documents, or to get rid of the function limitations, please request a 30-day trial license for yourself.
A list is a collection of related values written one after another. Lists are the best tool to make important information stand out on the page, show the steps in a process, or present an overview to the readers. In this article, you will learn how to create ordered or unordered lists in a PDF document in C# and VB.NET using Spire.PDF for .NET.
- Create an Ordered List in PDF
- Create an Unordered List with Symbol Bullets in PDF
- Create an Unordered List with Image Bullets in PDF
- Create a Nested Numbered List in PDF
Spire.PDF provides the PdfSortedList class and the PdfList class to represent the ordered lists and unordered lists, respectively. To set the list's content, indent, font, marker style and other attributes, use the methods, properties, or events under these two classes. The following table lists some of the core items involved in this tutorial.
| Member | Description |
| PdfSortedList class | Represents an ordered list in a PDF document. |
| PdfList class | Represents an unordered list in a PDF document. |
| Brush property | Gets or sets a list's brush. |
| Font property | Gets or sets a list's font. |
| Indent property | Gets or sets a list's indent. |
| TextIndent property | Gets or sets the indent from the marker to the list item text. |
| Items property | Gets items of a list. |
| Marker property | Gets or sets the marker of a list. |
| Draw() method | Draw list on the canvas of a page at the specified location. |
| PdfOrderedMarker class | Represents the marker style of an ordered list, such as numbers, letters, and roman numerals. |
| PdfMarker class | Represents bullet style for an unordered list. |
Install Spire.PDF for .NET
To begin with, you need to add the DLL files included in the Spire.PDF for.NET package as references in your .NET project. The DLL files can be either downloaded from this link or installed via NuGet.
PM> Install-Package Spire.PDF
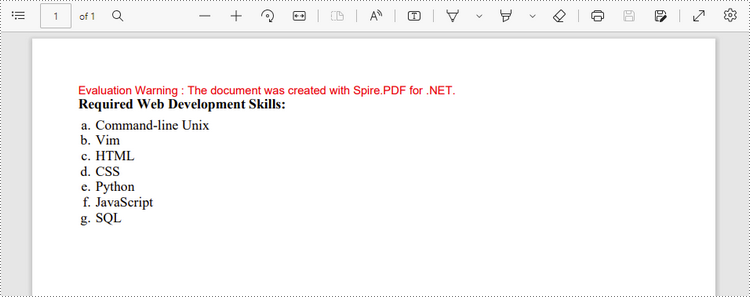
Create an Ordered List in PDF
An ordered list is a container which holds a sequence of objects. Each item in the list is marked with a number, a letter, or a roman numeral. The following are the step to create an ordered list in PDF using Spire.PDF for .NET.
- Create a PdfDocument object.
- Add a page to it using PdfDocument.Pages.Add() method.
- Create PdfBrush and PdfFont objects for the list.
- Create a PdfOrderedMarker object, specifying the marker style.
- Specify the list content with a string, and create an object of PdfSortedList class based on the string.
- Set the font, indent, brush and marker of the list though the properties under the PdfSortedList object.
- Draw the list on the page at the specified location using PdfSortedList.Draw() method.
- Save the document to another file using PdfDocument.SaveToFile() method.
- C#
- VB.NET
using System;
using Spire.Pdf;
using Spire.Pdf.Graphics;
using Spire.Pdf.Lists;

namespace CreateOrderedList
{
    class Program
    {
        static void Main(string[] args)
        {
            //Create a PdfDocument object
            PdfDocument doc = new PdfDocument();

            //Set the margins
            PdfMargins margins = new PdfMargins(30);

            //Add a page
            PdfPageBase page = doc.Pages.Add(PdfPageSize.A4, margins);

            //Create a brush
            PdfBrush brush = PdfBrushes.Black;

            //Create fonts
            PdfFont titleFont = new PdfFont(PdfFontFamily.TimesRoman, 12f, PdfFontStyle.Bold);
            PdfFont listFont = new PdfFont(PdfFontFamily.TimesRoman, 12f, PdfFontStyle.Regular);

            //Create a maker for ordered list
            PdfOrderedMarker marker = new PdfOrderedMarker(PdfNumberStyle.LowerLatin, listFont);

            //Specify the initial coordinate
            float x = 10;
            float y = 20;

            //Draw title
            String title = "Required Web Development Skills:";
            page.Canvas.DrawString(title, titleFont, brush, x, y);
            y = y + (float)titleFont.MeasureString(title).Height;
            y = y + 5;


            //Create a numbered list
            String listContent = "Command-line Unix\n"
                + "Vim\n"
                + "HTML\n"
                + "CSS\n"
                + "Python\n"
                + "JavaScript\n"
                + "SQL";
            PdfSortedList list = new PdfSortedList(listContent);

            //Set the font, indent, text indent, brush of the list
            list.Font = listFont;
            list.Indent = 2;
            list.TextIndent = 4;
            list.Brush = brush;
            list.Marker = marker;

            //Draw list on the page at the specified location
            list.Draw(page, x, y);

            //Save to file
            doc.SaveToFile("OrderedList.pdf");
        }
    }
}
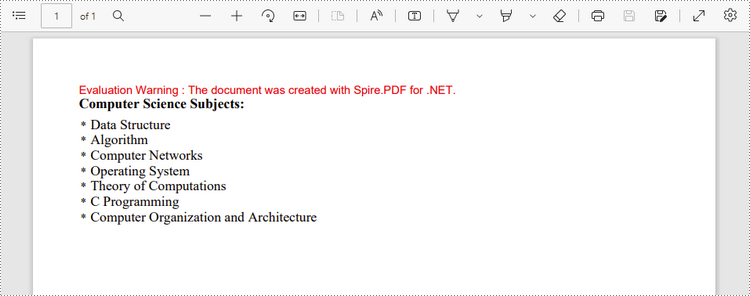
Create an Unordered List with Symbol Bullets in PDF
An unordered list, also named bulleted list, is a collection of related items that have no special order or sequence. Each item in the list is marked with a bullet. The following are the step to create an unordered list in PDF using Spire.PDF for .NET.
- Create a PdfDocument object.
- Add a page to it using PdfDocument.Pages.Add() method.
- Create PdfBrush and PdfFont objects for the list.
- Create a PdfMarker object, specifying the marker style.
- Specify the list content with a string, and create an object of PdfList class based on the string.
- Set the font, indent, brush and marker of the list though the properties under the PdfList object.
- Draw the list on the page at the specified location using PdfList.Draw() method.
- Save the document to another file using PdfDocument.SaveToFile() method.
- C#
- VB.NET
using Spire.Pdf;
using Spire.Pdf.Graphics;
using Spire.Pdf.Lists;
using System;

namespace CreateBulletedList
{
    class Program
    {
        static void Main(string[] args)
        {
            //Create a PdfDocument object
            PdfDocument doc = new PdfDocument();

            //Set the margin
            PdfMargins margin = new PdfMargins(30);

            //Add a page
            PdfPageBase page = doc.Pages.Add(PdfPageSize.A4, margin);

            //Create fonts
            PdfFont titleFont = new PdfFont(PdfFontFamily.TimesRoman, 12f, PdfFontStyle.Bold);
            PdfFont listFont = new PdfFont(PdfFontFamily.TimesRoman, 12f, PdfFontStyle.Regular);
            PdfFont markerFont = new PdfFont(PdfFontFamily.TimesRoman, 6f, PdfFontStyle.Regular);

            //Create a brush
            PdfBrush brush = PdfBrushes.Black;

            //Specify the initial coordinate
            float x = 10;
            float y = 20;

            //Draw title
            String title = "Computer Science Subjects:";
            page.Canvas.DrawString(title, titleFont, brush, x, y);
            y = y + (float)titleFont.MeasureString(title).Height;
            y = y + 5;

            //Specify the marker style
            PdfMarker marker = new PdfMarker(PdfUnorderedMarkerStyle.Asterisk);
            marker.Font = markerFont;

            //Create an unordered list
            String listContent = "Data Structure\n"
                    + "Algorithm\n"
                    + "Computer Networks\n"
                    + "Operating System\n"
                    + "Theory of Computations\n"
                    + "C Programming\n"
                    +"Computer Organization and Architecture";

            PdfList list = new PdfList(listContent);

            //Set the font, indent, text indent, brush, maker of the list
            list.Font = listFont;
            list.Indent = 2;
            list.TextIndent = 4;
            list.Brush = brush;
            list.Marker = marker;

            //Draw list on a page at the specified location
            list.Draw(page, x, y);

            //Save to file
            doc.SaveToFile("UnorderedList.pdf");
        }
    }
}
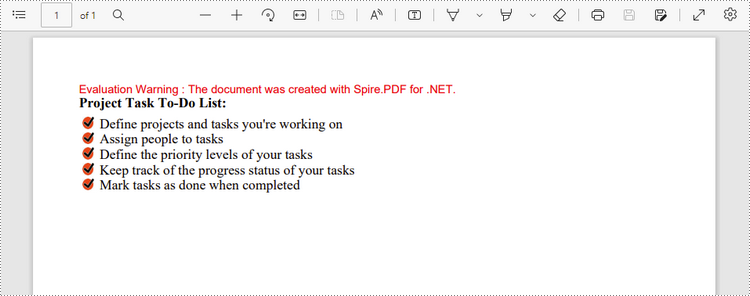
Create an Unordered List with Image Bullets in PDF
In addition to symbols, the bullet points of an unordered list can be also a picture. The steps to create an unordered list with images bullets are as follows.
- Create a PdfDocument object.
- Add a page to it using PdfDocument.Pages.Add() method.
- Create PdfBrush and PdfFont objects for the list.
- Create a PdfMarker object, setting the marker style as CustomImage.
- Set an image as the mark through PdfMarker.Image property.
- Specify the list content with a string, and create an object of PdfList class based on the string.
- Set the font, indent, brush and marker of the list though the properties under the PdfList object.
- Draw the list on the page at the specified location using PdfList.Draw() method.
- Save the document to another file using PdfDocument.SaveToFile() method.
- C#
- VB.NET
using System;
using Spire.Pdf;
using Spire.Pdf.Graphics;
using Spire.Pdf.Lists;

namespace CustomizeBulletPointsWithImage
{
    class Program
    {
        static void Main(string[] args)
        {
            //Create a PdfDocument object
            PdfDocument doc = new PdfDocument();

            //Set the margin
            PdfMargins margin = new PdfMargins(30);

            //Add a page
            PdfPageBase page = doc.Pages.Add(PdfPageSize.A4, margin);

            //Create fonts
            PdfFont titleFont = new PdfFont(PdfFontFamily.TimesRoman, 12f, PdfFontStyle.Bold);
            PdfFont listFont = new PdfFont(PdfFontFamily.TimesRoman, 12f, PdfFontStyle.Regular);

            //Create a brush
            PdfBrush brush = PdfBrushes.Black;

            //Specify the initial coordinate
            float x = 10;
            float y = 20;

            //Draw title
            String title = "Project Task To-Do List:";
            page.Canvas.DrawString(title, titleFont, brush, x, y);
            y = y + (float)titleFont.MeasureString(title).Height;
            y = y + 5;

            //Specify the marker style to image
            PdfMarker marker = new PdfMarker(PdfUnorderedMarkerStyle.CustomImage);

            //Set the image for the marker
            marker.Image = PdfImage.FromFile(@"C:\Users\Administrator\Desktop\checkmark.jpg");

            //Create an unordered list
            String listContent = "Define projects and tasks you're working on\n"
                    + "Assign people to tasks\n"
                    + "Define the priority levels of your tasks\n"
                    + "Keep track of the progress status of your tasks\n"
                    + "Mark tasks as done when completed";
            PdfList list = new PdfList(listContent);

            //Set the font, indent, text indent, brush, maker of the list
            list.Font = listFont;
            list.Indent = 2;
            list.TextIndent = 4;
            list.Brush = brush;
            list.Marker = marker;

            //Draw list on a page at the specified location
            list.Draw(page, x, y);

            //Save to file
            doc.SaveToFile("ImageBullets.pdf");
        }
    }
}
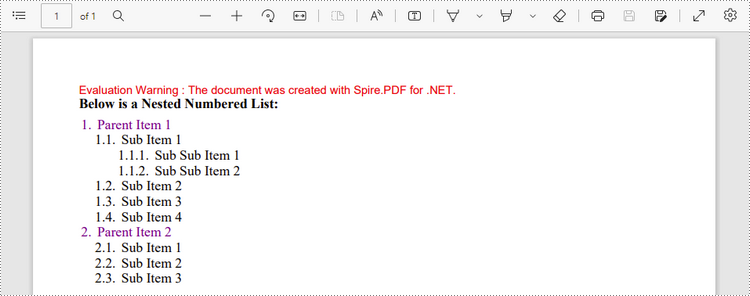
Create a Nested Numbered List in PDF
A nested list is a list that contains at least one sub list. Nested lists are used to present data in hierarchical structures. The following are the steps to create a nested numbered list in PDF using Spire.PDF for .NET.
- Create a PdfDocument object.
- Add a page to it using PdfDocument.Pages.Add() method.
- Create a PdfOrderedMarker object, specifying the marker style as Numeric.
- Specify the list content with a string, and create a parent list based on the string. And then set the font, indent, brush and marker of the list though the properties under the PdfSortedList object.
- Repeat the above step to create sub lists and sub-sub lists.
- Get the specific item of the parent list through PdfSortedList.Items[] property, and add a list to it as its sub list through PdfListItem.Sublist property.
- Draw the list on the page at the specified location using PdfSortedList.Draw() method.
- Save the document to another file using PdfDocument.SaveToFile() method.
- C#
- VB.NET
using System;
using Spire.Pdf;
using Spire.Pdf.Graphics;
using Spire.Pdf.Lists;

namespace CreateMultiLevelLists
{
    class Program
    {
        static void Main(string[] args)
        {
            //Create a PdfDocument object
            PdfDocument doc = new PdfDocument();

            //Set the margin
            PdfMargins margin = new PdfMargins(30);

            //Add a page
            PdfPageBase page = doc.Pages.Add(PdfPageSize.A4, margin);

            //Specify the initial coordinate
            float x = 10;
            float y = 20;

            //Create two brushes
            PdfBrush blackBrush = PdfBrushes.Black;
            PdfBrush purpleBrush = PdfBrushes.Purple;

            //Create two fonts
            PdfFont titleFont = new PdfFont(PdfFontFamily.TimesRoman, 12f, PdfFontStyle.Bold);
            PdfFont listFont = new PdfFont(PdfFontFamily.TimesRoman, 12f, PdfFontStyle.Regular);

            //Create a maker for ordered list
            PdfOrderedMarker marker = new PdfOrderedMarker(PdfNumberStyle.Numeric, listFont);

            //Draw title
            String title = "Below is a Nested Numbered List:";
            page.Canvas.DrawString(title, titleFont, blackBrush, x, y);
            y = y + (float)titleFont.MeasureString(title).Height;
            y = y + 5;

            //Create a parent list
            String parentListContent = "Parent Item 1\n"
                    + "Parent Item 2";
            PdfSortedList parentList = new PdfSortedList(parentListContent);
            parentList.Font = listFont;
            parentList.Indent = 2;
            parentList.Brush = purpleBrush;
            parentList.Marker = marker;

            //Create a sub list - "subList_1"
            String subListContent_1 = "Sub Item 1\n"
                    + "Sub Item 2\n"
                    + "Sub Item 3\n"
                    + "Sub Item 4";
            PdfSortedList subList_1 = new PdfSortedList(subListContent_1);
            subList_1.Indent = 12;
            subList_1.Font = listFont;
            subList_1.Brush = blackBrush;
            subList_1.Marker = marker;
            subList_1.MarkerHierarchy = true;

            //Create another sub list -"subList_2"
            String subListContent_2 = "Sub Item 1\n"
                    + "Sub Item 2\n"
                    + "Sub Item 3";
            PdfSortedList subList_2 = new PdfSortedList(subListContent_2);
            subList_2.Indent = 12;
            subList_2.Font = listFont;
            subList_2.Brush = blackBrush;
            subList_2.Marker = marker;
            subList_2.MarkerHierarchy = true;

            //Create a sub-sub list - "subList_1"
            String subSubListContent_1 = "Sub Sub Item 1\n"
                    + "Sub Sub Item 2";
            PdfSortedList subSubList = new PdfSortedList(subSubListContent_1);
            subSubList.Indent = 20;
            subSubList.Font = listFont;
            subSubList.Brush = blackBrush;
            subSubList.Marker = marker;
            subSubList.MarkerHierarchy = true;

            //Set subList_1 as sub list of the first item of parent list
            PdfListItem item_1 = parentList.Items[0];
            item_1.SubList = subList_1;

            //Set subList_2 as sub list of the second item of parent list
            PdfListItem item_2 = parentList.Items[1];
            item_2.SubList = subList_2;

            //Set subSubList as sub list of the first item of subList_1
            PdfListItem item_1_1 = subList_1.Items[0];
            item_1_1.SubList = subSubList;

            //Draw parent list
            parentList.Draw(page, x, y);

            //Save to file
            doc.SaveToFile("MultiLevelList.pdf");
        }
    }
}
Apply for a Temporary License
If you'd like to remove the evaluation message from the generated documents, or to get rid of the function limitations, please request a 30-day trial license for yourself.
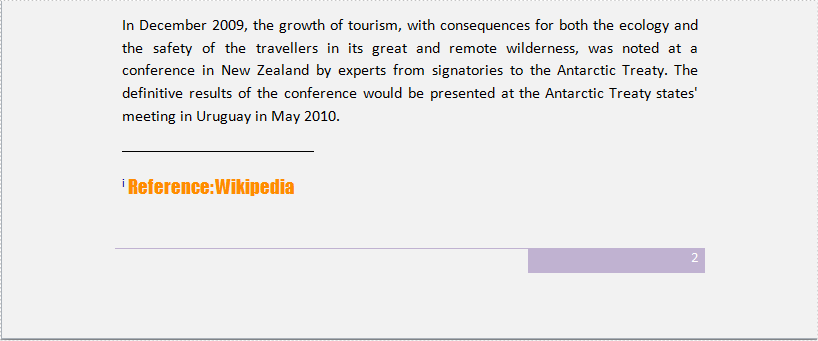
Word endnote is often put in the end of the document, which presents references of referred words/sentences/paragraphs. It includes two parts, marker and text. Marker can be customized or ordered automatically (i, ii, iii…). When one endnote is added, deleted or moved, the marker will be reordered automatically.
Spire.Doc for .NET, a stand-alone component used to manipulate Word document for .NET applications, enables users to insert endnote in Word by using C#, VB.NET. This guide introduces a method about how to realize this function via Spire.Doc for .NET.
Because endnote is included in footnote class, so invoke p.AppendFootnote(FootnoteType.Endnote) method to insert endnote. Then, use endnote.TextBody.AddParagraph().AppendText(string) method to add text and set CharacterFormat and MarkerCharacterFormat properties for endnote text and marker format. Download and install Spire.Doc for .NET and use the following code to insert endnote in Word.
using System.Drawing;
using Spire.Doc;
using Spire.Doc.Documents;
using Spire.Doc.Fields;

namespace WordEndnote
{
    class InsertEndnote
    {
        static void Main(string[] args)
        {
            //Load Document
            Document doc = new Document();
            doc.LoadFromFile(@"E:\Work\Documents\WordDocuments\Antarctic.docx", FileFormat.Docx);
            Section s = doc.Sections[0];
            Paragraph p = s.Paragraphs[3];

            //Add Footnote
            Footnote endnote = p.AppendFootnote(FootnoteType.Endnote);

            //Append Text
            TextRange text = endnote.TextBody.AddParagraph().AppendText("Reference: Wikipedia");

            //Text Format
            text.CharacterFormat.FontName = "Impact";
            text.CharacterFormat.FontSize = 14;
            text.CharacterFormat.TextColor = Color.DarkOrange;

            //Marker Format
            endnote.MarkerCharacterFormat.FontName = "Calibri";
            endnote.MarkerCharacterFormat.FontSize = 14;
            endnote.MarkerCharacterFormat.TextColor = Color.DarkBlue;

            //Save and Launch
            doc.SaveToFile("Endnote.docx", FileFormat.Docx);
            System.Diagnostics.Process.Start("Endnote.docx");
        }
    }
}
Imports System.Drawing
Imports Spire.Doc
Imports Spire.Doc.Documents
Imports Spire.Doc.Fields

Namespace WordEndnote
    Friend Class InsertEndnote
        Shared Sub Main(ByVal args() As String)
            'Load Document
            Dim doc As New Document()
            doc.LoadFromFile("E:\Work\Documents\WordDocuments\Antarctic.docx", FileFormat.Docx)
            Dim s As Section = doc.Sections(0)
            Dim p As Paragraph = s.Paragraphs(3)

            'Add Footnote
            Dim endnote As Footnote = p.AppendFootnote(FootnoteType.Endnote)

            'Append Text
            Dim text As TextRange = endnote.TextBody.AddParagraph().AppendText("Reference: Wikipedia")

            'Text Format
            text.CharacterFormat.FontName = "Impact"
            text.CharacterFormat.FontSize = 14
            text.CharacterFormat.TextColor = Color.DarkOrange

            'Marker Format
            endnote.MarkerCharacterFormat.FontName = "Calibri"
            endnote.MarkerCharacterFormat.FontSize = 14
            endnote.MarkerCharacterFormat.TextColor = Color.DarkBlue

            'Save and Launch
            doc.SaveToFile("Endnote.docx", FileFormat.Docx)
            System.Diagnostics.Process.Start("Endnote.docx")
        End Sub
    End Class
End Namespace
Spire.Doc is a Microsoft Word component, which enables users to perform a wide range of Word document processing tasks directly, such as generate, read, write and modify Word document in WPF, .NET and Silverlight.
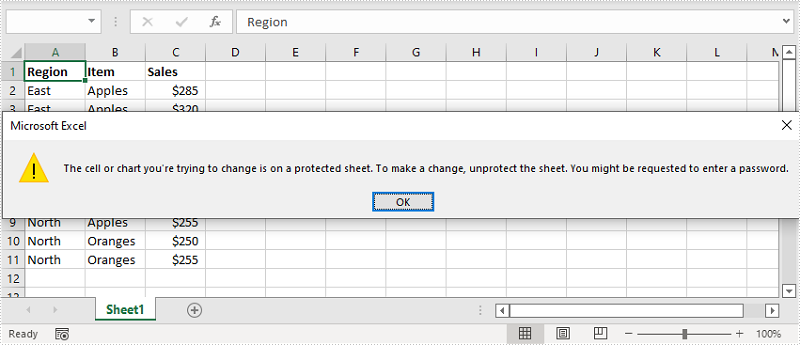
When creating an Excel worksheet, you may enter some data or formulas that you don't wish other users to modify. Locking the corresponding cells can be essential to maintain the integrity of the data and formulas. In this article, you will learn how to lock specific cells in Excel in C# and VB.NET using Spire.XLS for .NET library.
Install Spire.XLS for .NET
To begin with, you need to add the DLL files included in the Spire.XLS for .NET package as references in your .NET project. The DLL files can be either downloaded from this link or installed via NuGet.
PM> Install-Package Spire.XLS
Lock Specific Cells in Excel in C# and VB.NET
Normally, the locked option is enabled for all cells in a worksheet. Therefore, before locking a cell or range of cells, all cells must be unlocked. Keep in mind that locking cells doesn’t take effect until the worksheet is protected.
The following are the main steps to lock cells in Excel:
- Create an instance of Workbook class.
- Load the Excel file using Workbook.LoadFromFile() method.
- Get the desired worksheet using Workbook.Worksheet[sheetIndex] property.
- Access the used range in the worksheet and then unlock all the cells in the range by setting the CellRange.Style.Locked property as false.
- Access specific cells and then lock them by setting the CellRange.Style.Locked property as true.
- Protect the worksheet using XlsWorksheetBase.Protect() method.
- Save the result file using Workbook.SaveToFile() method.
- C#
- VB.NET
using Spire.Xls;

namespace LockCells
{
    class Program
    {
        static void Main(string[] args)
        {
            //Create a Workbook instance
            Workbook workbook = new Workbook();
            //Load an Excel file
            workbook.LoadFromFile("Input.xlsx");

            //Get the first worksheet
            Worksheet sheet = workbook.Worksheets[0];

            //Unlock all cells in the used range of the worksheet
            CellRange usedRange = sheet.Range;
            usedRange.Style.Locked = false;

            //Lock specific cells
            CellRange cells = sheet.Range["A1:C3"];
            cells.Style.Locked = true;

            //Protect the worksheet with password
            sheet.Protect("123456", SheetProtectionType.All);

            //Save the result file
            workbook.SaveToFile("LockCells.xlsx", ExcelVersion.Version2016);
        }
    }
}
Apply for a Temporary License
If you'd like to remove the evaluation message from the generated documents, or to get rid of the function limitations, please request a 30-day trial license for yourself.
C#/VB.NET: Set Viewer Preferences and Zoom Factors for PDFs
2023-07-20 07:18:00 Written by support iceblueOptimizing the viewer preferences and zoom factors is crucial for improving the viewing experience of PDF documents. By using the appropriate viewer preferences and zoom factors, you can make your PDF documents more user-friendly, viewable and suitable for different devices and platforms. In this article, we will demonstrate how to set viewer preferences and zoom factors for PDF documents in C# and VB.NET using Spire.PDF for .NET.
Install Spire.PDF for .NET
To begin with, you need to add the DLL files included in the Spire.PDF for.NET package as references in your .NET project. The DLL files can be either downloaded from this link or installed via NuGet.
PM> Install-Package Spire.PDF
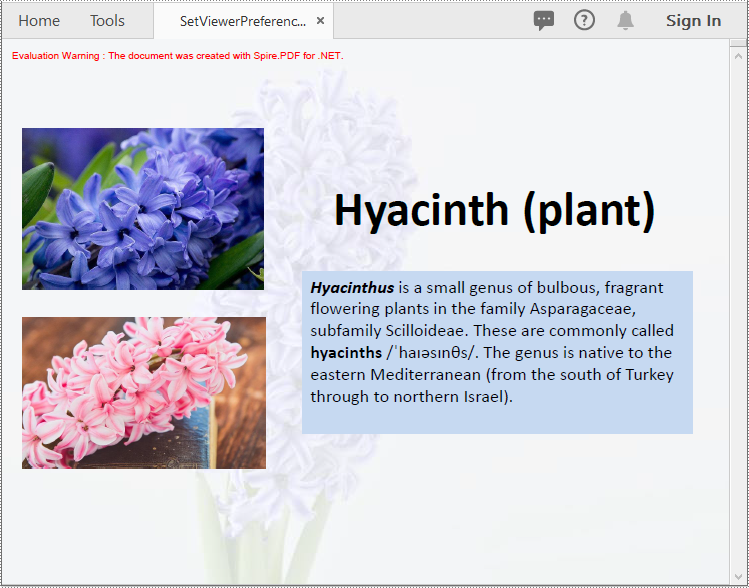
Set Viewer Preferences for PDF in C# and VB.NET
Viewer preferences are settings that can be applied to a PDF document to control how it is displayed when it is opened in a PDF viewer. These preferences can affect various aspects of the viewing experience, such as the initial view, page layout, and navigation tabs.
To set the viewer preference for a PDF document using Spire.PDF for .NET, you can follow these steps:
- Initialize an instance of PdfDocument class.
- Load a PDF document using PdfDocument.LoadFromFile() method.
- Get the PdfViewerPreferences object.
- Set viewer preference for the document using the properties provided by the PdfViewerPreferences class.
- Save the result document using PdfDocument.SaveToFile() method.
- C#
- VB.NET
using Spire.Pdf;

namespace SetViewerPreference
{
    internal class Program
    {
        static void Main(string[] args)
        {
            //Initialize an instance of PdfDocument class
            PdfDocument pdf = new PdfDocument();
            //Load a PDF document
            pdf.LoadFromFile(@"Example.pdf");

            //Get the PdfViewerPreferences object
            PdfViewerPreferences viewerPreferences = pdf.ViewerPreferences;

            //Set viewer preference
            viewerPreferences.FitWindow = false;
            viewerPreferences.HideMenubar = true;
            viewerPreferences.HideToolbar = true;
            viewerPreferences.CenterWindow= true;
            viewerPreferences.DisplayTitle = false;
            viewerPreferences.PageLayout = PdfPageLayout.SinglePage;
            viewerPreferences.PageMode = PdfPageMode.UseNone;

            //Save the result document
            pdf.SaveToFile("SetViewerPreference.pdf");
            pdf.Close();
        }
    }
}
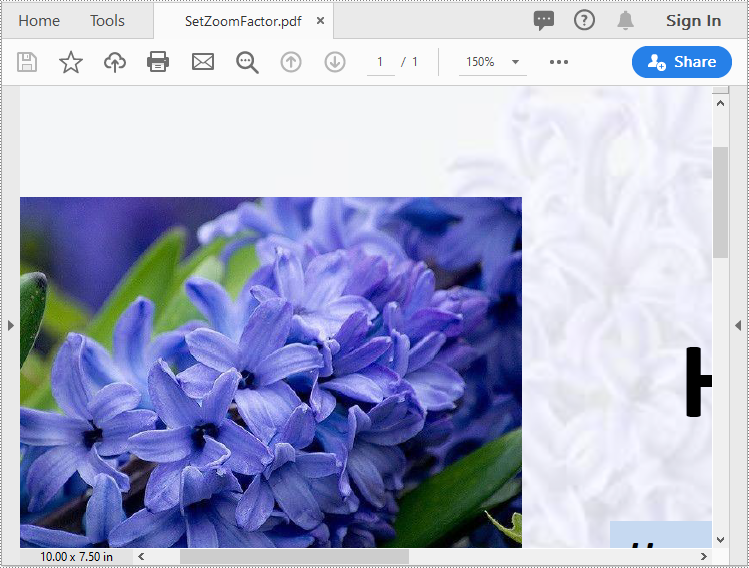
Set Zoom Factors for PDF in C# and VB.NET
The zoom factor determines the zoom level of the PDF document when it is opened. By default, most PDF viewers set the zoom factor to "Fit Page," which scales the document to fit the width of the viewer window. However, you can also set a specific zoom factor, such as 60%, 150% or 200%, depending on your needs.
To set the zoom factor for a PDF document using Spire.PDF for .NET, you can follow these steps:
- Initialize an instance of PdfDocument class.
- Load a PDF document using PdfDocument.LoadFromFile() method.
- Get a specific page using PdfDocument.Pages[int index] property.
- Initialize an instance of the PdfDestination class.
- Set the destination mode, location and zoom factor using PdfDestination.Mode and PdfDestination.Location and PdfDestination.Zoom properties.
- Initialize an instance of the PdfGoToAction class and pass the PdfDestination instance to the constructor of the class as a parameter.
- Set the action to be executed when the document is opened using PdfDocument.AfterOpenAction property.
- Save the result document using PdfDocument.SaveToFile() method.
- C#
- VB.NET
using Spire.Pdf;
using Spire.Pdf.Actions;
using Spire.Pdf.General;
using System.Drawing;

namespace SetZoomFactor
{
    internal class Program
    {
        static void Main(string[] args)
        {
            //Initialize an instance of the PdfDocument class
            PdfDocument pdf = new PdfDocument();
            //Load a PDF document
            pdf.LoadFromFile(@"Example.pdf");

            //Get the first page
            PdfPageBase page = pdf.Pages[0];

            //Initialize an instance of the PdfDestination class
            PdfDestination dest = new PdfDestination(page);
            //Set the destination mode
            dest.Mode = PdfDestinationMode.Location;
            //Set the destination location
            dest.Location = new PointF(40f, 40f);
            //Set the zoom factor
            dest.Zoom = 1.5f;

            //Initialize an instance of the PdfGoToAction class
            PdfGoToAction gotoAction = new PdfGoToAction(dest);
            //Set the action to be executed when the document is opened
            pdf.AfterOpenAction = gotoAction;

            //Save the result document
            pdf.SaveToFile("SetZoomFactor.pdf");
            pdf.Close();
        }
    }
}
Apply for a Temporary License
If you'd like to remove the evaluation message from the generated documents, or to get rid of the function limitations, please request a 30-day trial license for yourself.
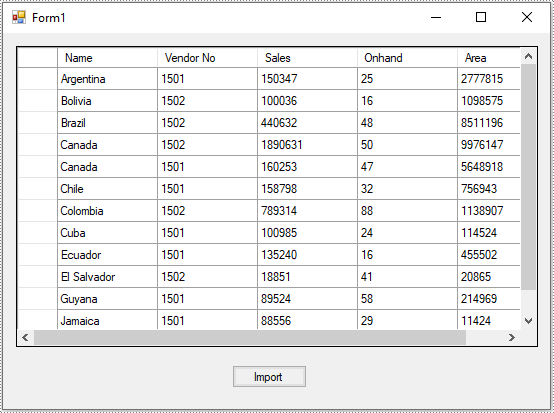
A DataTable represents a table of in-memory relational data. It can be populated from a data source like Microsoft SQL Server or from a file like CSV or Excel. In this article, you will learn how to populate DataTable from CSV, or in other words, how to convert CSV to DataTable in C# and VB.NET using Spire.XLS for .NET.
Install Spire.XLS for .NET
To begin with, you need to add the DLL files included in the Spire.XLS for .NET package as references in your .NET project. The DLL files can be either downloaded from this link or installed via NuGet.
PM> Install-Package Spire.XLS
Convert CSV to DataTable in C# and VB.NET
The following are the main steps to convert CSV to DataTable:
- Initialize an instance of Workbook class.
- Load a CSV file using Workbook.LoadFromFile() method and passing the file path and the delimiter/separator of the CSV file in the form of string as parameters.
- Get the desired worksheet by its index (zero-based) through Workbook.Worksheets[sheetIndex] property.
- Export data from the worksheet to a DataTable using Worksheet.ExportDataTable() method.
(The ExportDataTable() method has several overloads that can be used to control how the data will be exported, for example, ExportDataTable(CellRange range, bool exportColumnNames, bool computedFormulaValue): this overload allows you to specify the range to be exported along with whether to export columns names and calculated values of formulas.
- C#
- VB.NET
using Spire.Xls;
using System;
using System.Data;
using System.Windows.Forms;

namespace ConvertCsvToExcel
{
    public partial class Form1 : Form
    {
        public Form1()
        {
            InitializeComponent();
        }

        private void button1_Click(object sender, EventArgs e)
        {
            //Create a Workbook instance
            Workbook workbook = new Workbook();
            //Load a CSV file
            workbook.LoadFromFile(@"C:\Users\Administrator\Desktop\Input.csv", ",");

            //Get the first worksheet
            Worksheet worksheet = workbook.Worksheets[0];

            //Export data from the worksheet to a DataTable
            DataTable dt = worksheet.ExportDataTable();

            //This overload enables you to specify the range to be exported along with whether to export column names and calculated values of formulas
            //DataTable dt = worksheet.ExportDataTable(worksheet.Range["A1:C10"], true, true);

            //Show the DataTable in a DataGridView control (optional)
            dataGridView1.DataSource = dt;
        }
    }
}
Apply for a Temporary License
If you'd like to remove the evaluation message from the generated documents, or to get rid of the function limitations, please request a 30-day trial license for yourself.
