C# Set animation effect for the animate text on the presentation slides
We have already demonstrated how to set the animations on shapes in PowerPoint. Now Spire.Presentation starts to support set the Animation Effect for the type and time of the animate text. This article will show you how to use IterateType property and IterateTimeValue property for animation Effect to set the type and time of animate text in C#.
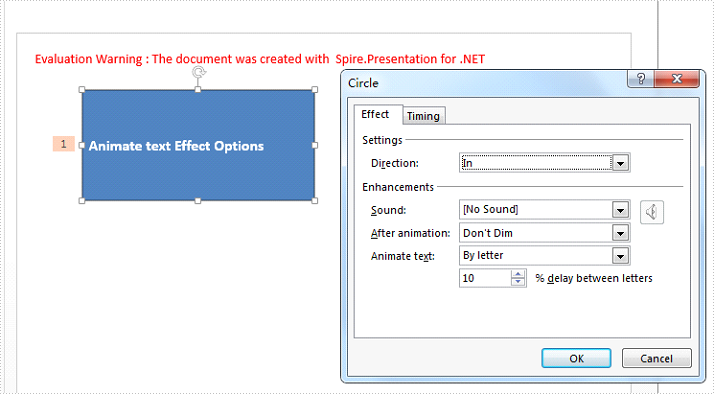
Firstly, view the original sample document with animate text effect with "All at once".

Step 1: Create a presentation instance and load the sample document from file.
Presentation ppt = new Presentation();
ppt.LoadFromFile("Sample.pptx",FileFormat.Pptx2010);
Step 2: Set the AnimateType as Letter.
ppt.Slides[0].Timeline.MainSequence[0].IterateType = Spire.Presentation.Drawing.TimeLine.AnimateType.Letter;
Step 3: Set the IterateTimeValue for the animate text.
ppt.Slides[0].Timeline.MainSequence[0].IterateTimeValue = 10;
Step 4: Save the document to file.
ppt.SaveToFile("Result.pptx", FileFormat.Pptx2010);
Effective screenshot of the animation effect for the animate text effect with "by Letter".

Apply Transparency to Image in PowerPoint in C#, VB.NET
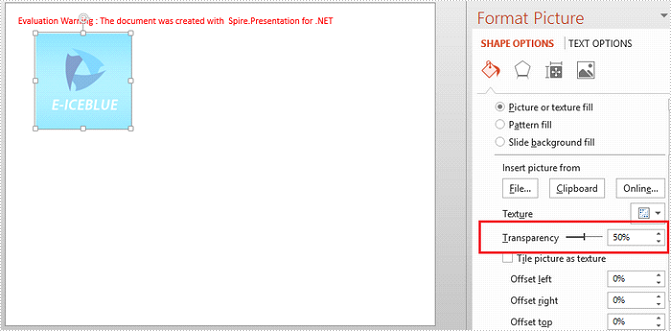
When you position some text over an image shape, you may want to make the image lighter or transparent so it doesn’t interfere with text. This article will demonstrate how to apply transparency to the image inside of a shape using Spire.Presentation with C# and VB.NET.
Step 1: Create a Presentation instance.
Presentation presentation = new Presentation();
Step 2: Create an Image from the specified file.
string imagePath = "logo.png";
Image image = Image.FromFile(imagePath);
Step 3: Add a shape to the first slide.
float width = image.Width;
float height = image.Height;
RectangleF rect = new RectangleF(50, 50, width, height);
IAutoShape shape = presentation.Slides[0].Shapes.AppendShape(ShapeType.Rectangle, rect);
shape.Line.FillType = FillFormatType.None;
Step 4: Fill the shape with image.
shape.Fill.FillType = FillFormatType.Picture;
shape.Fill.PictureFill.Picture.Url = imagePath;
shape.Fill.PictureFill.FillType = PictureFillType.Stretch;
Step 5: Set transparency on the image.
shape.Fill.PictureFill.Picture.Transparency = 50;
Step 6: Save to file.
presentation.SaveToFile("output.pptx", FileFormat.Pptx2013);
Output:
Full Code:
using Spire.Presentation;
using Spire.Presentation.Drawing;
using System.Drawing;

namespace ApplyTransparency
{

    class Program
    {

        static void Main(string[] args)
        {
            {
                //create a PowerPoint document
                Presentation presentation = new Presentation();
                string imagePath = "logo.png";
                Image image = Image.FromFile(imagePath);
                float width = image.Width;
                float height = image.Height;
                RectangleF rect = new RectangleF(50, 50, width, height);
                //add a shape
                IAutoShape shape = presentation.Slides[0].Shapes.AppendShape(ShapeType.Rectangle, rect);
                shape.Line.FillType = FillFormatType.None;
                //fill shape with image
                shape.Fill.FillType = FillFormatType.Picture;
                shape.Fill.PictureFill.Picture.Url = imagePath;
                shape.Fill.PictureFill.FillType = PictureFillType.Stretch;
                //set transparency on image
                shape.Fill.PictureFill.Picture.Transparency = 50;
                //save file
                presentation.SaveToFile("output.pptx", FileFormat.Pptx2013);
            }
        }

    }
}
Imports Spire.Presentation
Imports Spire.Presentation.Drawing
Imports System.Drawing

Namespace ApplyTransparency

	Class Program

		Private Shared Sub Main(args As String())
			If True Then
				'create a PowerPoint document
				Dim presentation As New Presentation()
				Dim imagePath As String = "logo.png"
				Dim image__1 As Image = Image.FromFile(imagePath)
				Dim width As Single = image__1.Width
				Dim height As Single = image__1.Height
				Dim rect As New RectangleF(50, 50, width, height)
				'add a shape
				Dim shape As IAutoShape = presentation.Slides(0).Shapes.AppendShape(ShapeType.Rectangle, rect)
				shape.Line.FillType = FillFormatType.None
				'fill shape with image
				shape.Fill.FillType = FillFormatType.Picture
				shape.Fill.PictureFill.Picture.Url = imagePath
				shape.Fill.PictureFill.FillType = PictureFillType.Stretch
				'set transparency on image
				shape.Fill.PictureFill.Picture.Transparency = 50
				'save file
				presentation.SaveToFile("output.pptx", FileFormat.Pptx2013)
			End If
		End Sub

	End Class
End Namespace
Reset the size and position for the shape on presentation slides in C#
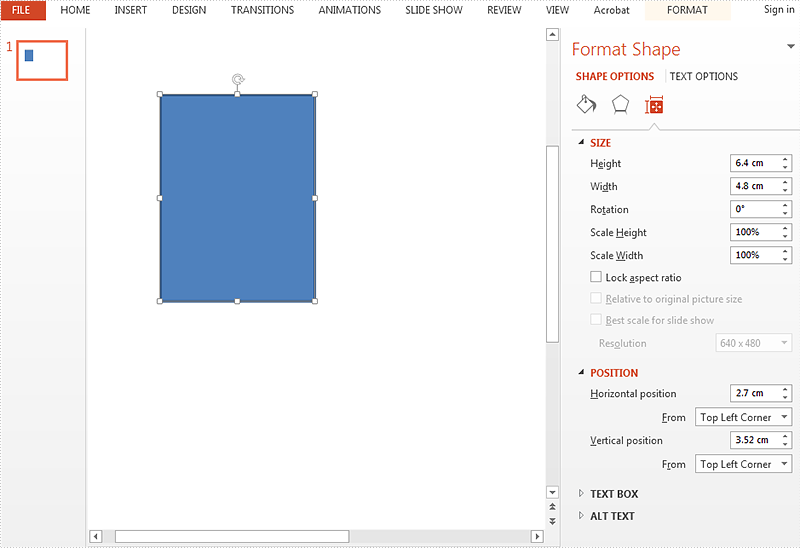
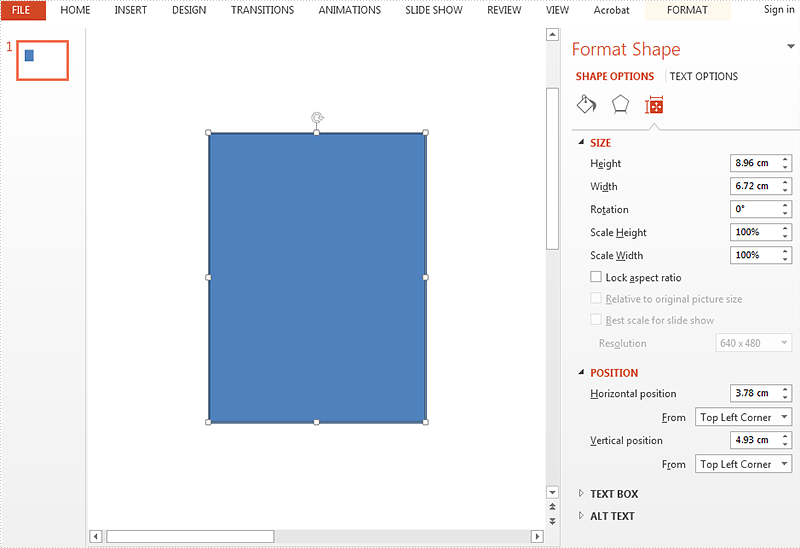
Every time when we change the slide's size, we need to reset the size and position for the shape to ensure the shape on the slide shows orderly. This tutorial will focus on demonstrating how to reset the size and position for the shape in C#.
Firstly, please view the original shape:
Code snippet of how to set the size and position of the shape:
Step 1: Create a new presentation document and load the document from file.
Presentation presentation = new Presentation();
presentation.LoadFromFile("Sample.pptx");
Step 2: Define the original slide size.
float currentHeight = presentation.SlideSize.Size.Height;
float currentWidth = presentation.SlideSize.Size.Width;
Step 3: Change the slide size as A3.
presentation.SlideSize.Type = SlideSizeType.A3;
Step 4: Define the new slide size.
float newHeight = presentation.SlideSize.Size.Height;
float newWidth = presentation.SlideSize.Size.Width;
Step 5: Define the ratio from the old and new slide size.
float ratioHeight = newHeight / currentHeight;
float ratioWidth = newWidth / currentWidth;
Step 6: Reset the size and position of the shape on the slide.
foreach (ISlide slide in presentation.Slides)
{
    foreach (IShape shape in slide.Shapes)
    {
        //Reset the shape size
        shape.Height = shape.Height * ratioHeight;
        shape.Width = shape.Width * ratioWidth;

        //Reset the shape position
        shape.Left = shape.Left * ratioHeight;
        shape.Top = shape.Top * ratioWidth;

    }
Step 7: Save the document to file.
presentation.SaveToFile("resize.pptx", FileFormat.Pptx2010);
Effective screenshot after reset the size and position of the shape on the slide:
Full codes:
using Spire.Presentation;

namespace ResetSizeandPosition
{

    class Program
    {

        static void Main(string[] args)
        {
            {
                Presentation presentation = new Presentation();
                presentation.LoadFromFile("Sample.pptx");

                float currentHeight = presentation.SlideSize.Size.Height;
                float currentWidth = presentation.SlideSize.Size.Width;

                presentation.SlideSize.Type = SlideSizeType.A3;

                float newHeight = presentation.SlideSize.Size.Height;
                float newWidth = presentation.SlideSize.Size.Width;

                float ratioHeight = newHeight / currentHeight;
                float ratioWidth = newWidth / currentWidth;

                foreach (ISlide slide in presentation.Slides)
                {
                    foreach (IShape shape in slide.Shapes)
                    {
                        shape.Height = shape.Height * ratioHeight;
                        shape.Width = shape.Width * ratioWidth;

                        shape.Left = shape.Left * ratioHeight;
                        shape.Top = shape.Top * ratioWidth;
                    }

                    presentation.SaveToFile("resize.pptx", FileFormat.Pptx2010);
                }
            }

        }
    }
}
How to fill shape with picture in PowerPoint in C#
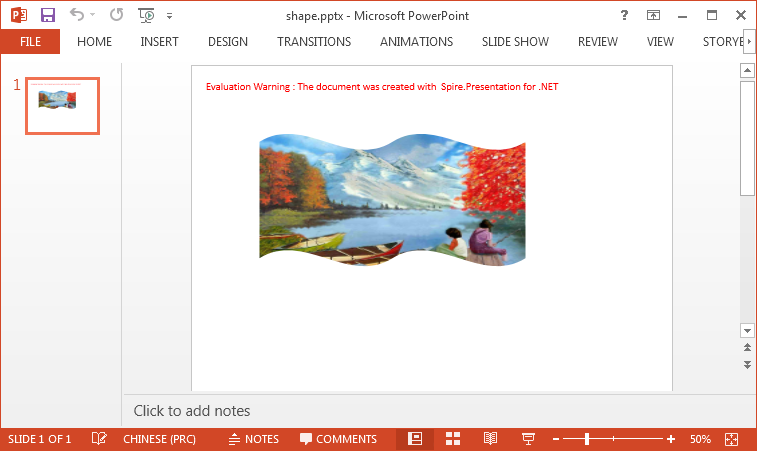
In order to change the look of a shape, users can add a solid, gradient, pattern or picture fill to it. Spire.Presentation supports all fill types listed. This article will introduce how to add a picture fill to a shape in C# and VB.NET.
Code Snippets:
Step 1: Initialize an instance of Presentation class.
Presentation ppt = new Presentation();
Step 2: Add a shape to the first slide.
IAutoShape shape = (IAutoShape)ppt.Slides[0].Shapes.AppendShape(ShapeType.DoubleWave, new RectangleF(100, 100, 400, 200));
Step 3: Set the FillType as picture and fill the shape with an image.
string picUrl = @"C:\Users\Administrator\Desktop\image.jpg";
shape.Fill.FillType = FillFormatType.Picture;
shape.Fill.PictureFill.Picture.Url = picUrl;
Step 4: Set the picture fill mode to stretch.
shape.Fill.PictureFill.FillType = PictureFillType.Stretch;
Step 5: Save to file.
ppt.SaveToFile("shape.pptx", FileFormat.Pptx2010);
Output:
Full Code:
using Spire.Presentation;
using Spire.Presentation.Drawing;
using System.Drawing;

namespace FillShape
{

    class Program
    {

        static void Main(string[] args)
        {
            Presentation ppt = new Presentation();

            IAutoShape shape = (IAutoShape)ppt.Slides[0].Shapes.AppendShape(ShapeType.DoubleWave, new RectangleF(100, 100, 400, 200));
            string picUrl = @"C:\Users\Administrator\Desktop\image.jpg";
            shape.Fill.FillType = FillFormatType.Picture;
            shape.Fill.PictureFill.Picture.Url = picUrl;
            shape.Fill.PictureFill.FillType = PictureFillType.Stretch;
            shape.ShapeStyle.LineColor.Color = Color.Transparent;

            ppt.SaveToFile("shape.pptx", FileFormat.Pptx2010);
            System.Diagnostics.Process.Start("shape.pptx");
        }
    }
}
Imports Spire.Presentation
Imports Spire.Presentation.Drawing
Imports System.Drawing

Namespace FillShape

	Class Program

		Private Shared Sub Main(args As String())
			Dim ppt As New Presentation()

			Dim shape As IAutoShape = DirectCast(ppt.Slides(0).Shapes.AppendShape(ShapeType.DoubleWave, New RectangleF(100, 100, 400, 200)), IAutoShape)
			Dim picUrl As String = "C:\Users\Administrator\Desktop\image.jpg"
			shape.Fill.FillType = FillFormatType.Picture
			shape.Fill.PictureFill.Picture.Url = picUrl
			shape.Fill.PictureFill.FillType = PictureFillType.Stretch
			shape.ShapeStyle.LineColor.Color = Color.Transparent

			ppt.SaveToFile("shape.pptx", FileFormat.Pptx2010)
			System.Diagnostics.Process.Start("shape.pptx")
		End Sub
	End Class
End Namespace
How to extract all images from a specific slide
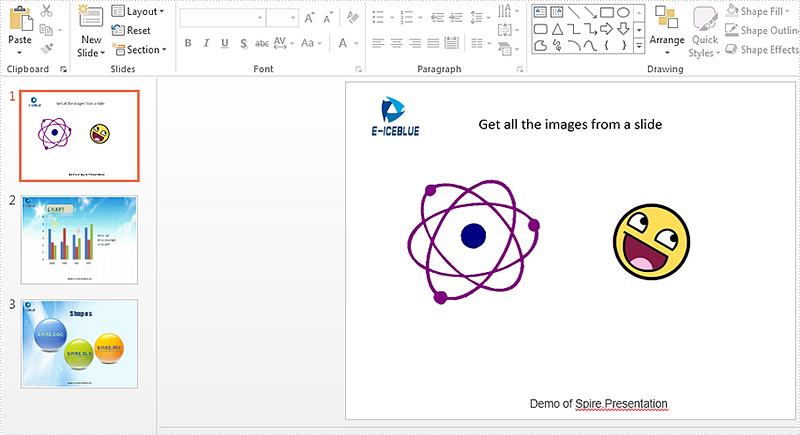
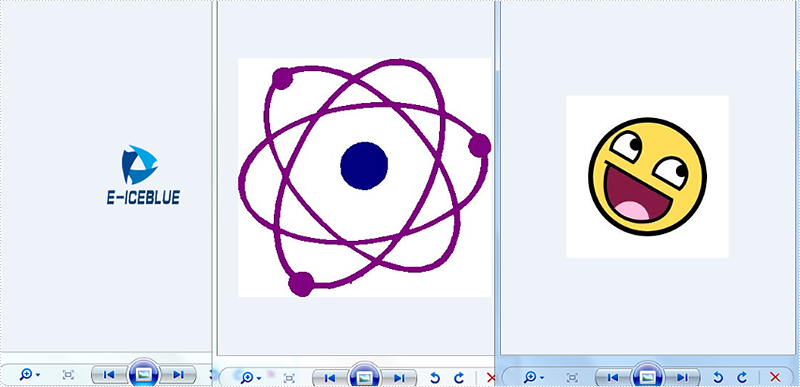
We usually add lots of images to make the PowerPoint presentation obvious and attractive. With Spire.Presentation, we can easily extract the text from the presentation slides, and we can extract all the images from the whole PowerPoint document file. From Spire.Presentation v 2.5.21, now it supports to get all images from a single specific slide. This article will demonstrate you how to extract all images from a slide.
Firstly, please view the whole PowerPoint slides with images and these images need to be extracted.
Note: Before Start, please download the latest version of Spire.Presentation and add Spire.Presentaion.dll in the bin folder as the reference of Visual Studio.
Here come to the code snippet of how to extract the images from a slide.
Step 1: Create a Presentation document and load from file.
Presentation PPT = new Presentation();
PPT.LoadFromFile("sample.pptx");
Step 2: Get the pictures on the first slide and save them to image file.
int i = 0;
foreach (IShape s in PPT.Slides[0].Shapes)
{
    if (s is SlidePicture)
    {
        SlidePicture ps = s as SlidePicture;
        ps.PictureFill.Picture.EmbedImage.Image.Save(string.Format("{0}.png", i));
        i++;
    }
    if (s is PictureShape)
    {
        PictureShape ps = s as PictureShape;
        ps.EmbedImage.Image.Save(string.Format("{0}.png", i));
        i++;
    }
}
Effective screenshots of the extracted images:
Full codes:
using Spire.Presentation;

namespace ExtractImage
{

    class Program
    {

        static void Main(string[] args)
        {
            Presentation PPT = new Presentation();
            PPT.LoadFromFile("sample.pptx");

            int i = 0;
            foreach (IShape s in PPT.Slides[0].Shapes)
            {
                if (s is SlidePicture)
                {
                    SlidePicture ps = s as SlidePicture;
                    ps.PictureFill.Picture.EmbedImage.Image.Save(string.Format("{0}.png", i));
                    i++;
                }
                if (s is PictureShape)
                {
                    PictureShape ps = s as PictureShape;
                    ps.EmbedImage.Image.Save(string.Format("{0}.png", i));
                    i++;
                }
            }
        }
    }
}
How to Add an Image to Slide Master in C#, VB.NET
A slide master is the top slide that stores the information about the theme and slide layouts, which will be inherited by other slides in the presentation. In other words, when you modify the style of slide master, every slide in the presentation will be changed accordingly, including the ones added later.
This quality makes it possible that when you want to insert an image or watermark to every slide, you only need to insert the image in slide master. In this article, you'll learn how to add an image to slide master using Spire.Presenation in C#, VB.NET.
Screenshot of original file:

Detailed Steps:
Step 1: Initialize a new Presentation and load the sample file
Presentation presentation = new Presentation();
presentation.LoadFromFile(@"sample.pptx");
Step 2: Get the master collection.
IMasterSlide master = presentation.Masters[0];
Step 3: Insert an image to slide master.
String image = @"logo.png";
RectangleF rff = new RectangleF(40, 40, 100, 80);
IEmbedImage pic=master.Shapes.AppendEmbedImage(ShapeType.Rectangle, image, rff);
pic.Line.FillFormat.FillType = FillFormatType.None;
Step 4: Add a new blank slide to the presentation.
presentation.Slides.Append();
Step 5: Save and launch the file.
presentation.SaveToFile("result.pptx", FileFormat.Pptx2010);
System.Diagnostics.Process.Start("result.pptx");
Output:

Full Code:
using Spire.Presentation;
using Spire.Presentation.Drawing;
using System;
using System.Drawing;

namespace AddImage
{

    class Program
    {

        static void Main(string[] args)
        {
            //initialize a new Presentation and load the sample file
            Presentation presentation = new Presentation();
            presentation.LoadFromFile(@"sample.pptx");
            //get the master collection
            IMasterSlide master = presentation.Masters[0];
            //append image to slide master
            String image = @"logo.png";
            RectangleF rff = new RectangleF(40, 40, 100, 80);
            IEmbedImage pic = master.Shapes.AppendEmbedImage(ShapeType.Rectangle, image, rff);
            pic.Line.FillFormat.FillType = FillFormatType.None;
            //add new slide to presentation
            presentation.Slides.Append();
            //save and launch the file
            presentation.SaveToFile("result.pptx", FileFormat.Pptx2010);
            System.Diagnostics.Process.Start("result.pptx");
        }
    }
}
Imports Spire.Presentation
Imports Spire.Presentation.Drawing
Imports System.Drawing

Namespace AddImage

	Class Program

		Private Shared Sub Main(args As String())
			'initialize a new Presentation and load the sample file
			Dim presentation As New Presentation()
			presentation.LoadFromFile("sample.pptx")
			'get the master collection
			Dim master As IMasterSlide = presentation.Masters(0)
			'append image to slide master
			Dim image As [String] = "logo.png"
			Dim rff As New RectangleF(40, 40, 100, 80)
			Dim pic As IEmbedImage = master.Shapes.AppendEmbedImage(ShapeType.Rectangle, image, rff)
			pic.Line.FillFormat.FillType = FillFormatType.None
			'add new slide to presentation
			presentation.Slides.Append()
			'save and launch the file
			presentation.SaveToFile("result.pptx", FileFormat.Pptx2010)
			System.Diagnostics.Process.Start("result.pptx")
		End Sub
	End Class
End Namespace
How to set 3-D format for shapes in slides
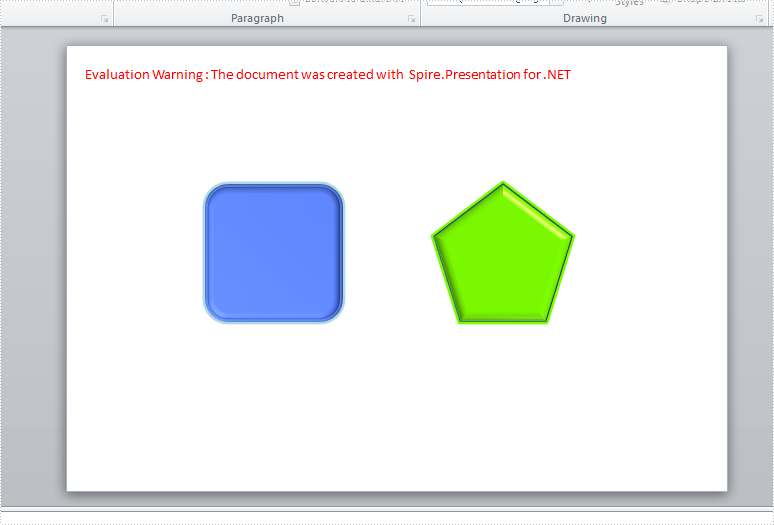
3-D is the abbreviation for three-dimensional. After adding a shape into the slide, we could set its format as 3-D, which looks more fresh and attractive. We could use options like Bevel, Contours, and Surface Material to customize 3-D shapes. This article is going to introduce the method to set 3-D shapes in C# using Spire.Presentation.
Note: before start, please download the latest version of Spire.Presentation and add the .dll in the bin folder as the reference of Visual Studio.
Step 1: Create a new presentation document.
Presentation presentation = new Presentation();
Step 2: Add shape1 and fill it with color.
IAutoShape shape1 = presentation.Slides[0].Shapes.AppendShape(ShapeType.RoundCornerRectangle, new RectangleF(150, 150, 150, 150));
shape1.Fill.FillType = FillFormatType.Solid;
shape1.Fill.SolidColor.KnownColor = KnownColors.RoyalBlue;
Step 3: Initialize a new instance of the 3-D class for shape1 and set its properties.
            ShapeThreeD Demo1 = shape1.ThreeD.ShapeThreeD;
            Demo1.PresetMaterial = PresetMaterialType.Powder;
            Demo1.TopBevel.PresetType = BevelPresetType.ArtDeco;
            Demo1.TopBevel.Height = 4;
            Demo1.TopBevel.Width = 12;
            Demo1.BevelColorMode = BevelColorType.Contour;
            Demo1.ContourColor.KnownColor = KnownColors.LightBlue;
            Demo1.ContourWidth = 3.5;
Step 4: Set 3-D format for shape2 as comparison.
IAutoShape shape2 = presentation.Slides[0].Shapes.AppendShape(ShapeType.Pentagon, new RectangleF(400, 150, 150, 150));
           shape2.Fill.FillType = FillFormatType.Solid;
           shape2.Fill.SolidColor.KnownColor = KnownColors.LawnGreen;
           ShapeThreeD Demo2 = shape2.ThreeD.ShapeThreeD;
           Demo2.PresetMaterial = PresetMaterialType.SoftEdge;
           Demo2.TopBevel.PresetType = BevelPresetType.SoftRound;
           Demo2.TopBevel.Height = 12;
           Demo2.TopBevel.Width = 12;
           Demo2.BevelColorMode = BevelColorType.Contour;
           Demo2.ContourColor.KnownColor = KnownColors.LawnGreen;
           Demo2.ContourWidth = 5;
Step 5: Save the document and launch to see effects.
           presentation.SaveToFile("result.pptx", FileFormat.Pptx2010);
           System.Diagnostics.Process.Start("result.pptx");
Effects:
Full Codes:
using System;
using System.Collections.Generic;
using System.Linq;
using System.Text;
using Spire.Presentation;
using Spire.Presentation.Drawing;
using System.Drawing;

namespace test
{
    class Program
    {
        static void Main(string[] args)
        {

            Presentation presentation = new Presentation();

            IAutoShape shape1 = presentation.Slides[0].Shapes.AppendShape(ShapeType.RoundCornerRectangle, new RectangleF(150, 150, 150, 150));
            shape1.Fill.FillType = FillFormatType.Solid;
            shape1.Fill.SolidColor.KnownColor = KnownColors.RoyalBlue;
            ShapeThreeD Demo1 = shape1.ThreeD.ShapeThreeD;
            Demo1.PresetMaterial = PresetMaterialType.Powder;
            Demo1.TopBevel.PresetType = BevelPresetType.ArtDeco;
            Demo1.TopBevel.Height = 4;
            Demo1.TopBevel.Width = 12;
            Demo1.BevelColorMode = BevelColorType.Contour;
            Demo1.ContourColor.KnownColor = KnownColors.LightBlue;
            Demo1.ContourWidth = 3.5;

            IAutoShape shape2 = presentation.Slides[0].Shapes.AppendShape(ShapeType.Pentagon, new RectangleF(400, 150, 150, 150));
            shape2.Fill.FillType = FillFormatType.Solid;
            shape2.Fill.SolidColor.KnownColor = KnownColors.LawnGreen;
            ShapeThreeD Demo2 = shape2.ThreeD.ShapeThreeD;
            Demo2.PresetMaterial = PresetMaterialType.SoftEdge;
            Demo2.TopBevel.PresetType = BevelPresetType.SoftRound;
            Demo2.TopBevel.Height = 12;
            Demo2.TopBevel.Width = 12;
            Demo2.BevelColorMode = BevelColorType.Contour;
            Demo2.ContourColor.KnownColor = KnownColors.LawnGreen;
            Demo2.ContourWidth = 5;

            presentation.SaveToFile("result.pptx", FileFormat.Pptx2010);
            System.Diagnostics.Process.Start("result.pptx");
        }
    }
}
How to prevent or allow changes to shapes
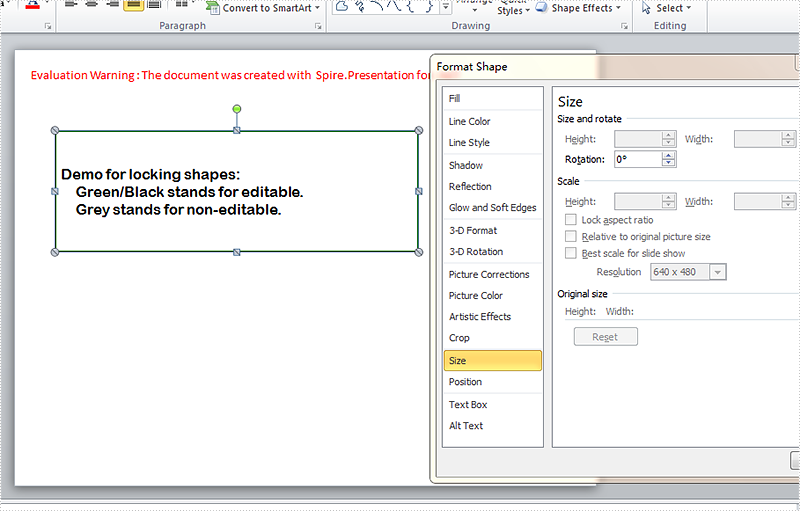
After finishing designs of shapes in slides, accidental changes might happen if we haven't made necessary protecting settings. Locking shapes from being selected firstly or preventing changes to shape attributes (like size, position, rotation etc.) can be used to prevent changes to shapes. It's necessary to mention that Spire.Presentation supports the features to prevent changes to shapes. This article is going to introduce how to prevent or allow changes to shapes in C# using Spire.Presentation.
Note: before start, please download the latest version of Spire.Presentation and add the .dll in the bin folder as the reference of Visual Studio.
Step 1: create a presentation file and add a sample shape.
Presentation presentation = new Presentation();
            IAutoShape shape = presentation.Slides[0].Shapes.AppendShape(ShapeType.Rectangle, new RectangleF(50, 100, 450, 150));
Step 2: format the sample shape.
            shape.Fill.FillType = FillFormatType.None;
            shape.ShapeStyle.LineColor.Color = Color.DarkGreen;
            shape.TextFrame.Paragraphs[0].Alignment = TextAlignmentType.Justify;
            shape.TextFrame.Text = "Demo for locking shapes:\n    Green/Black stands for editable.\n    Grey points stands for non-editable.";
            shape.TextFrame.Paragraphs[0].TextRanges[0].LatinFont = new TextFont("Arial Rounded MT Bold");
            shape.TextFrame.Paragraphs[0].TextRanges[0].Fill.FillType = FillFormatType.Solid;
            shape.TextFrame.Paragraphs[0].TextRanges[0].Fill.SolidColor.Color = Color.Black;
Step 3: set which operations are disabled on the shape to prevent changes. Here the selection and rotation changing of the shape are allowed while the changes of size, position, shape type, text, rotation, handles, and aspect ratio are not allowed.
            shape.Locking.RotationProtection = false;
            shape.Locking.SelectionProtection = false;
            shape.Locking.ResizeProtection = true;
            shape.Locking.PositionProtection = true;
            shape.Locking.ShapeTypeProtection = true;
            shape.Locking.AspectRatioProtection = true;
            shape.Locking.TextEditingProtection = true;
            shape.Locking.AdjustHandlesProtection = true;
Step 4: save the document and launch to see effects.
            presentation.SaveToFile("result.pptx", FileFormat.Pptx2010);
            System.Diagnostics.Process.Start("result.pptx");
Effects:
Full codes:
using System;
using System.Collections.Generic;
using System.Linq;
using System.Text;
using Spire.Presentation;
using Spire.Presentation.Drawing;
using System.Drawing;

namespace test
{
    class Program
    {
        static void Main(string[] args)
        {

            Presentation presentation = new Presentation();
            IAutoShape shape = presentation.Slides[0].Shapes.AppendShape(ShapeType.Rectangle, new RectangleF(50, 100, 450, 150));

            shape.Fill.FillType = FillFormatType.None;
            shape.ShapeStyle.LineColor.Color = Color.DarkGreen;
            shape.TextFrame.Paragraphs[0].Alignment = TextAlignmentType.Justify;
            shape.TextFrame.Text = "Demo for locking shapes:\n    Green/Black stands for editable.\n    Grey stands for non-editable.";
            shape.TextFrame.Paragraphs[0].TextRanges[0].LatinFont = new TextFont("Arial Rounded MT Bold");
            shape.TextFrame.Paragraphs[0].TextRanges[0].Fill.FillType = FillFormatType.Solid;
            shape.TextFrame.Paragraphs[0].TextRanges[0].Fill.SolidColor.Color = Color.Black;

            shape.Locking.RotationProtection = false;
            shape.Locking.SelectionProtection = false;
            shape.Locking.ResizeProtection = true;
            shape.Locking.PositionProtection = true;
            shape.Locking.ShapeTypeProtection = true;
            shape.Locking.AspectRatioProtection = true;
            shape.Locking.TextEditingProtection = true;
            shape.Locking.AdjustHandlesProtection = true;

            presentation.SaveToFile("result.pptx", FileFormat.Pptx2010);
            System.Diagnostics.Process.Start("result.pptx");
        }
    }
}
How to set the format for the shape lines in C#
With Spire.Presentation for .NET, developers can add different shapes to slides in C#. We can also use Spire.Presentation to formatting the lines of shape, such as the style, width, dash style and color of the line, etc. This article will show you how to set the format for the shape lines in C#. We will use rectangle for example. Here comes to the code snippet:
Step 1: Create a PPT document.
Presentation presentation = new Presentation();
Step 2: Add a rectangle shape to the slide.
IAutoShape shape = presentation.Slides[0].Shapes.AppendShape(ShapeType.Rectangle, new RectangleF(50, 100, 100, 100));
Step 3: Set the fill color of the rectangle shape.
shape.Fill.FillType = FillFormatType.Solid;
shape.Fill.SolidColor.Color = Color.White;
Step 4: Apply some formatting on the line of the rectangle.
shape.Line.Style = TextLineStyle.ThickThin;
shape.Line.Width = 5;
shape.Line.DashStyle = LineDashStyleType.Dash;
Step 5: Set the color of the line of the rectangle.
shape.ShapeStyle.LineColor.Color = Color.Red;
Step 6: Save the document to file.
presentation.SaveToFile("shape.pptx", FileFormat.Pptx2010);
Effective screenshot:

Full codes:
using Spire.Presentation;
using Spire.Presentation.Drawing;
using System.Drawing;

namespace SetFormat
{

    class Program
    {

        static void Main(string[] args)
        {
            Presentation presentation = new Presentation();

            IAutoShape shape = presentation.Slides[0].Shapes.AppendShape(ShapeType.Rectangle, new RectangleF(50, 100, 100, 100));

            shape.Fill.FillType = FillFormatType.Solid;
            shape.Fill.SolidColor.Color = Color.White;

            shape.Line.Style = TextLineStyle.ThickThin;
            shape.Line.Width = 5;
            shape.Line.DashStyle = LineDashStyleType.Dash;

            shape.ShapeStyle.LineColor.Color = Color.Red;

            presentation.SaveToFile("shape.pptx", FileFormat.Pptx2010);

        }
    }
}
How to add line arrow to presentation slides in C#
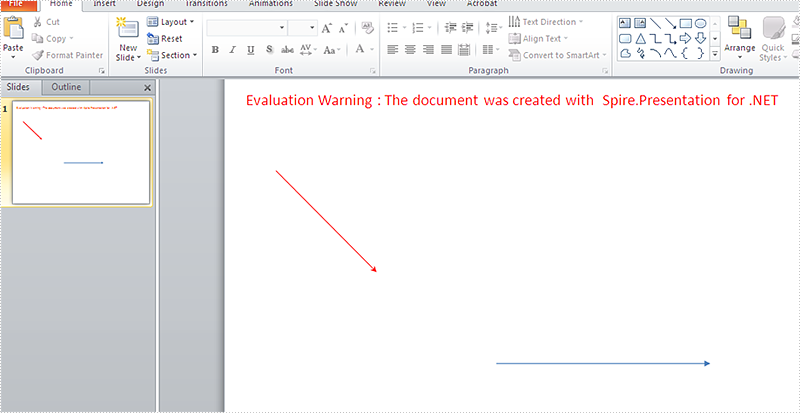
We have introduced how to add shapes to the slides by Spire.Presentaion. Spire.Presentation supports to work with lots of shapes, such as triangle, rectangle, ellipse, star, line and so on. This time we will show you how to add line arrow to the slides in C#.
Here comes to the code snippet.
Step 1: Create a PPT document.
Presentation presentation = new Presentation();
Step 2: Add a line to the slides and set its color to red.
IAutoShape shape = presentation.Slides[0].Shapes.AppendShape(ShapeType.Line, new RectangleF(50, 100, 100, 100));
shape.ShapeStyle.LineColor.Color = Color.Red;
Step 3: Set the line arrow by using LineEndType.
shape.Line.LineEndType = LineEndType.StealthArrow;
Step 4: Save and launch to view the PPTX document.
presentation.SaveToFile("shape.pptx", FileFormat.Pptx2010);
System.Diagnostics.Process.Start("shape.pptx");
Effective screenshots:
Full codes:
using Spire.Presentation;
using System.Drawing;

namespace AddLineArrow
{

    class Program
    {

        static void Main(string[] args)
        {
            Presentation presentation = new Presentation();
            IAutoShape shape = presentation.Slides[0].Shapes.AppendShape(ShapeType.Line, new RectangleF(50, 100, 100, 100));
            shape.ShapeStyle.LineColor.Color = Color.Red;
            shape.Line.LineEndType = LineEndType.StealthArrow;

            shape = presentation.Slides[0].Shapes.AppendShape(ShapeType.Line, new RectangleF(300, 250, 150, 150));
            shape.Rotation = -45;
            shape.Line.LineEndType = LineEndType.TriangleArrowHead;

            presentation.SaveToFile("shape.pptx", FileFormat.Pptx2010);
            System.Diagnostics.Process.Start("shape.pptx");


        }
    }
}