How to Export Shapes as Images in PowerPoint in C#, VB.NET
It is pretty easy in MS PowerPoint to export a certain shape as image with following two steps:
- 1. Select the object shape
- 2. From the right-click menu select Save as Picture
However, Spire.Presentation also provides easy method for programmers to save shapes out of slides. In the following section, we’ll introduce how to export shapes as images via Spire.Presentation with an example.
Test File:
As is shown in the screenshot, the sample file for testing contains several shapes on the first slide.

Code Snippet for Exporting Shape as Image:
Step 1: Initialize a new instance of Presentation class and load the test file from disk.
Presentation ppt = new Presentation();
ppt.LoadFromFile("test.pptx");
Step 2: Use for loop to traverse every shape in the slide. Call ShapeList.SaveAsImage(int shapeIndex) to save shape as image, then save this image to the specified file in the specified format.
for (int i = 0; i < ppt.Slides[0].Shapes.Count; i++)
{
    Image image = ppt.Slides[0].Shapes.SaveAsImage(i);
    image.Save(String.Format("Picture-{0}.png", i), System.Drawing.Imaging.ImageFormat.Png);
}
Output:
Picture-0

Picture-1

Entire Code:
using Spire.Presentation;
using System.Drawing;

namespace ExportShape
{

    class Program
    {

        static void Main(string[] args)
        {
            //create PPT document
            Presentation ppt = new Presentation();
            ppt.LoadFromFile("test.pptx");

            for (int i = 0; i < ppt.Slides[0].Shapes.Count; i++)
            {
                Image image = ppt.Slides[0].Shapes.SaveAsImage(i);
                image.Save(System.String.Format("Picture-{0}.png", i), System.Drawing.Imaging.ImageFormat.Png);
            }


        }
    }
}
Imports Spire.Presentation
Imports System.Drawing

Namespace ExportShape

	Class Program

		Private Shared Sub Main(args As String())
			'create PPT document
			Dim ppt As New Presentation()
			ppt.LoadFromFile("test.pptx")

			For i As Integer = 0 To ppt.Slides(0).Shapes.Count - 1
				Dim image As Image = ppt.Slides(0).Shapes.SaveAsImage(i)
				image.Save(System.[String].Format("Picture-{0}.png", i), System.Drawing.Imaging.ImageFormat.Png)
			Next


		End Sub
	End Class
End Namespace
Set the outline and effects for shapes in PowerPoint files via Spire.Presentation
Outline and effects for shapes can make the presentation of your PowerPoint files more attractive. This article talks about how to set the outline and effects for shapes via Spire.Presentation.
Step 1: Create a PowerPoint document.
Presentation ppt = new Presentation();
Step 2: Get the first slide
ISlide slide = ppt.Slides[0];
Step 3: Draw Rectangle shape on slide[0] with methord AppendShape();
IAutoShape shape = slide.Shapes.AppendShape(ShapeType.Rectangle, new RectangleF(50, 100, 100, 50));
Step 4: Set outline color as red.
//Outline color
shape.ShapeStyle.LineColor.Color = Color.Red;
Step 5: Add shadow effect and set parameters for it.
//Effect
PresetShadow shadow = new PresetShadow();
shadow.Preset = PresetShadowValue.FrontRightPerspective;
shadow.Distance = 10.0;
shadow.Direction = 225.0f;
shape.EffectDag.PresetShadowEffect = shadow;
Step 6: Change a Ellipse to add yellow outline with a glow effect:
Change step 4 and 5 as Code:
shape = slide.Shapes.AppendShape(ShapeType.Ellipse, new RectangleF(200, 100, 100, 100));
//Outline color
shape.ShapeStyle.LineColor.Color = Color.Yellow;
//Effect
GlowEffect glow = new GlowEffect();
glow.ColorFormat.Color = Color.Purple;
glow.Radius = 20.0;
shape.EffectDag.GlowEffect = glow;
Step 7: Save and review.
ppt.SaveToFile("Result.pptx", FileFormat.Pptx2010);
System.Diagnostics.Process.Start("Sample.PPTx");
Here is the screen shot:

How to create gradient shape in PowerPoint in C#
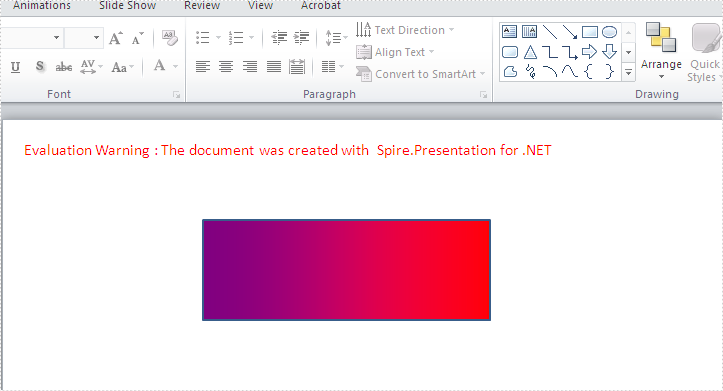
A gradient is a smooth transition from one color to another, and the gradient backgrounds make your presentation very cool. This article will show you how to create a shape with gradient effects by using Spire.Presentation. With the help of Spire.Presentation, you can not only insert gradient shapes into the slides, but also insert solid shapes in PowerPoint in C# easily.
The following steps will give you clear information of how to fill a shape with gradient effects. We will use rectangle shape in this example.
Step 1: Create an instance of presentation.
Presentation ppt = new Presentation();
Step 2: Add a rectangle to the slide.
IAutoShape GradientShape = (IAutoShape)ppt.Slides[0].Shapes.AppendShape(ShapeType.Rectangle, new RectangleF(200, 100, 287, 100));
Step 3: Set the Fill Type of the Shape to Gradient.
GradientShape.Fill.FillType = FillFormatType.Gradient;
Step 4: Set the start and end color for the gradient effects.
GradientShape.Fill.Gradient.GradientStops.Append(0, Color.Purple);
GradientShape.Fill.Gradient.GradientStops.Append(1, Color.Red);
Step 5: Save and Launch to view the resulted PPTX file.
ppt.SaveToFile("CreateGradientShape.pptx", FileFormat.Pptx2010);
System.Diagnostics.Process.Start("CreateGradientShape.pptx");
Effective screenshot of the resulted gradient shape:
Full codes:
using Spire.Presentation;
using Spire.Presentation.Drawing;
using System.Drawing;

namespace createGradientshape
{
    class Program
    {
        static void Main(string[] args)
        {
            Presentation ppt = new Presentation();
            IAutoShape GradientShape = (IAutoShape)ppt.Slides[0].Shapes.AppendShape(ShapeType.Rectangle, new RectangleF(200, 100, 287, 100));

            GradientShape.Fill.FillType = FillFormatType.Gradient;
            GradientShape.Fill.Gradient.GradientStops.Append(0, Color.Purple);
            GradientShape.Fill.Gradient.GradientStops.Append(1, Color.Red);
            ppt.SaveToFile("CreateGradientShape.pptx", FileFormat.Pptx2010);
            System.Diagnostics.Process.Start("CreateGradientShape.pptx");
        }
    }
}
Rotate Shapes on PowerPoint Slide with .NET
Various kinds of shapes like triangle, rectangle, ellipse, star, line and etc, can be created with Spire.Presentation. To make shapes more compatible with the entire slide, not only can we set color and choose fill style of the shape, we can also rotate shapes to a desired degree. This article is aimed to provide a simple example.
To begin with, create or open a .NET class application in Visual Studio 2005 or above versions, add Spire.Presentation.dll to your .NET project assemblies. Then, you are able create and format shapes using the sample C# code we have offered below.
Code snippets for rotate shapes on slide:
Step 1: Create an instance of Presentation class.
Presentation presentation = new Presentation();
Step 2: Add a new shape - Triangle ,to PPT slide.
IAutoShape shape = presentation.Slides[0].Shapes.AppendShape(ShapeType.Triangle, new RectangleF(100, 100, 100, 100));
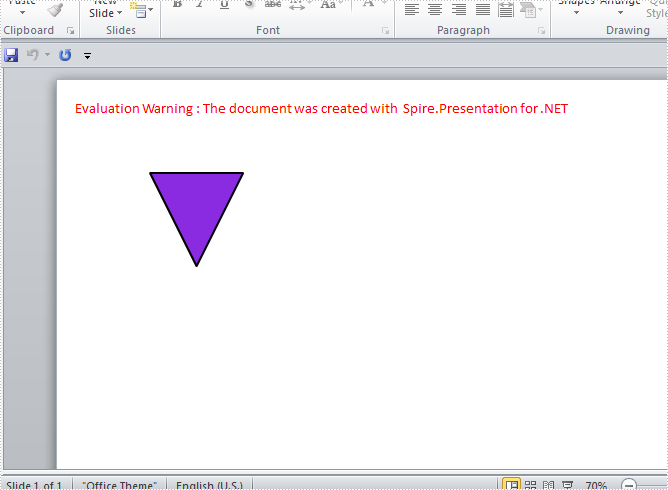
Step 3: Rotate the shape to 180 degree.
shape.Rotation = 180;
Step 4: Set the color and fill style of shape.
shape.Fill.FillType = FillFormatType.Solid;
shape.Fill.SolidColor.Color = Color.BlueViolet;
shape.ShapeStyle.LineColor.Color = Color.Black;
Step 5: Save and launch the file.
presentation.SaveToFile("shape.pptx", FileFormat.Pptx2010);
System.Diagnostics.Process.Start("shape.pptx");
Effect Screenshot:
Full code:
using Spire.Presentation;
using Spire.Presentation.Drawing;
using System.Drawing;

namespace RotateShape
{

    class Program
    {

        static void Main(string[] args)
        {
           //create PPT document
            Presentation presentation = new Presentation();

            //append new shape - Triangle
            IAutoShape shape = presentation.Slides[0].Shapes.AppendShape(ShapeType.Triangle, new RectangleF(100, 100, 100, 100));
            //set rotation to 180
            shape.Rotation = 180;

            //set the color and fill style of shape
            shape.Fill.FillType = FillFormatType.Solid;
            shape.Fill.SolidColor.Color = Color.BlueViolet;
            shape.ShapeStyle.LineColor.Color = Color.Black;

            //save the document
            presentation.SaveToFile("shape.pptx", FileFormat.Pptx2010);
            System.Diagnostics.Process.Start("shape.pptx");
        }

        }
    }
Imports Spire.Presentation
Imports Spire.Presentation.Drawing
Imports System.Drawing

Namespace RotateShape

	Class Program

		Private Shared Sub Main(args As String())
			'create PPT document
			Dim presentation As New Presentation()

			'append new shape - Triangle
			Dim shape As IAutoShape = presentation.Slides(0).Shapes.AppendShape(ShapeType.Triangle, New RectangleF(100, 100, 100, 100))
			'set rotation to 180
			shape.Rotation = 180

			'set the color and fill style of shape
			shape.Fill.FillType = FillFormatType.Solid
			shape.Fill.SolidColor.Color = Color.BlueViolet
			shape.ShapeStyle.LineColor.Color = Color.Black

			'save the document
			presentation.SaveToFile("shape.pptx", FileFormat.Pptx2010)
			System.Diagnostics.Process.Start("shape.pptx")
		End Sub

	End Class
End Namespace
Reorder overlapping shapes in presentation
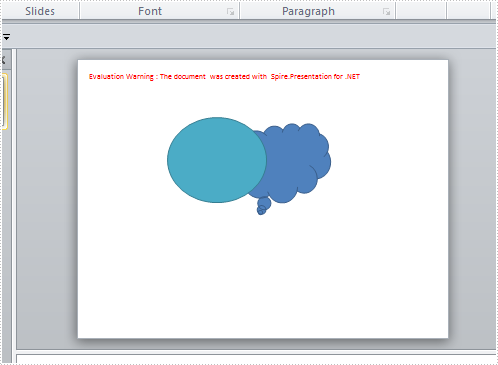
As is shown in the following presentation slide, shapes automatically stack in separate layers as you add them. To change the order of overlapping shapes, we can move the layers forward and backward. But how can we achieve this task programmatically using C# or VB.NET? This article is aimed to present you a solution on how to reorder overlapping shapes using Spire.Presentation.

In the early edition, Spire.Presentation is already capable of adding different kinds of shapes to the slides, setting color and fill style of the shape. In the Version2.0.18, we add reordering overlapping shapes as a new feature to satisfy our customer’s demands. Now, let’s see how to make it happen with sample code snippet.
Step 1: Create a new instance of Spire.Presentation class and load the test file.
Spire.Presentation.Presentation presentation = new Presentation();
presentation.LoadFromFile("..\\..\\test.pptx");
Step 2: Get the first shape from the slide.
IShape shape = presentation.Slides[0].Shapes[0];
Step 3: Change the shape's Zorder by setting its position index.
presentation.Slides[0].Shapes.ZOrder(1, shape);
Step 4: Save to a PPTX file and launch the file.
string output = "output.pptx";
presentation.SaveToFile(output,FileFormat.Pptx2010);
System.Diagnostics.Process.Start(output);
Output:
Full code:
using Spire.Presentation;

namespace ReorderOverlappingShape
{

    class Program
    {

        static void Main(string[] args)
        {
            //Create an instance of Spire.Presentation
            Spire.Presentation.Presentation presentation = new Presentation();
            //Load a pptx file
            presentation.LoadFromFile("..\\..\\test.pptx");

            //Get the first shape of the first slide
            IShape shape = presentation.Slides[0].Shapes[0];
            //Change the shape's zorder
            presentation.Slides[0].Shapes.ZOrder(1, shape);

            //Save to a pptx2010 file.
            string output = "output.pptx";
            presentation.SaveToFile(output, FileFormat.Pptx2010);
            //Launch the output file
            System.Diagnostics.Process.Start(output);

        }
    }
}
Imports Spire.Presentation

Namespace ReorderOverlappingShape

	Class Program

		Private Shared Sub Main(args As String())
			'Create an instance of Spire.Presentation
			Dim presentation As Spire.Presentation.Presentation = New Presentation()
			'Load a pptx file
			presentation.LoadFromFile("..\..\test.pptx")

			'Get the first shape of the first slide
			Dim shape As IShape = presentation.Slides(0).Shapes(0)
			'Change the shape's zorder
			presentation.Slides(0).Shapes.ZOrder(1, shape)

			'Save to a pptx2010 file.
			Dim output As String = "output.pptx"
			presentation.SaveToFile(output, FileFormat.Pptx2010)
			'Launch the output file
			System.Diagnostics.Process.Start(output)

		End Sub
	End Class
End Namespace
C#/VB.NET: Extract Images from PowerPoint Presentations
Images are one of the most common elements in PowerPoint presentations. There may be times when you need to extract images from specific presentation slides or from an entire presentation, for example, when you want to reuse those images in another presentation. In this article, you will learn how to extract images from PowerPoint presentations in C# and VB.NET using Spire.Presentation for .NET library.
- Extract Images from an Entire Presentation in C# and VB.NET
- Extract Images from a Specific Presentation Slide in C# and VB.NET
Install Spire.Presentation for .NET
To begin with, you need to add the DLL files included in the Spire.Presentation for.NET package as references in your .NET project. The DLL files can be either downloaded from this link or installed via NuGet.
PM> Install-Package Spire.Presentation
Extract Images from an Entire Presentation in C# and VB.NET
To extract images from an entire PowerPoint presentation, you need to use the Presentation.Images property to get the collection of all the images in the presentation, then iterate through the collection and call ImageCollection[int].Image.Save() method to save each image to an image file. The following are the detailed steps:
- Initialize an instance of the Presentation class.
- Load a PowerPoint presentation using Presentation.LoadFromFile() method.
- Get the collection of all the images in the presentation through Presentation.Images property.
- Iterate through the collection, and call ImageCollection[int].Image.Save() method to save the images in the collection to image files.
- C#
- VB.NET
using Spire.Presentation;
using Spire.Presentation.Collections;
using System.Drawing;

namespace ExtractImagesFromPresentation
{
    internal class Program
    {
        static void Main(string[] args)
        {
            //Initialize an instance of the Presentation class
            Presentation ppt = new Presentation();
            //Load a PowerPoint presentation
            ppt.LoadFromFile(@"Template.pptx");

            //Get the image collection of the presentation
            ImageCollection imageCollection = ppt.Images;

            //Iterate through the images in the collection
            for (int i = 0; i < imageCollection.Count; i++)
            {
                //Extract the images
                imageCollection[i].Image.Save(string.Format(@"Presentation\Images{0}.png", i));
            }

            ppt.Dispose();
        }
    }
}

Extract Images from a Specific Presentation Slide in C# and VB.NET
To extract images from a specific slide, you need to iterate through all shapes on the slide, find the shapes that are of SlidePicture or PictureShape type, then use the SlidePicture.PictureFill.Picture.EmbedImage.Image.Save() or PictureShape.EmbedImage.Image.Save() method to save the images to image files. The following are the detailed steps:
- Initialize an instance of the Presentation class.
- Load a PowerPoint presentation using Presentation.LoadFromFile() method.
- Get a specific slide by its index through Presentation.Slides[int] property.
- Iterate through all shapes on the slide.
- Check if the shapes are of SlidePicture or PictureShape type. If the result is true, save the images to image files using SlidePicture.PictureFill.Picture.EmbedImage.Image.Save() or PictureShape.EmbedImage.Image.Save() method.
- C#
- VB.NET
using Spire.Presentation;

namespace ExtractImagesFromSlide
{
    internal class Program
    {
        static void Main(string[] args)
        {
            //Initialize an instance of the Presentation class
            Presentation ppt = new Presentation();
            //Load a PowerPoint presentation
            ppt.LoadFromFile(@"Template4.pptx");

            //Get the first slide
            ISlide slide = ppt.Slides[0];

            int i = 0;
            //Iterate through all shapes on the first slide
            foreach (IShape s in slide.Shapes)
            {
                //Check if the shape is of SlidePicture type
                if (s is SlidePicture)
                {
                    //Extract the image
                    SlidePicture ps = s as SlidePicture;
                    ps.PictureFill.Picture.EmbedImage.Image.Save(string.Format(@"Slide\Images{0}.png", i));
                    i++;
                }
                //Check if the shape is of PictureShape type
                if (s is PictureShape)
                {
                    //Extract the image
                    PictureShape ps = s as PictureShape;
                    ps.EmbedImage.Image.Save(string.Format(@"Slide\Images{0}.png", i));
                    i++;
                }
            }
        }
    }
}

Apply for a Temporary License
If you'd like to remove the evaluation message from the generated documents, or to get rid of the function limitations, please request a 30-day trial license for yourself.
How to Set Animations on Shapes in PowerPoint in C#
Animation is a great way to emphasize important points, to control the flow of information, and to increase viewer interest in your presentation. You can animate text, pictures, shapes, tables, SmartArt graphics, and other objects in PowerPoint slide to give them visual effects. This article will focus on how to apply animation effect to a shape using Spire.Presentation in C#.
Step 1: Initialize an instance of Presentation class and get the first slide from the presentation.
Presentation ppt = new Presentation();
ISlide slide = ppt.Slides[0];
Step 2: Insert a rectangle in the slide and fill the shape with purple.
IAutoShape shape = slide.Shapes.AppendShape(ShapeType.Rectangle, new RectangleF(50, 50, 200, 80));
shape.Fill.FillType = FillFormatType.Solid;
shape.Fill.SolidColor.Color = Color.Purple;
shape.ShapeStyle.LineColor.Color = Color.White;
Step 3: Apply FadedSwivel animation effect to the shape.
shape.Slide.Timeline.MainSequence.AddEffect(shape, AnimationEffectType.FadedSwivel);
Step 4: Save the file.
ppt.SaveToFile("animations.pptx", FileFormat.Pptx2010);
Output:

Full Code:
using Spire.Presentation;
using Spire.Presentation.Drawing.Animation;
using System.Drawing;
using Spire.Presentation.Drawing;

namespace SetAnimationsOnShapes
{
    class Program
    {
        static void Main(string[] args)
        {
            Presentation ppt = new Presentation();
            ISlide slide = ppt.Slides[0];

            IAutoShape shape = slide.Shapes.AppendShape(ShapeType.Rectangle, new RectangleF(50, 50, 200, 80));
            shape.Fill.FillType = FillFormatType.Solid;
            shape.Fill.SolidColor.Color = Color.Purple;
            shape.ShapeStyle.LineColor.Color = Color.White;
            shape.AppendTextFrame("Animated Shape");
            shape.Slide.Timeline.MainSequence.AddEffect(shape, AnimationEffectType.FadedSwivel);

            ppt.SaveToFile("animations.pptx", FileFormat.Pptx2010);
        }
    }
}
C#/VB.NET: Add Shapes to PowerPoint Presentations
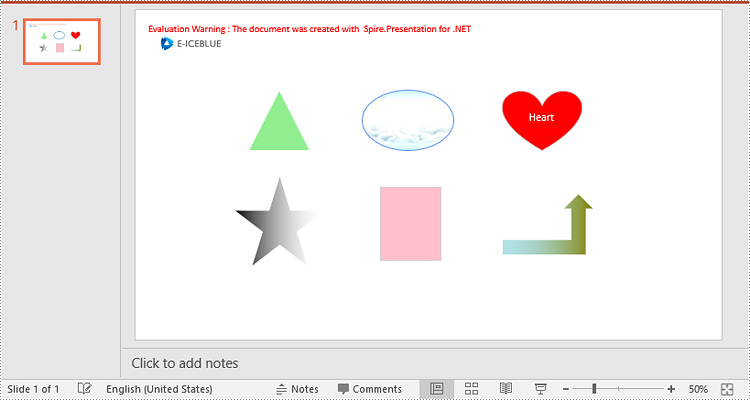
Shapes in PowerPoint are excellent tools for highlighting important information or key messages within a slide. They offer an effective way to draw attention, create visual cues, and actively engage viewers. By adding shapes strategically, you can elevate the impact of your PowerPoint presentation and leave a lasting impression on your audience. In this article, we will demonstrate how to add various types of shapes to a PowerPoint Presentation in C# and VB.NET using Spire.Presentation for .NET.
Install Spire.Presentation for .NET
To begin with, you need to add the DLL files included in the Spire.Presentation for.NET package as references in your .NET project. The DLL files can be either downloaded from this link or installed via NuGet.
PM> Install-Package Spire.Presentation
Add Shapes to a PowerPoint Presentation in C# and VB.NET
You can easily add various types of shapes such as rectangles, circles, triangles, arrows, and eclipses to a PowerPoint Presentation by using the ISlide.Shapes.AppendShape(ShapeType shapeType, RectangleF rectangle) method provided by Spire.Presentation for .NET. The detailed steps are as follows:
- Initialize an instance of the Presentation class.
- Load a PowerPoint presentation using Presentation.LoadFromFile(string fileName) method.
- Get a specific slide using Presentation.Slides[int index] property.
- Append various types of shapes to the slide using ISlide.Shapes.Append(ShapeType shapeType, RectangleF rectangle) method and then set styles for the shapes.
- Save the PowerPoint presentation using the Presentation.SaveToFile(string fileName, FileFormat fileFormat) method.
- C#
- VB.NET
using Spire.Presentation;
using Spire.Presentation.Drawing;
using System.Drawing;

namespace AddShapes
{
    internal class Program
    {
        static void Main(string[] args)
        {
            //Initialize an instance of the Presentation class
            Presentation presentation = new Presentation();
            //Load a PowerPoint presentation
            presentation.LoadFromFile("Input.pptx");

            //Get the first slide
            ISlide slide = presentation.Slides[0];

            //Append a triangle shape to the slide
            IAutoShape shape = slide.Shapes.AppendShape(ShapeType.Triangle, new RectangleF(185, 130, 100, 100));
            //Fill the shape with solid color
            shape.Fill.FillType = FillFormatType.Solid;
            shape.Fill.SolidColor.Color = Color.LightGreen;
            //Set the outline color for the shape
            shape.ShapeStyle.LineColor.Color = Color.White;

            //Append an ellipse shape to the slide
            shape = slide.Shapes.AppendShape(ShapeType.Ellipse, new RectangleF(370, 130, 150, 100));
            //Fill the shape with picture
            string picUrl = @"bg.png";
            shape.Fill.FillType = FillFormatType.Picture;
            shape.Fill.PictureFill.Picture.Url = picUrl;
            shape.Fill.PictureFill.FillType = PictureFillType.Stretch;
            //Set the outline color for the shape
            shape.ShapeStyle.LineColor.Color = Color.CornflowerBlue;

            //Append a heart shape to the slide
            shape = slide.Shapes.AppendShape(ShapeType.Heart, new RectangleF(600, 130, 130, 100));
            //Add text to the shape
            shape.TextFrame.Text = "Heart";
            //Fill the shape with solid color
            shape.Fill.FillType = FillFormatType.Solid;
            shape.Fill.SolidColor.Color = Color.Red;
            //Set the outline color for the shape
            shape.ShapeStyle.LineColor.Color = Color.LightGray;

            //Append a five-pointed star shape to the slide
            shape = slide.Shapes.AppendShape(ShapeType.FivePointedStar, new RectangleF(160, 270, 150, 150));
            //Fill the shape with gradient color
            shape.Fill.FillType = FillFormatType.Gradient;
            shape.Fill.SolidColor.Color = Color.Black;
            //Set the outline color for the shape
            shape.ShapeStyle.LineColor.Color = Color.White;

            //Append a rectangle shape to the slide
            shape = slide.Shapes.AppendShape(ShapeType.Rectangle, new RectangleF(400, 290, 100, 120));
            //Fill the shape with solid color
            shape.Fill.FillType = FillFormatType.Solid;
            shape.Fill.SolidColor.Color = Color.Pink;
            //Set the outline color for the shape
            shape.ShapeStyle.LineColor.Color = Color.LightGray;

            //Append an arrow shape to the slide
            shape = slide.Shapes.AppendShape(ShapeType.BentUpArrow, new RectangleF(600, 300, 150, 100));
            //Fill the shape with gradient color
            shape.Fill.FillType = FillFormatType.Gradient;
            shape.Fill.Gradient.GradientStops.Append(1f, KnownColors.Olive);
            shape.Fill.Gradient.GradientStops.Append(0, KnownColors.PowderBlue);
            //Set the outline color for the shape
            shape.ShapeStyle.LineColor.Color = Color.White;

            //Save the result PowerPoint presentation
            presentation.SaveToFile("AddShapes_result.pptx", FileFormat.Pptx2010);
            presentation.Dispose();
        }
    }
}
Apply for a Temporary License
If you'd like to remove the evaluation message from the generated documents, or to get rid of the function limitations, please request a 30-day trial license for yourself.
C#: Insert Images to a PowerPoint Document
Incorporating images into a PowerPoint presentation is crucial for captivating your audience and reinforcing your message. Visual elements not only break up text but also make complex information more digestible. From personal photos to professional graphics, the right images can elevate your slides and enhance understanding.
In this article, you will learn how to insert images from your local disk or a URL into a PowerPoint slide using C# and Spire.Presentation for .NET.
Install Spire.Presentation for .NET
To begin with, you need to add the DLL files included in the Spire.Presentation for.NET package as references in your .NET project. The DLL files can be either downloaded from this link or installed via NuGet.
PM> Install-Package Spire.Presentation
Insert an Image from Disk to PowerPoint in C#
To insert an image from your disk to a PowerPoint document, you can use the ISlide.Shapes.AppendEmbedImage() method. The method requires the following three parameters:
- ShapeType: The type of shape for the image, typically a rectangle.
- IImageData: The data corresponding to the image you want to insert.
- RectangleF: Defines the position and size of the image.
The steps to insert an image from disk to a PowerPoint slide are as follows:
- Create a Presentation object.
- Load a PowerPoint document.
- Load an image from disk using Image.FromFile() method.
- Add the image to the image collection of the document using Presentation.Images.Append() method.
- Create a RectangleF object to specify where the image will be placed and its dimensions.
- Add the image to a specific slide at the specified position using ISlide.Shapes.AppendEmbedImage() method.
- Save the document to a different PowerPoint file.
- C#
using Spire.Presentation;
using Spire.Presentation.Drawing;
using System.Drawing;

namespace InsertImageFromDisk
{
    class Program
    {
        static void Main(string[] args)
        {
            // Create a Presentation object
            Presentation presentation = new Presentation();

            // Load a PowerPoint file
            presentation.LoadFromFile("C:\\Users\\Administrator\\Desktop\\input.pptx");

            // Load an image from the given file path
            Image img = Image.FromFile("C:\\Users\\Administrator\\Desktop\\logo.png");

            // Add the image to the image collection of the document
            IImageData image = presentation.Images.Append(img);

            // Get the image width and height
            int width =  image.Width;
            int height = image.Height;

            // Specify the image position in the slide
            int x = 100;
            int y = 100;

            // Get a specific slide
            ISlide slide = presentation.Slides[0];

            // Insert the image to the slide at the specified position
            RectangleF rect = new RectangleF(x, y, width, height);
            IEmbedImage imageShape = slide.Shapes.AppendEmbedImage(ShapeType.Rectangle, image, rect);

            // Set the line fill type of the image shape to none
            imageShape.Line.FillType = FillFormatType.None;

            // Save the presentation to a different file
            presentation.SaveToFile("InsertImage.pptx", FileFormat.Pptx2010);

            // Dispose resources
            presentation.Dispose();
        }
    }
}

Insert an Image from a URL to PowerPoint
An image from a URL can be downloaded and saved as a stream using the WebClient class. Once downloaded, it can be loaded as a System.Drawing.Image object using the Image.FromStream() method. Then, you can use the ISlide.Shapes.AppendEmbedImage() method to insert the image into the slide as an image shape.
The steps to insert an image from a URL to a PowerPoint slide are as follows:
- Create a Presentation object.
- Load a PowerPoint document.
- Read and convert an image from a URL into stream using WebClient class.
- Load the image from stream using Image.FromStream() method.
- Add the image to the image collection of the document using Presentation.Images.Append() method.
- Create a RectangleF object to specify where the image will be placed and its dimensions.
- Add the image to a specific slide at the specified position using ISlide.Shapes.AppendEmbedImage() method.
- Save the document to a different PowerPoint file.
- C#
using Spire.Presentation;
using Spire.Presentation.Drawing;
using System.Drawing;
using System.Net;

namespace InsertImageFromUrl
{
    class Program
    {
        static void Main(string[] args)
        {
            // Create a Presentation object
            Presentation presentation = new Presentation();

            // Load a PowerPoint file
            presentation.LoadFromFile("C:\\Users\\Administrator\\Desktop\\input.pptx");

            // Declare a variable
            Image img;

            // Read an image from a URL
            string imageUrl = "https://i.imgur.com/OygmMoN.png";
            using (WebClient webClient = new WebClient())
            {
                using (Stream stream = webClient.OpenRead(imageUrl))
                {
                    // Load the image from stream
                    img =  Image.FromStream(stream);
                }
            }

            // Add the image to the image collection of the document
            IImageData image = presentation.Images.Append(img);

            // Get the image width and height
            int width = image.Width;
            int height = image.Height;

            // Specify the image position in the slide
            int x = 100;
            int y = 100;

            // Get a specific slide
            ISlide slide = presentation.Slides[0];

            // Insert the image to the slide at the specified position
            RectangleF rect = new RectangleF(x, y, width, height);
            IEmbedImage imageShape = slide.Shapes.AppendEmbedImage(ShapeType.Rectangle, image, rect);

            // Set the line fill type of the image shape to none
            imageShape.Line.FillType = FillFormatType.None;

            // Save the presentation to a different file
            presentation.SaveToFile("InsertImage.pptx", FileFormat.Pptx2010);

            // Dispose resources
            presentation.Dispose();
        }
    }
}

Apply for a Temporary License
If you'd like to remove the evaluation message from the generated documents, or to get rid of the function limitations, please request a 30-day trial license for yourself.