
Insert Header and Footer to Excel with C#, VB.NET in WPF
Generally we add predefined information or insert elements such as data, time and file name to Excel header or footer for printing purpose. Header or footer can be manually inserted or modified in Page Layout View or from Page Setup dialog box.
This article will present how to insert header and footer at runtime using Spire.XLS for WPF. Spire.XLS provides a class of PageSetup that contains all the page setup settings including header and footer, and a set of script commands that are used to set header and footer formatting.
Script Commands:
| Commands | Description |
| &G | A picture |
| &D | The current data |
| &T | The current time |
| &A | Worksheet name |
| &F | File name |
| &B | Make text bold |
| &I | Italicize text |
| &<Font name> | Font name. For example: &"Arial" |
| &K<Html color code> | Font color. For example: &KFFFFF0 |
Code Snippets:
Step 1: Initialize a new instance of Workbook class and get the first sheet from workbook.
Workbook wb = new Workbook();
Worksheet sheet = wb.Worksheets[0];
Step 2: Insert header text with formatting (specified font name, size and color) to the left part of Excel header.
sheet.PageSetup.LeftHeader ="&\"Showcard Gothic\"&14&K8B2252 Header and Footer Sample";
Step 3: Insert footer with formatting to the center part of Excel footer.
sheet.PageSetup.CenterFooter = "&B Copyright © 2016 e-iceblue. All Rights Reserved.";
Step 4: Save and launch the file.
wb.SaveToFile(@"..\Sample.xls");
System.Diagnostics.Process.Start(@"..\Sample.xls");
Output:
Header

Footer

Full Code:
using System.Drawing;
using System.Windows;

namespace WpfApplication1
{
    public partial class MainWindow : Window
    {
        public MainWindow()
        {
            InitializeComponent();
        }
        private void button1_Click(object sender, RoutedEventArgs e)
        {
            Workbook wb = new Workbook();
            Worksheet sheet = wb.Worksheets[0];

            sheet.PageSetup.LeftHeader = "&\"Showcard Gothic\"&14&K8B2252 Header and Footer Sample";
            sheet.PageSetup.CenterFooter = "&B Copyright © 2016 e-iceblue. All Rights Reserved.";

            wb.SaveToFile(@"..\Sample.xls");
            System.Diagnostics.Process.Start(@"..\Sample.xls");

        }
    }
}
Imports System.Drawing
Imports System.Windows

Namespace WpfApplication1
	Public Partial Class MainWindow
		Inherits Window
		Public Sub New()
			InitializeComponent()
		End Sub
		Private Sub button1_Click(sender As Object, e As RoutedEventArgs)
			Dim wb As New Workbook()
			Dim sheet As Worksheet = wb.Worksheets(0)

			sheet.PageSetup.LeftHeader = "&""Showcard Gothic""&14&K8B2252 Header and Footer Sample"
			sheet.PageSetup.CenterFooter = "&B Copyright © 2016 e-iceblue. All Rights Reserved."

			wb.SaveToFile("..\Sample.xls")
			System.Diagnostics.Process.Start("..\Sample.xls")

		End Sub
	End Class
End Namespace
How to add header to PDF on WPF applications
We often use header to the PDF file to give additional information to the PDF file. With Spire.PDF for WPF, developers can easily use the method SetDocumentTemplate() to create a PDF template that only contains header text and header image. By invoking this method, the template will be applied to all pages in your PDF document. This article will demonstrate how to add a header to PDF in C# on WPF applications.
Note: Before Start, please download the latest version of Spire.PDF and add Spire.Pdf.Wpf.dll in the bin folder as the reference of Visual Studio.
Step 1: Create a new PDF document, set its margin and load from file.
PdfDocument doc = new PdfDocument();
doc.PageSettings.Margins.All = 0;
PdfPageBase page = null;
PdfDocument original = new PdfDocument();
original.LoadFromFile("Test.pdf");
Step 2: Create a SetDocumentTemplate() method to add header text.
SetDocumentTemplate(doc, PdfPageSize.A4, original.PageSettings.Margins);
Step 3: Traverse every page of the original PDF document and create a new page with the original contents.
foreach (PdfPageBase origianlPage in original.Pages)
{
    page = doc.Pages.Add(new SizeF(origianlPage.Size.Width, origianlPage.Size.Height));
    origianlPage.CreateTemplate().Draw(page, 0, -(original.PageSettings.Margins.Top));
}
Step 4: Save the document to file and launch to preview it.
doc.SaveToFile("output.pdf");
System.Diagnostics.Process.Start("output.pdf");
Step 5: Details of how to add the header text to the PDF.
private static void SetDocumentTemplate(PdfDocument doc, SizeF pageSize, PdfMargins margin)
{
    PdfPageTemplateElement topSpace = new PdfPageTemplateElement(pageSize.Width, margin.Top);
    topSpace.Foreground = true;
    doc.Template.Top = topSpace;
    PdfTrueTypeFont font1 = new PdfTrueTypeFont(new Font("Trebuchet MS", 14f, System.Drawing.FontStyle.Italic));
    String label = "This is a PDF text header";
    SizeF size = font1.MeasureString(label);
    float y = 0;
    float x = 0;
    topSpace.Graphics.DrawString(label, font1, PdfBrushes.PaleVioletRed, x, y);
}
Effective screenshot:
Full codes:
private void button1_Click(object sender, RoutedEventArgs e)
 {
     // Create a pdf document.
     PdfDocument doc = new PdfDocument();
     doc.PageSettings.Margins.All = 0;
     PdfPageBase page = null;
     PdfDocument original = new PdfDocument();

     original.LoadFromFile("Test.pdf");

     SetDocumentTemplate(doc, PdfPageSize.A4, original.PageSettings.Margins);
     foreach (PdfPageBase origianlPage in original.Pages)
     {
         page = doc.Pages.Add(new SizeF(origianlPage.Size.Width, origianlPage.Size.Height));
         origianlPage.CreateTemplate().Draw(page, 0, -(original.PageSettings.Margins.Top));

     }

     doc.SaveToFile("output.pdf");
     System.Diagnostics.Process.Start("output.pdf");

 }
 private static void SetDocumentTemplate(PdfDocument doc, SizeF pageSize, PdfMargins margin)
 {
     PdfPageTemplateElement topSpace = new PdfPageTemplateElement(pageSize.Width, margin.Top);
     topSpace.Foreground = true;
     doc.Template.Top = topSpace;
     PdfTrueTypeFont font1 = new PdfTrueTypeFont(new Font("Trebuchet MS", 14f, System.Drawing.FontStyle.Italic));
     String label = "This is a PDF text header";
     SizeF size = font1.MeasureString(label);
     float y = 0;
     float x = 0;
     topSpace.Graphics.DrawString(label, font1, PdfBrushes.PaleVioletRed, x, y);
 }
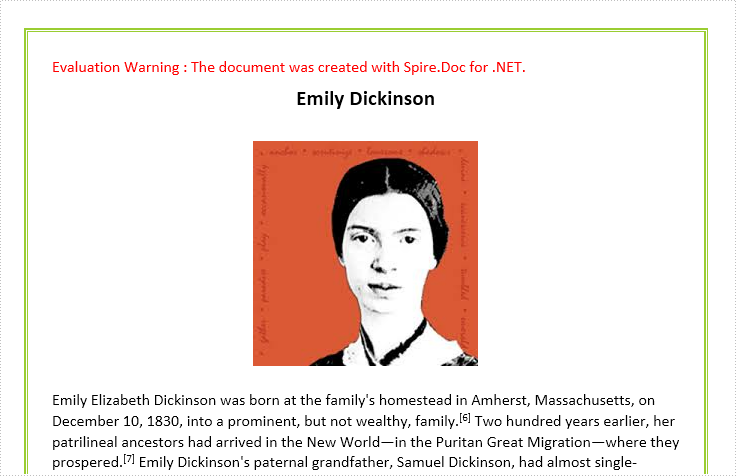
Set up page borders in word in WPF
A page border is a border that appears outside the margins on each page. Page borders are primarily for decoration so you can use any style, color, and line thickness you want. A good page border can make your page more appealing. In this section, we will demonstrate how to set up page borders in word using Spire.Doc for WPF.
Step 1: Initialize a new instance of Document class. Load the word document from the file.
Document document = new Document();
document.LoadFromFile("Emily.docx");
Step 2: Add page borders and set up the format of borders. In this instance, we set the style of border to ThinThickLargeGap and set the color to yellow green.
Section section = document.Sections[0];
section.PageSetup.Borders.BorderType = BorderStyle.ThinThickLargeGap;
section.PageSetup.Borders.Color = Color.YellowGreen;
Step 3: Set up the space between the borders and the text.
section.PageSetup.Borders.Left.Space = 50;
section.PageSetup.Borders.Right.Space = 50;
section.PageSetup.Borders.Top.Space = 50;
section.PageSetup.Borders.Bottom.Space = 50;
Step 4: Save the document and launch the file.
document.SaveToFile("Dickinson.docx", FileFormat.Docx);
System.Diagnostics.Process.Start("Dickinson.docx");
Effective Screenshots:
Full codes:
using System.Drawing;
using System.Windows;
using Spire.Doc;
using Spire.Doc.Documents;

namespace Emily
{
    ///
    /// Interaction logic for MainWindow.xaml
    ///
    public partial class MainWindow : Window
    {
        public MainWindow()
        {
            InitializeComponent();
        }

        private void button1_Click(object sender, RoutedEventArgs e)
        {
            //Load Document
            Document document = new Document();
            document.LoadFromFile("Emily.docx");
            Section section = document.Sections[0];

            //Add Page Borders with Special Style and Color
            section.PageSetup.Borders.BorderType = BorderStyle.ThinThickLargeGap;
            section.PageSetup.Borders.Color = Color.YellowGreen;
            //Space between Border and Text
            section.PageSetup.Borders.Left.Space = 50;
            section.PageSetup.Borders.Right.Space = 50;
            section.PageSetup.Borders.Top.Space = 50;
            section.PageSetup.Borders.Bottom.Space = 50;
            //Save and Launch
            document.SaveToFile("Dickinson.docx", FileFormat.Docx);
            System.Diagnostics.Process.Start("Dickinson.docx");
        }
    }

}
Imports System.Drawing
Imports System.Windows
Imports Spire.Doc
Imports Spire.Doc.Documents

Namespace Emily
	'''
	''' Interaction logic for MainWindow.xaml
	'''
	Public Partial Class MainWindow
		Inherits Window
		Public Sub New()
			InitializeComponent()
		End Sub

		Private Sub button1_Click(sender As Object, e As RoutedEventArgs)
			'Load Document
			Dim document As New Document()
			document.LoadFromFile("Emily.docx")
			Dim section As Section = document.Sections(0)

			'Add Page Borders with Special Style and Color
			section.PageSetup.Borders.BorderType = BorderStyle.ThinThickLargeGap
			section.PageSetup.Borders.Color = Color.YellowGreen
			'Space between Border and Text
			section.PageSetup.Borders.Left.Space = 50
			section.PageSetup.Borders.Right.Space = 50
			section.PageSetup.Borders.Top.Space = 50
			section.PageSetup.Borders.Bottom.Space = 50
			'Save and Launch
			document.SaveToFile("Dickinson.docx", FileFormat.Docx)
			System.Diagnostics.Process.Start("Dickinson.docx")
		End Sub
	End Class
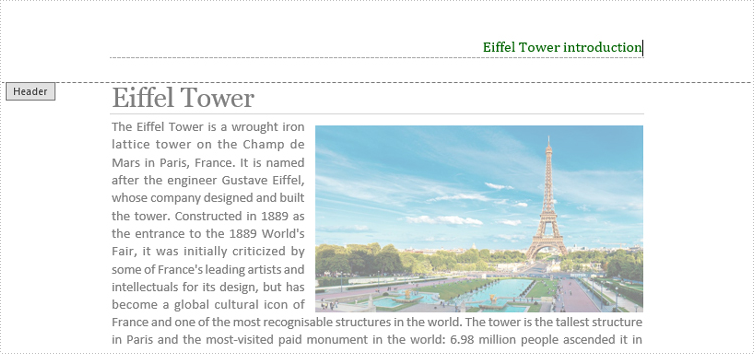
Insert Header and Footer for Word Document in WPF
Header or footer are pieces of text or images that appear at the top or bottom of every document page. You can add any information you want to the header and footer areas such as page numbers, author's name, current date and company logo.
This article will demonstrate how to insert text header and footer for word document in WPF by using Spire.Doc for WPF.
Below are the effective screenshots after inserting header and footer:

At first, please download Spire.Doc and install it correctly, then add Spire.Doc.Wpf.dll and Spire.License.dll from the installation folder to your project as reference.
Then follow the detail steps below:
Use namespace:
using System.Windows;
using Spire.Doc;
using Spire.Doc.Documents;
using Spire.Doc.Fields;
using System.Drawing;
Insert Header
Step 1: Initialize a new instance of Document class and load the word document from file.
Document doc = new Document();
doc.LoadFromFile("Eiffel Tower.docx");
Step 2: Get its first section, then add a header paragraph for section one.
Section section = doc.Sections[0];
HeaderFooter header = section.HeadersFooters.Header;
Paragraph paragraph = header.AddParagraph();
Step 3: Append text for header paragraph and set text format.
TextRange text = paragraph.AppendText("Eiffel Tower introduction");
text.CharacterFormat.FontName = "Cambria";
text.CharacterFormat.FontSize = 12;
text.CharacterFormat.TextColor = Color.DarkGreen;
Step 4: Set Header Paragraph Format.
paragraph.Format.HorizontalAlignment = Spire.Doc.Documents.HorizontalAlignment.Right;
paragraph.Format.Borders.Bottom.BorderType = BorderStyle.DashSmallGap;
paragraph.Format.Borders.Bottom.Space = 0.05f;
paragraph.Format.Borders.Bottom.Color = Color.DarkGray;
Insert Footer
Step 5: Add a Footer paragraph.
HeaderFooter footer = section.HeadersFooters.Footer;
Paragraph sparagraph = footer.AddParagraph();
Step 6: Append text for footer paragraph and set text format.
TextRange stext = sparagraph.AppendText("the tallest structure in Paris");
stext.CharacterFormat.FontName = "Calibri";
stext.CharacterFormat.FontSize = 12;
stext.CharacterFormat.TextColor = Color.DarkGreen;
Step 7: Set Footer Paragrah Format.
sparagraph.Format.HorizontalAlignment = Spire.Doc.Documents.HorizontalAlignment.Right;
sparagraph.Format.Borders.Top.BorderType = BorderStyle.Hairline;
sparagraph.Format.Borders.Top.Space = 0.15f;
sparagraph.Format.Borders.Color = Color.DarkGray;
Step 8: Save and launch the file.
doc.SaveToFile("HeaderFooter.docx");
System.Diagnostics.Process.Start("HeaderFooter.docx");
Full codes:
using Spire.Doc;
using Spire.Doc.Documents;
using Spire.Doc.Fields;
using System.Drawing;
using System.Windows;

namespace WpfApplication1
{
    public partial class MainWindow : Window
    {
        public MainWindow()
        {
            InitializeComponent();
        }
        private void button1_Click(object sender, RoutedEventArgs e)
        {
            Document doc = new Document();
            doc.LoadFromFile("Eiffel Tower.docx");

            Section section = doc.Sections[0];
            HeaderFooter header = section.HeadersFooters.Header;
            Paragraph paragraph = header.AddParagraph();

            TextRange text = paragraph.AppendText("Eiffel Tower introduction");
            text.CharacterFormat.FontName = "Cambria";
            text.CharacterFormat.FontSize = 12;
            text.CharacterFormat.TextColor = Color.DarkGreen;

            paragraph.Format.HorizontalAlignment = Spire.Doc.Documents.HorizontalAlignment.Right;
            paragraph.Format.Borders.Bottom.BorderType = BorderStyle.DashSmallGap;
            paragraph.Format.Borders.Bottom.Space = 0.05f;
            paragraph.Format.Borders.Bottom.Color = Color.DarkGray;

            HeaderFooter footer = section.HeadersFooters.Footer;
            Paragraph sparagraph = footer.AddParagraph();

            TextRange stext = sparagraph.AppendText("the tallest structure in Paris");
            stext.CharacterFormat.FontName = "Calibri";
            stext.CharacterFormat.FontSize = 12;
            stext.CharacterFormat.TextColor = Color.DarkGreen;

            sparagraph.Format.HorizontalAlignment = Spire.Doc.Documents.HorizontalAlignment.Right;
            sparagraph.Format.Borders.Top.BorderType = BorderStyle.Hairline;
            sparagraph.Format.Borders.Top.Space = 0.15f;
            sparagraph.Format.Borders.Color = Color.DarkGray;

            doc.SaveToFile("HeaderFooter.docx");
            System.Diagnostics.Process.Start("HeaderFooter.docx");
        }


    }
}
Private Sub button1_Click(sender As Object, e As RoutedEventArgs)
	Dim doc As New Document()
	doc.LoadFromFile("Eiffel Tower.docx")

	Dim section As Section = doc.Sections(0)
	Dim header As HeaderFooter = section.HeadersFooters.Header
	Dim paragraph As Paragraph = header.AddParagraph()

	Dim text As TextRange = paragraph.AppendText("Eiffel Tower introduction")
	text.CharacterFormat.FontName = "Cambria"
	text.CharacterFormat.FontSize = 12
	text.CharacterFormat.TextColor = Color.DarkGreen

	paragraph.Format.HorizontalAlignment = Spire.Doc.Documents.HorizontalAlignment.Right
	paragraph.Format.Borders.Bottom.BorderType = BorderStyle.DashSmallGap
	paragraph.Format.Borders.Bottom.Space = 0.05F
	paragraph.Format.Borders.Bottom.Color = Color.DarkGray

	Dim footer As HeaderFooter = section.HeadersFooters.Footer
	Dim sparagraph As Paragraph = footer.AddParagraph()

	Dim stext As TextRange = sparagraph.AppendText("the tallest structure in Paris")
	stext.CharacterFormat.FontName = "Calibri"
	stext.CharacterFormat.FontSize = 12
	stext.CharacterFormat.TextColor = Color.DarkGreen

	sparagraph.Format.HorizontalAlignment = Spire.Doc.Documents.HorizontalAlignment.Right
	sparagraph.Format.Borders.Top.BorderType = BorderStyle.Hairline
	sparagraph.Format.Borders.Top.Space = 0.15F
	sparagraph.Format.Borders.Color = Color.DarkGray

	doc.SaveToFile("HeaderFooter.docx")
	System.Diagnostics.Process.Start("HeaderFooter.docx")
End Sub
Add Footnote in word in WPF
Footnote is a note at the bottom of a page that gives more detailed information about something on the page. In this section, we will demonstrate how to add footnote in word using Spire.Doc for WPF.
First, create a new project by choosing WPF Application in Visual Studio, adding a button in the Main Window. Add Spire.Doc.Wpf.dll as reference to your project, and then double click the button to start.
Step 1: Initialize a new instance of Document class. Load the word document from the file.
Document doc = new Document();
doc.LoadFromFile("Oscar.docx");
Step 2: Select the section and paragraph which needs adding footnote. In this example, we choose the first section and the fourth paragraph.
Section sec = doc.Sections[0];
Paragraph paragraph = sec.Paragraphs[3];
Step 3: Add footnote by the method of paragraph.AppendFootnote() and then add the footnote contents by using footnote.TextBody.AddParagraph().AppendText(). At last, set the font style, size and color.
Footnote fn = paragraph.AppendFootnote(FootnoteType.Footnote);
TextRange text = fn.TextBody.AddParagraph().AppendText("Oscar Wilde (film), a 1960 biographical film about Oscar Wilde");
text.CharacterFormat.FontName = "Calibri";
text.CharacterFormat.FontSize = 11;
text.CharacterFormat.TextColor = Color.Chocolate;
Step 4: Set format of the marker.
fn.MarkerCharacterFormat.FontName = "Arial";
fn.MarkerCharacterFormat.FontSize = 14;
fn.MarkerCharacterFormat.Bold = true;
fn.MarkerCharacterFormat.TextColor = Color.Brown;
Step 5: Save the document and launch the file.
document.SaveToFile("FootNote.docx", FileFormat.Docx);
System.Diagnostics.Process.Start("FootNote.docx");
Effective Screenshot:


Full codes:
using System.Drawing;
using System.Windows;
using Spire.Doc;
using Spire.Doc.Documents;
using Spire.Doc.Fields;

namespace Add_Footnote_to_Word
{
    ///
    /// Interaction logic for MainWindow.xaml
    ///
    public partial class MainWindow : Window
    {
        public MainWindow()
        {
            InitializeComponent();
        }

        private void button1_Click(object sender, RoutedEventArgs e)
        {
            Document doc = new Document();
            doc.LoadFromFile("Oscar.docx");
            Section sec = doc.Sections[0];
            Paragraph paragraph = sec.Paragraphs[3];

            Footnote fn = paragraph.AppendFootnote(FootnoteType.Footnote);
            TextRange text = fn.TextBody.AddParagraph().AppendText("Oscar Wilde (film), a 1960 biographical film about Oscar Wilde");
            text.CharacterFormat.FontName = "Calibri";
            text.CharacterFormat.FontSize = 11;
            text.CharacterFormat.TextColor = Color.Chocolate;

            fn.MarkerCharacterFormat.FontName = "Arial";
            fn.MarkerCharacterFormat.FontSize = 14;
            fn.MarkerCharacterFormat.Bold = true;
            fn.MarkerCharacterFormat.TextColor = Color.Brown;

            doc.SaveToFile("AddFootNote.docx", FileFormat.Docx);
            System.Diagnostics.Process.Start("AddFootNote.docx");

        }
    }
}
Imports System.Drawing
Imports System.Windows
Imports Spire.Doc
Imports Spire.Doc.Documents
Imports Spire.Doc.Fields

Namespace Add_Footnote_to_Word
	'''
	''' Interaction logic for MainWindow.xaml
	'''
	Public Partial Class MainWindow
		Inherits Window
		Public Sub New()
			InitializeComponent()
		End Sub

		Private Sub button1_Click(sender As Object, e As RoutedEventArgs)
			Dim doc As New Document()
			doc.LoadFromFile("Oscar.docx")
			Dim sec As Section = doc.Sections(0)
			Dim paragraph As Paragraph = sec.Paragraphs(3)

			Dim fn As Footnote = paragraph.AppendFootnote(FootnoteType.Footnote)
			Dim text As TextRange = fn.TextBody.AddParagraph().AppendText("Oscar Wilde (film), a 1960 biographical film about Oscar Wilde")
			text.CharacterFormat.FontName = "Calibri"
			text.CharacterFormat.FontSize = 11
			text.CharacterFormat.TextColor = Color.Chocolate

			fn.MarkerCharacterFormat.FontName = "Arial"
			fn.MarkerCharacterFormat.FontSize = 14
			fn.MarkerCharacterFormat.Bold = True
			fn.MarkerCharacterFormat.TextColor = Color.Brown

			doc.SaveToFile("AddFootNote.docx", FileFormat.Docx)
			System.Diagnostics.Process.Start("AddFootNote.docx")

		End Sub
	End Class
End Namespace
How to Insert Hyperlink in Excel for WPF Applications
Generally, a hyperlink is a picture or a piece of text which contains a web link that points to another object. The object can be a website, an email address and a file, etc. By clicking on the hyperlink, readers can access the target place quickly and conveniently.
This article demonstrates how to insert hyperlink in excel for WPF Applications by using Spire.XLS for WPF.
Below is the effective screenshot:

In this sample, we added two hyperlinks: one for cell A5, another for cell D13. Now, refer to the following detail steps:
Code snippets:
Use namespace:
using System.Windows;
using Spire.Xls;
Step 1: Initialize a new instance of Workbook class and load the excel document from file, then get its first worksheet.
Workbook workbook = new Workbook();
workbook.LoadFromFile("Vendors Information.xlsx");
Worksheet sheet = workbook.Worksheets[0];
Step 2: In the first worksheet, add hyperlink to cell A5, set its display text as the existing text of cell A5, next set type and address.
HyperLink Link = sheet.HyperLinks.Add(sheet.Range["A5"]);
Link.TextToDisplay = sheet.Range["A5"].Text;
Link.Type = HyperLinkType.Url;
Link.Address = "https://en.wikipedia.org/wiki/Canada";
Step 3: Add a new hyperlink to cell D13 and set its display text, type and address.
HyperLink NewLink = sheet.HyperLinks.Add(sheet.Range["D13"]);
NewLink.TextToDisplay = "https://www.google.com";
NewLink.Type = HyperLinkType.Url;
NewLink.Address = "https://www.google.com";
Step 4: Save and launch the file.
workbook.SaveToFile("Hyperlink.xlsx", ExcelVersion.Version2010);
System.Diagnostics.Process.Start("Hyperlink.xlsx");
Full codes:
private void button1_Click(object sender, RoutedEventArgs e)
{
    Workbook workbook = new Workbook();
    workbook.LoadFromFile("Vendors Information.xlsx");
    Worksheet sheet = workbook.Worksheets[0];

    HyperLink Link = sheet.HyperLinks.Add(sheet.Range["A5"]);
    Link.TextToDisplay = sheet.Range["A5"].Text;
    Link.Type = HyperLinkType.Url;
    Link.Address = "https://en.wikipedia.org/wiki/Canada";

    HyperLink NewLink = sheet.HyperLinks.Add(sheet.Range["D13"]);
    NewLink.TextToDisplay = "https://www.google.com";
    NewLink.Type = HyperLinkType.Url;
    NewLink.Address = "https://www.google.com";

    workbook.SaveToFile("Hyperlink.xlsx", ExcelVersion.Version2010);
    System.Diagnostics.Process.Start("Hyperlink.xlsx");
}
Private Sub button1_Click(sender As Object, e As RoutedEventArgs)
	Dim workbook As New Workbook()
	workbook.LoadFromFile("Vendors Information.xlsx")
	Dim sheet As Worksheet = workbook.Worksheets(0)

	Dim Link As HyperLink = sheet.HyperLinks.Add(sheet.Range("A5"))
	Link.TextToDisplay = sheet.Range("A5").Text
	Link.Type = HyperLinkType.Url
	Link.Address = "https://en.wikipedia.org/wiki/Canada"

	Dim NewLink As HyperLink = sheet.HyperLinks.Add(sheet.Range("D13"))
	NewLink.TextToDisplay = "https://www.google.com"
	NewLink.Type = HyperLinkType.Url
	NewLink.Address = "https://www.google.com"

	workbook.SaveToFile("Hyperlink.xlsx", ExcelVersion.Version2010)
	System.Diagnostics.Process.Start("Hyperlink.xlsx")
End Sub
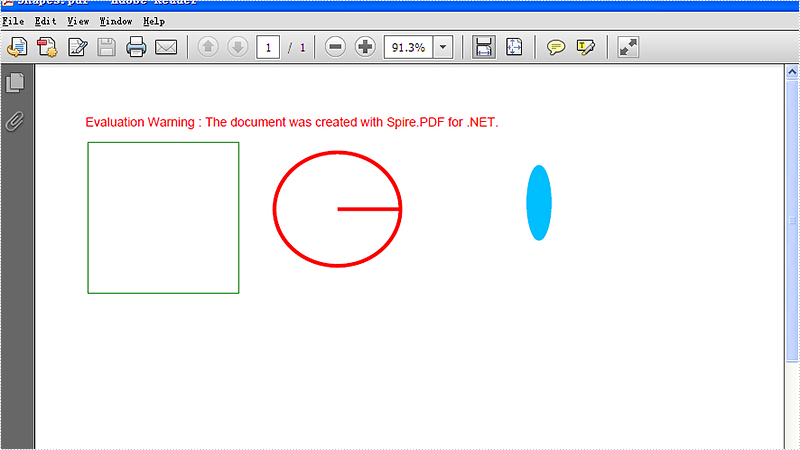
How to add shapes to PDF on WPF applications
We often use shape to the PDF file to make it obvious and show the data clearly. With Spire.PDF for WPF, developers can easily use the object Spire.Pdf.PdfPageBase.Canvas to add different kind of shapes, such as rectangle, circle and Ellipse, etc. This article will demonstrate how to add shapes to PDF in C# on WPF applications.
Note: Before Start, please download the latest version of Spire.PDF and add Spire.Pdf.Wpf.dll in the bin folder as the reference of Visual Studio.
Here comes to the steps of how to add shapes to PDF file in C#:
Step 1: Create a new PDF document and add a page to it.
PdfDocument pdfDoc = new PdfDocument();
PdfPageBase page = pdfDoc.Pages.Add();
Step 2: Save graphics state.
PdfGraphicsState state = page.Canvas.Save();
Step 3: Set the color for the shapes.
PdfPen pen = new PdfPen(System.Drawing.Color.ForestGreen, 0.1f);
PdfPen pen1 = new PdfPen(System.Drawing.Color.Red, 3f);
PdfBrush brush = new PdfSolidBrush(System.Drawing.Color.DeepSkyBlue);
Step 4: Draw shapes and set the position for them.
page.Canvas.DrawRectangle(pen, new System.Drawing.Rectangle(new System.Drawing.Point(2, 22), new System.Drawing.Size(120, 120)));
page.Canvas.DrawPie(pen1, 150, 30, 100, 90, 360, 360);
page.Canvas.DrawEllipse(brush, 350, 40, 20, 60);
Step 5: Restore graphics.
page.Canvas.Restore(state);
Step 6: Save the PDF document to file.
pdfDoc.SaveToFile("Shapes.pdf");
Effective screenshots of the adding shapes to PDF file:
Full codes:
private void button1_Click(object sender, RoutedEventArgs e)
{
    PdfDocument pdfDoc = new PdfDocument();
    PdfPageBase page = pdfDoc.Pages.Add();
    PdfGraphicsState state = page.Canvas.Save();
    PdfPen pen = new PdfPen(System.Drawing.Color.ForestGreen, 0.1f);
    PdfPen pen1 = new PdfPen(System.Drawing.Color.Red, 3f);
    PdfBrush brush = new PdfSolidBrush(System.Drawing.Color.DeepSkyBlue);

    //draw rectangle
    page.Canvas.DrawRectangle(pen, new System.Drawing.Rectangle(new System.Drawing.Point(2, 22), new System.Drawing.Size(120, 120)));
    //draw circle
    page.Canvas.DrawPie(pen1, 150, 30, 100, 90, 360, 360);
    //draw ellipse
    page.Canvas.DrawEllipse(brush, 350, 40, 20, 60);

    page.Canvas.Restore(state);
    pdfDoc.SaveToFile("Shapes.pdf");
}
Encrypt Workbook or Worksheet with Password in WPF
The simplest and most efficient way to keep your Excel file confidential is to encrypt the whole workbook or the specified worksheet with password. Apart from setting a password for your document, you could also choose whether to protect workbook structure or protect worksheet with a certain protection type.
In this article, I am going to introduce how to password protect a workbook or a worksheet as well as set specified permissions to control what types of changes people can make to this workbook using Spire.XLS for WPF.
Code Snippets:
Step 1: Initialize a new instance of workbook class and load an existing Excel file.
Workbook wb = new Workbook();
wb.LoadFromFile("sample.xlsx", ExcelVersion.Version2013);
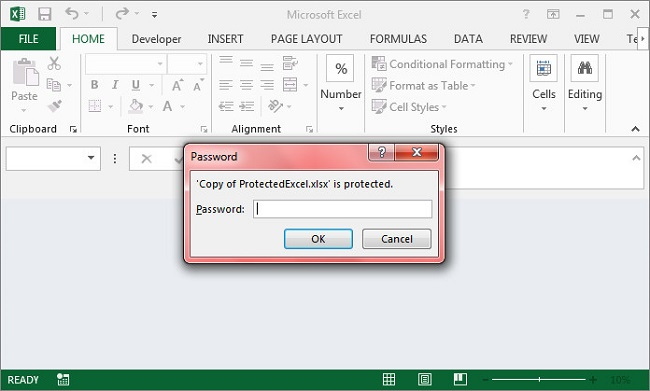
Step 2: Call Workbook.Protect(string passwordToOpen, bool bIsProtectWindow, bool bIsProtectContent) to protect the workbook with password and also protect the workbook window and structure.
wb.Protect("password-1",true,true);
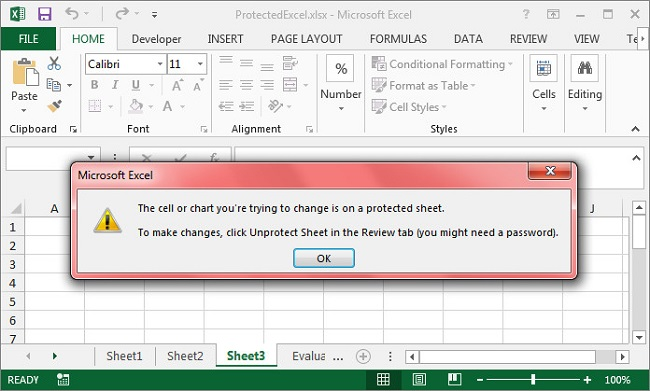
Step 3: Get the third worksheet from workbook, call protect method of XlsWorksheetBase class to encrypt the sheet with password and set the protection type as None which represents no changes are allowed in the protected sheet. Besides None, there are 17 others in SheetProtectionType enum that can help you to set different permissions to command what users can do to this worksheet.
Worksheet sheet = wb.Worksheets[2];
sheet.Protect("password-2", SheetProtectionType.None);
Step 4: Save and launch the file.
wb.SaveToFile("ProtectedExcel.xlsx");
System.Diagnostics.Process.Start("ProtectedExcel.xlsx");
Output:
Protect Workbook
Protect Worksheet
Full Code:
using Spire.Xls;
using System.Windows;

namespace WpfApplication1
{
    public partial class MainWindow : Window
    {
        public MainWindow()
        {
            InitializeComponent();
        }
        private void button1_Click(object sender, RoutedEventArgs e)
        {
            Workbook wb = new Workbook();
            wb.LoadFromFile("sample.xlsx", ExcelVersion.Version2013);

            wb.Protect("password-1", true, true);
            Worksheet sheet = wb.Worksheets[2];
            sheet.Protect("password-2", SheetProtectionType.None);

            wb.SaveToFile("ProtectedExcel.xlsx");
            System.Diagnostics.Process.Start("ProtectedExcel.xlsx");

        }
    }
}
Imports Spire.Xls
Imports System.Windows

Namespace WpfApplication1
	Public Partial Class MainWindow
		Inherits Window
		Public Sub New()
			InitializeComponent()
		End Sub
		Private Sub button1_Click(sender As Object, e As RoutedEventArgs)
			Dim wb As New Workbook()
			wb.LoadFromFile("sample.xlsx", ExcelVersion.Version2013)

			wb.Protect("password-1", True, True)
			Dim sheet As Worksheet = wb.Worksheets(2)
			sheet.Protect("password-2", SheetProtectionType.None)

			wb.SaveToFile("ProtectedExcel.xlsx")
			System.Diagnostics.Process.Start("ProtectedExcel.xlsx")

		End Sub
	End Class
End Namespace
Convert worksheet to PDF in C#, VB.NET
We have discussed before about converting workbook to PDF. However, in this section, we will show you a neat solution to convert the specific worksheet to PDF with C# and VB.NET in workbook. Apply Spire.Xls for .NET in your application and you can turn worksheet into PDF easily without changing the layout of worksheet.
In the following sections, we will demonstrate how to convert worksheet to PDF.
Step 1: Initialize a new instance of Workbook class and load the sample Excel file.
Workbook workbook = new Workbook();
workbook.LoadFromFile("Sample.xlsx");
Step 2: Get its first worksheet.
Worksheet sheet = workbook.Worksheets[0];
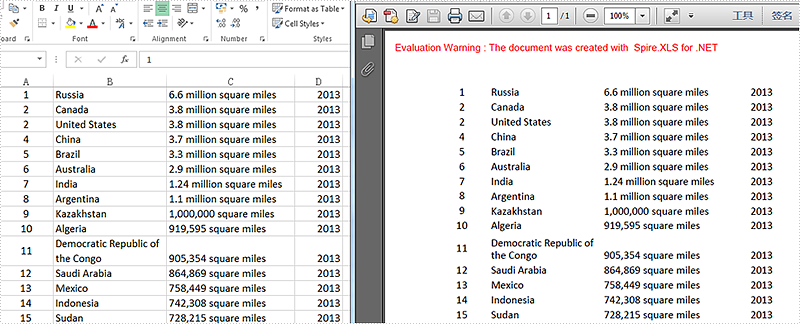
Step 3: Convert the selected worksheet to PDF and save to file.
sheet.SaveToPdf("toPDF.pdf");
Step 4: Launch the file.
System.Diagnostics.Process.Start("toPDF.pdf");
Effective screenshot:
Full codes:
using Spire.Xls;

namespace Excel_Worksheet_to_PDF
{
    class Program
    {
        static void Main(string[] args)
        {
            Workbook workbook = new Workbook();
            workbook.LoadFromFile("Sample.xlsx");

            Worksheet sheet = workbook.Worksheets[0];

            sheet.SaveToPdf("toPDF.pdf");
            System.Diagnostics.Process.Start("toPDF.pdf");
        }
    }
}
Imports Spire.Xls

Namespace Excel_Worksheet_to_PDF
	Class Program
		Private Shared Sub Main(args As String())
			Dim workbook As New Workbook()
			workbook.LoadFromFile("Sample.xlsx")

			Dim sheet As Worksheet = workbook.Worksheets(0)

			sheet.SaveToPdf("toPDF.pdf")
			System.Diagnostics.Process.Start("toPDF.pdf")
		End Sub
	End Class
End Namespace
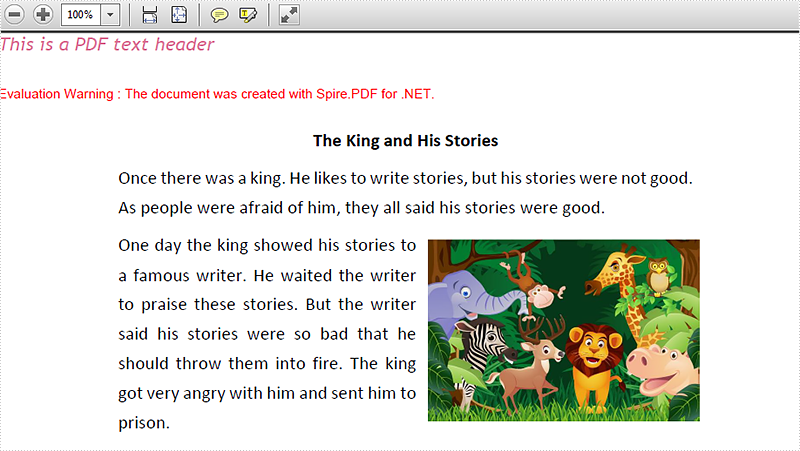
How to Insert Word Bookmark in WPF
In Word, bookmark is used for positioning, it enables readers to return to the read or modified location quickly. Thus, it would be necessary for us to insert a bookmark when we are editing or reading a long word document, so that next time we can get back to the specific location in a short period.
This article will demonstrate how to insert word bookmark in WPF by using Spire.Doc for WPF.
At first, please download Spire.Doc and install it correctly, then add Spire.Doc.Wpf.dll and Spire.License.dll from the installation folder as reference.
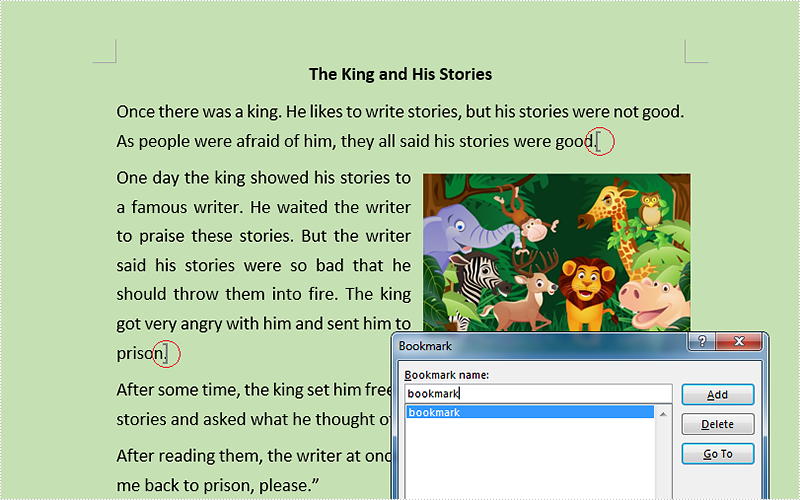
This is the effective screenshot after inserting bookmark:
Now, follow the Detail steps below:
Use namespace:
using System.Windows;
using Spire.Doc;
Step 1: Initialize a new instance of the Document class and load the word document from file.
Document document = new Document();
document.LoadFromFile("Stories.docx");
Step 2: Get its first section and insert bookmark starts from the end of the second paragraph and ends to the third paragraph.
Section section = document.Sections[0];
section.Paragraphs[1].AppendBookmarkStart("bookmark");
section.Paragraphs[2].AppendBookmarkEnd("bookmark");
Step 3: Save and launch the file.
document.SaveToFile("Bookmark.docx", FileFormat.Docx);
System.Diagnostics.Process.Start("Bookmark.docx");
Full codes:
using Spire.Doc;
using System.Windows;

namespace WpfApplication1
{
    public partial class MainWindow : Window
    {
        public MainWindow()
        {
            InitializeComponent();
        }
        private void button1_Click(object sender, RoutedEventArgs e)
        {
            Document document = new Document();
            document.LoadFromFile("Stories.docx");

            Section section = document.Sections[0];
            section.Paragraphs[1].AppendBookmarkStart("bookmark");
            section.Paragraphs[2].AppendBookmarkEnd("bookmark");

            document.SaveToFile("Bookmark.docx", FileFormat.Docx);
            System.Diagnostics.Process.Start("Bookmark.docx");
        }


    }
}