
Document Operation (15)
Python: Detect and Remove VBA Macros in Word Documents
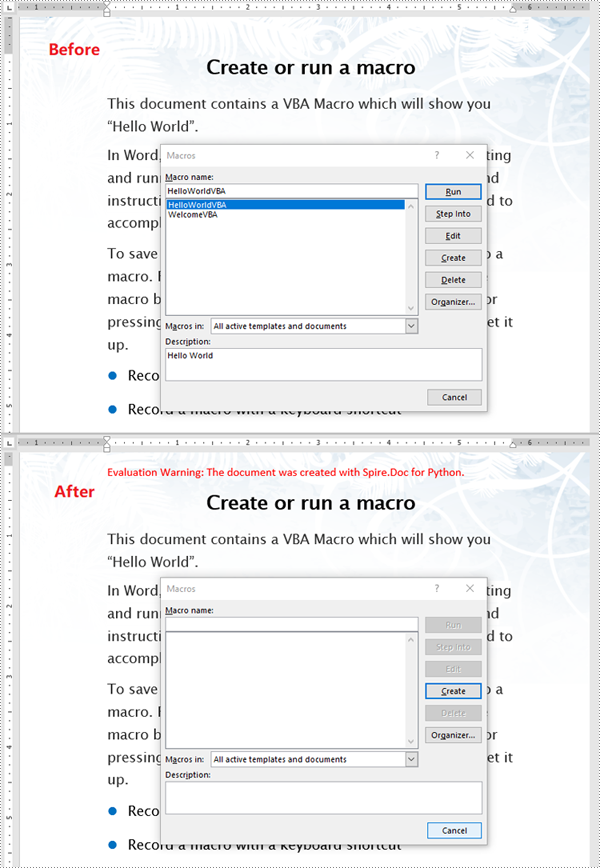
2024-10-23 01:01:00 Written by support iceblueMacros in Word documents are small programs created using the Visual Basic for Applications (VBA) language. They are designed to automate repetitive tasks or add advanced functionality. While these macros can be powerful tools for improving productivity, they also pose security risks if used maliciously. Therefore, it is essential to detect and remove potentially harmful macros from Word documents, especially when handling files from untrusted sources. In this article, we will explain how to detect and remove VBA macros in Word documents in Python using Spire.Doc for Python.
- Detect Whether a Word Document Contains VBA Macros in Python
- Remove VBA Macros from a Word Document in Python
Install Spire.Doc for Python
This scenario requires Spire.Doc for Python and plum-dispatch v1.7.4. They can be easily installed in your Windows through the following pip command.
pip install Spire.Doc
If you are unsure how to install, please refer to this tutorial: How to Install Spire.Doc for Python on Windows
Detect Whether a Word Document Contains VBA Macros in Python
Spire.Doc for Python provides the Document.IsContainMacro property, enabling developers to check whether a Word document contains VBA macros easily. This property returns a boolean value: True indicates that the document includes one or more VBA macros, while False indicates that no macros are present in the document.
The following steps explain how to detect whether a Word document contains VBA macros using Spire.Doc for Python:
- Initialize an instance of the Document class.
- Load a Word document using the Document.LoadFromFile() method.
- Detect whether the document includes VBA macros using the Document.IsContainMacro property.
- Python
from spire.doc import *
from spire.doc.common import *

# Initialize an instance of the Document class
document = Document()
# Load a Word document
document.LoadFromFile("Test.docm")

# Detect if the document contains VBA macros
if document.IsContainMacro:
    print("The document contains VBA macros.")
else:
    print("The document does not contain any VBA macros.")

document.Close()

Remove VBA Macros from a Word Document in Python
Developers can remove all macros from a Word document at once by using the Document.ClearMacros() method. The detailed steps are as follows.
- Initialize an instance of the Document class.
- Load a Word document using the Document.LoadFromFile() method.
- Remove all macros from the document using the Document.ClearMacros() method.
- Save the result document using the Document.SaveToFile() method.
- Python
from spire.doc import *
from spire.doc.common import *

# Initialize an instance of the Document class
document = Document()
# Load a Word document
document.LoadFromFile("Test.docm")

# Remove all VBA macros from the document
document.ClearMacros()

# Save the modified document to a docm file
document.SaveToFile("RemoveMacros.docm", FileFormat.Docm2016)
document.Close()
Apply for a Temporary License
If you'd like to remove the evaluation message from the generated documents, or to get rid of the function limitations, please request a 30-day trial license for yourself.
Programmatic editing of Word documents involves using code to alter or modify the contents of these documents. This approach enables automation and customization, making it particularly advantageous for handling large document collections. Through the use of Spire.Doc library, developers can perform a wide range of operations, including text manipulation, formatting changes, and the addition of images or tables.
The following sections will demonstrate how to edit or modify a Word document in Python using Spire.Doc for Python.
- Modify Text in a Word Document
- Change Formatting of Text in a Word Document
- Add New Elements to a Word Document
- Remove Paragraphs from a Word Document
Install Spire.Doc for Python
This scenario requires Spire.Doc for Python and plum-dispatch v1.7.4. They can be easily installed in your Windows through the following pip command.
pip install Spire.Doc
If you are unsure how to install, please refer to this tutorial: How to Install Spire.Doc for Python on Windows
Modify Text in a Word Document in Python
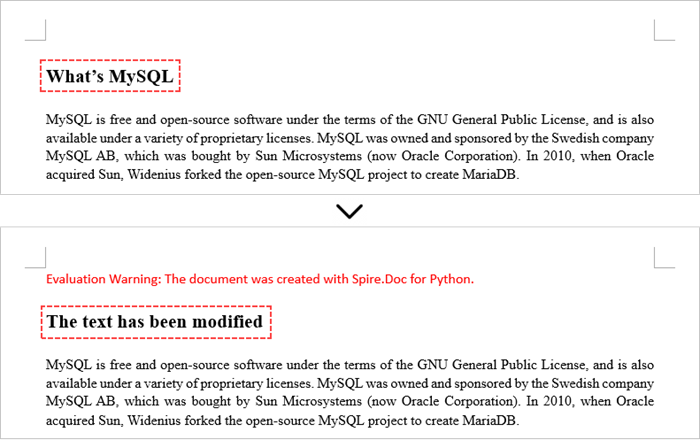
In order to alter the content of a paragraph, the initial step is to obtain the desired paragraph from a specific section through the use of the Section.Paragraphs[index] property. Following this, you can replace the existing text with the new content by assigning it to the Paragraph.Text property of the chosen paragraph.
Here are the steps to edit text in a Word document with Python:
- Create a Document object.
- Load a Word file from the given file path.
- Get a specific section using Document.Sections[index] property.
- Get a specific paragraph using Section.Paragraphs[index] property.
- Reset the text of the paragraph using Paragraph.Text property.
- Save the updated document to a different Word file.
- Python
from spire.doc import *
from spire.doc.common import *

# Create a Document object
document = Document()

# Load an existing Word file
document.LoadFromFile("C:\\Users\\Administrator\\Desktop\\input.docx");

# Get a specific section
section = document.Sections[0]

# Get a specific paragraph
paragraph = section.Paragraphs[0]

# Modify the text of the paragraph
paragraph.Text = "The text has been modified"

# Save the document to a different Word file
document.SaveToFile("output/ModifyText.docx", FileFormat.Docx)

# Dispose resource
document.Dispose()
Change Formatting of Text in a Word Document in Python
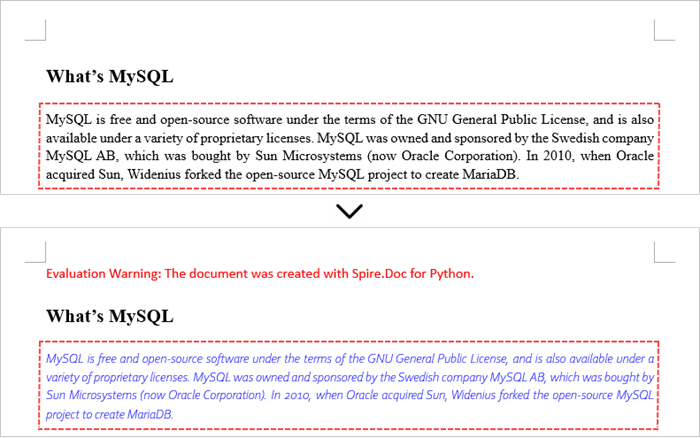
To alter the text appearance of a particular paragraph, you first need to obtain the specified paragraph. Next, go through its child objects to find the individual text ranges. The formatting of each text range can then be updated using the TextRange.CharacterFormat property.
The steps to change text formatting in a Word document are as follows:
- Create a Document object.
- Load a Word file from the given file path.
- Get a specific section using Document.Sections[index] property.
- Get a specific paragraph using Section.Paragraphs[index] property.
- Iterate through the child objects in the paragraph.
- Determine if a child object is a text range.
- Get a specific text range.
- Reset the text formatting using TextRange.CharacterFormat property.
- Save the updated document to a different Word file.
- Python
from spire.doc import *
from spire.doc.common import *

# Create an object of Document
doc = Document()

# Load a Word document
doc.LoadFromFile("C:\\Users\\Administrator\\Desktop\\input.docx")

# Get a specific section
section = doc.Sections[0]

# Get a specific paragraph
paragraph = section.Paragraphs[1];

# Iterate through the child objects in the paragraph
for i in range(paragraph.ChildObjects.Count):

    # Determine if a child object is text range
    if isinstance(paragraph.ChildObjects[i], TextRange):

        # Get a specific text range
        textRange = paragraph.ChildObjects[i]

        # Reset font name
        textRange.CharacterFormat.FontName = "Corbel Light"

        # Reset font size
        textRange.CharacterFormat.FontSize = 11.0

        # Reset text color
        textRange.CharacterFormat.TextColor = Color.get_Blue()

        # Apply italic to the text range
        textRange.CharacterFormat.Italic = True

# Save the document to a different Word file
doc.SaveToFile("output/ChangeFormatting.docx", FileFormat.Docx2019)

# Dispose resource
doc.Dispose()
Add New Elements to a Word Document in Python
In a Word document, most elements—such as text, images, lists, and charts—are fundamentally organized around the concept of a paragraph. To insert a new paragraph into a specific section, use the Section.AddParagraph() method.
After creating the new paragraph, you can add various elements to it by leveraging the methods and properties of the Paragraph object.
The steps to add new elements (text and images) to a Word document are as follows:
- Create a Document object.
- Load a Word file from the given file path.
- Get a specific section through Document.Sections[index] property.
- Add a paragraph to the section using Section.AddParagraph() method.
- Add text to the paragraph using Paragraph.AppendText() method.
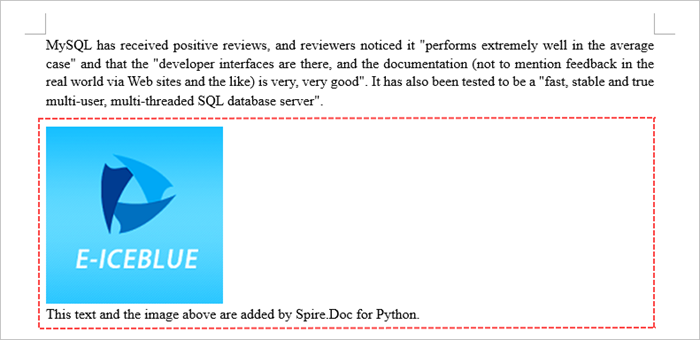
- Add an image to the paragraph using Paragraph.AppendPicture() method.
- Save the updated document to a different Word file.
- Python
from spire.doc import *
from spire.doc.common import *

# Create an object of Document
doc = Document()

# Load a Word document
doc.LoadFromFile("C:\\Users\\Administrator\\Desktop\\Input.docx")

# Get the last section
lastSection = doc.LastSection

# Add a paragraph to the section
paragraph = lastSection.AddParagraph()

# Add an image to the paragraph
picture = paragraph.AppendPicture("C:\\Users\\Administrator\\Desktop\\logo.png");

# Set text wrap style
picture.TextWrappingStyle = TextWrappingStyle.TopAndBottom

# Add text to the paragraph
paragraph.AppendText("This text and the image above are added by Spire.Doc for Python.")

# Create a paragraph style
style = ParagraphStyle(doc)
style.Name = "FontStyle"
style.CharacterFormat.FontName = "Times New Roman"
style.CharacterFormat.FontSize = 12
doc.Styles.Add(style)

# Apply the style to the paragraph
paragraph.ApplyStyle(style.Name)

# Save the document to a different Word file
doc.SaveToFile("output/AddNewElements.docx", FileFormat.Docx2019)

# Dispose resource
doc.Dispose()
Remove Paragraphs from a Word Document in Python
To eliminate a specific paragraph from a document, simply invoke the ParagraphCollection.RemoveAt() method and supply the index of the paragraph you intend to delete.
The steps to remove paragraphs from a Word document are as follows:
- Create a Document object.
- Load a Word file from the given file path.
- Get a specific section through Document.Sections[index] property.
- Remove a specific paragraph from the section using Section.Paragraphs.RemoveAt() method.
- Save the updated document to a different Word file.
- Python
from spire.doc import *
from spire.doc.common import *

# Create an object of Document
doc = Document()

# Load a Word document
doc.LoadFromFile("C:\\Users\\Administrator\\Desktop\\input.docx")

# Get a specific section
section = doc.Sections[0]

# Remove a specific paragraph
section.Paragraphs.RemoveAt(0)

# Save the document to a different Word file
doc.SaveToFile("output/RemoveParagraph.docx", FileFormat.Docx);

# Dispose resource
doc.Dispose()
Apply for a Temporary License
If you'd like to remove the evaluation message from the generated documents, or to get rid of the function limitations, please request a 30-day trial license for yourself.
In Microsoft Word, adding, adjusting, and removing page borders is an effective strategy to enhance the aesthetics and professionalism of your documents. The inclusion of borders can lend a page a more refined and dignified appearance, particularly suitable for formal contexts such as reports, certificates, or invitations, conveying a sense of meticulous elegance. By customizing the color, pattern, and thickness of borders, users can ingeniously integrate personal creativity according to the document theme, crafting a unique design style that makes the content more captivating. Conversely, opting to remove borders can achieve a streamlined page layout, effectively eliminating unnecessary visual clutter—a practice especially fitting for those pursuing minimalist aesthetics or aiming to save on printing costs. This article will introduce how to add, modify, or remove Word page borders in Python projects using Spire.Doc for Python.
Install Spire.Doc for Python
This scenario requires Spire.Doc for Python and plum-dispatch v1.7.4. They can be easily installed in your VS Code through the following pip command.
pip install Spire.Doc
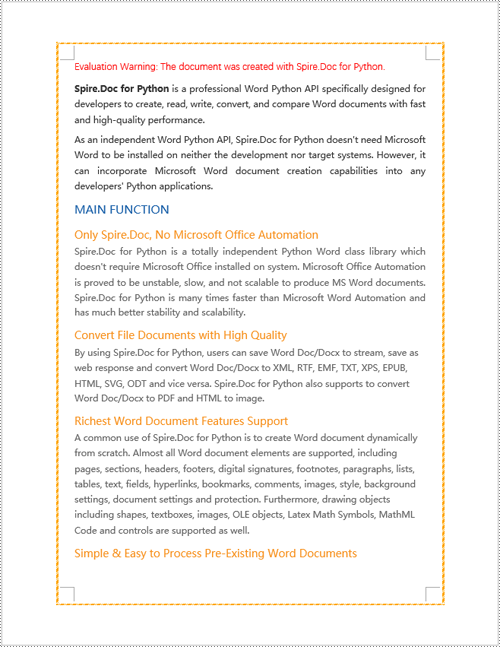
Python Add Word Page Borders
When setting page borders in a Word document using the Spire.Doc library, you can achieve this by invoking the Section.PageSetup.Borders property. Here are the detailed steps:
- Create a Document object.
- Load a document using the Document.LoadFromFile() method.
- Use a for loop to iterate through each section (Section) in the document.
- Apply borders to all pages by setting the Section.PageSetup.PageBordersApplyType property to PageBordersApplyType.AllPages.
- Set the page border style using the Secton.PageSetup.Borders.BorderType(BorderStyle.DashDotStroker) method.
- Define the border width using the Section.PageSetup.Borders.LineWidth(2) method.
- Set the border color using the Section.PageSetup.Borders.Color(Color.get_Orange()) method.
- Set the distance between the border and the page content using the Section.PageSetup.Borders.Top.Space, Bottom.Space, Left.Space, and Right.Space properties.
- Save the changes to a Word document using the Document.SaveToFile() method.
- Python
from spire.doc import *
from spire.doc.common import *

# Create a Document object
doc = Document()

# Load an existing Word document
doc.LoadFromFile("Sample01.docx")

# Iterate through all sections in the document
for i in range(doc.Sections.Count):
    # Set borders for all pages in the current section
    doc.Sections.get_Item(i).PageSetup.PageBordersApplyType = PageBordersApplyType.AllPages

    # Set border style
    doc.Sections.get_Item(i).PageSetup.Borders.BorderType(BorderStyle.DashDotStroker)

    # Set border width
    doc.Sections.get_Item(i).PageSetup.Borders.LineWidth(2)

    # Set border color
    doc.Sections.get_Item(i).PageSetup.Borders.Color(Color.get_Orange())

    # Set the distance between the top border and page content
    doc.Sections.get_Item(i).PageSetup.Borders.Top.Space = 20.0

    # Set the distance between the bottom border and page content
    doc.Sections.get_Item(i).PageSetup.Borders.Bottom.Space = 20.0

    # Set the distance between the left border and page content
    doc.Sections.get_Item(i).PageSetup.Borders.Left.Space = 20.0

    # Set the distance between the right border and page content
    doc.Sections.get_Item(i).PageSetup.Borders.Right.Space = 20.0

# Save the modified document to a new file
doc.SaveToFile("AddWordPageBorders.docx", FileFormat.Docx)

# Release resources used by the Document object
doc.Dispose()
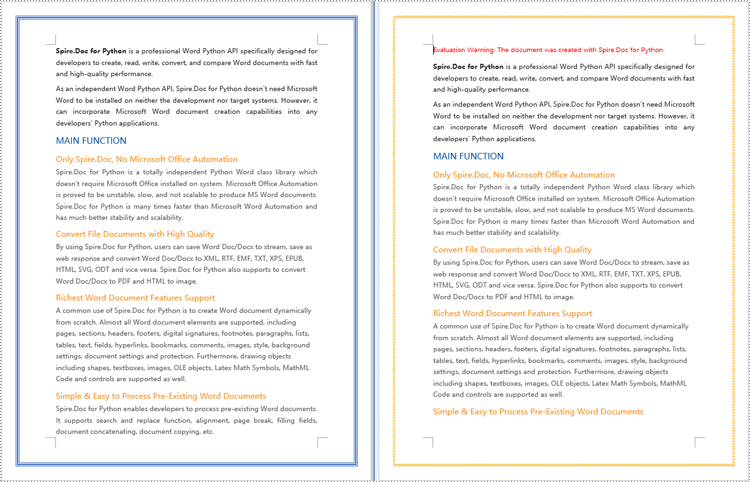
Python Modify Word Page Borders
Leveraging the Spire.Doc library, we can extensively customize the page borders in Word documents, including the style, hue, width, and other visual attributes of the borders. By tweaking these properties, achieving the desired visual presentation becomes effortless. Here are the detailed steps:
- Create a Document object.
- Load a document using the Document.LoadFromFile() method.
- Retrieve the first section of the document using Document.Sections.get_Item(0).
- Alter the page border style using the Section.PageSetup.Borders.BorderType(BorderStyle.DoubleWave) method.
- Change the color of the page border with the Section.PageSetup.Borders.Color(Color.get_Orange()) method.
- Adjust the width of the page border through the Section.PageSetup.Borders.LineWidth(2) method.
- Save the changes to a Word document using the Document.SaveToFile() method.
- Python
from spire.doc import *
from spire.doc.common import *

# Create a Document object
doc = Document()

# Load an existing Word document
doc.LoadFromFile("Sample02.docx")

# Get the first section
section = doc.Sections.get_Item(0)

# Set border style
section.PageSetup.Borders.BorderType(BorderStyle.DoubleWave)

# Set border color
section.PageSetup.Borders.Color(Color.get_Orange())

# Set border width
section.PageSetup.Borders.LineWidth(2)

# Save the modified document to a new file
doc.SaveToFile("ModifyWordPageBorders.docx", FileFormat.Docx)

# Release resources occupied by the Document object
doc.Dispose()
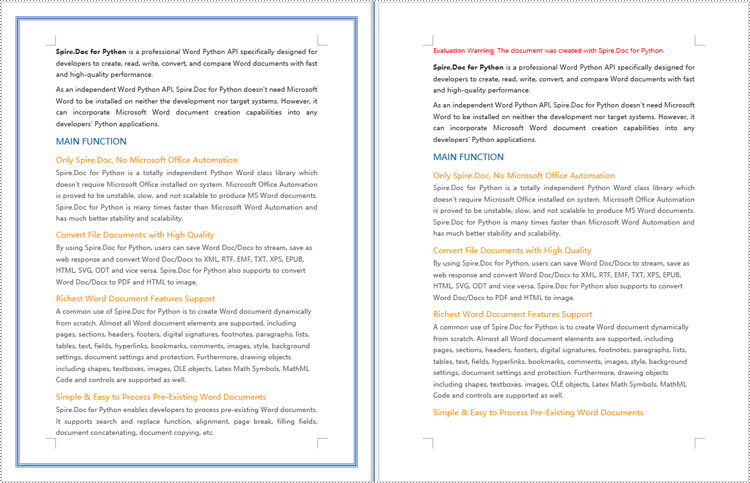
Python Remove Word Page Borders
To remove page borders in Word, you can use the Section.PageSetup.Borders.BorderType(BorderStyle.none) method. Here are the detailed steps:
- Create a Document object.
- Load a document using the Document.LoadFromFile() method.
- Use a for loop to iterate through each section (Section) in the document.
- Apply the Section.PageSetup.Borders.BorderType(BorderStyle.none) method to remove the page borders.
- Save the document using the Document.SaveToFile() method.
- Python
from spire.doc import *
from spire.doc.common import *

# Create a Document object
doc = Document()

# Load an existing Word document
doc.LoadFromFile("Sample02.docx")

# Iterate through all sections in the document
for i in range(doc.Sections.Count):
    # Remove page borders
    doc.Sections.get_Item(i).PageSetup.Borders.BorderType(BorderStyle.none)

# Save the modified document to a new file
doc.SaveToFile("RemoveWordPageBorders.docx", FileFormat.Docx)

# Release the resources occupied by the Document object
doc.Dispose()
Apply for a Temporary License
If you'd like to remove the evaluation message from the generated documents, or to get rid of the function limitations, please request a 30-day trial license for yourself.
Python: Count Words, Pages, Characters, Paragraphs and Lines in Word
2024-06-17 01:10:38 Written by support iceblueVarious written documents, such as academic papers, reports, and legal materials, often have specific formatting guidelines that encompass word count, page count, and other essential metrics. Accurately measuring these elements is crucial as it ensures that your document adheres to the required standards and meets the expected quality benchmarks. In this article, we will explain how to count words, pages, characters, paragraphs, and lines in a Word document in Python using Spire.Doc for Python.
- Count Words, Pages, Characters, Paragraphs, and Lines in a Word Document in Python
- Count Words and Characters in a Specific Paragraph of a Word Document in Python
Install Spire.Doc for Python
This scenario requires Spire.Doc for Python. It can be easily installed in your Windows through the following pip commands.
pip install Spire.Doc
If you are unsure how to install, please refer to: How to Install Spire.Doc for Python on Windows
Count Words, Pages, Characters, Paragraphs, and Lines in a Word Document in Python
Spire.Doc for Python offers the BuiltinDocumentProperties class that empowers you to retrieve crucial information from your Word document. By utilizing this class, you can access a wealth of details, including the built-in document properties, as well as the number of words, pages, characters, paragraphs, and lines contained within the document.
The steps below explain how to get the number of words, pages, characters, paragraphs, and lines in a Word document in Python using Spire.Doc for Python:
- Create an object of the Document class.
- Load a Word document using the Document.LoadFromFile() method.
- Get the BuiltinDocumentProperties object using the Document.BuiltinDocumentProperties property.
- Get the number of words, characters, paragraphs, lines, and pages in the document using the WordCount, CharCount, ParagraphCount, LinesCount, PageCount properties of the BuiltinDocumentProperties class, and append the result to a list.
- Write the content of the list into a text file.
- Python
from spire.doc import *
from spire.doc.common import *

# Create an object of the Document class
doc = Document()
# Load a Word document
doc = Document("Input.docx")

# Create a list
sb = []

# Get the built-in properties of the document
properties = doc.BuiltinDocumentProperties

# Get the number of words, characters, paragraphs, lines, and pages and append the result to the list
sb.append("The number of words: " + str(properties.WordCount))
sb.append("The number of characters: " + str(properties.CharCount))
sb.append("The number of paragraphs: " + str(properties.ParagraphCount))
sb.append("The number of lines: " + str(properties.LinesCount))
sb.append("The number of pages: " + str(properties.PageCount))

# Save the data in the list to a text file
with open("result.txt", "w") as file:
file.write("\n".join(sb))

doc.Close()

Count Words and Characters in a Specific Paragraph of a Word Document in Python
In addition to retrieving the overall word count, page count, and other metrics for an entire Word document, you are also able to get the word count and character count for a specific paragraph by using the Paragraph.WordCount and Paragraph.CharCount properties.
The steps below explain how to get the number of words and characters of a paragraph in a Word document in Python using Spire.Doc for Python:
- Create an object of the Document class.
- Load a Word document using the Document.LoadFromFile() method.
- Get a specific paragraph using the Document.Sections[sectionIndex].Paragraphs[paragraphIndex] property.
- Get the number of words and characters in the paragraph using the Paragraph.WordCount and Paragraph.CharCount properties, and append the result to a list.
- Write the content of the list into a text file.
- Python
from spire.doc import *
from spire.doc.common import *

# Create an object of the Document class
doc = Document()
# Load a Word document
doc = Document("Input.docx")

# Get a specific paragraph
paragraph = doc.Sections[0].Paragraphs[0]

# Create a list
sb = []

# Get the number of words and characters in the paragraph and append the result to the list
sb.append("The number of words: " + str(paragraph.WordCount))
sb.append("The number of characters: " + str(paragraph.CharCount))

# Save the data in the list to a text file
with open("result.txt", "w") as file:
file.write("\n".join(sb))

doc.Close()

Apply for a Temporary License
If you'd like to remove the evaluation message from the generated documents, or to get rid of the function limitations, please request a 30-day trial license for yourself.
Python: Add, Count, Retrieve and Remove Word Variables
2024-06-13 06:38:34 Written by support iceblueWhen dealing with a large volume of customized documents such as contracts, reports, or personal letters, the variable feature in Word documents becomes crucial. Variables allow you to store and reuse information like dates, names, or product details, making the documents more personalized and dynamic. This article will delve into how to use Spire.Doc for Python to insert, count, retrieve, and delete variables in Word documents, enhancing the efficiency and flexibility of document management.
- Add Variables into Word Documents
- Count the Number of Variables in a Word Document
- Retrieve Variables from a Word Document
- Delete Variables from a Word Document
Install Spire.Doc for Python
This scenario requires Spire.Doc for Python and plum-dispatch v1.7.4. They can be easily installed in your Window through the following pip command.
pip install Spire.Doc
If you are unsure how to install, please refer to this tutorial: How to Install Spire.Doc for Python on Window
Add Variables into Word Documents with Python
The way Word variables work is based on the concept of "fields". When you insert a variable into a Word document, what you're actually doing is inserting a field, which points to a value stored either in the document properties or an external data source. Upon updating the fields, Word recalculates them to display the most current information.
Spire.Doc for Python offers the VariableCollection.Add(name, value) method to insert variables into Word documents. Here are the detailed steps:
- Create a Document object.
- Call the Document.AddSection() method to create a new section.
- Call the Section.AddParagraph() method to create a new paragraph.
- Call the Paragraph.AppendField(fieldName, fieldType) method to add a variable field (FieldDocVariable) within the paragraph.
- Set Document.IsUpdateFields to True to update the fields.
- Save the document by Document.SaveToFile() method.
- Python
from spire.doc import *

# Create a Document object
document = Document()

# Add a new section to the document
section = document.AddSection()

# Add a new paragraph within the newly created section
paragraph = section.AddParagraph()

# Append a FieldDocVariable type field named "CompanyName" to the paragraph
paragraph.AppendField("CompanyName", FieldType.FieldDocVariable)

# Add the variable to the document's variable collection
document.Variables.Add("CompanyName", "E-ICEBLUE")

# Update fields
document.IsUpdateFields = True

# Save the document to a specified path
document.SaveToFile("AddVariable.docx", FileFormat.Docx2016)

# Dispose the document
document.Dispose()
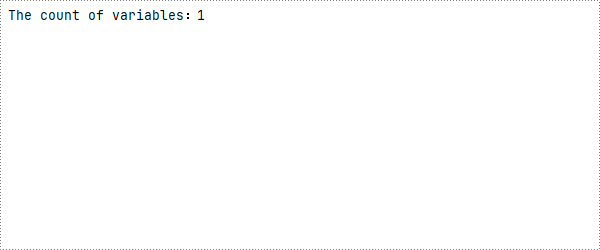
Count the Number of Variables in a Word Document with Python
Here are the detailed steps to use the Document.Variables.Count property to get the number of variables:
- Create a Document object.
- Call the Document.LoadFromFile() method to load the document that contains the variables.
- Use the Document.Variables.Count property to obtain the number of variables.
- Print the count in console.
- Python
from spire.doc import *

# Create a Document object
document = Document()

# Load an existing document
document.LoadFromFile("AddVariable.docx")

# Get the count of variables in the document
count=document.Variables.Count

# Print to console
print(f"The count of variables:{count}")
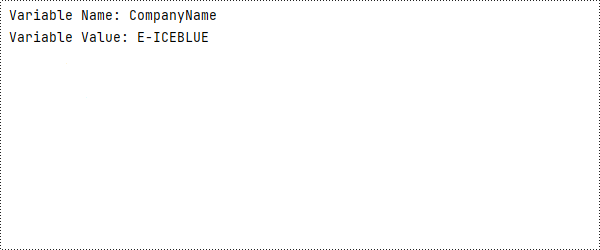
Retrieve Variables from a Word Document with Python
Spire.Doc for Python provides the GetNameByIndex(int index) and GetValueByIndex(int index) methods to retrieve variable names and values by their indices. Below are the detailed steps:
- Create a Document object.
- Call the Document.LoadFromFile() method to load the document that contains the variables.
- Call the Document.Variables.GetNameByIndex(index) method to obtain the variable name.
- Call the Document.Variables.GetValueByIndex(index) method to obtain the variable value.
- Call the Document.Variables.get_Item(name) to obtain variable value through the variable name.
- Print the count in console.
- Python
from spire.doc import *

# Create a Document object
document = Document()

# Load an existing document
document.LoadFromFile("AddVariable.docx")

# Obtain variable name based on index 0
name=document.Variables.GetNameByIndex(0)

# Obtain variable value based on index 0
value=document.Variables.GetValueByIndex(0)

# Obtain variable value through the variable name
value1=document.Variables.get_Item("CompanyName")

# Print to console
print("Variable Name:", name)
print("Variable Value:", value)
Delete Variables from a Word Document with Python
The VariableCollection.Remove(name) method can be used to delete a specified variable from the document, with the parameter being the name of the variable.
- Create a Document object.
- Call the Document.LoadFromFile() method to load the document that contains the variables.
- Call the Document.Variables.Remove(name) method to remove the variable.
- Set Document.IsUpdateFields to True to update the fields.
- Save the document by Document.SaveToFile() method.
- Python
from spire.doc import *

# Create a Document object
document = Document()

# Load an existing document
document.LoadFromFile("AddVariable.docx")

# Remove the variable named "CompanyName"
document.Variables.Remove("CompanyName")

# Update fields
document.IsUpdateFields=True

# Save the document
document.SaveToFile("RemoveVariable.docx",FileFormat.Docx2016)

# Dispose the document
document.Dispose()
Apply for a Temporary License
If you'd like to remove the evaluation message from the generated documents, or to get rid of the function limitations, please request a 30-day trial license for yourself.
With the increasing popularity of team collaboration, the track changes function in Word documents has become the cornerstone of version control and content review. However, for developers who pursue automation and efficiency, how to flexibly extract these revision information from Word documents remains a significant challenge. This article will introduce you to how to use Spire.Doc for Python to obtain revision information in Word documents.
Install Spire.Doc for Python
This scenario requires Spire.Doc for Python and plum-dispatch v1.7.4. They can be easily installed in your Windows through the following pip command.
pip install Spire.Doc
If you are unsure how to install, please refer to this tutorial: How to Install Spire.Doc for Python on Windows
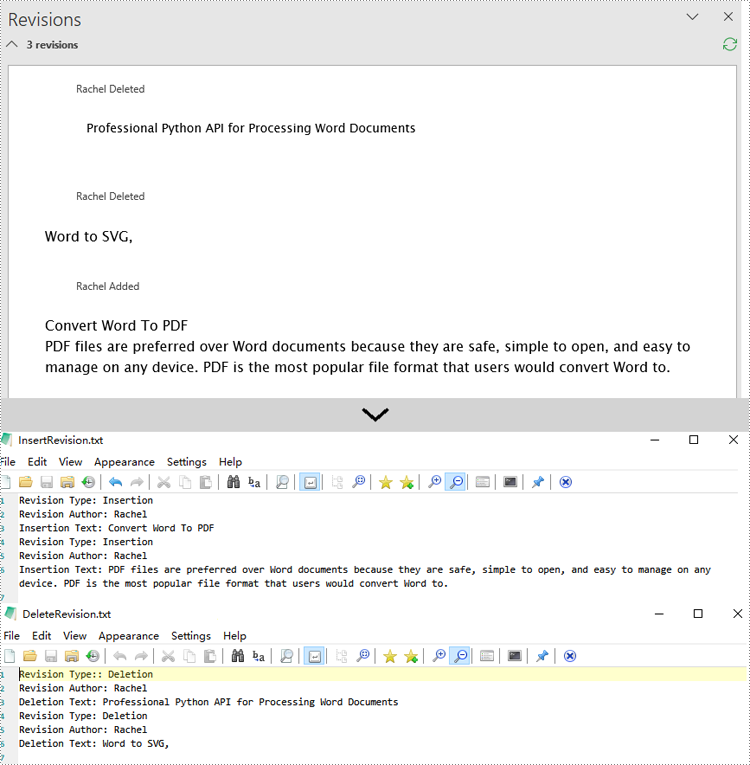
Get Revisions of Word Document in Python
Spire.Doc for Python provides the IsInsertRevision and DeleteRevision properties to support determining whether an element in a Word document is an insertion revision or a deletion revision. Here are the detailed steps:
- Create an instance of the Document class and load the Word document that contains revisions.
- Initialize lists to collect insertion and deletion revision information.
- Iterate through the sections of the document and their body elements.
- Obtain the paragraphs in the body and use the IsInsertRevision property to determine if the paragraph is an insertion revision.
- Get the type, author, and associated text of the insertion revision.
- Use the IsDeleteRevision property to determine if the paragraph is a deletion revision, and obtain its revision type, author, and associated text.
- Iterate through the child elements of the paragraph, similarly checking if the TextRange is an insertion or deletion revision, and retrieve the revision type, author, and associated text.
- Define a WriteAllText function to save the insertion and deletion revision information to TXT documents.
- Python
from spire.doc import *

# Function to write text to a file
def WriteAllText(fname: str, text: str):
    with open(fname, "w", encoding='utf-8') as fp:
        fp.write(text)

# Input and output file names
inputFile = "sample.docx"
outputFile1 = "InsertRevision.txt"
outputFile2 = "DeleteRevision.txt"

# Create a Document object
document = Document()

# Load the Word document
document.LoadFromFile(inputFile)

# Initialize lists to store insert and delete revisions
insert_revisions = []
delete_revisions = []

# Iterate through sections in the document
for k in range(document.Sections.Count):
    sec = document.Sections.get_Item(k)

    # Iterate through body elements in the section
    for m in range(sec.Body.ChildObjects.Count):
        # Check if the item is a Paragraph
        docItem = sec.Body.ChildObjects.get_Item(m)
        if isinstance(docItem, Paragraph):
            para = docItem
            para.AppendField("",FieldType.FieldDocVariable)

            # Check if the paragraph is an insertion revision
            if para.IsInsertRevision:
                insRevison = para.InsertRevision
                insType = insRevison.Type
                insAuthor = insRevison.Author

                # Add insertion revision details to the list
                insert_revisions.append(f"Revision Type: {insType.name}\n")
                insert_revisions.append(f"Revision Author: {insAuthor}\n")
                insert_revisions.append(f"Insertion Text: {para.Text}\n")
            # Check if the paragraph is a deletion revision
            elif para.IsDeleteRevision:
                delRevison = para.DeleteRevision
                delType = delRevison.Type
                delAuthor = delRevison.Author

                # Add deletion revision details to the list
                delete_revisions.append(f"Revision Type:: {delType.name}\n")
                delete_revisions.append(f"Revision Author: {delAuthor}\n")
                delete_revisions.append(f"Deletion Text: {para.Text}\n")
            else:
                # Iterate through all child objects of Paragraph
                for j in range(para.ChildObjects.Count):
                    obj = para.ChildObjects.get_Item(j)
                    # Check if the current object is an instance of TextRange
                    if isinstance(obj, TextRange):
                        textRange = obj

                        # Check if the textrange is an insertion revision
                        if textRange.IsInsertRevision:
                            insRevison = textRange.InsertRevision
                            insType = insRevison.Type
                            insAuthor = insRevison.Author

                            # Add insertion revision details to the list
                            insert_revisions.append(f"Revision Type: {insType.name}\n")
                            insert_revisions.append(f"Revision Author: {insAuthor}\n")
                            insert_revisions.append(f"Insertion Text: {textRange.Text}\n")
                        # Check if the textrange is a deletion revision
                        elif textRange.IsDeleteRevision:
                            delRevison = textRange.DeleteRevision
                            delType = delRevison.Type
                            delAuthor = delRevison.Author

                            # Add deletion revision details to the list
                            delete_revisions.append(f"Revision Type: {delType.name}\n")
                            delete_revisions.append(f"Revision Author: {delAuthor}\n")
                            delete_revisions.append(f"Deletion Text: {textRange.Text}\n")

# Write all the insertion revision details to the 'outputFile1' file
WriteAllText(outputFile1, ''.join(insert_revisions))

# Write all the deletion revision details to the 'outputFile2' file
WriteAllText(outputFile2, ''.join(delete_revisions))

# Dispose the document
document.Dispose()
Apply for a Temporary License
If you'd like to remove the evaluation message from the generated documents, or to get rid of the function limitations, please request a 30-day trial license for yourself.
Python: Create a Table Of Contents for a Newly Created Word Document
2024-05-31 01:00:34 Written by support iceblueCreating a table of contents in a Word document significantly enhances its navigability and readability. It serves as a road map for the document, enabling readers to quickly overview the structure and grasp the content framework. This feature facilitates easy navigation for users to jump to any section within the document, which is particularly valuable for lengthy reports, papers, or manuals. It not only saves readers time in locating information but also augments the professionalism of the document and enhances the user experience. Moreover, a table of contents is easy to maintain and update; following any restructuring of the document, it can be swiftly revised to reflect the latest content organization, ensuring coherence and accuracy throughout the document. This article will demonstrate how to use Spire.Doc for Python to create a table of contents in a newly created Word document within a Python project.
- Python Create a Table Of Contents Using Heading Styles
- Python Create a Table Of Contents Using Outline Level Styles
- Python Create a Table Of Contents Using Image Captions
- Python Create a Table Of Contents Using Table Captions
Install Spire.Doc for Python
This scenario requires Spire.Doc for Python and plum-dispatch v1.7.4. They can be easily installed in your Windows through the following pip command.
pip install Spire.Doc
If you are unsure how to install, please refer to: How to Install Spire.Doc for Python on Windows
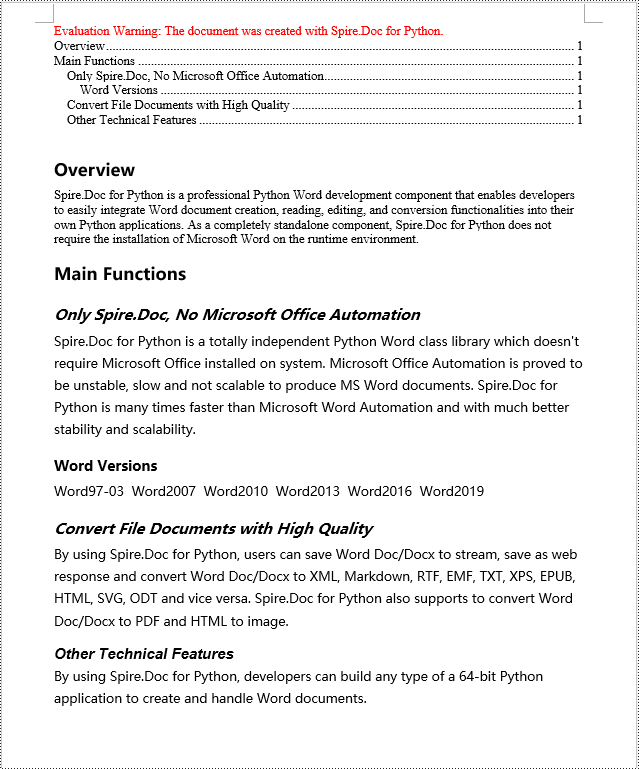
Python Create a Table Of Contents Using Heading Styles
Creating a table of contents using heading styles is a default method in Word documents to automatically generate a table of contents by utilizing different levels of heading styles to mark titles and sub-titles within the document, followed by leveraging Word's table of contents feature to automatically populate the contents. Here are the detailed steps:
- Create a Document object.
- Add a section using the Document.AddSection() method.
- Add a paragraph using the Section.AddParagraph() method.
- Create a table of contents object using the Paragraph.AppendTOC(int lowerLevel, int upperLevel) method.
- Create a CharacterFormat object and set the font.
- Apply a heading style to the paragraph using the Paragraph.ApplyStyle(BuiltinStyle.Heading1) method.
- Add text content using the Paragraph.AppendText() method.
- Apply character formatting to the text using the TextRange.ApplyCharacterFormat() method.
- Update the table of contents using the Document.UpdateTableOfContents() method.
- Save the document using the Document.SaveToFile() method.
- Python
from spire.doc import *
from spire.doc.common import *

# Create a new document object
doc = Document()

# Add a section to the document
section = doc.AddSection()

# Append a Table of Contents (TOC) paragraph
TOC_paragraph = section.AddParagraph()
TOC_paragraph.AppendTOC(1, 3)

# Create and set character format objects for font
character_format1 = CharacterFormat(doc)
character_format1.FontName = "Microsoft YaHei"

character_format2 = CharacterFormat(doc)
character_format2.FontName = "Microsoft YaHei"
character_format2.FontSize = 12

# Add a paragraph with Heading 1 style
paragraph = section.Body.AddParagraph()
paragraph.ApplyStyle(BuiltinStyle.Heading1)

# Add text and apply character formatting
text_range1 = paragraph.AppendText("Overview")
text_range1.ApplyCharacterFormat(character_format1)

# Insert normal content
paragraph = section.Body.AddParagraph()
text_range2 = paragraph.AppendText("Spire.Doc for Python is a professional Python Word development component that enables developers to easily integrate Word document creation, reading, editing, and conversion functionalities into their own Python applications. As a completely standalone component, Spire.Doc for Python does not require the installation of Microsoft Word on the runtime environment.")

# Add a paragraph with Heading 1 style
paragraph = section.Body.AddParagraph()
paragraph.ApplyStyle(BuiltinStyle.Heading1)
text_range1 = paragraph.AppendText("Main Functions")
text_range1.ApplyCharacterFormat(character_format1)

# Add a paragraph with Heading 2 style
paragraph = section.Body.AddParagraph()
paragraph.ApplyStyle(BuiltinStyle.Heading2)
textRange1 = paragraph.AppendText("Only Spire.Doc, No Microsoft Office Automation")
textRange1.ApplyCharacterFormat(character_format1)

# Add regular content
paragraph = section.Body.AddParagraph()
textRange2 = paragraph.AppendText("Spire.Doc for Python is a totally independent Python Word class library which doesn't require Microsoft Office installed on system. Microsoft Office Automation is proved to be unstable, slow and not scalable to produce MS Word documents. Spire.Doc for Python is many times faster than Microsoft Word Automation and with much better stability and scalability.")
textRange2.ApplyCharacterFormat(character_format2)

# Add a paragraph with Heading 3 style
paragraph = section.Body.AddParagraph()
paragraph.ApplyStyle(BuiltinStyle.Heading3)
textRange1 = paragraph.AppendText("Word Versions")
textRange1.ApplyCharacterFormat(character_format1)
paragraph = section.Body.AddParagraph()
textRange2 = paragraph.AppendText("Word97-03  Word2007  Word2010  Word2013  Word2016  Word2019")
textRange2.ApplyCharacterFormat(character_format2)

# Add a paragraph with Heading 2 style
paragraph = section.Body.AddParagraph()
paragraph.ApplyStyle(BuiltinStyle.Heading2)
textRange1 = paragraph.AppendText("Convert File Documents with High Quality")
textRange1.ApplyCharacterFormat(character_format1)

# Add regular content
paragraph = section.Body.AddParagraph()
textRange2 = paragraph.AppendText("By using Spire.Doc for Python, users can save Word Doc/Docx to stream, save as web response and convert Word Doc/Docx to XML, Markdown, RTF, EMF, TXT, XPS, EPUB, HTML, SVG, ODT and vice versa. Spire.Doc for Python also supports to convert Word Doc/Docx to PDF and HTML to image.")
textRange2.ApplyCharacterFormat(character_format2)

# Add a paragraph with Heading 2 style
paragraph = section.Body.AddParagraph()
paragraph.ApplyStyle(BuiltinStyle.Heading2)
extRange1 = paragraph.AppendText("Other Technical Features")
textRange1.ApplyCharacterFormat(character_format1)

# Add regular content
paragraph = section.Body.AddParagraph()
textRange2 = paragraph.AppendText("By using Spire.Doc for Python, developers can build any type of a 64-bit Python application to create and handle Word documents.")
textRange2.ApplyCharacterFormat(character_format2)

# Update the table of contents
doc.UpdateTableOfContents()

# Save the document
doc.SaveToFile("CreateTOCUsingHeadingStyles.docx", FileFormat.Docx2016)

# Release resources
doc.Dispose()
Python Create a Table Of Contents Using Outline Level Styles
In a Word document, you can create a table of contents using outline level styles. You can assign an outline level to a paragraph using the ParagraphFormat.OutlineLevel property. Afterwards, you apply these outline levels to the rules for generating the table of contents using the TableOfContent.SetTOCLevelStyle() method. Here's a detailed steps:
- Create a Document object.
- Add a section using the Document.AddSection() method.
- Create a ParagraphStyle object and set the outline level using ParagraphStyle.ParagraphFormat.OutlineLevel = OutlineLevel.Level1.
- Add the created ParagraphStyle object to the document using the Document.Styles.Add() method.
- Add a paragraph using the Section.AddParagraph() method.
- Create a table of contents object using the Paragraph.AppendTOC(int lowerLevel, int upperLevel) method.
- Set the default setting for creating the table of contents with heading styles to False, TableOfContent.UseHeadingStyles = false.
- Apply the outline level style to the table of contents rules using the TableOfContent.SetTOCLevelStyle(int levelNumber, string styleName) method.
- Create a CharacterFormat object and set the font.
- Apply the style to the paragraph using the Paragraph.ApplyStyle(ParagraphStyle.Name) method.
- Add text content using the Paragraph.AppendText() method.
- Apply character formatting to the text using the TextRange.ApplyCharacterFormat() method.
- Update the table of contents using the Document.UpdateTableOfContents() method.
- Save the document using the Document.SaveToFile() method.
- Python
from spire.doc import *
from spire.doc.common import *

# Create a document object
doc = Document()

# Add a section to the document
section = doc.AddSection()

# Define Outline Level 1
titleStyle1 = ParagraphStyle(doc)
titleStyle1.Name = "T1S"
titleStyle1.ParagraphFormat.OutlineLevel = OutlineLevel.Level1
titleStyle1.CharacterFormat.Bold = True
titleStyle1.CharacterFormat.FontName = "Microsoft YaHei"
titleStyle1.CharacterFormat.FontSize = 18
titleStyle1.ParagraphFormat.HorizontalAlignment = HorizontalAlignment.Left
doc.Styles.Add(titleStyle1)

# Define Outline Level 2
titleStyle2 = ParagraphStyle(doc)
titleStyle2.Name = "T2S"
titleStyle2.ParagraphFormat.OutlineLevel = OutlineLevel.Level2
titleStyle2.CharacterFormat.Bold = True
titleStyle2.CharacterFormat.FontName = "Microsoft YaHei"
titleStyle2.CharacterFormat.FontSize = 16
titleStyle2.ParagraphFormat.HorizontalAlignment = HorizontalAlignment.Left
doc.Styles.Add(titleStyle2)

# Define Outline Level 3
titleStyle3 = ParagraphStyle(doc)
titleStyle3.Name = "T3S"
titleStyle3.ParagraphFormat.OutlineLevel = OutlineLevel.Level3
titleStyle3.CharacterFormat.Bold = True
titleStyle3.CharacterFormat.FontName = "Microsoft YaHei"
titleStyle3.CharacterFormat.FontSize = 14
titleStyle3.ParagraphFormat.HorizontalAlignment = HorizontalAlignment.Left
doc.Styles.Add(titleStyle3)

# Add a paragraph
TOCparagraph = section.AddParagraph()
toc = TOCparagraph.AppendTOC(1, 3)
toc.UseHeadingStyles = False
toc.UseHyperlinks = True
toc.UseTableEntryFields = False
toc.RightAlignPageNumbers = True
toc.SetTOCLevelStyle(1, titleStyle1.Name)
toc.SetTOCLevelStyle(2, titleStyle2.Name)
toc.SetTOCLevelStyle(3, titleStyle3.Name)

# Define character format
characterFormat = CharacterFormat(doc)
characterFormat.FontName = "Microsoft YaHei"
characterFormat.FontSize = 12

# Add a paragraph and apply outline level style 1
paragraph = section.Body.AddParagraph()
paragraph.ApplyStyle(titleStyle1.Name)
paragraph.AppendText("Overview")

# Add a paragraph and set the text content
paragraph = section.Body.AddParagraph()
textRange = paragraph.AppendText("Spire.Doc for Python is a professional Word Python API specifically designed for developers to create, read, write, convert, and compare Word documents with fast and high-quality performance.")
textRange.ApplyCharacterFormat(characterFormat)

# Add a paragraph and apply outline level style 1
paragraph = section.Body.AddParagraph()
paragraph.ApplyStyle(titleStyle1.Name)
paragraph.AppendText("Main Functions")

# Add a paragraph and apply outline level style 2
paragraph = section.Body.AddParagraph()
paragraph.ApplyStyle(titleStyle2.Name)
paragraph.AppendText("Only Spire.Doc, No Microsoft Office Automation")

# Add a paragraph and set the text content
paragraph = section.Body.AddParagraph()
textRange = paragraph.AppendText("Spire.Doc for Python is a totally independent Python Word class library which doesn't require Microsoft Office installed on system. Microsoft Office Automation is proved to be unstable, slow and not scalable to produce MS Word documents. Spire.Doc for Python is many times faster than Microsoft Word Automation and with much better stability and scalability.")
textRange.ApplyCharacterFormat(characterFormat)

# Add a paragraph and apply outline level style 3
paragraph = section.Body.AddParagraph()
paragraph.ApplyStyle(titleStyle3.Name)
paragraph.AppendText("Word Versions")

# Add a paragraph and set the text content
paragraph = section.Body.AddParagraph()
textRange = paragraph.AppendText("Word97-03  Word2007  Word2010  Word2013  Word2016  Word2019")
textRange.ApplyCharacterFormat(characterFormat)

# Add a paragraph and apply outline level style 2
paragraph = section.Body.AddParagraph()
paragraph.ApplyStyle(titleStyle2.Name)
paragraph.AppendText("Convert File Documents with High Quality")

# Add a paragraph and set the text content
paragraph = section.Body.AddParagraph()
textRange = paragraph.AppendText("By using Spire.Doc for Python, users can save Word Doc/Docx to stream, save as web response and convert Word Doc/Docx to XML, RTF, EMF, TXT, XPS, EPUB, HTML, SVG, ODT and vice versa. Spire.Doc for Python also supports to convert Word Doc/Docx to PDF and HTML to image.")
textRange.ApplyCharacterFormat(characterFormat)

# Add a paragraph and apply outline level style 2
paragraph = section.Body.AddParagraph()
paragraph.ApplyStyle(titleStyle2.Name)
paragraph.AppendText("Other Technical Features")

# Add a paragraph and set the text content
paragraph = section.Body.AddParagraph()
textRange = paragraph.AppendText("By using Spire.Doc for Python, developers can build any type of a 64-bit Python application to create and handle Word documents.")
textRange.ApplyCharacterFormat(characterFormat)

# Update the table of contents
doc.UpdateTableOfContents()

# Save the document
doc.SaveToFile("CreateTOCUsingOutlineStyles.docx", FileFormat.Docx2016)

# Release resources
doc.Dispose()

Python Create a Table Of Contents Using Image Captions
Using the Spire.Doc library, you can create a table of contents based on image captions by employing the TableOfContent(Document, "\\h \\z \\c \"Picture\"") method. Below are the detailed steps:
- Create a Document object.
- Add a section using the Document.AddSection() method.
- Create a table of content object with tocForImage = new TableOfContent(Document, " \\h \\z \\c \"Picture\"") and specify the style of the table of contents.
- Add a paragraph using the Section.AddParagraph() method.
- Add the table of content object to the paragraph using the Paragraph.Items.Add(tocForImage) method.
- Add a field separator using the Paragraph.AppendFieldMark(FieldMarkType.FieldSeparator) method.
- Add the text content "TOC" using the Paragraph.AppendText("TOC") method.
- Add a field end mark using the Paragraph.AppendFieldMark(FieldMarkType.FieldEnd) method.
- Add an image using the Paragraph.AppendPicture() method.
- Add a caption paragraph for the image using the DocPicture.AddCaption() method, including product information and formatting.
- Update the table of contents to reflect changes in the document using the Document.UpdateTableOfContents(tocForImage) method.
- Save the document using the Document.SaveToFile() method.
- Python
from spire.doc import *
from spire.doc.common import *

# Create a new document object
doc = Document()

# Add a section to the document
section = doc.AddSection()

# Create a table of content object for images
tocForImage = TableOfContent(doc, " \\h \\z \\c \"Picture\"")

# Add a paragraph to the section
tocParagraph = section.Body.AddParagraph()

# Add the TOC object to the paragraph
tocParagraph.Items.Add(tocForImage)

# Add a field separator
tocParagraph.AppendFieldMark(FieldMarkType.FieldSeparator)

# Add text content
tocParagraph.AppendText("TOC")

# Add a field end mark
tocParagraph.AppendFieldMark(FieldMarkType.FieldEnd)

# Add a blank paragraph to the section
section.Body.AddParagraph()

# Add a paragraph to the section
paragraph = section.Body.AddParagraph()

# Add an image
docPicture = paragraph.AppendPicture("images/DOC-Python.png")
docPicture.Width = 100
docPicture.Height = 100

# Add a caption paragraph for the image
obj = docPicture.AddCaption("Picture",CaptionNumberingFormat.Number,CaptionPosition.BelowItem)

paragraph = (Paragraph)(obj)
paragraph.AppendText("  Spire.Doc for Python product")
paragraph.Format.AfterSpacing = 20

# Continue adding paragraphs to the section
paragraph = section.Body.AddParagraph()
docPicture = paragraph.AppendPicture("images/PDF-Python.png")
docPicture.Width = 100
docPicture.Height = 100
obj = docPicture.AddCaption("Picture",CaptionNumberingFormat.Number,CaptionPosition.BelowItem)
paragraph = (Paragraph)(obj)
paragraph.AppendText("  Spire.PDF for Python product")
paragraph.Format.AfterSpacing = 20

paragraph = section.Body.AddParagraph()
docPicture = paragraph.AppendPicture("images/XLS-Python.png")
docPicture.Width = 100
docPicture.Height = 100
obj = docPicture.AddCaption("Picture",CaptionNumberingFormat.Number,CaptionPosition.BelowItem)
paragraph = (Paragraph)(obj)
paragraph.AppendText("  Spire.XLS for Python product")
paragraph.Format.AfterSpacing = 20

paragraph = section.Body.AddParagraph()
docPicture = paragraph.AppendPicture("images/PPT-Python.png")
docPicture.Width = 100
docPicture.Height = 100
obj = docPicture.AddCaption("Picture",CaptionNumberingFormat.Number,CaptionPosition.BelowItem)
paragraph = (Paragraph)(obj)
paragraph.AppendText("  Spire.Presentation for Python product")
paragraph.Format.AfterSpacing = 20

# Update the table of contents
doc.UpdateTableOfContents(tocForImage)

# Save the document to a file
doc.SaveToFile("CreateTOCWithImageCaptions.docx", FileFormat.Docx2016)

# Dispose of the document object
doc.Dispose()
Python Create a Table Of Contents Using Table Captions
Similarly, you can create a table of contents based on table captions by employing the TableOfContent(Document, " \\h \\z \\c \"Table\"") method. Here are the detailed steps:
- Create a Document object.
- Add a section using the Document.AddSection() method.
- Create a table of content object tocForTable = new TableOfContent(Document, " \\h \\z \\c \"Table\"") and specify the style of the table of contents.
- Add a paragraph using the Section.AddParagraph() method.
- Add the table of content object to the paragraph using the Paragraph.Items.Add(tocForTable) method.
- Add a field separator using the Paragraph.AppendFieldMark(FieldMarkType.FieldSeparator) method.
- Add the text content "TOC" using the Paragraph.AppendText("TOC") method.
- Add a field end mark using the Paragraph.AppendFieldMark(FieldMarkType.FieldEnd) method.
- Add a table using the Section.AddTable() method and set the number of rows and columns using the Table.ResetCells(int rowsNum, int columnsNum) method.
- Add a table caption paragraph using the Table.AddCaption() method, including product information and formatting.
- Update the table of contents to reflect changes in the document using the Document.UpdateTableOfContents(tocForTable) method.
- Save the document using the Document.SaveToFile() method.
- Python
from spire.doc import *
from spire.doc.common import *

# Create a new document
doc = Document()

# Add a section to the document
section = doc.AddSection()

# Create a TableOfContent object
tocForTable = TableOfContent(doc,  " \\h \\z \\c \"Table\"")

# Add a paragraph in the section to place the TableOfContent object
tocParagraph = section.Body.AddParagraph()
tocParagraph.Items.Add(tocForTable)
tocParagraph.AppendFieldMark(FieldMarkType.FieldSeparator)
tocParagraph.AppendText("TOC")
tocParagraph.AppendFieldMark(FieldMarkType.FieldEnd)

# Add two empty paragraphs in the section
section.Body.AddParagraph()
section.Body.AddParagraph()

# Add a table in the section
table = section.Body.AddTable(True)
table.ResetCells(1, 3)

# Add a caption paragraph for the table
obj = table.AddCaption("Table", CaptionNumberingFormat.Number, CaptionPosition.BelowItem)
paragraph = (Paragraph)(obj)
paragraph.AppendText(" One row three columns")
paragraph.Format.AfterSpacing = 20

# Add a new table in the section
table = section.Body.AddTable(True)
table.ResetCells(3, 3)

# Add a caption paragraph for the second table
obj = table.AddCaption("Table", CaptionNumberingFormat.Number, CaptionPosition.BelowItem)
paragraph = (Paragraph)(obj)
paragraph.AppendText(" Three rows three columns")
paragraph.Format.AfterSpacing = 20

# Add another new table in the section
table = section.Body.AddTable(True)
table.ResetCells(5, 3)

# Add a caption paragraph for the third table
obj = table.AddCaption("Table", CaptionNumberingFormat.Number, CaptionPosition.BelowItem)
paragraph = (Paragraph)(obj)
paragraph.AppendText(" Five rows three columns")
paragraph.Format.AfterSpacing = 20

# Update the table of contents
doc.UpdateTableOfContents(tocForTable)

# Save the document to a specified file
doc.SaveToFile("CreateTOCUsingTableCaptions.docx", FileFormat.Docx2016)

# Dispose resources
doc.Dispose()
Apply for a Temporary License
If you'd like to remove the evaluation message from the generated documents, or to get rid of the function limitations, please request a 30-day trial license for yourself.
Python: Add, Read, and Remove Built-in Document Properties in Word Documents
2024-05-16 01:17:49 Written by support iceblueWord documents often contain metadata known as document properties, which include information like title, author, subject, and keywords. Manipulating these properties is invaluable for maintaining organized documentation, enhancing searchability, and ensuring proper attribution in collaborative environments. With Spire.Doc for Python, developers can automate the tasks of adding, reading, and removing document properties in Word documents to streamline document management workflows and enable the integration of these processes into larger automated systems. This article provides detailed steps and code examples that demonstrate how to utilize Spire.Doc for Python to effectively manage document properties within Word files.
- Add Built-in Document Properties to Word Documents with Python
- Read Built-in Document Properties from Word Documents with Python
- Remove Built-in Document Properties from Word Documents with Python
Install Spire.Doc for Python
This scenario requires Spire.Doc for Python and plum-dispatch v1.7.4. They can be easily installed in your Windows through the following pip commands.
pip install Spire.Doc
If you are unsure how to install, please refer to: How to Install Spire.Doc for Python on Windows
Add Built-in Document Properties to Word Documents with Python
Spire.Doc for Python provides developers with the Document.BuiltinDocumentProperties property to access the built-in properties of Word documents. The value of these properties can be set using the corresponding properties under the BuiltinDocumentProperties class.
The following steps show how to add the main built-in properties in Word documents:
- Create an object of Document class.
- Load a Word document using Document.LoadFromFile() method.
- Get the built-in properties through Document.BuiltinDocumentProperties property.
- Add values to the properties with properties under BuiltinDocumentProperties property.
- Save the document using Document.SaveToFile() method.
- Python
from spire.doc import *
from spire.doc.common import *
# Create an object of Document
doc = Document()
# Load a Word document
doc.LoadFromFile("Sample.docx")
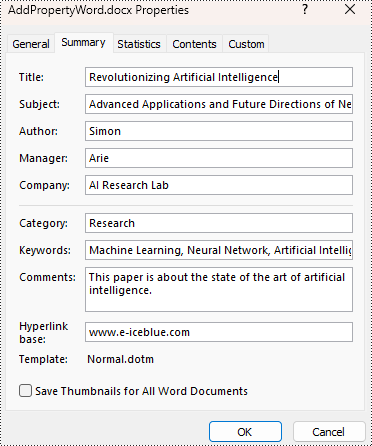
# Set the built-in property
builtinProperty = doc.BuiltinDocumentProperties
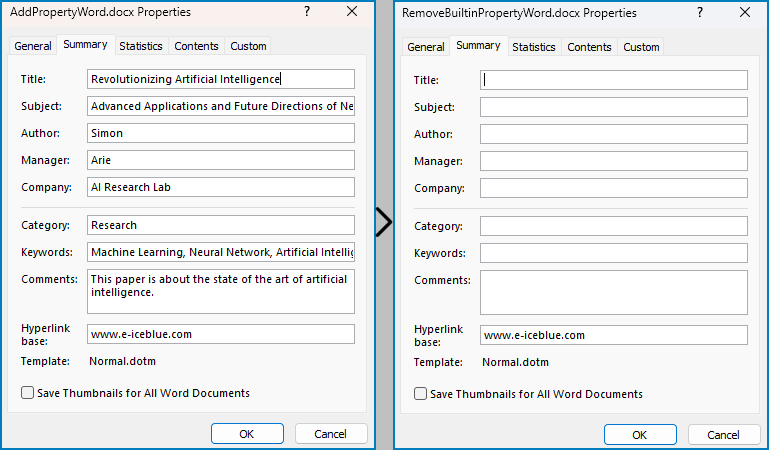
builtinProperty.Title = "Revolutionizing Artificial Intelligence"
builtinProperty.Subject = "Advanced Applications and Future Directions of Neural Networks in Artificial Intelligence"
builtinProperty.Author = "Simon"
builtinProperty.Manager = "Arie"
builtinProperty.Company = "AI Research Lab"
builtinProperty.Category = "Research"
builtinProperty.Keywords = "Machine Learning, Neural Network, Artificial Intelligence"
builtinProperty.Comments = "This paper is about the state of the art of artificial intelligence."
builtinProperty.HyperLinkBase = "www.e-iceblue.com"
# Save the document
doc.SaveToFile("output/AddPropertyWord.docx", FileFormat.Docx2019)
doc.Close()
Read Built-in Document Properties from Word Documents with Python
Besides adding values, the properties under the BuiltinDocumentProperties class also empower developers to read existing built-in properties of Word documents. This enables various functionalities like document search, information extraction, and document analysis.
The detailed steps for reading document built-in properties using Spire.Doc for Python are as follows:
- Create an object of Document class.
- Load a Word document using Document.LoadFromFile() method.
- Get the built-in properties of Document using Document.BuiltinDocumentProperties property.
- Get the value of the properties using properties under BuiltinDocumentProperties class.
- Output the built-in properties of the document.
- Python
from spire.doc import *
from spire.doc.common import *
# Create an object of Document
doc = Document()
# Load a Word document
doc.LoadFromFile("output/AddPropertyWord.docx")
# Get the built-in properties of the document
builtinProperties = doc.BuiltinDocumentProperties
# Get the value of the built-in properties
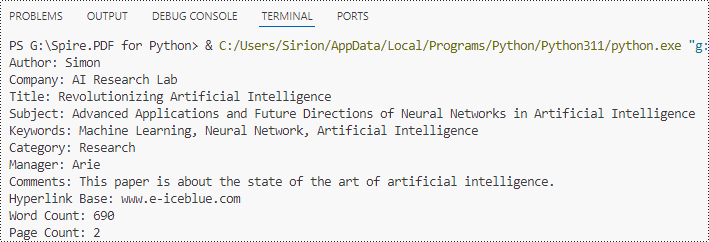
properties = [
"Author: " + builtinProperties.Author,
"Company: " + builtinProperties.Company,
"Title: " + builtinProperties.Title,
"Subject: " + builtinProperties.Subject,
"Keywords: " + builtinProperties.Keywords,
"Category: " + builtinProperties.Category,
"Manager: " + builtinProperties.Manager,
"Comments: " + builtinProperties.Comments,
"Hyperlink Base: " + builtinProperties.HyperLinkBase,
"Word Count: " + str(builtinProperties.WordCount),
"Page Count: " + str(builtinProperties.PageCount),
]
# Output the built-in properties
for i in range(0, len(properties)):
print(properties[i])
doc.Close()
Remove Built-in Document Properties from Word Documents with Python
The built-in document properties of a Word document that contain specific content can be removed by setting them to null values. This protects private information while retaining necessary details.
The detailed steps for removing specific built-in document properties from Word documents are as follows:
- Create an object of Document class.
- Load a Word document using Document.LoadFromFile() method.
- Get the built-in properties of the document through Document.BuiltinDocumentProperties property.
- Set the value of some properties to none to remove the properties with properties under BuiltinDocumentProperties class.
- Save the document using Document.SaveToFile() method.
- Python
from spire.doc import *
from spire.doc.common import *

# Create an instance of the Document class
doc = Document()

# Load the Word document
doc.LoadFromFile("output/AddPropertyWord.docx")

# Get the document's built-in properties
builtinProperties = doc.BuiltinDocumentProperties

# Remove the built-in properties by setting them to None
builtinProperties.Author = None
builtinProperties.Company = None
builtinProperties.Title = None
builtinProperties.Subject = None
builtinProperties.Keywords = None
builtinProperties.Comments = None
builtinProperties.Category = None
builtinProperties.Manager = None

# Save the document
doc.SaveToFile("output/RemovePropertyWord.docx", FileFormat.Docx)
doc.Close()
Apply for a Temporary License
If you'd like to remove the evaluation message from the generated documents, or to get rid of the function limitations, please request a 30-day trial license for yourself.
Adding page numbers to a Word document is a fundamental feature that enhances readability and navigation, especially in lengthy documents. It allows readers to find specific content more easily and helps authors organize their work. Word offers flexible options for adding page numbers, including choosing the location (header, footer, or body) and customizing the format and appearance to match your document's design needs.
In this article, you will learn how to add pager numbers to a Word document, as well as customizing their appearance using Spire.Doc for Python.
- Add Page Numbers to a Word Document
- Add Page Numbers to a Specific Section
- Add Discontinuous Page Numbers to Different Sections
Install Spire.Doc for Python
This scenario requires Spire.Doc for Python and plum-dispatch v1.7.4. They can be easily installed in your Windows through the following pip command.
pip install Spire.Doc
Add Page Numbers to a Word Document in Python
To dynamically add page numbers to a Word document using Spire.Doc, you can leverage various fields such as FieldPage, FieldNumPages, and FieldSection. These fields serve as placeholders for the current page number, total page count, and section number, enabling you to customize and automate the pagination process.
You can embed these placeholders in the header or footer of your document by calling the Paragraph.AppendField() method.
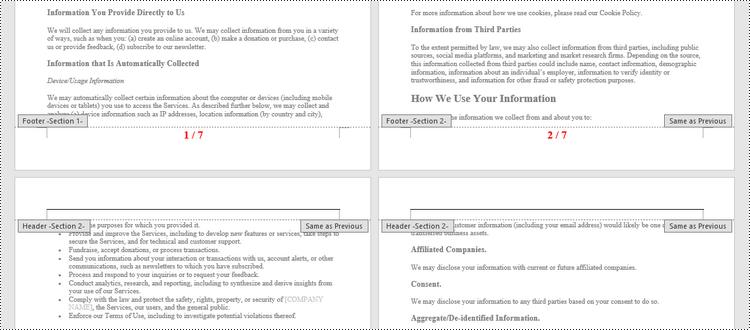
Here's a step-by-step guide on how to insert a FieldPage and FieldNumPages field in the footer, which will display the page number in the format "X / Y":
- Create a Document object.
- Load a Word document from a specified file path.
- Get the first section using Document.Sections[index] property
- Get the footer of the first section using Section.HeadersFooters.Footer property.
- Add a paragraph to the footer using HeaderFooter.AddParagraph() method.
- Insert a FieldPage field, and a FieldNumPages field to the paragraph using Paragraph.AppendField() method.
- Save the document to a different Word file.
- Python
from spire.doc import *
from spire.doc.common import *

# Create a Document object
document = Document()

# Load a Word file
document.LoadFromFile("C:\\Users\\Administrator\\Desktop\\Input.docx")

# Get the first section
section = document.Sections[0]

# Get the footer of the section
footer = section.HeadersFooters.Footer

# Add "page number / page count" to the footer
footerParagraph = footer.AddParagraph()
footerParagraph.AppendField("page number", FieldType.FieldPage)
footerParagraph.AppendText(" / ")
footerParagraph.AppendField("page count", FieldType.FieldNumPages)
footerParagraph.Format.HorizontalAlignment = HorizontalAlignment.Center

# Apply formatting to the page number
style = ParagraphStyle(document)
style.CharacterFormat.Bold = True
style.CharacterFormat.FontName = "Times New Roman"
style.CharacterFormat.FontSize = 18
style.CharacterFormat.TextColor = Color.get_Red()
document.Styles.Add(style)
footerParagraph.ApplyStyle(style)

# Save the document
document.SaveToFile("Output/AddPageNumbersToDocument.docx")

# Dispose resources
document.Dispose()
Add Page Numbers to a Specific Section in Python
By default, when you add page numbers to the footer of a section, they are automatically linked to the preceding section, maintaining a continuous sequence of page numbers. This behavior is convenient for most documents but may not be ideal when you want to start numbering from a certain section without affecting the numbering in other parts of the document.
If you need to add page numbers to a specific section without them being linked to the previous section, you must unlink the subsequent sections and clear the contents of their footers. Here's how you can do it using Spire.Doc for Python.
- Create a Document object.
- Load a Word document from a specified file path.
- Get a specific section using Document.Sections[index] property
- Get the footer of the section using Section.HeadersFooters.Footer property.
- Restart page numbering from 1 by setting Section.PageSetup.RestartPageNumbering property to true and Section.PageSetup.PageStartingNumber property to 1.
- Insert a FieldPage field and a FieldSection field to the footer using Paragraph.AppendField() method.
- Disable "Link to previous" by setting HeadersFooters.Footer.LinkToPrevious propety to false.
- Delete the content of the footers in the subsequent sections
- Save the document to a different Word file.
- Python
from spire.doc import *
from spire.doc.common import *
# Create a Document object
document = Document()
# Load a Word file
document.LoadFromFile("C:\\Users\\Administrator\\Desktop\\Input.docx")
# Get a specific section
sectionIndex = 1
section = document.Sections[sectionIndex]
# Restart page numbering from 1
section.PageSetup.RestartPageNumbering = True
section.PageSetup.PageStartingNumber = 1
# Get the footer of the section
footer = section.HeadersFooters.Footer
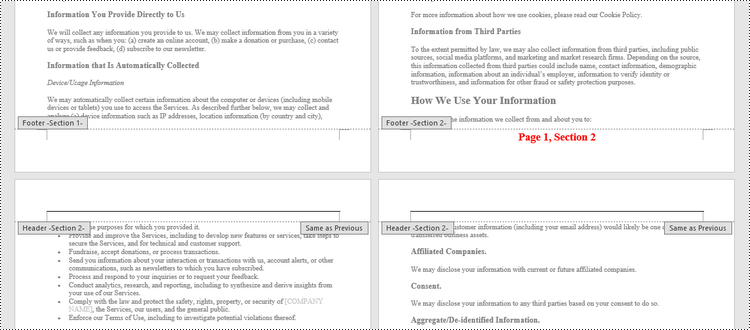
# Add "Page X, Section Y" to the footer
footerParagraph = footer.AddParagraph()
footerParagraph.AppendText("Page ")
footerParagraph.AppendField("page number", FieldType.FieldPage)
footerParagraph.AppendText(", Section ")
footerParagraph.AppendField("section number", FieldType.FieldSection)
footerParagraph.Format.HorizontalAlignment = HorizontalAlignment.Center
# Apply formatting to the page number
style = ParagraphStyle(document);
style.CharacterFormat.Bold = True
style.CharacterFormat.FontName = "Times New Roman"
style.CharacterFormat.FontSize = 18
style.CharacterFormat.TextColor = Color.get_Red()
document.Styles.Add(style)
footerParagraph.ApplyStyle(style)
# Disable "Link to previous" in the subsequent section
document.Sections[sectionIndex + 1].HeadersFooters.Footer.LinkToPrevious = False
# Delete the content of the footers in the subsequent sections
for i in range(sectionIndex +1, document.Sections.Count, 1):
document.Sections[i].HeadersFooters.Footer.ChildObjects.Clear()
document.Sections[i].HeadersFooters.Footer.AddParagraph()
# Save the document
document.SaveToFile("Output/AddPageNumbersToSection.docx")
# Dispose resources
document.Dispose()
Add Discontinuous Page Numbers to Different Sections in Python
When working with documents that contain multiple sections, you might want to start page numbering anew for each section to clearly distinguish between them. To achieve this, you must go through each section individually, add page numbers, and then reset the page numbering for the next section.
The following are the steps to add discontinuous page numbers to different sections using Spire.Doc for Python.
- Create a Document object.
- Load a Word document from a specified file path.
- Iterate through the sections in the document.
- Get a specific section using Document.Sections[index] property
- Get the footer of the section using Section.HeadersFooters.Footer property.
- Restart page numbering from 1 by setting Section.PageSetup.RestartPageNumbering property to true and Section.PageSetup.PageStartingNumber property to 1.
- Insert a FieldPage field and a FieldSection field to the footer using Paragraph.AppendField() method.
- Save the document to a different Word file.
- Python
from spire.doc import *
from spire.doc.common import *
# Create a Document object
document = Document()
# Load a Word file
document.LoadFromFile("C:\\Users\\Administrator\\Desktop\\Input.docx")
# Iterate through the sections in the document
for i in range(document.Sections.Count):
# Get a specific section
section = document.Sections[i]
# Restart page numbering from 1
section.PageSetup.RestartPageNumbering = True
section.PageSetup.PageStartingNumber = 1
# Get the footer of the section
footer = section.HeadersFooters.Footer
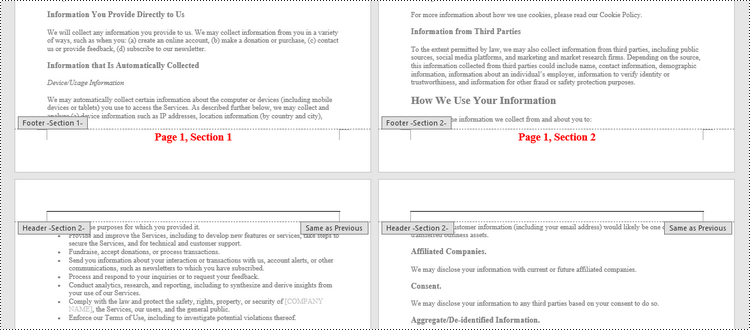
# Add "Page X, Section Y" to the footer
footerParagraph = footer.AddParagraph()
footerParagraph.AppendText("Page ")
footerParagraph.AppendField("page number", FieldType.FieldPage)
footerParagraph.AppendText(", Section ")
footerParagraph.AppendField("section number", FieldType.FieldSection)
footerParagraph.Format.HorizontalAlignment = HorizontalAlignment.Center
# Apply formatting to the page number
style = ParagraphStyle(document)
style.CharacterFormat.Bold = True
style.CharacterFormat.FontName = "Times New Roman";
style.CharacterFormat.FontSize = 18;
style.CharacterFormat.TextColor = Color.get_Red()
document.Styles.Add(style)
footerParagraph.ApplyStyle(style)
# Save the document
document.SaveToFile("Output/AddDifferentPageNumbersToSections.docx")
# Dispose resources
document.Dispose()
Apply for a Temporary License
If you'd like to remove the evaluation message from the generated documents, or to get rid of the function limitations, please request a 30-day trial license for yourself.
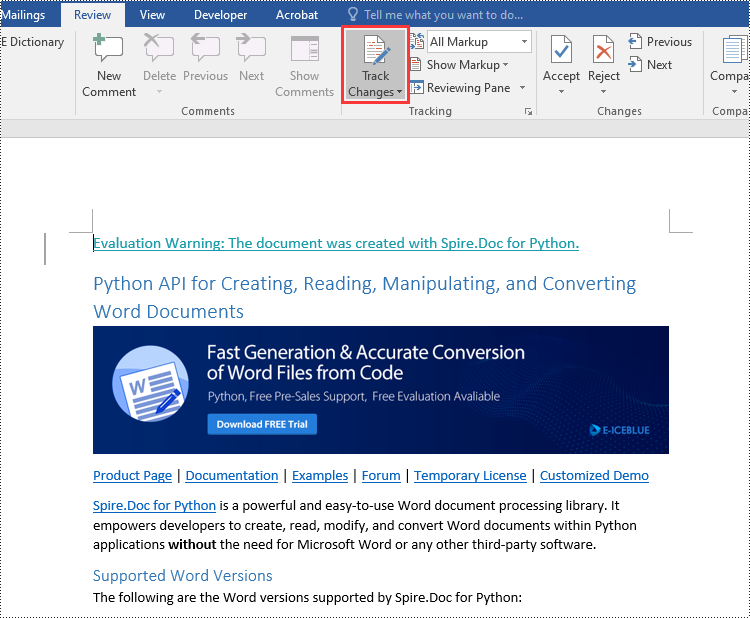
Python: Enable Track Changes, Accept or Reject Tracked Changes in Word
2024-04-07 01:31:37 Written by support iceblueTrack changes in Microsoft Word is a powerful feature that facilitates document collaboration and review processes. When track changes is enabled, any modifications made to the document, such as text additions or deletions, formatting changes, and comments, are visually highlighted. This makes it easier for document editors or collaborators to identify and review the changes made by themselves or others. In this article, we will explain how to enable track changes, as well as accept or reject the tracked changes in Word documents in Python using Spire.Doc for Python.
- Enable Track Changes in Word in Python
- Accept Tracked Changes in Word in Python
- Reject Tracked Changes in Word in Python
Install Spire.Doc for Python
This scenario requires Spire.Doc for Python and plum-dispatch v1.7.4. They can be easily installed in your Windows through the following pip commands.
pip install Spire.Doc
If you are unsure how to install, please refer to this tutorial: How to Install Spire.Doc for Python on Windows
Enable Track Changes in Word in Python
Spire.Doc for Python offers the Document.TrackChanges property to enable the track changes mode for a Word document. The detailed steps are as follows.
- Create an object of the Document class.
- Load a Word document using Document.LoadFromFile() method.
- Enable the track changes mode for the document by setting the Document.TrackChanges property to True.
- Save the result document using Document.SaveToFile() method.
- Python
from spire.doc import *
from spire.doc.common import *

# Create an object of the Document class
doc = Document()
# Load a Word document
doc.LoadFromFile("Sample.docx")

# Enable the track changes mode for the document
doc.TrackChanges = True

# Save the result document
doc.SaveToFile("EnableTrackChanges.docx", FileFormat.Docx2016)
doc.Close()
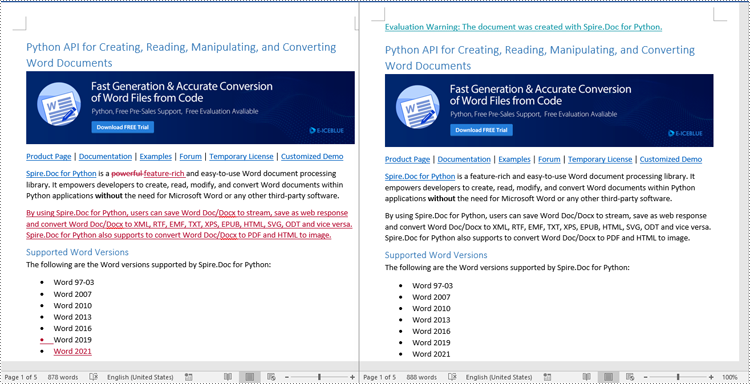
Accept Tracked Changes in Word in Python
Accepting tracked changes allows you to incorporate the suggested modifications permanently into the document. By using the Document.AcceptChanges() method provided by Spire.Doc for Python, you can easily accept all tracked changes in a Word document. The detailed steps are as follows.
- Create an object of the Document class.
- Load a Word document using Document.LoadFromFile() method.
- Check if the document has tracked changes using Document.HasChanges property.
- Accept the tracked changes in the document using Document.AcceptChanges() method.
- Save the result document using Document.SaveToFile() method.
- Python
from spire.doc import *
from spire.doc.common import *

# Create an object of the Document class
doc = Document()
# Load a Word document
doc.LoadFromFile("Sample.docx")

# Check if the document has tracked changes
if(doc.HasChanges):
    # Accept the tracked changes in the document
    doc.AcceptChanges()

# Save the result document
doc.SaveToFile("AcceptChanges.docx", FileFormat.Docx2016)
doc.Close()
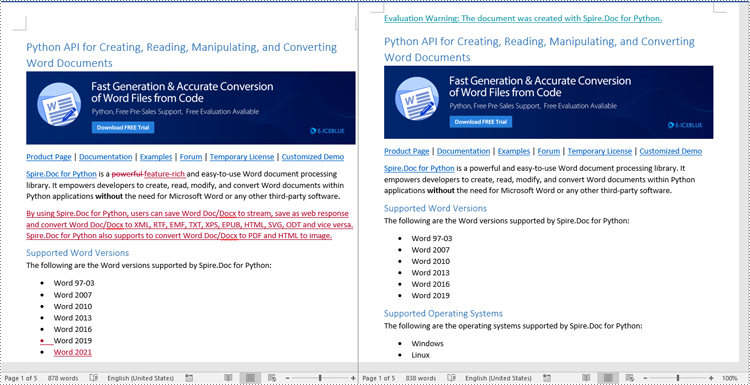
Reject Tracked Changes in Word in Python
Sometimes, suggested modifications may not align with your vision or requirements for the document. In such cases, rejecting these changes becomes essential to ensure that the document accurately reflects your intended content and formatting choices.
Spire.Doc for Python offers the Document.RejectChanges() method to reject the tracked changes in a Word document. The detailed steps are as follows.
- Create an object of the Document class.
- Load a Word document using Document.LoadFromFile() method.
- Check if the document has tracked changes using Document.HasChanges property.
- Reject the tracked changes in the document using Document.RejectChanges() method.
- Save the result document using Document.SaveToFile() method.
- Python
from spire.doc import *
from spire.doc.common import *

# Create an object of the Document class
doc = Document()
# Load a Word document
doc.LoadFromFile("Sample.docx")

# Check if the document has tracked changes
if(doc.HasChanges):
    # Reject the tracked changes in the document
    doc.RejectChanges()

# Save the result document
doc.SaveToFile("RejectChanges.docx", FileFormat.Docx2016)
doc.Close()
Apply for a Temporary License
If you'd like to remove the evaluation message from the generated documents, or to get rid of the function limitations, please request a 30-day trial license for yourself.
