
Paragraph and Text (23)
Displaying PowerPoint text box content in multiple columns significantly enhances the presentation of information and audience comprehension. It improves readability by shortening line lengths, making dense text more digestible; optimizes visual layout for an aesthetically pleasing and professional look; and utilizes space efficiently to ensure that information is abundant yet uncluttered. In this article, we will introduce how to add or remove columns in a PowerPoint text box using Spire.Presentation for .NET in C# projects.
Install Spire.Presentation for .NET
To begin with, you need to add the DLL files included in the Spire.Presentation for.NET package as references in your .NET project. The DLL files can be either downloaded from this link or installed via NuGet.
PM> Install-Package Spire.Presentation
C# Add Columns to A PowerPoint Text Box
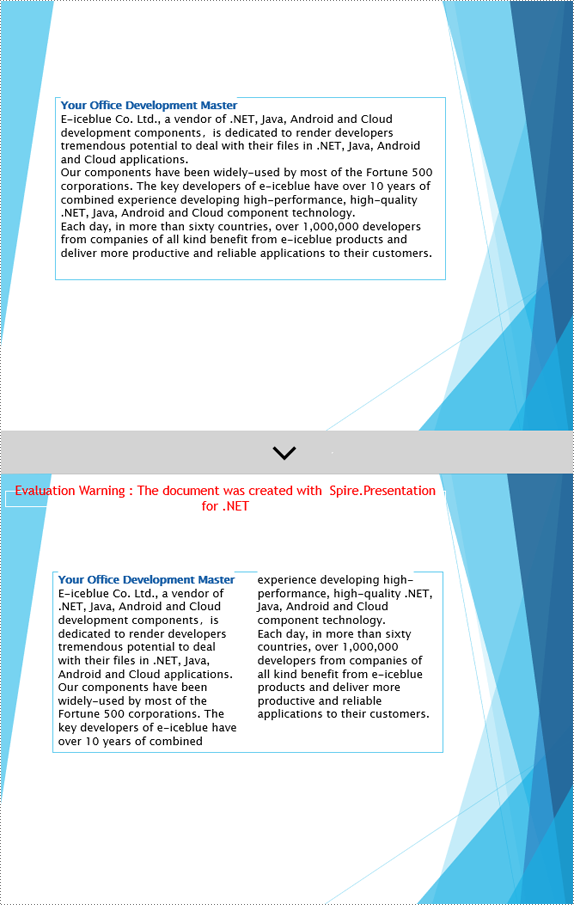
Spire.Presentation provides the Shape.TextFrame.ColumnCount property to set the number of columns for content and the Shape.TextFrame.ColumnSpacing property to set the spacing between columns. Below are the detailed steps:
- Create a Presentation object.
- Load a PowerPoint document using the Presentation.LoadFromFile() method.
- Retrieve the first slide using Presentation.Slides[0].
- Obtain the first text box object as IAutoShape.
- Use the Shape.TextFrame.ColumnCount property to set the number of columns for the text box content.
- Use the Shape.TextFrame.ColumnSpacing property to set the spacing between columns.
- Save the document to a specified path using the Presentation.SaveToFile() method.
- C#
using Spire.Presentation;

namespace Spire.PresentationDemo
{
    internal class Program
    {
        static void Main(string[] args)
        {
            // Create a Presentation object
            Presentation presentation = new Presentation();

            // Load the PPTX file
            presentation.LoadFromFile("Sample1.pptx");

            // Get the first slide
            ISlide slide = presentation.Slides[0];

            // Check if the first shape on the slide is of type IAutoShape
            if (slide.Shapes[0] is IAutoShape)
            {
                // Cast the first shape to an IAutoShape object
                IAutoShape shape = (IAutoShape)slide.Shapes[0];

                // Set the number of columns in the shape's text frame to 2
                shape.TextFrame.ColumnCount = 2;

                // Set the column spacing in the shape's text frame to 25 pt
                shape.TextFrame.ColumnSpacing = 25f;
            }

            // Save the modified presentation as a new PPTX file
            presentation.SaveToFile("SetColumns.pptx", Spire.Presentation.FileFormat.Pptx2016);

            // Dispose of the resources used by the Presentation object
            presentation.Dispose();
        }
    }
}
C# Remove Columns from A PowerPoint Text Box
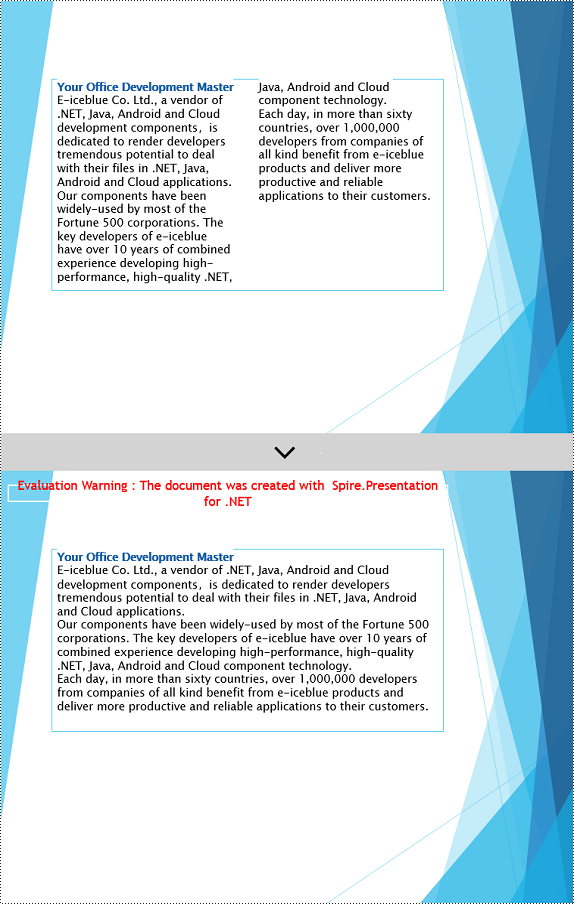
To remove the columns from the Powerpoint text box, simply set the Shape.TextFrame.ColumnCount property to 1. Below are the detailed steps:
- Create a Presentation object.
- Load a PowerPoint document using the Presentation.LoadFromFile() method.
- Retrieve a slide using the Presentation.Slides[index] property.
- Obtain the text box object as IAutoShape.
- Set Shape.TextFrame.ColumnCount = 1 to remove the columns.
- Save the document to a specified path using the Presentation.SaveToFile() method.
- C#
using Spire.Presentation;

namespace SpirePresentationDemo
{
    internal class Program
    {
        static void Main(string[] args)
        {
            // Create a Presentation object
            Presentation presentation = new Presentation();

            // Load the PPTX file
            presentation.LoadFromFile("Sample2.pptx");

            // Get the first slide
            ISlide slide = presentation.Slides[0];

            // Check if the first shape on the slide is of type IAutoShape
            if (slide.Shapes[0] is IAutoShape)
            {
                // Cast the first shape to an IAutoShape object
                IAutoShape shape = (IAutoShape)slide.Shapes[0];

                // Set the column count of the shape's text frame to 1
                shape.TextFrame.ColumnCount = 1;
            }

            // Save the modified presentation as a new PPTX file
            presentation.SaveToFile("RemoveColumns.pptx", Spire.Presentation.FileFormat.Pptx2016);

            // Dispose of the resources used by the Presentation object
            presentation.Dispose();
        }
    }
}
Apply for a Temporary License
If you'd like to remove the evaluation message from the generated documents, or to get rid of the function limitations, please request a 30-day trial license for yourself.
Replace Text with Regular Expression (Regex) in PowerPoint in C#, VB.NET
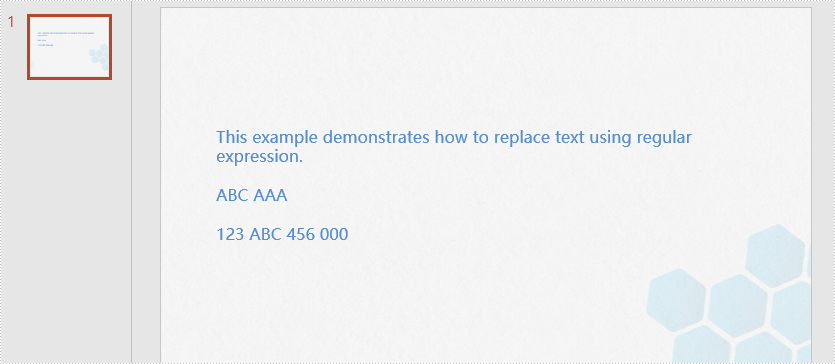
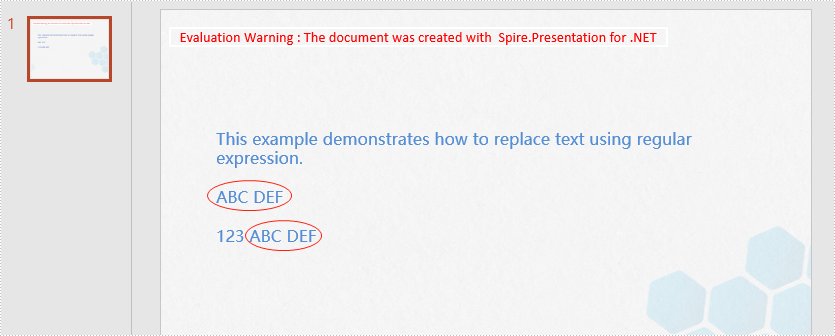
2021-08-23 07:49:36 Written by support iceblueSpire.Presentation for .NET provides you with the ability to replace text with regular expression using the ReplaceTextWithRegex method of IShape class. The ReplaceTextWithRegex method accepts the following parameters:
Regex: the regular expression to search text.
string: the text to replace with.
The following example demonstrates how to replace text with regular expression in a PowerPoint document using Spire.Presentation for .NET.
using Spire.Presentation;
using System.Text.RegularExpressions;

namespace ReplaceTextWithRegex
{
    class Program
    {
        static void Main(string[] args)
        {
            //Create a Presentation instance
            Presentation ppt = new Presentation();
            //Load a sample document
            ppt.LoadFromFile("Sample.pptx");

            //Get the first slide
            ISlide slide = ppt.Slides[0];

            //Replace "ABC" and the subsequent to the end of the line as "ABC DEF"
            Regex regex = new Regex("ABC.*");
            string newvalue = "ABC DEF";
            foreach (IShape shape in slide.Shapes)
            {
                shape.ReplaceTextWithRegex(regex, newvalue);
            }

            //Save the result document
            ppt.SaveToFile("ReplaceTextWithRegex.pptx", FileFormat.Pptx2013);
        }
    }
}
Imports Spire.Presentation
Imports System.Text.RegularExpressions

Namespace ReplaceTextWithRegex
    Friend Class Program
        Private Shared Sub Main(ByVal args As String())
            'Create a Presentation instance
            Dim ppt As Presentation = New Presentation()
            'Load the sample document
            ppt.LoadFromFile("Sample.pptx")

            'Get the first slide
            Dim slide As ISlide = ppt.Slides(0)

            'Replace "ABC" and the subsequent to the end of the line as "ABC DEF"
            Dim regex As Regex = New Regex("ABC.*")
            Dim newvalue As String = "ABC DEF"

            For Each shape As IShape In slide.Shapes
                shape.ReplaceTextWithRegex(regex, newvalue)
            Next

            'Save the result document
            ppt.SaveToFile("ReplaceTextWithRegex.pptx", FileFormat.Pptx2013)
        End Sub
    End Class
End Namespace
The input PowerPoint document:
The output PowerPoint document:
The replace feature in Microsoft PowerPoint allows you to search for a specific text and change its occurrences to a new text at once. This is extremely useful when you need to fix the same error in multiple places within a large PowerPoint document. In this article, you will learn how to programmatically replace text in PowerPoint documents in C# and VB.NET using Spire.Presentation for .NET.
- Replace the First Occurrence of a Specific Text in PowerPoint
- Replace All Occurrences of a Specific Text in PowerPoint
- Replace Text Using a Regular Expression in PowerPoint
Install Spire.Presentation for .NET
To begin with, you need to add the DLL files included in the Spire.Presentation for.NET package as references in your .NET project. The DLL files can be either downloaded from this link or installed via NuGet.
PM> Install-Package Spire.Presentation
Replace the First Occurrence of a Specific Text in PowerPoint in C# and VB.NET
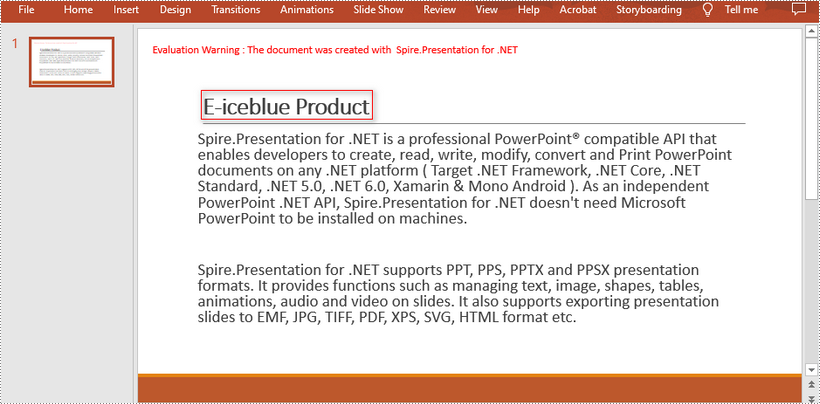
To replace the first occurrence of a specific text in a PowerPoint document, you can loop through all slides in the document, then call the ISlide.ReplaceFirstText() method. The detailed steps are as follows:
- Initialize an instance of the Presentation class.
- Load a PowerPoint document using Presentation.LoadFromFile() method.
- Loop through all slides in the PowerPoint document.
- Replace the first occurrence of a specific text with a new text using ISlide.ReplaceFirstText() method.
- Save the result document using Presentation.SaveToFile() method.
- C#
- VB.NET
using Spire.Presentation;

namespace ReplaceFirstTextOccurrenceInPPT
{
    class Program
    {
        static void Main(string[] args)
        {
            //Create a Presentation instance
            Presentation ppt = new Presentation();
            //Load a PowerPoint document
            ppt.LoadFromFile("Sample.pptx");

            //Loop through all slides in the document
            foreach (ISlide slide in ppt.Slides)
            {
                //Replace the first occurrence of "Spire.Presentation for .NET" with "E-iceblue Product"
                slide.ReplaceFirstText("Spire.Presentation for .NET", "E-iceblue Product", false);
                break;
            }

            //Save the result document
            ppt.SaveToFile("ReplaceFirstTextOccurrence.pptx", FileFormat.Pptx2013);

        }
    }
}
Replace All Occurrences of a Specific Text in PowerPoint in C# and VB.NET
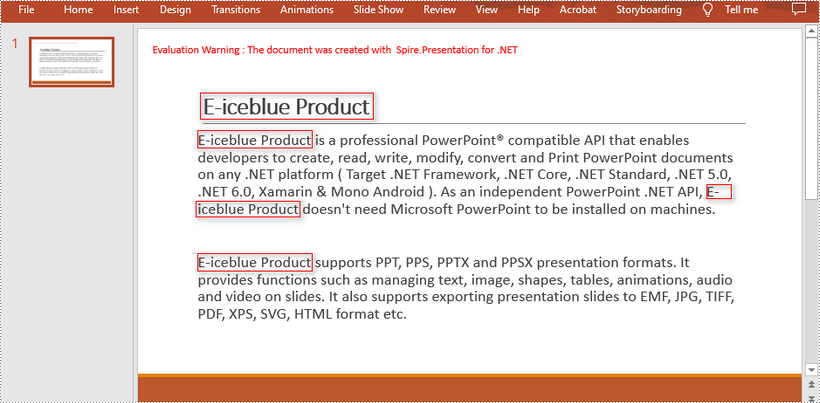
To replace all occurrences of a specific text in a PowerPoint document, you can loop through all slides in the document, and then use the ISlide.ReplaceAllText() method. The detailed steps are as follows:
- Initialize an instance of the Presentation class.
- Load a PowerPoint document using Presentation.LoadFromFile() method.
- Loop through all slides in the PowerPoint document.
- Replace all occurrences of a specific text with a new text using ISlide.ReplaceAllText() method.
- Save the result document using Presentation.SaveToFile() method.
- C#
- VB.NET
*using Spire.Presentation;

namespace ReplaceAllTextOccurrencesInPPT
{
    class Program
    {
        static void Main(string[] args)
        {
            //Create a Presentation instance
            Presentation ppt = new Presentation();
            //Load a PowerPoint document
            ppt.LoadFromFile("Sample.pptx");

            //Loop through all slides in the document
            foreach (ISlide slide in ppt.Slides)
            {
                //Replace all occurrences of "Spire.Presentation for .NET" with "E-iceblue Product"
                slide.ReplaceAllText("Spire.Presentation for .NET", "E-iceblue Product", false);
            }

            //Save the result document
            ppt.SaveToFile("ReplaceAllTextOccurrences.pptx", FileFormat.Pptx2013);

        }
    }
}
Replace Text Using a Regular Expression in PowerPoint using C# and VB.NET
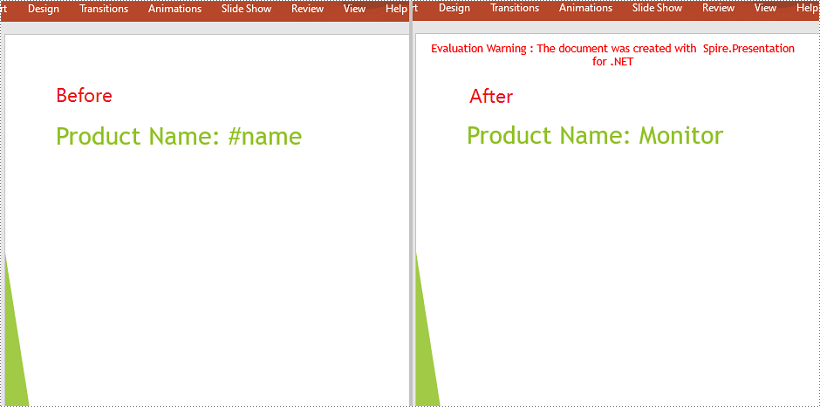
Spire.Presentation for .NET provides the IShape.ReplaceTextWithRegex() method that enables you to replace text matching a regular expression pattern. The detailed steps are as follows:
- Initialize an instance of the Presentation class.
- Load a PowerPoint document using Presentation.LoadFromFile() method.
- Loop through all slides in the PowerPoint document.
- Loop through all shapes on each slide.
- Replace text matching a regular expression pattern using IShape.ReplaceTextWithRegex() method.
- Save the result document using Presentation.SaveToFile() method.
- C#
- VB.NET
using Spire.Presentation;
using System.Text.RegularExpressions;

namespace ReplaceTextUsingRegexInPPT
{
    class Program
    {
        static void Main(string[] args)
        {
            //Create a Presentation instance
            Presentation ppt = new Presentation();
            //Load a PowerPoint document
            ppt.LoadFromFile("Sample1.pptx");

            //Loop through all slides in the document
            foreach (ISlide slide in ppt.Slides)
            {
                //Loop through all shapes on each slide
                foreach (IShape shape in slide.Shapes)
                {
                    //Replace text starting with # on the slide to "Monitor"
                    shape.ReplaceTextWithRegex(new Regex(@"\#\w+\b"), "Monitor");
                }
            }

            //Save the result document
            ppt.SaveToFile("ReplaceTextUsingRegex.pptx", FileFormat.Pptx2013);
        }
    }
}
Apply for a Temporary License
If you'd like to remove the evaluation message from the generated documents, or to get rid of the function limitations, please request a 30-day trial license for yourself.
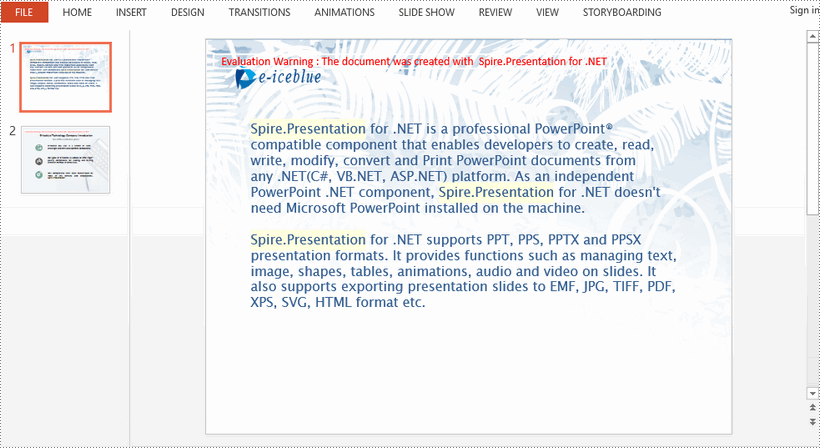
When creating a PowerPoint presentation, you may want to ensure that some important content in your presentation grabs the audience’s attention. A great way to make the content more prominent and noticeable is to highlight it with a bright color. This article will demonstrate how to highlight text in a PowerPoint presentation in C# and VB.NET using Spire.Presentation for .NET.
Install Spire.Presentation for .NET
To begin with, you need to add the DLL files included in the Spire.Presentation for.NET package as references in your .NET project. The DLL files can be either downloaded from this link or installed via NuGet.
PM> Install-Package Spire.Presentation
Highlight Text in PowerPoint in C# and VB.NET
The following are the steps to highlight specific text in a PowerPoint document:
- Initialize an instance of Presentation class.
- Load a PowerPoint presentation using Presentation.LoadFromFile() method.
- Loop through the slides in the presentation and the shapes on each slide.
- Check if the current shape is of IAutoShape type.
- If the result is true, typecast it to IAutoShape.
- Initialize an instance of TextHighLightingOptions class, and set the text highlighting options such as whole words only and case sensitive through TextHighLightingOptions.WholeWordsOnly and TextHighLightingOptions.CaseSensitive properties.
- Highlight a specific text in the shape using IAutoShape.TextFrame.HighLightText() method.
- Save the result file using Presentation.SaveToFile() method.
- C#
- VB.NET
using Spire.Presentation;
using System.Drawing;

namespace HighlightTextInPPT
{
    class Program
    {
        static void Main(string[] args)
        {
            //Create an instance of Presentation class
            Presentation presentation = new Presentation();
            //Load a PowerPoint file
            presentation.LoadFromFile(@"Sample1.pptx");

            //Loop through all slides
            for (int i = 0; i < presentation.Slides.Count; i++)
            {
                //Get the current slide
                ISlide slide = presentation.Slides[i];
                //Loop through the shapes on the slide
                for (int j = 0; j < slide.Shapes.Count; j++)
                {
                    //Check if the current shape is of IAutoShape type
                    if (slide.Shapes[j] is IAutoShape)
                    {
                        //Typecast the shape to IAutoShape
                        IAutoShape shape = slide.Shapes[j] as IAutoShape;

                        //Create an instance of TextHighLightingOptions class
                        TextHighLightingOptions options = new TextHighLightingOptions();
                        //Set text highlighting options
                        options.CaseSensitive = true;
                        options.WholeWordsOnly = true;

                        //Highlight specific text within the shape with color
                        shape.TextFrame.HighLightText("Spire.Presentation", Color.LightYellow, options);
                    }

                }
            }

            //Save the result file
            presentation.SaveToFile("HighlightText.pptx", FileFormat.Pptx2013);
        }
    }
}
Apply for a Temporary License
If you'd like to remove the evaluation message from the generated documents, or to get rid of the function limitations, please request a 30-day trial license for yourself.
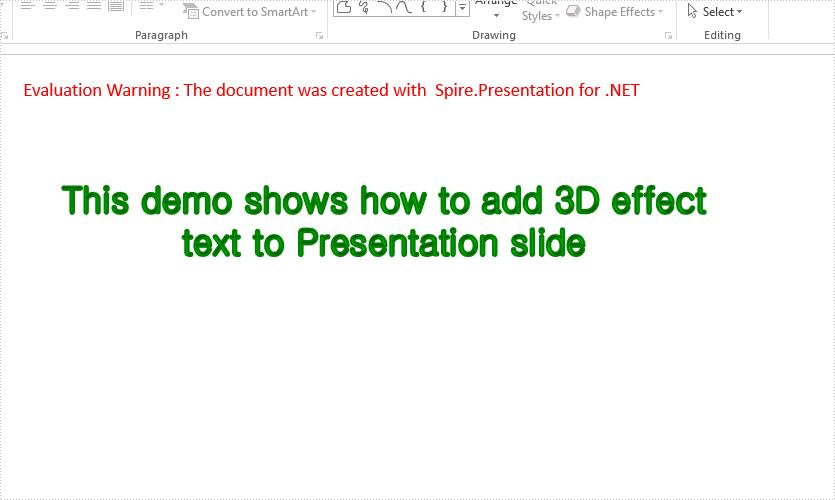
With the help of Spire.Presentation for .NET, we could set 3D effect to the shapes and text in the PowerPoint document to make it attractive. We have already demonstrated how to use Spire.Presentation to set 3D format for shapes. In this article, I will introduce how to create three dimensional effects text in PowerPoint in C#.
using Spire.Presentation;
using Spire.Presentation.Drawing;
using System.Drawing;

namespace 3DEffectForText
{
    class Program
    {
        static void Main(string[] args)
        {
            //Create a new presentation object
            Presentation presentation = new Presentation();

            //Get the first slide
            ISlide slide = presentation.Slides[0];

            //Append a new shape to slide and set the line color and fill type
            IAutoShape shape = slide.Shapes.AppendShape(ShapeType.Rectangle, new RectangleF(30, 40, 600, 200));
            shape.ShapeStyle.LineColor.Color = Color.White;
            shape.Fill.FillType = Spire.Presentation.Drawing.FillFormatType.None;

            //Add text to the shape
            shape.AppendTextFrame("This demo shows how to add 3D effect text to Presentation slide");

            //set the color of text in shape
            TextRange textRange = shape.TextFrame.TextRange;
            textRange.Fill.FillType = Spire.Presentation.Drawing.FillFormatType.Solid;
            textRange.Fill.SolidColor.Color = Color.Green;

            //set the Font of text in shape
            textRange.FontHeight = 30;
            textRange.LatinFont = new TextFont("Gulim");


            //Set 3D effect for text
            shape.TextFrame.TextThreeD.ShapeThreeD.PresetMaterial = PresetMaterialType.Matte;
            shape.TextFrame.TextThreeD.LightRig.PresetType = PresetLightRigType.Sunrise;
            shape.TextFrame.TextThreeD.ShapeThreeD.TopBevel.PresetType = BevelPresetType.Circle;
            shape.TextFrame.TextThreeD.ShapeThreeD.ContourColor.Color = Color.Green;
            shape.TextFrame.TextThreeD.ShapeThreeD.ContourWidth = 3;

            //Save the document to file.
            presentation.SaveToFile("3DEffectForText_result.pptx", FileFormat.Pptx2010);
        }
    }
}
Effective screenshot for 3-D effect text on Presentation slides:
Insert HTML with image into the Presentation slides in C#
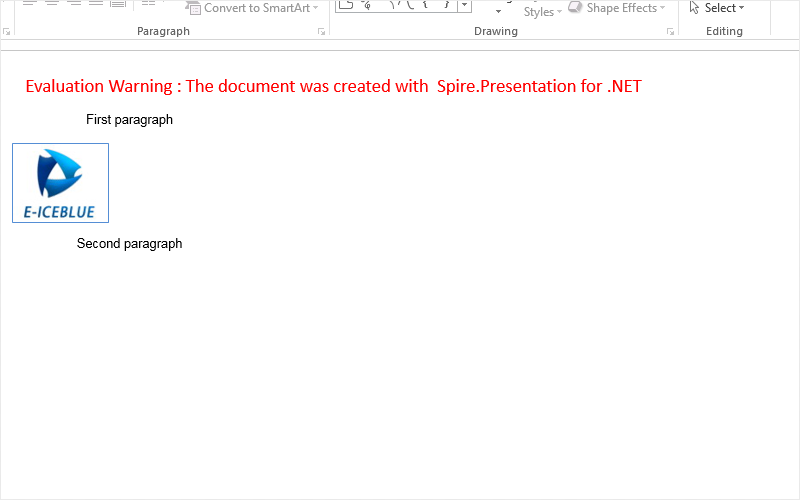
2018-04-11 03:51:26 Written by support iceblueWe have already demonstrated how to use Spire.Presentation to insert HTML formatted text to PowerPoint slide. Now from Spire.Presentation 3.4.1, it supports to insert html (including text, image, audio and video) into presentation slides and each html tag will be added to the slide as a separate shape. The following code snippets demonstrate how to.
Step 1: Create an instance of Presentation class.
Presentation ppt = new Presentation();
Step 2: Get the shapes on the first slide.
ShapeList shapes = ppt.Slides[0].Shapes;
Step 3: Add contents to shape from HTML code, which includes text and image.
shapes.AddFromHtml("<html><div><p>First paragraph</p><p><img src='https://cdn.e-iceblue.com/Logo.jpg'/></p><p>Second paragraph </p></html>");
Step 4: Save the document to file.
ppt.SaveToFile("Result.pptx", FileFormat.Pptx2010);
Effective screenshot:
Full codes of how to insert HTML into the Presentation slides:
using Spire.Presentation;
using Spire.Presentation.Collections;
namespace InsertHTML
{
class Program
{
static void Main(string[] args)
{
Presentation ppt = new Presentation();
ShapeList shapes = ppt.Slides[0].Shapes;
shapes.AddFromHtml("First paragraph

Second paragraph
");
ppt.SaveToFile("Result.pptx", FileFormat.Pptx2010);
}
}
}
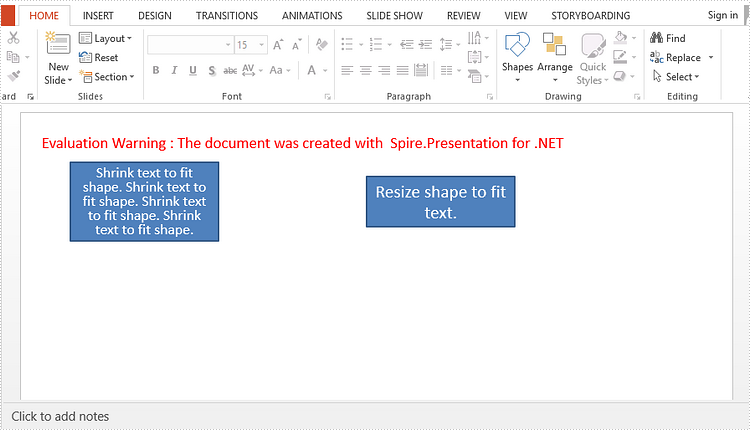
With auto-fit feature, you can automatically reduce the font size of text to fit a shape, or you can shrink or enlarge shape to fit the exact size of your text. This article will show you how to auto-fit text or shape using Spire.Presentation with C#, VB.NET.
Step 1: Create an instance of Presentation class.
Presentation presentation = new Presentation();
Step 2: Insert a shape, and set the AutofitType property to Normal, which means the text automatically shrinks to fit shape.
IAutoShape textShape1 = presentation.Slides[0].Shapes.AppendShape(ShapeType.Rectangle, new RectangleF(50, 50, 150, 80));
textShape1.TextFrame.Text = "Shrink text to fit shape. Shrink text to fit shape. Shrink text to fit shape. Shrink text to fit shape.";
textShape1.TextFrame.AutofitType = TextAutofitType.Normal;
Step 3: Insert a shape, and set the AutofitType property to Shape, which means the shape size automatically decreases or increases to fit text.
IAutoShape textShape2 = presentation.Slides[0].Shapes.AppendShape(ShapeType.Rectangle, new RectangleF(350, 50, 150, 80));
textShape2.TextFrame.Text = "Resize shape to fit text.";
textShape2.TextFrame.AutofitType = TextAutofitType.Shape;
Step 4: Save the file.
presentation.SaveToFile("output.pptx", FileFormat.Pptx2013);
Output:
Full Code:
using Spire.Presentation;
using System.Drawing;
namespace AutofitinPPT
{
    class Program
    {
        static void Main(string[] args)
        {

            Presentation presentation = new Presentation();

            IAutoShape textShape1 = presentation.Slides[0].Shapes.AppendShape(ShapeType.Rectangle, new RectangleF(50, 50, 150, 80));
            textShape1.TextFrame.Text = "Shrink text to fit shape. Shrink text to fit shape. Shrink text to fit shape. Shrink text to fit shape.";
            textShape1.TextFrame.AutofitType = TextAutofitType.Normal;

            IAutoShape textShape2 = presentation.Slides[0].Shapes.AppendShape(ShapeType.Rectangle, new RectangleF(350, 50, 150, 80));
            textShape2.TextFrame.Text = "Resize shape to fit text.";
            textShape2.TextFrame.AutofitType = TextAutofitType.Shape;

            presentation.SaveToFile("output.pptx", FileFormat.Pptx2013);
        }
    }
}
Imports Spire.Presentation
Imports System.Drawing
Namespace AutofitinPPT
	Class Program
		Private Shared Sub Main(args As String())

			Dim presentation As New Presentation()

			Dim textShape1 As IAutoShape = presentation.Slides(0).Shapes.AppendShape(ShapeType.Rectangle, New RectangleF(50, 50, 150, 80))
			textShape1.TextFrame.Text = "Shrink text to fit shape. Shrink text to fit shape. Shrink text to fit shape. Shrink text to fit shape."
			textShape1.TextFrame.AutofitType = TextAutofitType.Normal

			Dim textShape2 As IAutoShape = presentation.Slides(0).Shapes.AppendShape(ShapeType.Rectangle, New RectangleF(350, 50, 150, 80))
			textShape2.TextFrame.Text = "Resize shape to fit text."
			textShape2.TextFrame.AutofitType = TextAutofitType.Shape

			presentation.SaveToFile("output.pptx", FileFormat.Pptx2013)
		End Sub
	End Class
End Namespace
How to set the indent style for the paragraph on presentation slide in C#
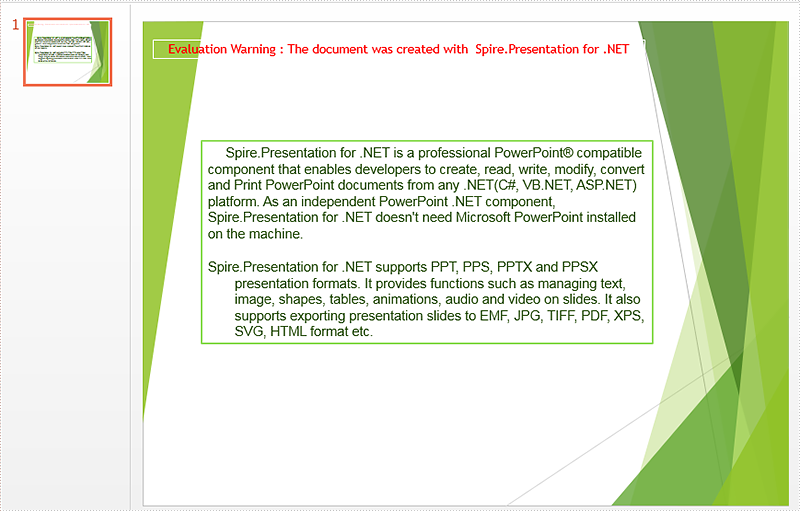
2018-01-30 07:45:45 Written by support iceblueSpire.Presentation supports to operate the paragraph styles from code. There are two kinds of special indentation styles for the paragraph, first line and hanging. This article will demonstrate how to set the indent style for the paragraph on presentation slide in C#.
Step 1: Create an instance of presentation and load the document from file.
Presentation presentation = new Presentation();
presentation.LoadFromFile("Sample.pptx");
Step 2: Get the paragraphs from the first slide.
IAutoShape shape = (IAutoShape)presentation.Slides[0].Shapes[0];
ParagraphCollection paras = shape.TextFrame.Paragraphs;
Step 3: Set the indentation as first line for the first paragraph.
paras[0].Indent = 20;
paras[0].SpaceAfter = 10;
Step 4: Set the indentation as Hanging for the third paragraph.
paras[2].Indent = -100;
paras[2].LeftMargin = 30;
Step 5: Save the document to file.
presentation.SaveToFile("Result.pptx", FileFormat.Pptx2010);
Effective screenshot of the presentation with indentation style:
Full codes:
using Spire.Presentation;
using Spire.Presentation.Collections;
namespace SetIndentStyle
{
    class Program
    {
        static void Main(string[] args)
        {

            Presentation presentation = new Presentation();
            presentation.LoadFromFile("Sample.pptx");

            IAutoShape shape = (IAutoShape)presentation.Slides[0].Shapes[0];
            ParagraphCollection paras = shape.TextFrame.Paragraphs;

            paras[0].Indent = 20;
            paras[0].SpaceAfter = 10;

            paras[2].Indent = -100;
            paras[2].LeftMargin = 30;

            presentation.SaveToFile("Result.pptx", FileFormat.Pptx2010);
        }
    }
}
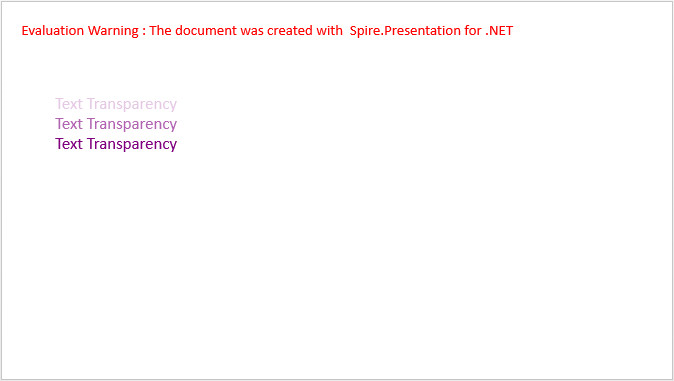
It is possible to add text transparency to any text shape in PowerPoint. In order to make the text transparent, we’d need to apply the transparency level to the text shape. This article will show you how to set the transparency level of text using Spire.Presentation.
Step 1: Create a Presentation instance.
Presentation ppt = new Presentation();
Step 2: Add a shape to the first slide.
IAutoShape textboxShape = ppt.Slides[0].Shapes.AppendShape(ShapeType.Rectangle, new RectangleF(50, 70,300, 120));
textboxShape.ShapeStyle.LineColor.Color = Color.Transparent;
textboxShape.Fill.FillType = FillFormatType.None;
Step 3: Add text to shape.
textboxShape.TextFrame.Text = "Text Transparency";
Step 4: Set the fill type of TextRange to solid, and fill the TextRange using the color created with specified alpha value.
textboxShape.TextFrame.TextRange.Fill.FillType = FillFormatType.Solid;
int alpha = 55;
textboxShape.TextFrame.TextRange.Fill.SolidColor.Color = Color.FromArgb(alpha, Color.Purple);
Step 5:Save the file.
ppt.SaveToFile("result.pptx", FileFormat.Pptx2013);
Output:
Full Code:
using Spire.Presentation;
using Spire.Presentation.Drawing;
using System.Drawing;
namespace ApplyTransparency
{
    class Program
    {
        static void Main(string[] args)
        {

            //create a PowerPoint document
            Presentation ppt = new Presentation();
            ppt.SlideSize.Type = SlideSizeType.Screen16x9;

            //add a shape
            IAutoShape textboxShape = ppt.Slides[0].Shapes.AppendShape(ShapeType.Rectangle, new RectangleF(50, 70, 300, 120));
            textboxShape.ShapeStyle.LineColor.Color = Color.Transparent;
            textboxShape.Fill.FillType = FillFormatType.None;

            //remove default blank paragraphs
            textboxShape.TextFrame.Paragraphs.Clear();

            //add three paragraphs, apply color with different alpha values to text
            int alpha = 55;
            for (int i = 0; i < 3; i++)
            {
                textboxShape.TextFrame.Paragraphs.Append(new TextParagraph());
                textboxShape.TextFrame.Paragraphs[i].TextRanges.Append(new TextRange("Text Transparency"));
                textboxShape.TextFrame.Paragraphs[i].TextRanges[0].Fill.FillType = FillFormatType.Solid;
                textboxShape.TextFrame.Paragraphs[i].TextRanges[0].Fill.SolidColor.Color = Color.FromArgb(alpha, Color.Purple);
                alpha += 100;
            }

            //save to file
            ppt.SaveToFile("result.pptx", FileFormat.Pptx2013);

        }
    }
}
Imports Spire.Presentation
Imports Spire.Presentation.Drawing
Imports System.Drawing
Namespace ApplyTransparency
	Class Program
		Private Shared Sub Main(args As String())

			'create a PowerPoint document
			Dim ppt As New Presentation()
			ppt.SlideSize.Type = SlideSizeType.Screen16x9

			'add a shape
			Dim textboxShape As IAutoShape = ppt.Slides(0).Shapes.AppendShape(ShapeType.Rectangle, New RectangleF(50, 70, 300, 120))
			textboxShape.ShapeStyle.LineColor.Color = Color.Transparent
			textboxShape.Fill.FillType = FillFormatType.None

			'remove default blank paragraphs
			textboxShape.TextFrame.Paragraphs.Clear()

			'add three paragraphs, apply color with different alpha values to text
			Dim alpha As Integer = 55
			For i As Integer = 0 To 2
				textboxShape.TextFrame.Paragraphs.Append(New TextParagraph())
				textboxShape.TextFrame.Paragraphs(i).TextRanges.Append(New TextRange("Text Transparency"))
				textboxShape.TextFrame.Paragraphs(i).TextRanges(0).Fill.FillType = FillFormatType.Solid
				textboxShape.TextFrame.Paragraphs(i).TextRanges(0).Fill.SolidColor.Color = Color.FromArgb(alpha, Color.Purple)
				alpha += 100
			Next

			'save to file
			ppt.SaveToFile("result.pptx", FileFormat.Pptx2013)

		End Sub
	End Class
End Namespace
How to Change Text Direction in PowerPoint in C#, VB.NET
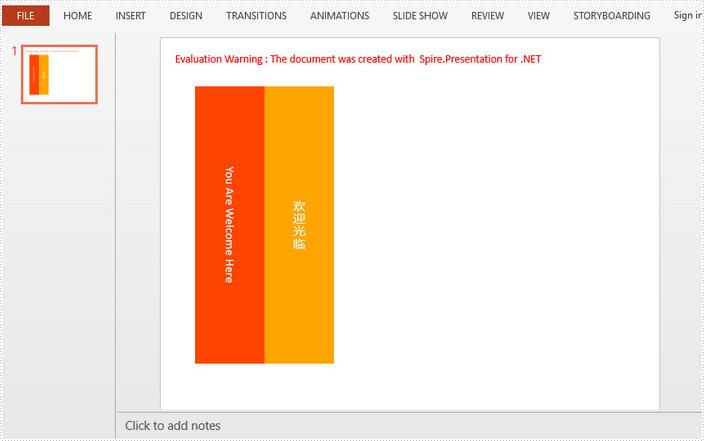
2017-09-22 08:19:57 Written by support iceblueYou may sometimes want your text to display vertically (letters stacked one on top of the other), horizontally, or rotated facing the right margin or the left margin. This tutorial shows you how to change the text direction using VerticalTextType property in Spire.Presentation.
Step 1: Initialize an instance of Prensentation class.
Presentation ppt = new Presentation();
Step 2: Append a shape with text to the first slide.
IAutoShape textboxShape = ppt.Slides[0].Shapes.AppendShape(ShapeType.Rectangle, new RectangleF(50, 70, 100, 400));
textboxShape.ShapeStyle.LineColor.Color = Color.Transparent;
textboxShape.Fill.FillType = Spire.Presentation.Drawing.FillFormatType.Solid;
textboxShape.Fill.SolidColor.Color = Color.OrangeRed;
textboxShape.TextFrame.Text = "You Are Welcome Here";
Step 3: Set the text direction to vertical.
textboxShape.TextFrame.VerticalTextType = VerticalTextType.Vertical;
Step 4: Append another shape with text to the slide.
textboxShape = ppt.Slides[0].Shapes.AppendShape(ShapeType.Rectangle, new RectangleF(150, 70, 100, 400));
textboxShape.ShapeStyle.LineColor.Color = Color.Transparent;
textboxShape.Fill.FillType = Spire.Presentation.Drawing.FillFormatType.Solid;
textboxShape.Fill.SolidColor.Color = Color.Orange;
textboxShape.TextFrame.Text = "欢迎光临";
Step 5: For asian characters, you can set the VerticalTextType as EastAsianVertical to aviod rotating text 90 degrees.
textboxShape.TextFrame.VerticalTextType = VerticalTextType.EastAsianVertical;
Step 6: Save the file.
ppt.SaveToFile("output.pptx", FileFormat.Pptx2013);
Output:
Full Code:
using Spire.Presentation;
using System.Drawing;
namespace ChangeTextDirection
{
    class Program
    {
        static void Main(string[] args)
        {

            Presentation ppt = new Presentation();

            IAutoShape textboxShape = ppt.Slides[0].Shapes.AppendShape(ShapeType.Rectangle, new RectangleF(50, 70, 100, 400));
            textboxShape.ShapeStyle.LineColor.Color = Color.Transparent;
            textboxShape.Fill.FillType = Spire.Presentation.Drawing.FillFormatType.Solid;
            textboxShape.Fill.SolidColor.Color = Color.OrangeRed;
            textboxShape.TextFrame.Text = "You Are Welcome Here";
            textboxShape.TextFrame.VerticalTextType = VerticalTextType.Vertical;

            textboxShape = ppt.Slides[0].Shapes.AppendShape(ShapeType.Rectangle, new RectangleF(150, 70, 100, 400));
            textboxShape.ShapeStyle.LineColor.Color = Color.Transparent;
            textboxShape.Fill.FillType = Spire.Presentation.Drawing.FillFormatType.Solid;
            textboxShape.Fill.SolidColor.Color = Color.Orange;
            textboxShape.TextFrame.Text = "欢迎光临";
            textboxShape.TextFrame.VerticalTextType = VerticalTextType.EastAsianVertical;

            ppt.SaveToFile("output.pptx", FileFormat.Pptx2013);

        }
    }
}
Imports Spire.Presentation
Imports System.Drawing
Namespace ChangeTextDirection
	Class Program
		Private Shared Sub Main(args As String())

			Dim ppt As New Presentation()

			Dim textboxShape As IAutoShape = ppt.Slides(0).Shapes.AppendShape(ShapeType.Rectangle, New RectangleF(50, 70, 100, 400))
			textboxShape.ShapeStyle.LineColor.Color = Color.Transparent
			textboxShape.Fill.FillType = Spire.Presentation.Drawing.FillFormatType.Solid
			textboxShape.Fill.SolidColor.Color = Color.OrangeRed
			textboxShape.TextFrame.Text = "You Are Welcome Here"
			textboxShape.TextFrame.VerticalTextType = VerticalTextType.Vertical

			textboxShape = ppt.Slides(0).Shapes.AppendShape(ShapeType.Rectangle, New RectangleF(150, 70, 100, 400))
			textboxShape.ShapeStyle.LineColor.Color = Color.Transparent
			textboxShape.Fill.FillType = Spire.Presentation.Drawing.FillFormatType.Solid
			textboxShape.Fill.SolidColor.Color = Color.Orange
			textboxShape.TextFrame.Text = "欢迎光临"
			textboxShape.TextFrame.VerticalTextType = VerticalTextType.EastAsianVertical

			ppt.SaveToFile("output.pptx", FileFormat.Pptx2013)

		End Sub
	End Class
End Namespace
