Python: Replace or Extract Images in Excel
Images in Excel can enhance data visualization and help convey information effectively. Apart from inserting/deleting images in Excel with Spire.XLS for Python, you can also use the library to replace existing images with new ones, or extract images for reuse or backup. This article will demonstrate how to replace or extract images in Excel in Python.
Install Spire.XLS for Python
This scenario requires Spire.XLS for Python and plum-dispatch v1.7.4. They can be easily installed in your Windows through the following pip command.
pip install Spire.XLS
If you are unsure how to install, please refer to this tutorial: How to Install Spire.XLS for Python on Windows
Replace Images in Excel with Python
To replace a picture in Excel, you can load a new picture and then set it as the value of the ExcelPicture.Picture property. The following are the detailed steps to replace an Excel image with another one.
- Create a Workbook instance.
- Load an Excel file using Workbook.LoadFromFile() method.
- Get a specified worksheet using Workbook.Worksheets[] property.
- Get a specified picture from the worksheet using Worksheet.Pictures[] property.
- Load an image and then replace the original picture with it using ExcelPicture.Picture property.
- Save the result file using Workbook.SaveToFile() method.
- Python
from spire.xls import *
from spire.xls.common import *

# Create a Workbook instance
workbook = Workbook()

# Load an Excel file
workbook.LoadFromFile ("ExcelImg.xlsx")

# Get the first worksheet
sheet = workbook.Worksheets[0]

# Get the first picture from the worksheet
excelPicture = sheet.Pictures[0]

# Replace the picture with another one
excelPicture.Picture = Image.FromFile("logo.png")

# Save the result file
workbook.SaveToFile("ReplaceImage.xlsx", ExcelVersion.Version2016)

Extract Images from Excel with Python
Spire.XLS for Python provides the ExcelPicture.Picture.Save() method to save the images in Excel to a specified file path. The following are the detailed steps to extract all images in an Excel worksheet at once.
- Create a Workbook instance.
- Load an Excel file using Workbook.LoadFromFile() method.
- Get a specified worksheet using Workbook.Worksheets[] property.
- Loop through to get all pictures in the worksheet using Worksheet.Pictures property.
- Extract pictures and save them to a specified file path using ExcelPicture.Picture.Save() method.
- Python
from spire.xls import *
from spire.xls.common import *

# Create a Workbook instance
workbook = Workbook()

# Load an Excel file
workbook.LoadFromFile("Test.xlsx")

# Get the first worksheet
sheet = workbook.Worksheets[0]

# Get all images in the worksheet
for i in range(sheet.Pictures.Count - 1, -1, -1):
    pic = sheet.Pictures[i]

    # Save each image as a PNG file
    pic.Picture.Save("ExtractImages\\Image-{0:d}.png".format(i), ImageFormat.get_Png())

workbook.Dispose()

Apply for a Temporary License
If you'd like to remove the evaluation message from the generated documents, or to get rid of the function limitations, please request a 30-day trial license for yourself.
Python: Compress, Resize, or Move Images in Excel
Excel provides various options to compress, resize, or move images, allowing users to effectively manage and optimize their spreadsheets. By utilizing these features, you can significantly reduce file size, adjust image dimensions to fit within cells, and effortlessly reposition images to enhance the visual appeal of your Excel documents. This article introduces how to programmatically compress, resize or move images in an Excel document in Python using Spire.XLS for Python.
- Compress Images in an Excel Document in Python
- Resize an Image in an Excel Worksheet in Python
- Move an Image within the Same Worksheet in Python
- Move an Image from a Worksheet to Another in Python
Install Spire.XLS for Python
This scenario requires Spire.XLS for Python and plum-dispatch v1.7.4. They can be easily installed in your Windows through the following pip command.
pip install Spire.XLS
If you are unsure how to install, please refer to this tutorial: How to Install Spire.XLS for Python on Windows
Compress Images in an Excel Document in Python
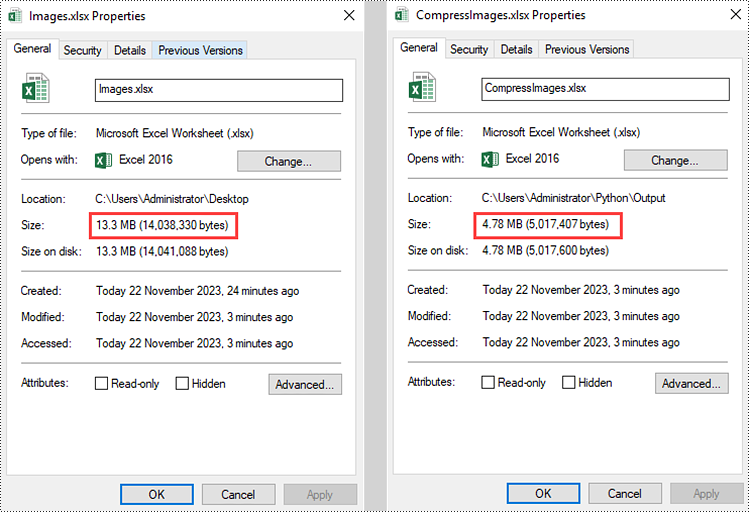
To compress the quality of an image, Spire.XLS for Python offers the ExcelPicture.Compress() method. The following are the steps to compress images in an Excel document using Spire.XLS for Python.
- Create a Workbook object.
- Load an Excel file using Workbook.LoadFromFile() method.
- Iterate through the worksheets in the document, and get the images from a specific sheet through Worksheet.Pictures property.
- Get a specific image from the image collection and compress it using ExcelPicture.Compress() method.
- Save the workbook to a different Excel file using Workbook.SaveToFile() method.
- Python
from spire.xls import *
from spire.xls.common import *

# Create a Workbook object
workbook = Workbook()

# Load an Excel document
workbook.LoadFromFile("C:/Users/Administrator/Desktop/Images.xlsx")

# Loop through the worksheets in the document
for sheet in workbook.Worksheets:

    # Loop through the images in the worksheet
    for picture in sheet.Pictures:

        # Compress a specific image
        picture.Compress(50)

# Save the file
workbook.SaveToFile("output/CompressImages.xlsx", ExcelVersion.Version2016)
workbook.Dispose()

Resize an Image in an Excel Worksheet in Python
The width and height of an image can be set or get through the ExcelPicture.Width property and the ExcelPicture.Height property. To resize an image in Excel, follow the steps below.
- Create a Workbook object.
- Load an Excel file using Workbook.LoadFromFile() method.
- Get a specific worksheet though Workbook.Worksheets[index] property.
- Get a specific image from the worksheet through Worksheet.Pictures[index] property.
- Reset the size of the image through ExcelPicture.Width property and ExcelPicture.Height property.
- Save the workbook to a different Excel file using Workbook.SaveToFile() method.
- Python
from spire.xls import *
from spire.xls.common import *

# Create a Workbook object
workbook = Workbook()

# Load the Excel document
workbook.LoadFromFile("C:/Users/Administrator/Desktop/Image.xlsx")

# Get a specific worksheet
sheet = workbook.Worksheets[0]

# Get a specific picture from the worksheet
picture = sheet.Pictures[0]

# Resize the picture
picture.Width = (int)(picture.Width / 2)
picture.Height = (int)(picture.Height / 2)

# Save to file
workbook.SaveToFile("output/ResizeImage.xlsx", ExcelVersion.Version2016)
workbook.Dispose()

Move an Image within the Same Worksheet in Python
The start position of an image can be set or get through the ExcelPicture.TopRow property and the ExcelPicture.LetColumn property. To move an image within the same worksheet, follow the steps below.
- Create a Workbook object.
- Load an Excel file using Workbook.LoadFromFile() method.
- Get a specific worksheet though Workbook.Worksheets[index] property.
- Get a specific image from the worksheet through Worksheet.Pictures[index] property.
- Reset the position of the image in the worksheet through ExcelPicture.TopRow property and ExcelPicture.LeftColumn property.
- Save the workbook to a different Excel file using Workbook.SaveToFile() method.
- Python
from spire.xls import *
from spire.xls.common import *

# Create a Workbook object
workbook = Workbook()

# Load the Excel document
workbook.LoadFromFile("C:/Users/Administrator/Desktop/Image.xlsx")

# Get a specific worksheet
sheet = workbook.Worksheets[0]

# Get a specific picture from the worksheet
picture = sheet.Pictures[0]

# Reset the position of the picture
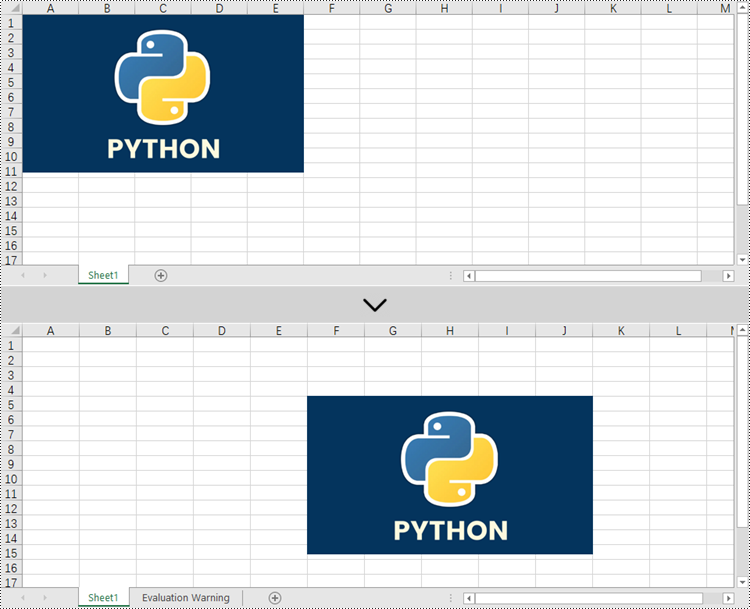
picture.TopRow = 5
picture.LeftColumn = 6

# Save to file
workbook.SaveToFile("output/MoveImage.xlsx", ExcelVersion.Version2016)
workbook.Dispose()

Move an Image from a Worksheet to Another in Python
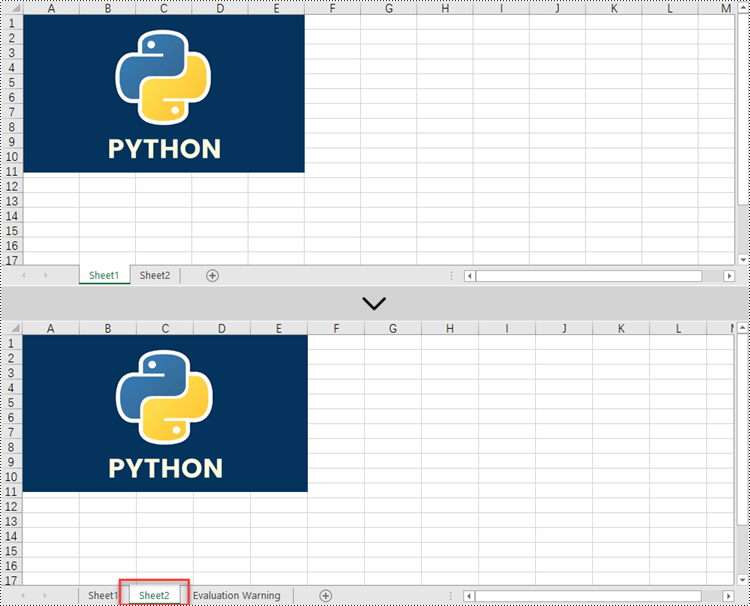
Besides moving images in the same worksheet, you can also move images in different worksheets of the workbook. First, you need to get the desired image from a worksheet and add it to a different worksheet using the Worksheet.Pictures.Add() method, and then delete the original image using the ExcelPicture.Remove() method. The detailed steps are as follows.
- Create a Workbook object.
- Load an Excel file using Workbook.LoadFromFile() method.
- Get a specific worksheet though Workbook.Worksheets[index] property.
- Get a specific image from the worksheet through Worksheet.Pictures[index] property.
- Get another worksheet though Workbook.Worksheets[index] property.
- Add the image to the target worksheet using Worksheet.Pictures.Add() method.
- Remove the image from the source worksheet using ExcelPicture.Remove() method.
- Save the workbook to a different Excel file using Workbook.SaveToFile() method.
- Python
from spire.xls import *
from spire.xls.common import *

# Create a Workbook object
workbook = Workbook()

# Load the Excel document
workbook.LoadFromFile("C:/Users/Administrator/Desktop/Image.xlsx")

# Get the first worksheet
sheet = workbook.Worksheets[0]

# Get the first picture from the worksheet
picture = sheet.Pictures[0]

# Get the second worksheet
sheet_two = workbook.Worksheets[1]

# Add the picture to the second worksheet
sheet_two.Pictures.Add(1, 1, picture.Picture)

# Remove the picture in the first worksheet
picture.Remove()

# Save to file
workbook.SaveToFile("output/MoveImage.xlsx", ExcelVersion.Version2016)
workbook.Dispose()

Apply for a Temporary License
If you'd like to remove the evaluation message from the generated documents, or to get rid of the function limitations, please request a 30-day trial license for yourself.
Python: Insert or Delete Pictures in Excel
Inserting or deleting images in Excel can be a powerful way to enhance your spreadsheets and make them visually appealing. Whether you want to include logos, charts, diagrams, or any other graphical elements, Excel provides the functionality to seamlessly integrate images into your worksheets. Additionally, Excel offers the options to manipulate and organize images, allowing you to resize, move, or delete them as needed. In this article, we will explore how to programmatically insert or delete pictures in Excel in Python by using Spire.XLS for Python.
Install Spire.XLS for Python
This scenario requires Spire.XLS for Python and plum-dispatch v1.7.4. They can be easily installed in your Windows through the following pip command.
pip install Spire.XLS
If you are unsure how to install, please refer to this tutorial: How to Install Spire.XLS for Python on Windows
Insert a Picture to a Specific Cell in Python
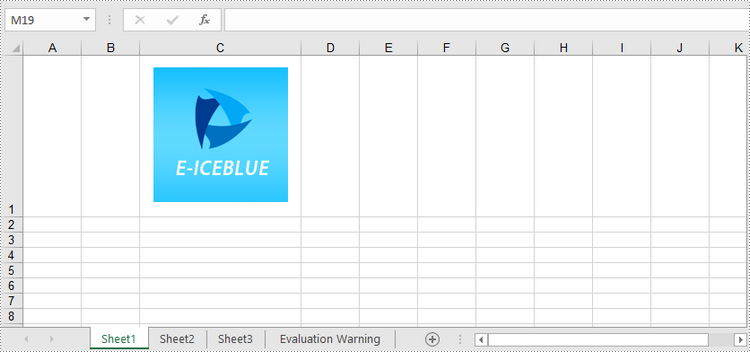
To add a picture to a certain cell, you use Worksheet.Pictures.Add(int topRow, int leftColumn, Image image) method. The following are the detailed steps.
- Initialize a Workbook instance.
- Get a specific worksheet through Workbook.Worksheets[sheetIndex] property.
- Insert a picture into a specific cell using Worksheet.Pictures.Add() method and return an object of ExcelPicture.
- Set the width and height of the picture, as well as the distance between the picture and the cell border through the properties under the ExcelPicture object.
- Save the workbook to an Excel file using Workbook.SaveToFile() method.
- Python
from spire.xls import *
from spire.xls.common import *

# Create a Workbook object
workbook = Workbook()

# Get the first worksheet.
sheet = workbook.Worksheets[0]

# Add a picture to a specific cell
imgPath = "C:\\Users\\Administrator\\Desktop\\logo.png"
picture = sheet.Pictures.Add(1, 3, imgPath)

# Set the picture width and height
picture.Width = 150
picture.Height = 150

# Adjust the column width and row height so that the cell can accommodate the picture
sheet.Columns[2].ColumnWidth = 25
sheet.Rows[0].RowHeight = 135

# Set the distance between cell border and image
picture.LeftColumnOffset = 90
picture.TopRowOffset = 20

# Save to file
workbook.SaveToFile("output/InsertImage.xlsx", ExcelVersion.Version2013)
workbook.Dispose()

Delete Pictures in a Worksheet in Python
A picture in a worksheet can be removed using Worksheet.Pictures[imgIndex].Remove() method. To delete all pictures, you can use a for loop to iterate through the pictures in the worksheet. The following are the detailed steps.
- Create a Workbook object.
- Load an Excel file using Workbook.LoadFromFile() method.
- Get a specific worksheet through Workbook.Worksheets[sheetIndex] property.
- Delete images in the worksheet using Worksheet.Pictures[imgIndex].Remove() method.
- Save the workbook to another Excel file using Workbook.SaveToFile() method.
- Python
from spire.xls import *
from spire.xls.common import *

# Create a Workbook object
workbook = Workbook()

# Load an Excel file
workbook.LoadFromFile("C:\\Users\\Administrator\\Desktop\\InsertImage.xlsx")

# Get the first worksheet
sheet = workbook.Worksheets[0]

# Delete all pictures from the worksheet
for i in range(sheet.Pictures.Count - 1, -1, -1):
    sheet.Pictures[i].Remove()

# Delete a specific picture
# sheet.Pictures[imgIndex].Remove()

# Save to file
workbook.SaveToFile("output/DeleteImage.xlsx", ExcelVersion.Version2013)
workbook.Dispose()
Apply for a Temporary License
If you'd like to remove the evaluation message from the generated documents, or to get rid of the function limitations, please request a 30-day trial license for yourself.