How to Install Spire.XLS for Python on Mac
Spire.XLS for Python is a high-performance library for reading and writing Excel spreadsheets in Python. With Spire.XLS, you can create, read, edit, and convert XLS and XLSX files without the need for Microsoft Excel to be installed on your system.
This article demonstrates how to install Spire.XLS for Python on Mac.
Step 1
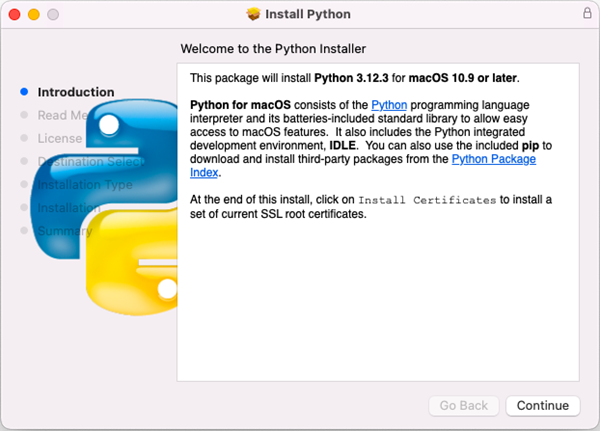
Download the most recent version of Python for macOS and install it on your Mac. If you have already completed this step, proceed directly to step 2.
Step 2
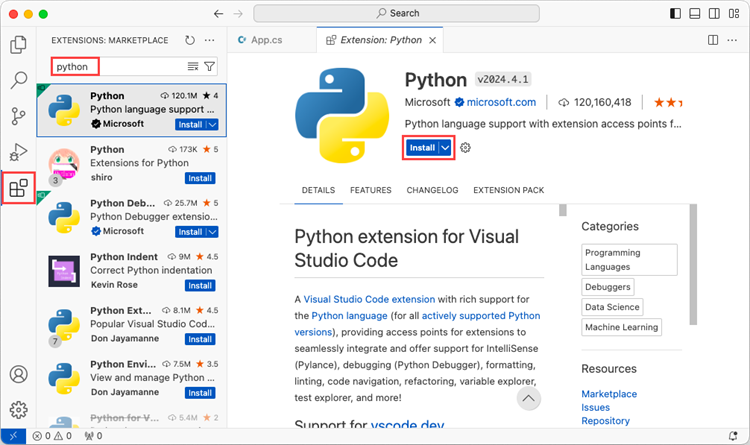
Open VS Code and search for 'Python' in the Extensions panel. Click 'Install' to add support for Python in your VS Code.
Step 3
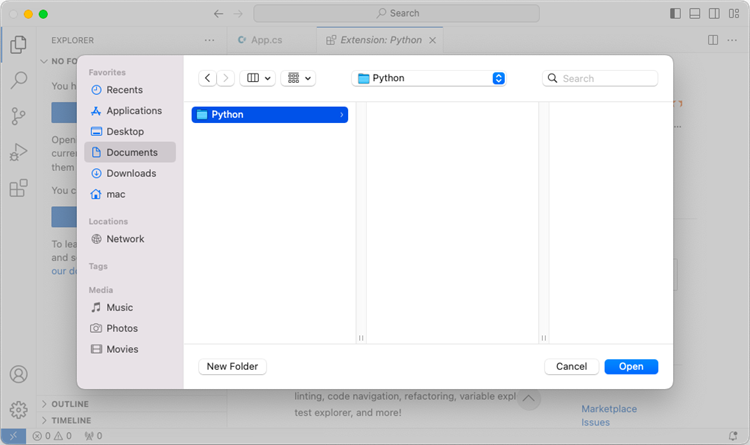
Click 'Explorer' > 'NO FOLRDER OPENED' > 'Open Folder'.
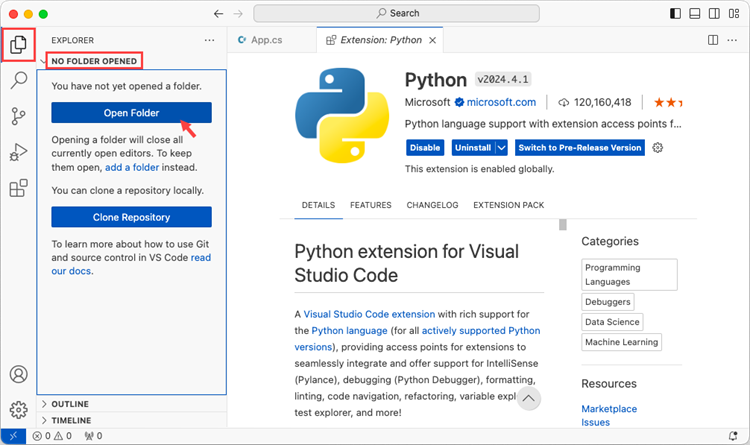
Choose an existing folder as the workspace, or you can create a new folder and then open it.
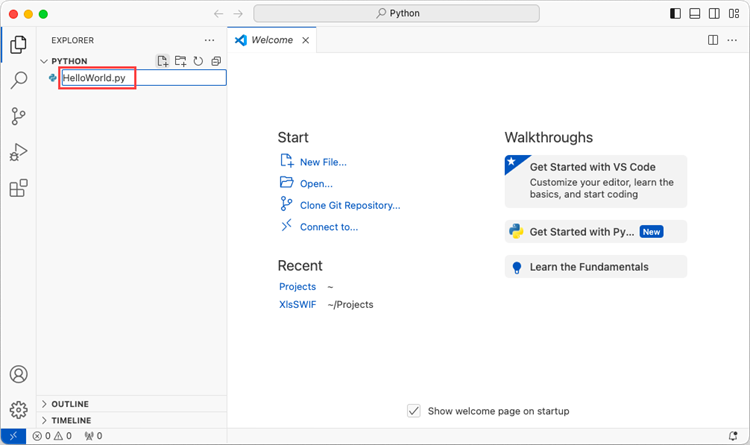
Add a .py file to the folder you just opened and name it whatever you want (in this case, HelloWorld.py).
Step 4
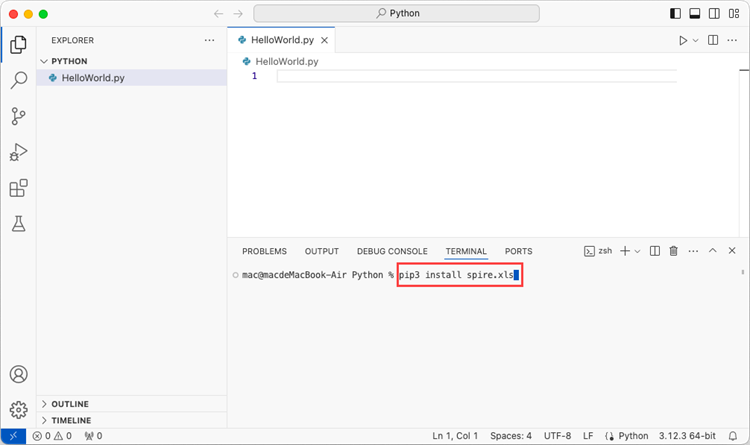
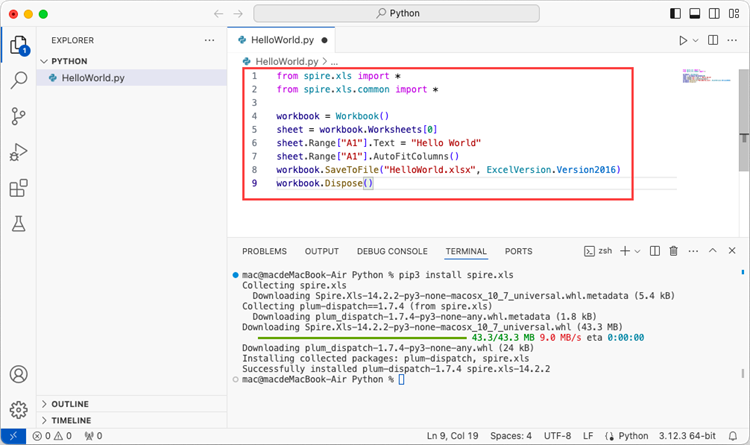
Use the keyboard shortcut Ctrl + ` to open the Terminal. Then, install Spire.XLS for Python by entering the following command line in the terminal.
pip3 install spire.xls
Note that pip3 is a package installer specifically designed for Python 3.x versions, while pip is a package installer for Python 2.x versions. If you are working with Python 2.x, you can use the pip command.
Step 5
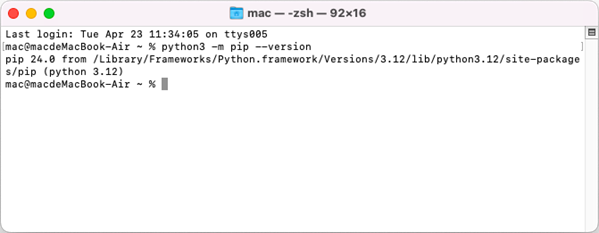
Open a Terminal window on your Mac, and type the following command to obtain the installation path of Python on your system.
python3 -m pip --version
Step 6
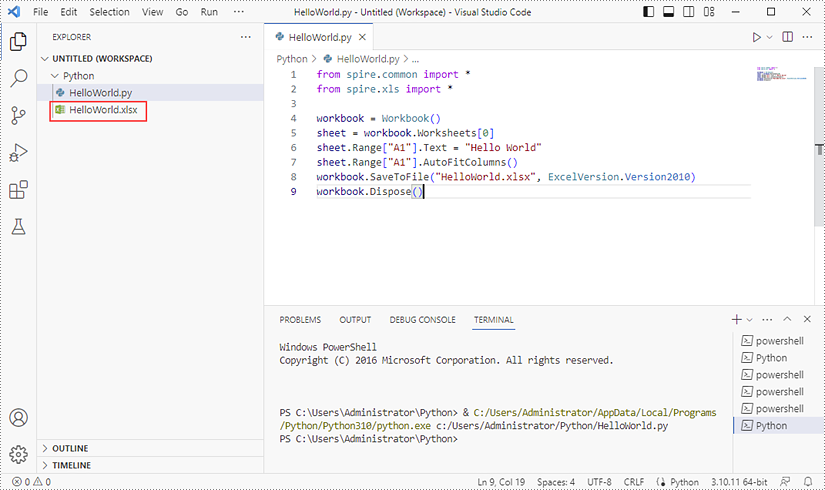
Add the following code snippet to the 'HelloWorld.py' file.
- Python
from spire.xls.common import *
from spire.xls import *

workbook = Workbook()
sheet = workbook.Worksheets[0]
sheet.Range["A1"].Text = "Hello World"
sheet.Range["A1"].AutoFitColumns()
workbook.SaveToFile("HelloWorld.xlsx", ExcelVersion.Version2010)
workbook.Dispose()
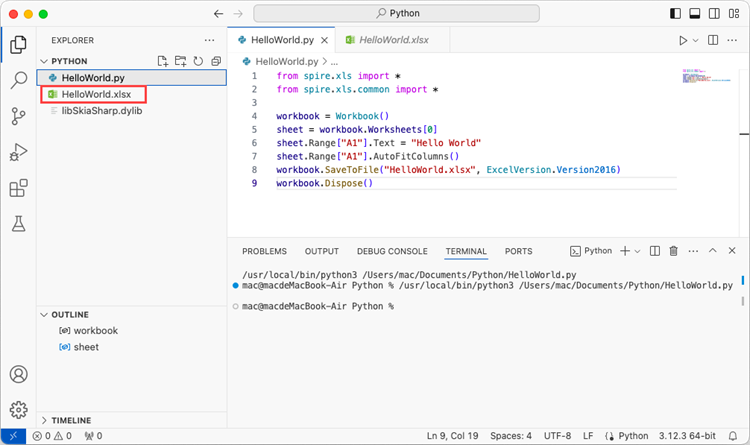
After executing the Python file, you will find the resulting Excel document displayed in the 'EXPLORER' panel.
How to Install Spire.XLS for Python on Windows
Spire.XLS for Python is a Python library for reading, creating, editing and converting Excel (.xls & .xlsx) files in any Python application. This article shows you how to install Spire.XLS for Python on Windows.
Step 1
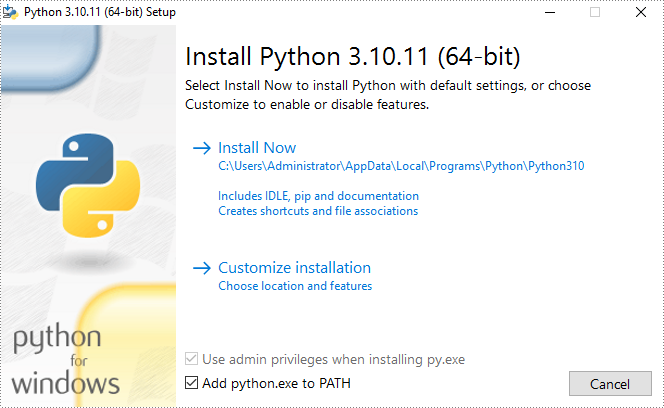
Download the latest version of Python and install it on your computer. If you have already installed it, skip to step 2.
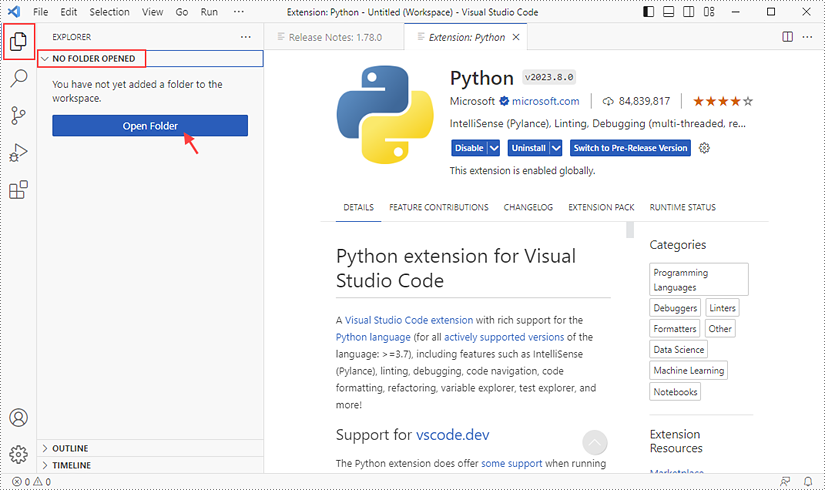
Step 2
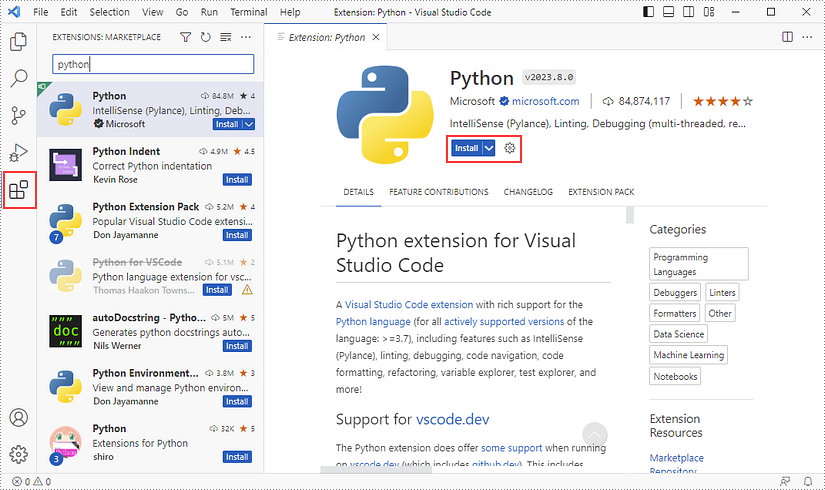
Click 'Extensions' in VS Code, search for 'Python' and then install it.
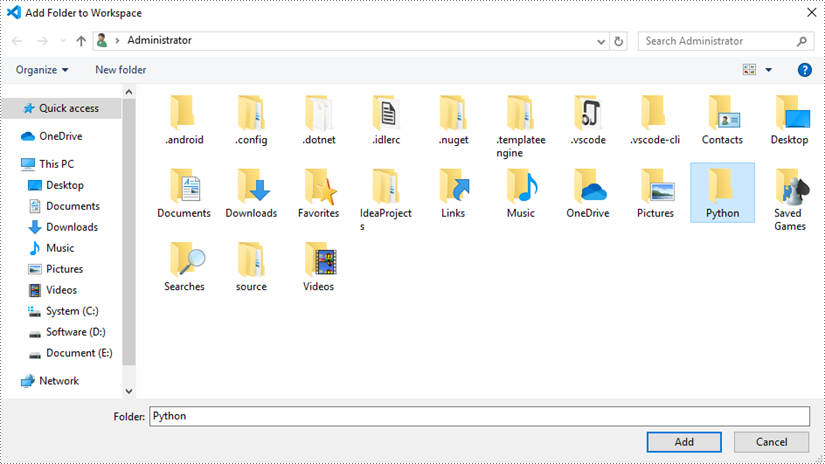
Step 3
Click 'Explorer' - 'NO FOLRDER OPENED' - 'Open Folder'.
Choose an existing folder as the workspace, or you can create a new folder and then select it.
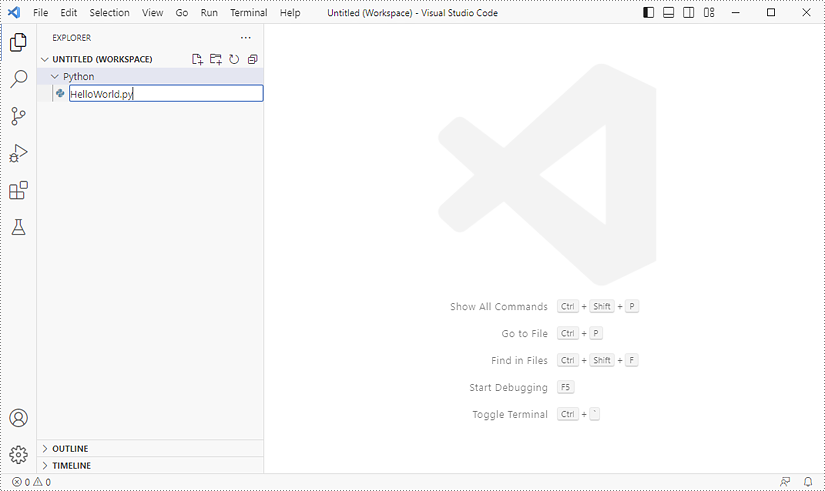
Add a .py file to the folder you've just added (Python folder in this case), and name it whatever you like.
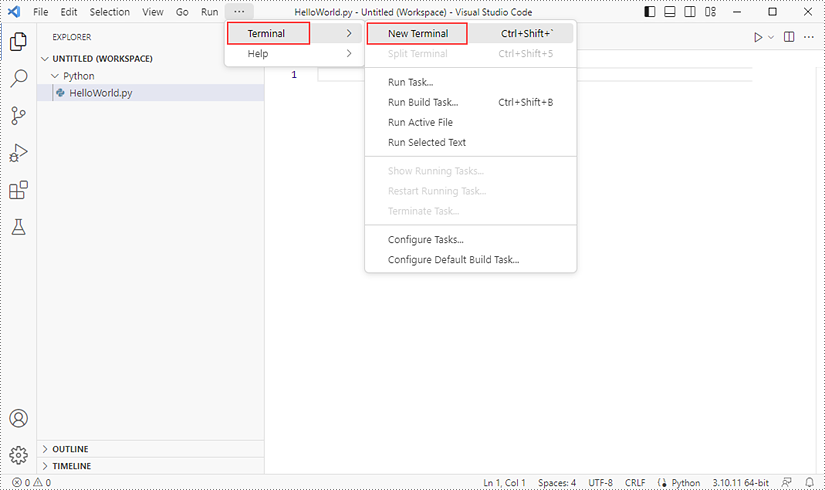
Step 4
Click 'Terminal' and then 'New Terminal'.
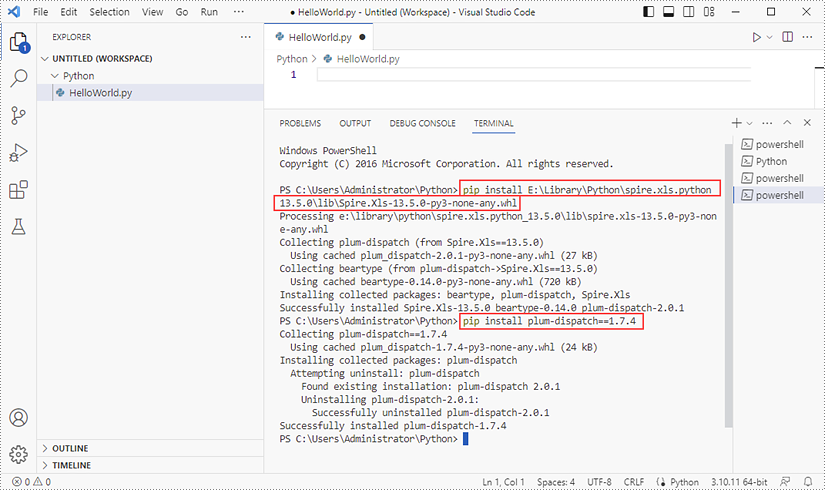
Input the following command to install Spire.XLS for Python and plum-dispatch v1.7.4.
pip install Spire.XLS
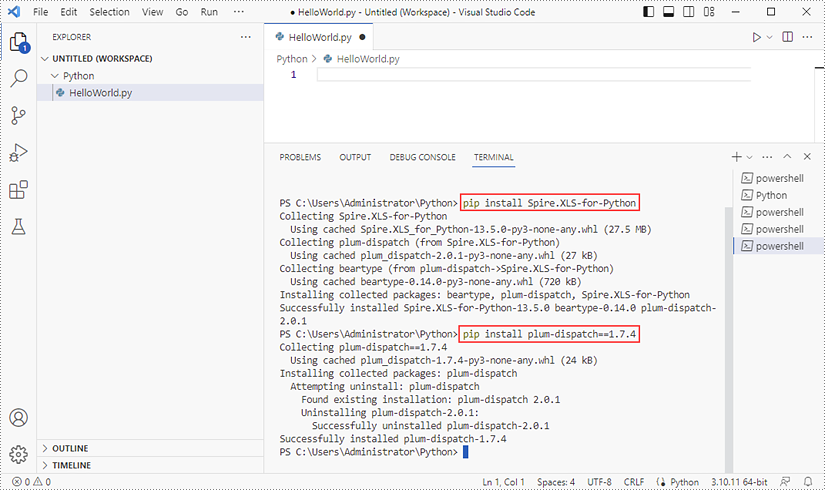
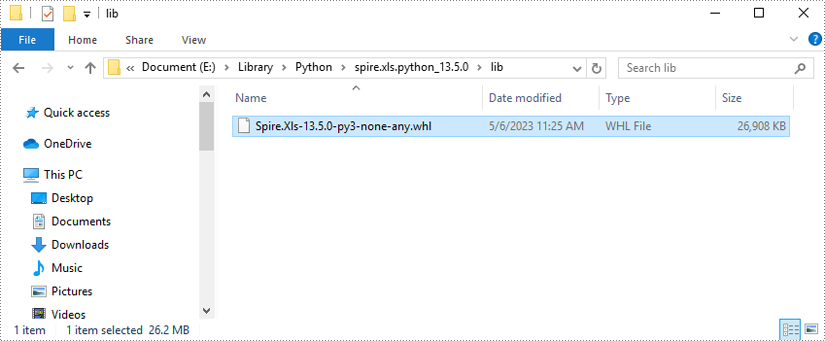
Alternatively, you can download Spire.XLS for Python from our website, and unzip it to get the .whl file from the 'lib' folder.
Then, install Spire.XLS for Python and plum-dispatch v1.7.4 by running the following commands.
pip install E:\Library\Python\spire.xls.python_13.5.0\lib\Spire.Xls-13.5.0-py3-none-any.whl
Step 5
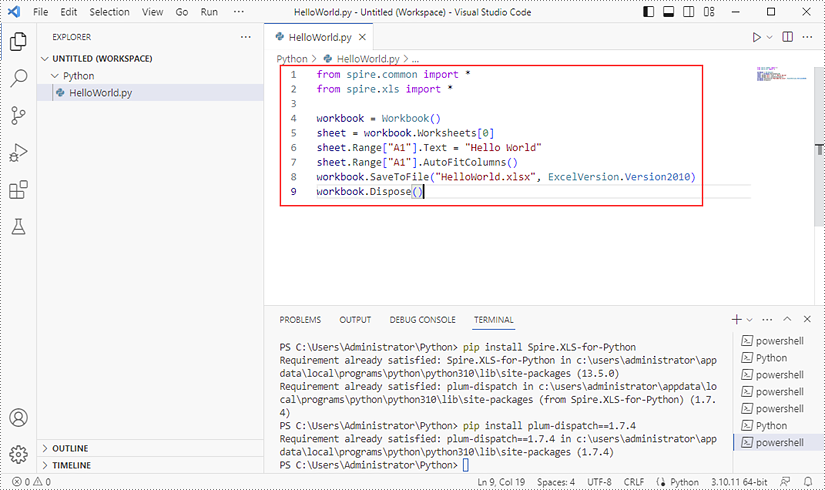
Add the following code snippet to the 'HelloWorld.py' file.
- Python
from spire.xls.common import *
from spire.xls import *

workbook = Workbook()
sheet = workbook.Worksheets[0]
sheet.Range["A1"].Text = "Hello World"
sheet.Range["A1"].AutoFitColumns()
workbook.SaveToFile("HelloWorld.xlsx", ExcelVersion.Version2010)
workbook.Dispose()
Once you run the Python file, you'll see the result Excel document in the 'EXPORER' panel.