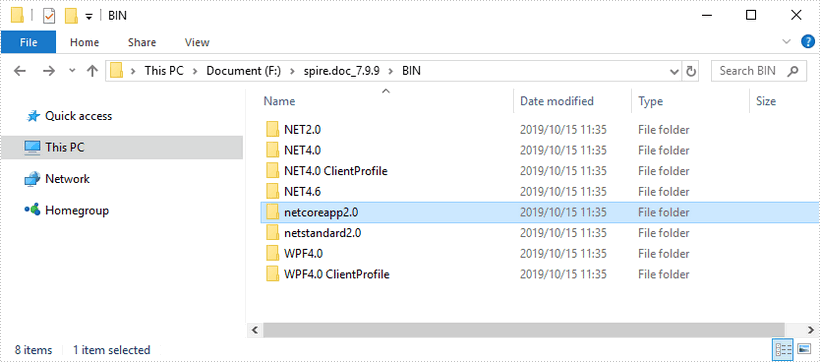
Step 1: Download the latest version of Spire.Doc Pack from the link below, unzip it, and you'll get the DLL files for .NET Core in the “netcoreapp2.0” folder. If you already have this folder in your disk, go straight to step two.

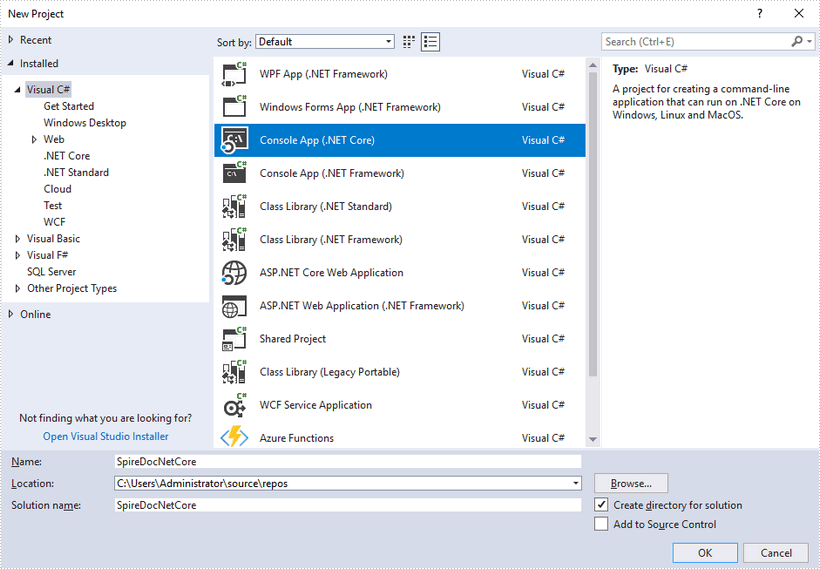
Step 2: Create a .Net Core application in your Visual Studio.

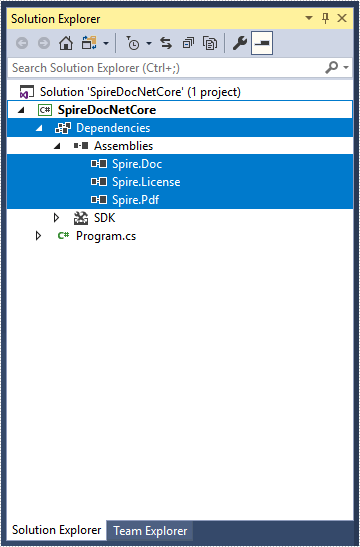
Step 3: Add all DLL files under the "netcoreapp2.0" folder as dependencies in your project.
Right-click "Dependencies" – select "Add Reference" – click "Browse" – selcet all DLLs under "netcoreapp2.0" folder – click "Add".

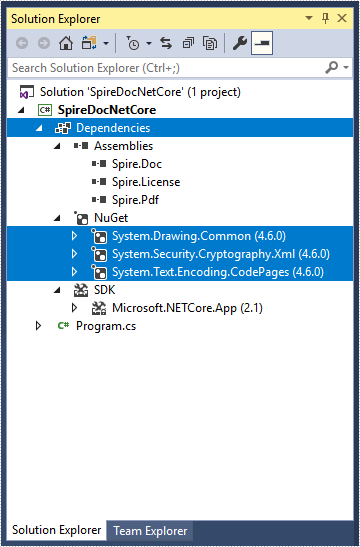
Step 4: Install the other three packages in your project via the NuGet Package Manager. They are System.Drawing.Common, System.Text.Encoding.CodePages and System.Security.Cryptography.Xml.
Right-click "Dependencies" – select "Manage NuGet Packages" – click "Browse" –type the package name – select the package from the search results – click "Install".

Step 5: Now that you've added all the dependences successfully, you can start to code. The following code snippet gives you an exmaple of how to create a simple Word document using Spire.Doc.
using Spire.Doc;
using Spire.Doc.Documents;

namespace SpireDocNetCore
{
    class Program
    {
        static void Main(string[] args)
        {
            //Create a document object
            Document doc = new Document();

            //Add a section
            Section section = doc.AddSection();

            //Add a paragrah
            Paragraph paragraph = section.AddParagraph();

            //Append text to the paragraph
            paragraph.AppendText("This article shows you how to mannually add Spire.Doc as dependency in a .NET Core application.");

            //Save to file
            doc.SaveToFile("Output.docx", FileFormat.Docx2013);
        }
    }
}

