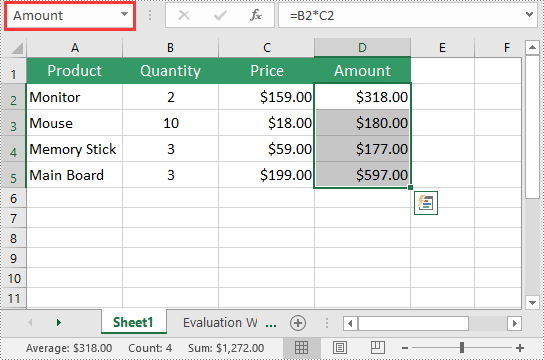
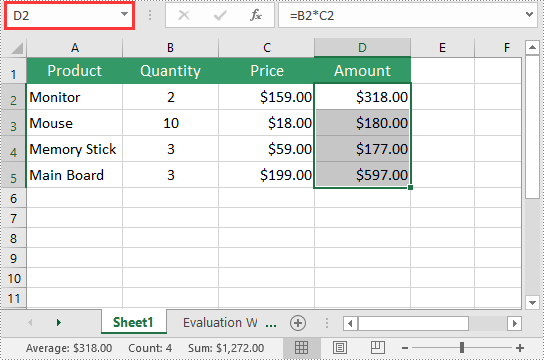
By default, Excel uses column letters and row numbers to refer to cells and ranges (for example, A1, B2:C5). While this approach is functional, it can become inconvenient, particularly when dealing with large datasets or complex formulas. Named ranges provide a solution to this problem by allowing users to assign custom names to cells or ranges, making them easier to identify, reference, and work with. In this article, we will explain how to create, edit and delete named ranges in Excel in Python using Spire.XLS for Python.
- Create a Named Range in Excel in Python
- Edit an Existing Named Range in Excel in Python
- Delete a Named Range from Excel in Python
Install Spire.XLS for Python
This scenario requires Spire.XLS for Python and plum-dispatch v1.7.4. They can be easily installed in your Windows through the following pip command.
pip install Spire.XLS
If you are unsure how to install, please refer to this tutorial: How to Install Spire.XLS for Python on Windows
Create a Named Range in Excel in Python
You can use the Workbook.NameRanges.Add() method provided by Spire.XLS for Python to add a named range to an Excel workbook. Once the named range is added, you can define the cell or range of cells it refers to using the INamedRange.RefersToRange property.
The following steps explain how to create a named range in Excel using Spire.XLS for Python:
- Create an object of the Workbook class.
- Load an Excel workbook using the Workbook.LoadFromFile() method.
- Add a named range to the workbook using the Workbook.NameRanges.Add() method.
- Get a specific worksheet in the workbook using the Workbook.Worksheets[] property.
- Set the cell range that the named range refers to using the INamedRange.RefersToRange property.
- Save the resulting file using the Workbook.SaveToFile() method.
- Python
from spire.xls import *
from spire.xls.common import *

# Create an object of the Workbook class
workbook = Workbook()
# Load an Excel workbook
workbook.LoadFromFile("Sample.xlsx")

# Add a named range to the workbook
namedRange = workbook.NameRanges.Add("Amount")

# Get a specific worksheet in the workbook
sheet = workbook.Worksheets[0]

# Set the cell range that the named range references
namedRange.RefersToRange = sheet.Range["D2:D5"]

# Save the resulting file to a specific location
workbook.SaveToFile("CreateNamedRange.xlsx", ExcelVersion.Version2016)

workbook.Dispose()

Edit an Existing Named Range in Excel in Python
After you've created a named range, you may want to modify its name or adjust the cells it refers to.
The following steps explain how to modify the name and cell references of an existing named range in Excel using Spire.XLS for Python:
- Create an object of the Workbook class.
- Load an Excel workbook using the Workbook.LoadFromFile() method.
- Get a specific named range in the workbook using the Workbook.NameRanges[] property.
- Modify the name of the named range using the INamedRange.Name property.
- Modify the cells that the named range refers to using the INamedRange.RefersToRange property.
- Save the resulting file using the Workbook.SaveToFile() method.
- Python
from spire.xls import *
from spire.xls.common import *

# Create an object of the Workbook class
workbook = Workbook()
# Load an Excel workbook
workbook.LoadFromFile("CreateNamedRange.xlsx")

# Get the first named range in the workbook
namedRange = workbook.NameRanges[0]

# Change the name of the named range
namedRange.Name = "MonitorAmount"

# Change the cell range that the named range references
namedRange.RefersToRange = workbook.Worksheets[0].Range["D2"]

# Save the resulting file to a specific location
workbook.SaveToFile("ModifyNamedRange.xlsx", ExcelVersion.Version2016)

workbook.Dispose()

Delete a Named Range from Excel in Python
If you have made significant changes to the structure or layout of your spreadsheet, it might be necessary to delete a named range that is no longer relevant or accurate.
The following steps explain how to delete a named range from Excel using Spire.XLS for Python:
- Create an object of the Workbook class.
- Load an Excel workbook using the Workbook.LoadFromFile() method.
- Remove a specific named range by its index or name using the Workbook.NameRanges.RemoveAt() or Workbook.NameRanges.Remove() method.
- Save the resulting file using the Workbook.SaveToFile() method.
- Python
from spire.xls import *
from spire.common import *

# Create an object of the Workbook class
workbook = Workbook()
# Load an Excel workbook
workbook.LoadFromFile("CreateNamedRange.xlsx")

# Remove the first named range by its index
workbook.NameRanges.RemoveAt(0)

# Remove the first named range by its name
# workbook.NameRanges.Remove("Amount");

# Save the resulting file to a specific location
workbook.SaveToFile("RemoveNamedRange.xlsx", ExcelVersion.Version2016)

workbook.Dispose()

Apply for a Temporary License
If you'd like to remove the evaluation message from the generated documents, or to get rid of the function limitations, please request a 30-day trial license for yourself.

