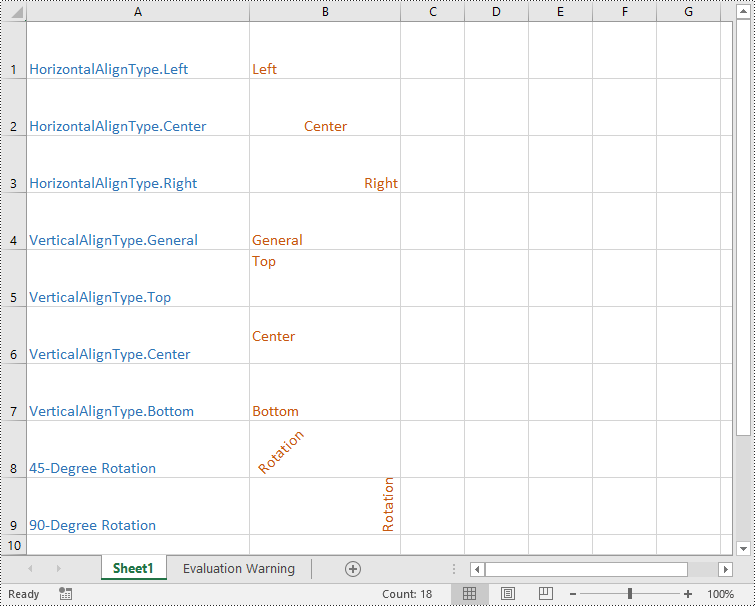
In Microsoft Excel, text alignment and text orientation are crucial formatting options for optimizing the presentation of text within cells. Text alignment determines the horizontal or vertical positioning of text within a cell, while text orientation controls the tilt angle or display direction of the text. By flexibly utilizing these formatting options, you can customize the appearance of text within cells to create professional and visually appealing spreadsheets. In this article, we will demonstrate how to set text alignment and orientation in Excel in Python using Spire.XLS for Python.
Install Spire.XLS for Python
This scenario requires Spire.XLS for Python and plum-dispatch v1.7.4. They can be easily installed in your Windows through the following pip command.
pip install Spire.XLS
If you are unsure how to install, please refer to this tutorial: How to Install Spire.XLS for Python on Windows
Set Text Alignment and Orientation in Excel in Python
Spire.XLS for Python provides the CellRange.Style.HorizontalAlignment and CellRange.Style.VerticalAlignment properties that enable you to customize the horizontal and vertical alignment of text in a single cell or range of cells. Additionally, it allows you to change the orientation of text by applying rotation to cells using the CellRange.Style.Rotation property. The detailed steps are as follows:
- Create an object of the Workbook class.
- Load an Excel file using the Workbook.LoadFromFile() method.
- Get a specific worksheet using the Workbook.Worksheets[index] property.
- Set the horizontal alignment for text in specific cells to Left, Center, Right, or General using the CellRange.Style.HorizontalAlignment property.
- Set the vertical alignment for text in specific cells to Top, Center, or Bottom using the CellRange.Style.VerticalAlignment property.
- Change the orientation for text in specific cells using the CellRange.Style.Rotation property.
- Save the result file using the Workbook.SaveToFile() method.
- Python
from spire.xls import *
from spire.xls.common import *

# Create an object of the Workbook class
workbook = Workbook()

# Load an Excel file
workbook.LoadFromFile("Example.xlsx")

# Get the first worksheet
sheet = workbook.Worksheets[0]

# Set the horizontal alignment for text in a specific cell to Left
sheet.Range["B1"].Style.HorizontalAlignment = HorizontalAlignType.Left
# Set the horizontal alignment for text in a specific cell to Center
sheet.Range["B2"].Style.HorizontalAlignment = HorizontalAlignType.Center
# Set the horizontal alignment for text in a specific cell to Right
sheet.Range["B3"].Style.HorizontalAlignment = HorizontalAlignType.Right
# Set the horizontal alignment for text in a specific cell to General
sheet.Range["B4"].Style.HorizontalAlignment = HorizontalAlignType.General

# Set the vertical alignment for text in a specific cell to Top
sheet.Range["B5"].Style.VerticalAlignment = VerticalAlignType.Top
# Set the vertical alignment for text in a specific cell to Center
sheet.Range["B6"].Style.VerticalAlignment = VerticalAlignType.Center
# Set the vertical alignment for text in a specific cell to Bottom
sheet.Range["B7"].Style.VerticalAlignment = VerticalAlignType.Bottom

# Change the text orientation in specific cells by applying rotation
sheet.Range["B8"].Style.Rotation = 45
sheet.Range["B9"].Style.Rotation = 90

# Save the result file
workbook.SaveToFile("TextAlignmentAndOrientation.xlsx", ExcelVersion.Version2016)
workbook.Dispose()

Apply for a Temporary License
If you'd like to remove the evaluation message from the generated documents, or to get rid of the function limitations, please request a 30-day trial license for yourself.


