Only convert visible or hidden worksheet to image in C#
Spire.XLS supports to convert the whole excel workbook into Image, PDF, HTML and other files formats; it also supports to hide or show the worksheet in C#. When we have hidden worksheet in the excel files, developers can also use Spire.XLS to only convert the visible or hidden excel worksheets to other file formats by judge the property of WorksheetVisibility. This article will show you how to only convert visible or hidden worksheet to image in C#.
Here comes to the steps:
Step 1: Create a new document and load from file.
Workbook book = new Workbook();
book.LoadFromFile("sample.xlsx", ExcelVersion.Version2010);
Step 2: Traverse every worksheet in the excel file.
foreach (Spire.Xls.Worksheet ws2 in book.Worksheets)
Step 3: Call the property of WorksheetVisibility to judge visible or hidden excel worksheet.
//only converts the visible sheet
if (ws2.Visibility == WorksheetVisibility.Visible)
//only converts the hidden sheet
if (ws2.Visibility == WorksheetVisibility.Hidden)
Step 4: Use SaveToImage to convert Excel worksheet to Image.
ws2.SaveToImage("result.jpg");
Effective screenshots:
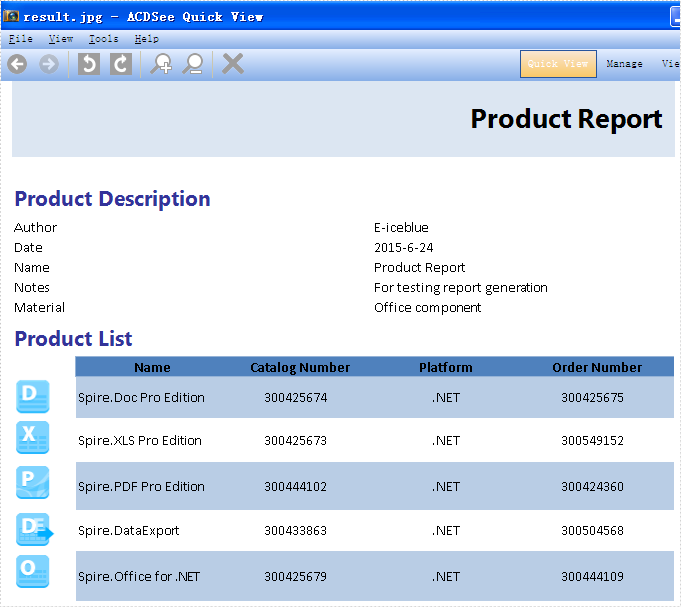
Only convert the visible worksheet to Image in .jpg format.
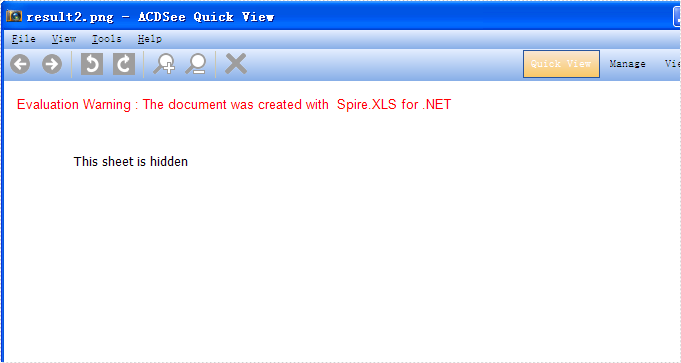
Only convert the hidden worksheet to Image in .png format.
Full codes:
using Spire.Xls;
namespace Convert

{
    class Program
    {

       static void Main(string[] args)
        {

            Workbook book = new Workbook();
            book.LoadFromFile("sample.xlsx", ExcelVersion.Version2010);

            foreach (Spire.Xls.Worksheet ws2 in book.Worksheets)
            {
                //only convert the visible sheet
                if (ws2.Visibility == WorksheetVisibility.Visible)
                    ////only convert the hidden sheet
                    //if (ws2.Visibility == WorksheetVisibility.Hidden)
                    ws2.SaveToImage("result.jpg");
            }
        }
        }
    }
C#/VB.NET: Hide or Show Worksheets in Excel
Sometimes, you may want to hide one or more worksheets in an Excel workbook to prevent the data they contain from being viewed by others. After hiding, the data in the hidden worksheets will no longer be visible, but it can still be referenced by other worksheets. If you want to display the data again, you can show the hidden worksheets at any time. In this article, you will learn how to hide or show worksheets in Excel in C# and VB.NET using Spire.XLS for .NET library.
Install Spire.XLS for .NET
To begin with, you need to add the DLL files included in the Spire.XLS for .NET package as references in your .NET project. The DLL files can be either downloaded from this link or installed via NuGet.
PM> Install-Package Spire.XLS
Hide a Worksheet in Excel in C# and VB.NET
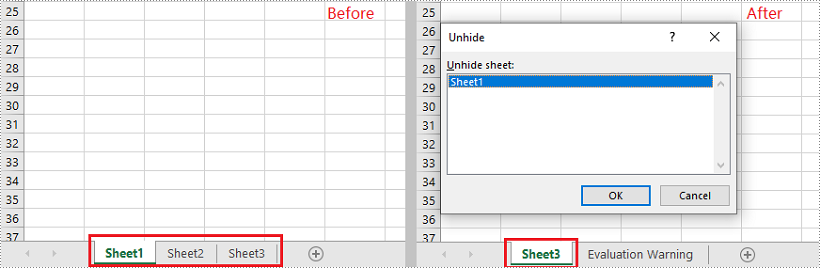
There can be two levels of worksheet hiding: hidden and very hidden. An end user can easily show a hidden worksheet using the unhide command of Excel, but if the worksheet is set as very hidden, he/she cannot make the sheet visible again via the Excel user interface.
In Spire.XLS for .NET, you can set a worksheet as hidden or very hidden by setting the Worksheet.Visibility property to WorksheetVisibility.Hidden or WorksheetVisibility.StrongHidden. Please note that you must leave at least one worksheet visible in an Excel workbook.
The following steps demonstrate how to set a worksheet as hidden or very hidden:
- Initialize an instance of the Workbook class.
- Load an Excel file through Workbook.LoadFromFile() method.
- Get a specific worksheet in the file by its index through Workbook.Worksheets[int] property.
- Set the worksheet as hidden or very hidden by setting the Worksheet.Visibility property to WorksheetVisibility.Hidden or WorksheetVisibility.StrongHidden.
- Save the result file using Workbook.SaveToFile() method.
- C#
- VB.NET
using Spire.Xls;

namespace HideWorksheetsInExcel
{
    class Program
    {
        static void Main(string[] args)
        {
            //Initialize an instance of the Workbook class
            Workbook workbook = new Workbook();
            //Load an Excel file
            workbook.LoadFromFile("Sample.xlsx");

            //Get the first worksheet
            Worksheet sheet1 = workbook.Worksheets[0];

            //Set the worksheet as hidden
            sheet1.Visibility = WorksheetVisibility.Hidden;

            //Get the second worksheet
            Worksheet sheet2 = workbook.Worksheets[1];

            //Set the worksheet as very hidden
            sheet2.Visibility = WorksheetVisibility.StrongHidden;

            //Save the result file
            workbook.SaveToFile("HideWorksheets.xlsx", ExcelVersion.Version2013);
        }
    }
}
Show All Hidden Worksheets in Excel in C# and VB.NET
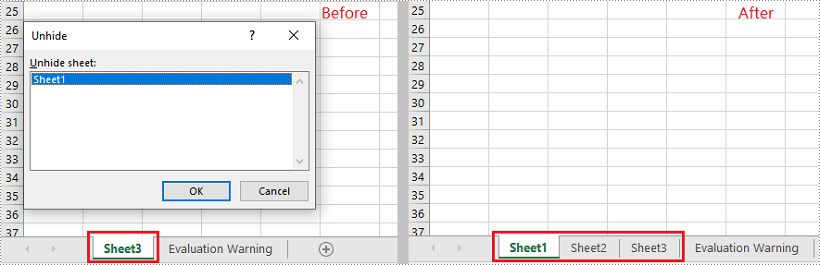
You can show a hidden worksheet in Excel by setting the Worksheet.Visibility property to WorksheetVisibility.Visible.
The following steps demonstrate how to show all hidden worksheets in an Excel file:
- Initialize an instance of the Workbook class.
- Load an Excel file through Workbook.LoadFromFile() method.
- Iterate through all worksheets in the Excel file.
- Find the hidden or very hidden worksheets, and then make them visible by setting the Worksheet.Visibility property to WorksheetVisibility.Visible.
- Save the result file using Workbook.SaveToFile() method.
- C#
- VB.NET
using Spire.Xls;

namespace ShowHiddenWorksheetsInExcel
{
    class Program
    {
        static void Main(string[] args)
        {
            //Initialize an instance of the Workbook class
            Workbook workbook = new Workbook();
            //Load an Excel file
            workbook.LoadFromFile("HideWorksheets.xlsx");

            //Iterate through all worksheets in the file
            foreach (Worksheet sheet in workbook.Worksheets)
            {
                //Show hidden worksheets
                if (sheet.Visibility == WorksheetVisibility.Hidden)
                {
                    sheet.Visibility = WorksheetVisibility.Visible;
                }
                //Show very hidden worksheets
                else if (sheet.Visibility == WorksheetVisibility.StrongHidden)
                {
                    sheet.Visibility = WorksheetVisibility.Visible;
                }
            }

            //Save the result file
            workbook.SaveToFile("ShowHiddenWorksheets.xlsx", ExcelVersion.Version2013);
        }
    }
}
Apply for a Temporary License
If you'd like to remove the evaluation message from the generated documents, or to get rid of the function limitations, please request a 30-day trial license for yourself.
How to get the page count of excel file in C#
Different printer drivers print out the document with different numbers of rows and columns. When we need to print an excel file with header and footer, the information of how many pages in one excel file and where is the first line start becomes very important. This article will show you how to get the page count of excel file and the row and column number of page break in C# by using Spire.XLS for .NET.
Firstly, make sure that Spire.XLS for .NET (version7.3.12 or above) has been installed on your machine. And then, adds Spire.XLS.dll as reference in the downloaded Bin folder thought the below path: "..\Spire.XLS\Bin\NET4.0\ Spire.XLS.dll".
Now it comes to the details of how to get the page count of excel file in C#:
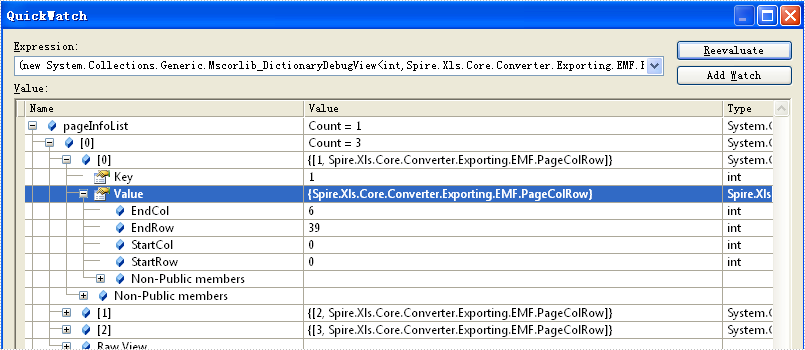
//Create a new excel document
Workbook wb = new Workbook();
//load from the file
wb.LoadFromFile(@"D:\test.xlsx");
//get the page info.
var pageInfoList = wb.GetSplitPageInfo();
//Get the sheet count
int sheetCount = pageInfoList.Count;
//The page count of the first sheet
int pageCount = pageInfoList[0].Count;
You could find a screenshot shows row number and column number of each Excel page.
Spire.XLS for .NET, as a professional Excel component, it enables you to generate, read, write and manipulate Excel files in C#, VB.NET in any .NET applications directly.
C#: Move or Delete Worksheets in Excel
When working with Excel files that contain multiple worksheets, you may sometimes find that some of the worksheets are no longer necessary or need to be organized in a different way. In these cases, you have the option of moving or deleting the worksheets to better manage your spreadsheet. In this article, you will learn how to move or delete worksheets in Excel in C# using Spire.XLS for .NET.
Install Spire.XLS for .NET
To begin with, you need to add the DLL files included in the Spire.XLS for .NET package as references in your .NET project. The DLL files can be either downloaded from this link or installed via NuGet.
PM> Install-Package Spire.XLS
Move a Worksheet in Excel in C#
Spire.XLS for .NET provides the Worksheet.MoveWorksheet(int destIndex) method to move an Excel worksheet to a desired position by specifying the index. The following are the detailed steps:
- Create a Workbook instance.
- Load an Excel file using Workbook.LoadFromFile() method.
- Get a specific worksheet using Workbook.Worksheet[] property.
- Move the worksheet to another position using Worksheet.MoveWorksheet() method.
- Save the result file using Workbook.SaveToFile() method.
- C#
using Spire.Xls;
namespace MoveSheet
{
class Program
{
static void Main(string[] args)
{
//Create a Workbook instance
Workbook workbook = new Workbook();
//Load an Excel file
workbook.LoadFromFile("Budget.xlsx");
//Get the first worksheet
Worksheet sheet = workbook.Worksheets[0];
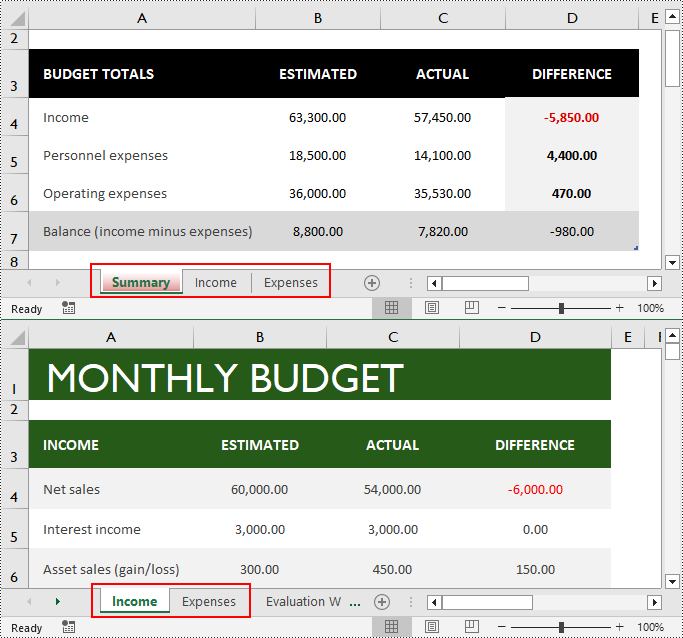
//Move the worksheet to the 3rd position
sheet.MoveWorksheet(2);
//Save the result file
workbook.SaveToFile("MoveWorksheet.xlsx", ExcelVersion.Version2016);
}
}
}

Delete a Worksheet in Excel in C#
You can remove a specific worksheet from Excel by sheet index or name using the Workbook.Worksheets.RemoveAt(int index) or Workbook.Worksheets.Remove(string sheetName) method. The following are the detailed steps:
- Create a Workbook instance.
- Load an Excel file using Workbook.LoadFromFile() method.
- Delete a specific worksheet from the file using Workbook.Worksheets.RemoveAt() or Workbook.Worksheets.Remove() method.
- Save the result file using Workbook.SaveToFile() method.
- C#
using Spire.Xls;

namespace RemoveSheet
{
    class Program
    {
        static void Main(string[] args)
        {
            //Create a Workbook instance
            Workbook workbook = new Workbook();

            //Load an Excel file
            workbook.LoadFromFile("Budget.xlsx");

            //Remove a specific worksheet by index
            workbook.Worksheets.RemoveAt(0);
            //Remove a specific worksheet by name
            //workbook.Worksheets.Remove("Summary");

            //Save the result file
            workbook.SaveToFile("DeleteWorksheet.xlsx", ExcelVersion.Version2016);

        }
    }
}
Apply for a Temporary License
If you'd like to remove the evaluation message from the generated documents, or to get rid of the function limitations, please request a 30-day trial license for yourself.
C#/VB.NET: Add Worksheets to Excel
When working with an existing Excel file or creating an Excel file from scratch, we may need to add one or more worksheets to record data. In this article, we will demonstrate how to add worksheets to Excel in C# and VB.NET using Spire.XLS for .NET library.
- Add a Worksheet to an Existing Excel file
- Add a Worksheet to a New Excel file
- Add Multiple Worksheets to a New Excel file
Install Spire.XLS for .NET
To begin with, you need to add the DLL files included in the Spire.XLS for.NET package as references in your .NET project. The DLLs files can be either downloaded from this link or installed via NuGet.
PM> Install-Package Spire.XLS
Add a Worksheet to an Existing Excel file in C# and VB.NET
The following are the steps to add a worksheet to an existing Excel file:
- Create an instance of Workbook class.
- Load an Excel workbook using Workbook.LoadFromFile() method.
- Add a worksheet to the workbook using Workbook.Worksheets.Add(sheetName) method.
- Add data to a cell using Worksheet.Range[rowIndex, columnIndex].Value property.
- Save the result workbook using Workbook.SaveToFile() method.
- C#
- VB.NET
using Spire.Xls;
namespace AddWorksheet
{
class Program
{
static void Main(string[] args)
{
//Create a Workbook instance
Workbook workbook = new Workbook();
//Load an Excel file
workbook.LoadFromFile("Sample.xlsx");
//Add a worksheet
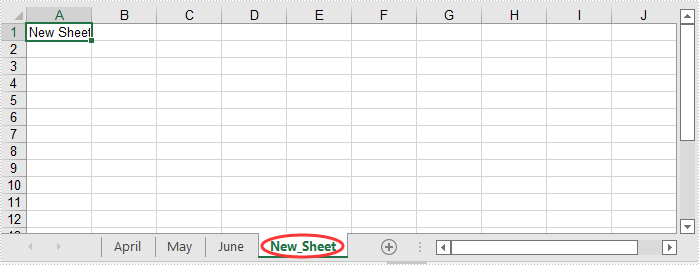
Worksheet sheet = workbook.Worksheets.Add("New_Sheet");
//Add data to cell (1, 1)
sheet.Range[1, 1].Value = "New Sheet";
//Save the result file
workbook.SaveToFile("AddWorksheets.xlsx", ExcelVersion.Version2016);
}
}
}
Add a Worksheet to a New Excel File in C# and VB.NET
The following steps show how to create a new Excel file and add a worksheet to it:
- Create an instance of Workbook class.
- Clear the default worksheets using Workbook.Worksheets.Clear() method.
- Add a worksheet to the workbook using Workbook.Worksheets.Add(sheetName) method.
- Add data to a cell using Worksheet.Range[rowIndex, columnIndex].Value property.
- Save the result workbook using Workbook.SaveToFile() method.
- C#
- VB.NET
using Spire.Xls;
namespace AddWorksheetToNewExcel
{
class Program
{
static void Main(string[] args)
{
//Create a Workbook instance
Workbook workbook = new Workbook();
//Clear the default worksheets
workbook.Worksheets.Clear();
//Add a worksheet with name
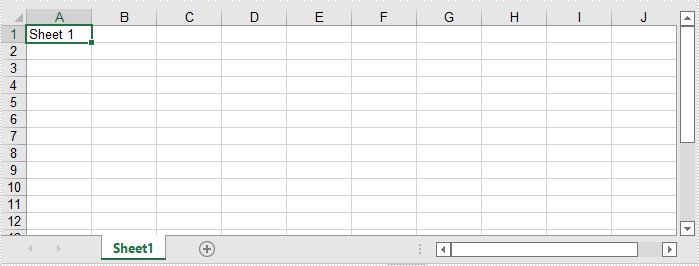
Worksheet sheet = workbook.Worksheets.Add("Sheet1");
//Add data to cell (1, 1)
sheet.Range[1, 1].Value = "Sheet 1";
//Save the result file
workbook.SaveToFile("AddWorksheets.xlsx", ExcelVersion.Version2016);
}
}
}
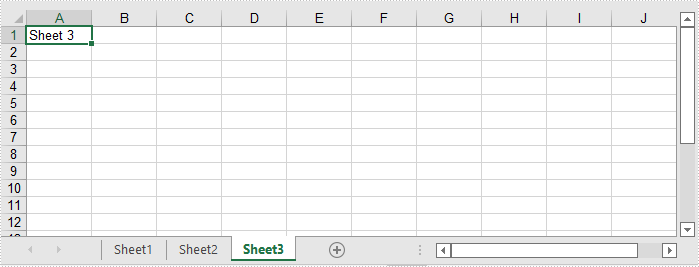
Add Multiple Worksheets to a New Excel File in C# and VB.NET
The following steps show how to create a new Excel file and add 3 worksheets to it:
- Create an instance of Workbook class.
- Add 3 worksheets to the workbook using Workbook.CreateEmptySheets(sheetCount) method.
- Loop through the worksheets in the workbook, add data to cell (1, 1) in each worksheet using Worksheet.Range[rowIndex, columnIndex].Value property.
- Save the result workbook using Workbook.SaveToFile() method.
- C#
- VB.NET
using Spire.Xls;

namespace AddWorksheetsToNewExcel
{
    class Program
    {
        static void Main(string[] args)
        {
            //Create a Workbook instance
            Workbook workbook = new Workbook();

            //Add 3 worksheets
            workbook.CreateEmptySheets(3);

            //Loop through the worksheets
            for (int i = 0; i < workbook.Worksheets.Count; i++)
            {
                Worksheet sheet = workbook.Worksheets[i];
                //Add data to cell (1, 1) in each worksheet
                sheet.Range[1, 1].Value = "Sheet " + (i + 1);
            }

            //Save the result file
            workbook.SaveToFile("AddWorksheetsToNewExcel.xlsx", ExcelVersion.Version2016);
        }
    }
}
Apply for a Temporary License
If you'd like to remove the evaluation message from the generated documents, or to get rid of the function limitations, please request a 30-day trial license for yourself.
C#/VB.NET: Insert Page Breaks in Excel
In Excel, a page break is a separator that divides a worksheet into several different pages/segments for the purpose of better printing. By inserting page breaks where necessary, you can avoid misalignment of data and ensure a desired print result, which is especially useful when working with a large data set. This article will demonstrate how to programmatically insert horizontal or vertical page breaks in Excel using Spire.XLS for .NET.
- Insert Horizontal Page Breaks in an Excel Worksheet
- Insert Vertical Page Breaks in an Excel Worksheet
Install Spire.XLS for .NET
To begin with, you need to add the DLL files included in the Spire.XLS for .NET package as references in your .NET project. The DLL files can be either downloaded from this link or installed via NuGet.
PM> Install-Package Spire.XLS
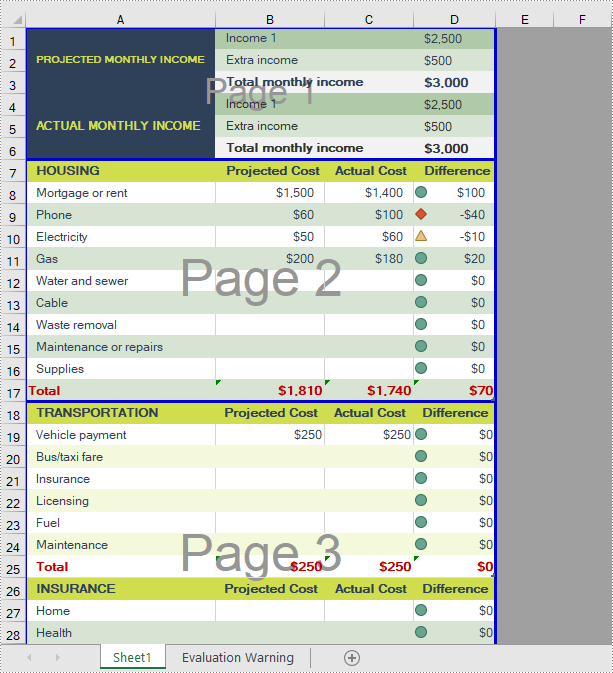
Insert Horizontal Page Breaks in an Excel Worksheet
A horizontal page break is inserted between a selected row and the row above it. After insertion, the selected row will become the top row of the new page. With Spire.XLS for .NET, developers are allowed to use the Worksheet.HPageBreaks.Add(CellRange) method to insert horizontal page breaks. The detailed steps are as follows.
- Create a Workbook instance.
- Load a sample Excel file using Workbook.LoadFromFile() method.
- Get a specified worksheet using Workbook.Worksheets[sheetIndex] property.
- Add horizontal page break to a specified cell range using Worksheet.HPageBreaks.Add(CellRange) method.
- Set view mode to Preview mode using Worksheet.ViewMode property.
- Save the result file using Workbook.SaveToFile() method.
- C#
- VB.NET
using Spire.Xls;

namespace EditExcelComment
{
    class Program
    {
        static void Main(string[] args)
        {
            //Create a Workbook instance
            Workbook workbook = new Workbook();

            //Load a sample Excel document
            workbook.LoadFromFile("input.xlsx");

            //Get the first worksheet
            Worksheet sheet = workbook.Worksheets[0];

            //Set Excel page break horizontally
            sheet.HPageBreaks.Add(sheet.Range["A7"]);
            sheet.HPageBreaks.Add(sheet.Range["A18"]);

            //Set view mode to Preview mode
            sheet.ViewMode = ViewMode.Preview;

            //Save the result document
            workbook.SaveToFile("SetHorizontalPageBreak.xlsx");
        }
    }
}
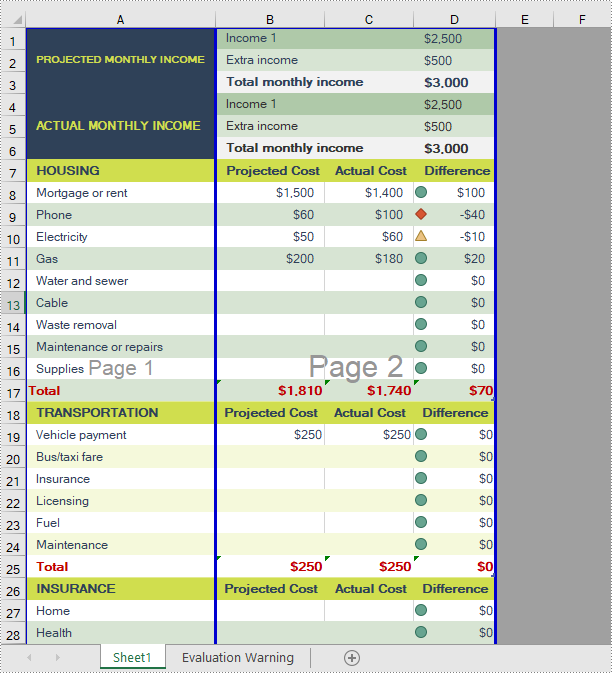
Insert Vertical Page Breaks in an Excel Worksheet
A vertical page break is inserted between a selected column and the column to its left. After insertion, the selected column will become the left most column of the new page. To insert vertical page breaks, developers can use the Worksheet.VPageBreaks.Add(CellRange) method offered by Spire.XLS for .NET offers. The detailed steps are as follows.
- Create a Workbook instance.
- Load a sample Excel file using Workbook.LoadFromFile() method.
- Get a specified worksheet using Workbook.Worksheets[sheetIndex] property.
- Add vertical page break to a specified cell range using Worksheet.VPageBreaks.Add(CellRange) method.
- Set view mode to Preview mode using Worksheet.ViewMode property.
- Save the result file using Workbook.SaveToFile() method.
- C#
- VB.NET
using Spire.Xls;

namespace EditExcelComment
{
    class Program
    {
        static void Main(string[] args)
        {
            //Create a Workbook instance
            Workbook workbook = new Workbook();

            //Load a sample Excel document
            workbook.LoadFromFile("input.xlsx");

            //Get the first worksheet
            Worksheet sheet = workbook.Worksheets[0];

            //Set Excel page break vertically
            sheet.VPageBreaks.Add(sheet.Range["B1"]);

            //Set view mode to Preview mode
            sheet.ViewMode = ViewMode.Preview;

            //Save the result document
            workbook.SaveToFile("SetVerticalPageBreak.xlsx");
        }
    }
}
Apply for a Temporary License
If you'd like to remove the evaluation message from the generated documents, or to get rid of the function limitations, please request a 30-day trial license for yourself.
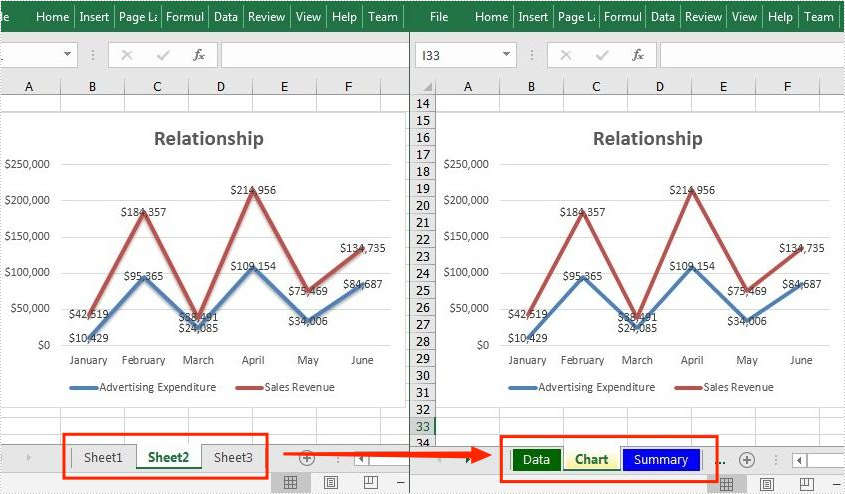
C#/VB.NET: Rename Excel Sheets and Set Tab Colors
An Excel file can contain dozens of sheets, and sometimes you may need to rename these sheets to make the whole workbook more organized. Meanwhile, setting different tab colors also seems to be a good way to highlight certain important sheets. This article will introduce how to programmatically rename Excel sheets and set tab colors using Spire.XLS for .NET.
Install Spire.XLS for.NET
To begin with, you need to add the DLL files included in the Spire.XLS for .NET package as references in your .NET project. The DLL files can be either downloaded from this link or installed via NuGet.
PM> Install-Package Spire.XLS
Rename Excel Sheets and Set Tab Colors
Spire.XLS for .NET offers a simple solution for you to rename sheets and set tab colors in Excel. The detailed steps are as follows.
- Create a Workbook object.
- Load a sample Excel file using Workbook.LoadFromFile() method.
- Get a specified worksheet using Workbook.Worksheets[int] property.
- Rename the specified worksheet using Worksheet.Name property.
- Set tab color for the specified worksheet using Worksheet.TabColor property.
- Save the document to another file using Workbook.SaveToFile() method.
- C#
- VB.NET
using Spire.Xls;
using System.Drawing;

namespace RenameWorksheet
{
    class Program
    {
        static void Main(string[] args)
        {
            //Create a Workbook object
            Workbook workbook = new Workbook();

            //Load a sample Excel file
            workbook.LoadFromFile(@"C:\Users\Administrator\Desktop\input.xlsx");

            //Get the specified worksheet
            Worksheet worksheet = workbook.Worksheets[0];
            Worksheet worksheet1 = workbook.Worksheets[1];
            Worksheet worksheet2 = workbook.Worksheets[2];

            //Rename Excel worksheet
            worksheet.Name = "Data";
            worksheet1.Name = "Chart";
            worksheet2.Name = "Summary";

            //Set tab color
            worksheet.TabColor = Color.DarkGreen;
            worksheet1.TabColor = Color.Gold;
            worksheet2.TabColor = Color.Blue;

            //Save to file
            workbook.SaveToFile("Rename.xlsx", ExcelVersion.Version2010);
        }
    }
}
Apply for a Temporary License
If you'd like to remove the evaluation message from the generated documents, or to get rid of the function limitations, please request a 30-day trial license for yourself.
C#/VB.NET: Copy Worksheets in Excel
Excel copy function enables you to not only copy worksheets within Excel workbook but also copy worksheets between different Excel workbooks. This article will introduce solutions to copy worksheets within one Excel workbook and among different workbooks via Spire.XLS for .NET in C#, VB.NET. Besides, all the cell formats in the original Excel worksheets will be completely remained.
Install Spire.XLS for .NET
To begin with, you need to add the DLL files included in the Spire.XLS for .NET package as references in your .NET project. The DLLs files can be either downloaded from this link or installed via NuGet.
- Package Manager
PM> Install-Package Spire.XLS
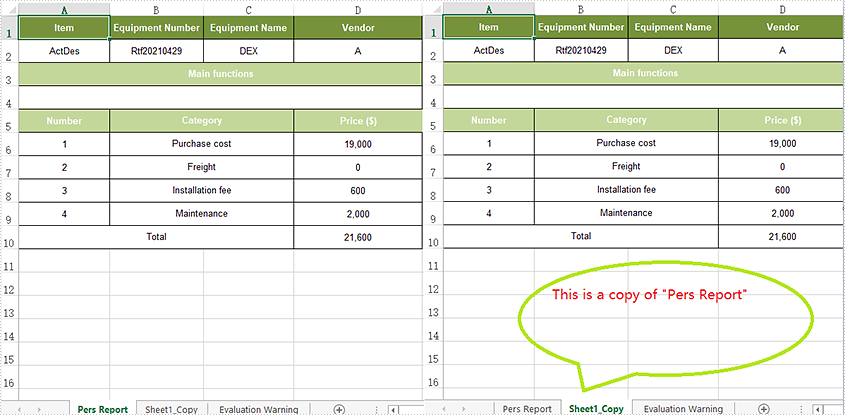
Copy Excel Worksheets within Excel Workbook
The following are the steps to duplicate worksheets within an Excel workbook.
- Initialize an instance of Workbook class.
- Load an Excel file using Workbook.LoadFromFile() method.
- Add a new blank sheet to the workbook using WorksheetCollection.Add() method.
- Copy the original worksheet to the new sheet using Worksheet.CopyFrom() method.
- Use Workbook.SaveToFile() method to save the changes to another file.
- C#
- VB.NET
using Spire.Xls;

namespace CopyExcelworksheet
{
    class Program
    {
        static void Main(string[] args)
        {
            //Load the sample Excel
            Workbook workbook = new Workbook();
            workbook.LoadFromFile("Sample.xlsx");

            //Add worksheet and set its name
            workbook.Worksheets.Add("Sheet1_Copy");

           //copy worksheet to the new added worksheets
           workbook.Worksheets[1].CopyFrom(workbook.Worksheets[0]);

            //Save the Excel workbook.
            workbook.SaveToFile("Duplicatesheet.xlsx", ExcelVersion.Version2013);
            System.Diagnostics.Process.Start("Duplicatesheet.xlsx");

        }
    }
}
Imports Spire.Xls

Namespace CopyExcelworksheet

    Class Program

        Private Shared Sub Main(ByVal args() As String)
            'Load the sample Excel
            Dim workbook As Workbook = New Workbook
            workbook.LoadFromFile("Sample.xlsx")
            'Add worksheet and set its name
            workbook.Worksheets.Add("Sheet1_Copy")
            'copy worksheet to the new added worksheets
            workbook.Worksheets(1).CopyFrom(workbook.Worksheets(0))
            'Save the Excel workbook.
            workbook.SaveToFile("Duplicatesheet.xlsx", ExcelVersion.Version2013)
            System.Diagnostics.Process.Start("Duplicatesheet.xlsx")
        End Sub
    End Class
End Namespace
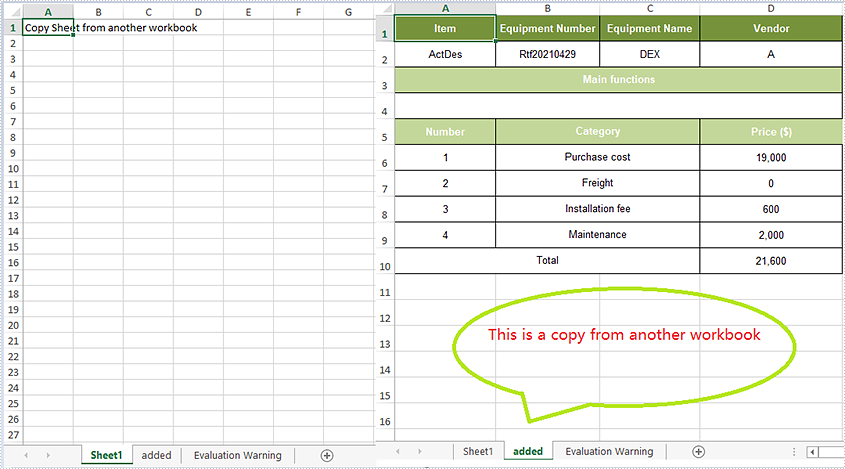
Copy Excel Worksheets between Excel Workbooks
The following are the steps to duplicate worksheets within an Excel workbook.
- Initialize an instance of Workbook class.
- Load an Excel file using Workbook.LoadFromFile() method.
- Get the first worksheet.
- Load another Excel sample document
- Add a new blank sheet to the second workbook using WorksheetCollection.Add() method.
- Copy the original worksheet to the new sheet using Worksheet.CopyFrom() method.
- Use Workbook.SaveToFile() method to save the changes to another file.
- C#
- VB.NET
using Spire.Xls;

namespace CopyExcelworksheet
{
    class Program
    {
        static void Main(string[] args)
        {
            //Load the sample Excel and get the first worksheet
            Workbook workbook = new Workbook();
            workbook.LoadFromFile("Sample.xlsx");
            Worksheet sheet = workbook.Worksheets[0];
            //Load the second Excel workbook
            Workbook workbook2 = new Workbook();
            workbook2.LoadFromFile("New.xlsx");
            //Add a new worksheet and set its name
            Worksheet targetWorksheet = workbook2.Worksheets.Add("added");
            //Copy the original worksheet to the new added worksheets
            targetWorksheet.CopyFrom(sheet);
            //Save the Excel workbook.
            workbook2.SaveToFile("CopySheetBetweenWorkbooks.xlsx", FileFormat.Version2013);
            System.Diagnostics.Process.Start("CopySheetBetweenWorkbooks.xlsx");

        }
    }
}
Imports Spire.Xls

Namespace CopyExcelworksheet

    Class Program

        Private Shared Sub Main(ByVal args() As String)
            'Load the sample Excel and get the first worksheet
            Dim workbook As Workbook = New Workbook
            workbook.LoadFromFile("Sample.xlsx")
            Dim sheet As Worksheet = workbook.Worksheets(0)
            'Load the second Excel workbook
            Dim workbook2 As Workbook = New Workbook
            workbook2.LoadFromFile("New.xlsx")
            'Add a new worksheet and set its name
            Dim targetWorksheet As Worksheet = workbook2.Worksheets.Add("added")
            'Copy the original worksheet to the new added worksheets
            targetWorksheet.CopyFrom(sheet)
            'Save the Excel workbook.
            workbook2.SaveToFile("CopySheetBetweenWorkbooks.xlsx", FileFormat.Version2013)
            System.Diagnostics.Process.Start("CopySheetBetweenWorkbooks.xlsx")
        End Sub
    End Class
End Namespace
Apply for a Temporary License
If you'd like to remove the evaluation message from the generated documents, or to get rid of the function limitations, please request a 30-day trial license for yourself.