Python: Add or Remove Shapes in Word
In the modern office environment, Microsoft Word has become an indispensable part of our daily work and study. Whether it's writing reports, creating resumes, or designing promotional materials, Word provides us with a rich set of features and tools. Among them, the function of adding shapes is particularly popular among users because it allows us to easily enhance the visual appeal and expressiveness of documents. Manipulating shape elements is one of the highlights of Spire.Doc functionality, and this article will introduce you to how to add or delete shapes in Word using Spire.Doc for Python.
Install Spire.Doc for Python
This scenario requires Spire.Doc for Python and plum-dispatch v1.7.4. They can be easily installed in your Windows through the following pip command.
pip install Spire.Doc
If you are unsure how to install, please refer to this tutorial: How to Install Spire.Doc for Python on Windows
Add Shapes in Word Document in Python
Spire.Doc for Python supports adding various shapes such as rectangles, trapezoids, triangles, arrows, lines, emoticons, and many other predefined shape types. By calling the Paragraph.AppendShape(width: float, height: float, shapeType: 'ShapeType') method, you can not only easily insert these shapes at any position in the document but also customize various properties of the shapes, such as fill color, border style, rotation angle, transparency, etc., to meet different typesetting needs and visual effects. Below are the detailed steps:
- Create a new Document object.
- Call Document.AddSection() and Section.AddParagraph() methods to add a section and a paragraph within the section, respectively.
- Call the Paragraph.AppendShape(width: float, height: float, shapeType: 'ShapeType') method to add a shape on the paragraph, where width and height represent the dimensions of the shape, and shapeType enum is used to specify the type of shape.
- Define the style of the shape, such as fill color, border color, border style, and width.
- Set the horizontal and vertical position of the shape relative to the page.
- Add multiple other types of shapes using the same method.
- Save the document using the Document.SaveToFile() method.
- Python
from spire.doc import *
from spire.doc.common import *

# Create a new Document object
doc = Document()

# Add a new section in the document
sec = doc.AddSection()

# Add a paragraph in the new section
para = sec.AddParagraph()

# Add a rectangle shape in the paragraph with width and height both 60
shape1 = para.AppendShape(60, 60, ShapeType.Rectangle)

# Define the fill color of the shape
shape1.FillColor = Color.get_YellowGreen()

# Define the border color
shape1.StrokeColor = Color.get_Gray()

# Define the border style and width
shape1.LineStyle = ShapeLineStyle.Single
shape1.StrokeWeight = 1

# Set the horizontal and vertical position of the shape relative to the page
shape1.HorizontalOrigin = HorizontalOrigin.Page
shape1.HorizontalPosition = 100
shape1.VerticalOrigin = VerticalOrigin.Page
shape1.VerticalPosition = 200

# Similarly, add a triangle shape in the same paragraph and set its properties
shape2 = para.AppendShape(60, 60, ShapeType.Triangle)
shape2.FillColor = Color.get_Green()
shape2.StrokeColor = Color.get_Gray()
shape2.LineStyle = ShapeLineStyle.Single
shape2.StrokeWeight = 1
shape2.HorizontalOrigin = HorizontalOrigin.Page
shape2.HorizontalPosition = 200
shape2.VerticalOrigin = VerticalOrigin.Page
shape2.VerticalPosition = 200

# Add an arrow shape and set its properties
shape3 = para.AppendShape(60, 60, ShapeType.Arrow)
shape3.FillColor = Color.get_SeaGreen()
shape3.StrokeColor = Color.get_Gray()
shape3.LineStyle = ShapeLineStyle.Single
shape3.StrokeWeight = 1
shape3.HorizontalOrigin = HorizontalOrigin.Page
shape3.HorizontalPosition = 300
shape3.VerticalOrigin = VerticalOrigin.Page
shape3.VerticalPosition = 200

# Add a smiley face shape and set its properties
shape4 = para.AppendShape(60, 60, ShapeType.SmileyFace)
shape4.FillColor = Color.get_LightGreen()
shape4.StrokeColor = Color.get_Gray()
shape4.LineStyle = ShapeLineStyle.Single
shape4.StrokeWeight = 1
shape4.HorizontalOrigin = HorizontalOrigin.Page
shape4.HorizontalPosition = 400
shape4.VerticalOrigin = VerticalOrigin.Page
shape4.VerticalPosition = 200

# Save the document
outputFile = "AddShapes.docx"
doc.SaveToFile(outputFile, FileFormat.Docx2016)

# Release the document
doc.Close()

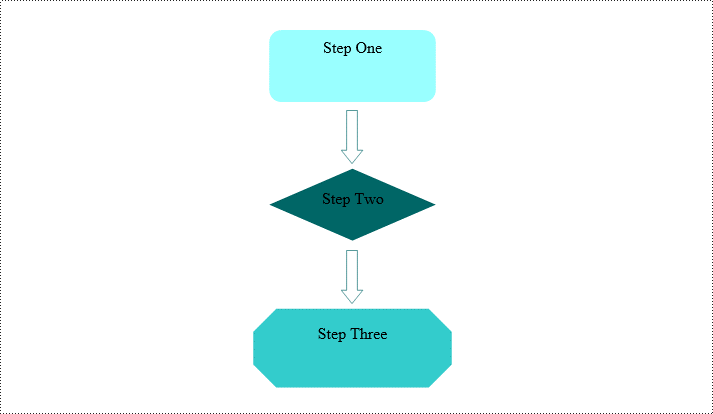
Add Shape Group in Word Document
Spire.Doc for Python not only provides the functionality to add individual shapes (such as rectangles, circles, lines, etc.) but also supports creating and managing grouped shapes. A grouped shape is a special collection of shapes that organizes multiple independent shapes together to form a whole, sharing the same transformation properties (such as position, rotation angle, etc.). Here are the specific steps to achieve this:
- Create an object of the Document class.
- Call the Document.AddSection() method to add a blank section.
- Call the Section.AddParagraph() method to add a blank paragraph in the section.
- Call Paragraph.AppendShapeGroup() to add a shape group and specify its dimensions.
- Create a Textbox and specify its shape type, dimensions, position, fill color, and other properties.
- Add paragraphs within the Textbox and insert text, setting the paragraph's horizontal alignment to center.
- Add the Textbox to the list of child objects of the shape group.
- Similar to the above steps, create shapes for symbols like arrows, diamond-shaped text boxes, octagonal text boxes, and set their properties, adding them to the list of child objects of the shape group.
- Save the document using the Document.SaveToFile() method.
- Python
from spire.doc import *
from spire.doc.common import *

# Create a Document object
doc = Document()

# Add a section to the document
sec = doc.AddSection()

# Add a paragraph to the section
para = sec.AddParagraph()

# Add a shape group to the paragraph and specify its horizontal position
shapegroup = para.AppendShapeGroup(375, 350)
shapegroup.HorizontalPosition = 180

# Calculate the relative unit scale X and Y for the shape group for subsequent element size positioning
X = float((shapegroup.Width / 1000.0))
Y = float((shapegroup.Height / 1000.0))

# Create a rounded rectangle text box
txtBox = TextBox(doc)

# Set the shape type of the text box
txtBox.SetShapeType(ShapeType.RoundRectangle)

# Set the width and height of the text box
txtBox.Width = 125 / X
txtBox.Height = 54 / Y

# Add a paragraph inside the text box and set its horizontal alignment to center
paragraph = txtBox.Body.AddParagraph()
paragraph.Format.HorizontalAlignment = HorizontalAlignment.Center

# Add the text "Step One" to the paragraph
paragraph.AppendText("Step One")

# Set the horizontal and vertical position of the text box
txtBox.HorizontalPosition = 19 / X
txtBox.VerticalPosition = 27 / Y

# Set the fill color of the text box and remove the border line
txtBox.Format.FillColor = Color.FromRgb(153, 255, 255)
txtBox.Format.NoLine = True

# Add the text box to the list of child objects of the shape group
shapegroup.ChildObjects.Add(txtBox)

# Create a downward arrow shape and specify its shape type
arrowLineShape = ShapeObject(doc, ShapeType.DownArrow)

# Set the width and height of the arrow shape
arrowLineShape.Width = 16 / X
arrowLineShape.Height = 40 / Y

# Set the horizontal and vertical position of the arrow shape
arrowLineShape.HorizontalPosition = 73 / X
arrowLineShape.VerticalPosition = 87 / Y

# Set the stroke color of the arrow shape
arrowLineShape.StrokeColor = Color.get_CadetBlue()

# Add the arrow shape to the list of child objects of the shape group
shapegroup.ChildObjects.Add(arrowLineShape)

# (Similar subsequent code, creating diamond-shaped text boxes, downward arrow shapes, and octagonal text boxes, with corresponding property settings and positioning)

txtBox = TextBox(doc)
txtBox.SetShapeType(ShapeType.Diamond)
txtBox.Width = 125 / X
txtBox.Height = 54 / Y
paragraph = txtBox.Body.AddParagraph()
paragraph.Format.HorizontalAlignment = HorizontalAlignment.Center
paragraph.AppendText("Step Two")
txtBox.HorizontalPosition = 19 / X
txtBox.VerticalPosition = 131 / Y
txtBox.Format.FillColor = Color.FromRgb(0, 102, 102)
txtBox.Format.NoLine = True
shapegroup.ChildObjects.Add(txtBox)

arrowLineShape = ShapeObject(doc, ShapeType.DownArrow)
arrowLineShape.Width = 16 / X
arrowLineShape.Height = 40 / Y
arrowLineShape.HorizontalPosition = 73 / X
arrowLineShape.VerticalPosition = 192 / Y
arrowLineShape.StrokeColor = Color.get_CadetBlue()
shapegroup.ChildObjects.Add(arrowLineShape)

txtBox = TextBox(doc)
txtBox.SetShapeType(ShapeType.Octagon)
txtBox.Width = 149 / X
txtBox.Height = 59 / Y
paragraph = txtBox.Body.AddParagraph()
paragraph.Format.HorizontalAlignment = HorizontalAlignment.Center
paragraph.AppendText("Step Three")
txtBox.HorizontalPosition = 7 / X
txtBox.VerticalPosition = 236 / Y
txtBox.Format.FillColor = Color.FromRgb(51, 204, 204)
txtBox.Format.NoLine = True
shapegroup.ChildObjects.Add(txtBox)

# Define the output file name
outputFile = "ShapeGroup.docx"

# Save the document
doc.SaveToFile(outputFile, FileFormat.Docx2016)

# Close the document object
doc.Close()
Remove Shapes from Word Document
Spire.Doc for Python supports efficiently removing individual shapes and shape groups from a Word document. Below are the detailed steps:
- Create an object of the Document class.
- Call the Document.LoadFromFile() method to load a document containing shapes.
- Traverse through all the sections of the document and the body elements within the sections to get paragraphs.
- Check if the child elements under the paragraph are shape objects or shape group objects.
- Call the Paragraph.ChildObjects.Remove() method to remove the shape object.
- Save the document using the Document.SaveToFile() method.
- Python
from spire.doc import *
from spire.doc.common import *

# Create an object of the Document class
doc = Document()

# Load a Word document
doc.LoadFromFile("ShapeGroup.docx")

# Iterate through all sections of the document
for s in range(doc.Sections.Count):
    # Get the current section
    section = doc.Sections[s]

    # Iterate through all child objects within the section
    for i in range(section.Body.ChildObjects.Count):
        # Get the current child object
        document_object = section.Body.ChildObjects[i]

        # If the current child object is a paragraph
        if isinstance(document_object, Paragraph):
            # Convert the child object to a paragraph object
            paragraph = document_object

            # Initialize the inner loop index
            j = 0

            # Iterate through all child objects within the paragraph
            while j < paragraph.ChildObjects.Count:
                # Get the current child object within the paragraph
                c_obj = paragraph.ChildObjects[j]

                # If the current child object is a shape group or shape object
                if isinstance(c_obj, ShapeGroup) or isinstance(c_obj, ShapeObject):
                    # Remove the shape object from the paragraph
                    paragraph.ChildObjects.Remove(c_obj)

                    # Update the inner loop index
                    j -= 1

                # Increment the inner loop index
                j += 1

# Save the document
doc.SaveToFile("RemovedShapes.docx", FileFormat.Docx2016)

# Close the document object
doc.Close()
Apply for a Temporary License
If you'd like to remove the evaluation message from the generated documents, or to get rid of the function limitations, please request a 30-day trial license for yourself.
Python: Replace Images in Word
Images play a crucial role in effectively communicating complex ideas or concepts. When there are low-quality or outdated images in a Word document, it is necessary to replace the images to enhance the overall visual appeal and professionalism of your document. In this article, you will learn how to replace images in a Word document in Python using Spire.Doc for Python.
Install Spire.Doc for Python
This scenario requires Spire.Doc for Python and plum-dispatch v1.7.4. They can be easily installed in your Windows through the following pip commands.
pip install Spire.Doc
If you are unsure how to install, please refer to this tutorial: How to Install Spire.Doc for Python on Windows
Replace Image with New Image in Word in Python
Spire.Doc for Python supports not only inserting images in Word, but also replacing existing images. The following are the detailed steps to get a specific image in Word and then replace it with a new image.
- Create a Document object.
- Load a Word document using Document.LoadFromFile() method.
- Create a list to store the images.
- Iterate through all sections in the document.
- Iterate through all paragraphs in each section.
- Iterate through all child objects in each paragraph.
- Find the images and add them to the list.
- Get a specific image from the list and replace it with another image using DocPicture.LoadImage() method.
- Save the result document using Document.SaveToFile() method.
- Python
from spire.doc import *
from spire.doc.common import *

# Create a Document object
doc = Document()

# Load a Word document
doc.LoadFromFile("Data.docx")

# Create a list to store the images
pictures = []

# Iterate through all sections in the document
for i in range(doc.Sections.Count):
    sec = doc.Sections.get_Item(i)

    # Iterate through all paragraphs in each section
    for j in range(sec.Paragraphs.Count):
        para = sec.Paragraphs.get_Item(j)

        # Iterate through all child objects in each paragraph
        for k in range(para.ChildObjects.Count):
            docObj = para.ChildObjects.get_Item(k)

            # Find the images and add them to the list
            if docObj.DocumentObjectType == DocumentObjectType.Picture:
                pictures.append(docObj)

# Replace the first picture in the list with a new image
picture = pictures[0] if isinstance(pictures[0], DocPicture) else None
picture.LoadImage("data.jpg")

# Save the result document
doc.SaveToFile("ReplaceImage.docx", FileFormat.Docx)
doc.Close()

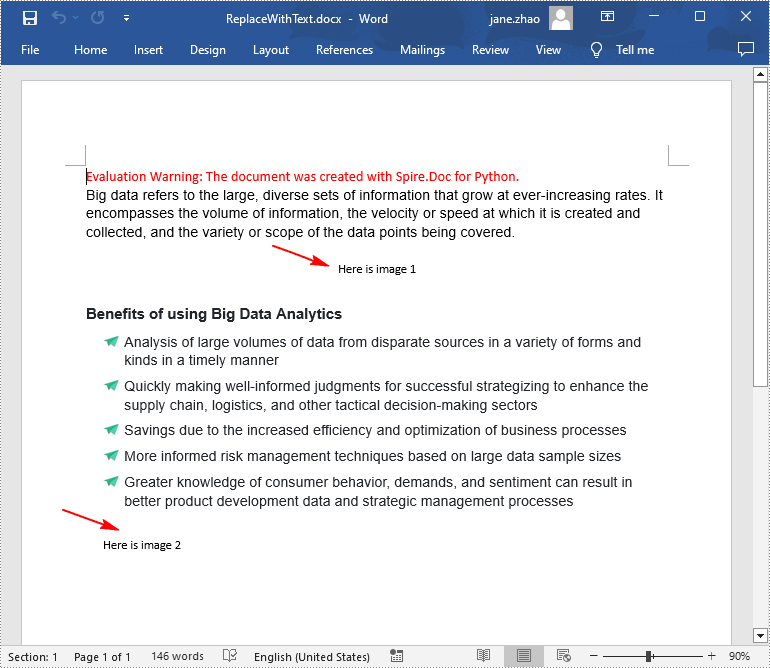
Replace Image with Text in Word in Python
Spire.Doc for Python doesn't provide a direct method to replace image with text, but you can achieve this task by inserting text at the image location and then removing the image from the document.
The following are the steps to replace all images in a Word document with text:
- Create a Document object.
- Load a Word document using Document.LoadFromFile() method.
- Iterate through all sections in the document.
- Iterate through all paragraphs in each section.
- Create a list to store the images.
- Iterate through all child objects in each paragraph.
- Find the images and add them to the list.
- Iterate through the images in the list.
- Get the index of the image in the paragraph using Paragraph.ChildObjects.Indexof() method.
- Initialize an instance of TextRange class and set text for the text range through TextRange.Text property.
- Insert the text range at the image location using Paragraph.ChildObjects.Insert() method.
- Remove the image from the paragraph using Paragraph.ChildObjects.Remove() method.
- Save the result document using Document.SaveToFile() method.
- Python
from spire.doc import *
from spire.doc.common import *

# Create a Document object
doc = Document()

# Load a Word document
doc.LoadFromFile("Data.docx")

j = 1
# Iterate through all sections in the document
for k in range(doc.Sections.Count):
    sec = doc.Sections.get_Item(k)

    # Iterate through all sections in the document
    for m in range(sec.Paragraphs.Count):
        para = sec.Paragraphs.get_Item(m)

        # Create a list to store the images
        pictures = []

        # Find the images and add them to the list
        for x in range(para.ChildObjects.Count):
            docObj = para.ChildObjects.get_Item(x)
            if docObj.DocumentObjectType == DocumentObjectType.Picture:
                pictures.append(docObj)

        # Iterate through all images in the list and replace them with text "Here is image {image index}"
        for pic in pictures:
            index = para.ChildObjects.IndexOf(pic)
            textRange = TextRange(doc)
            textRange.Text = "Here is image {0}".format(j)
            para.ChildObjects.Insert(index, textRange)
            para.ChildObjects.Remove(pic)
            j += 1

# Save the result document
doc.SaveToFile("ReplaceWithText.docx", FileFormat.Docx)
doc.Close()
Apply for a Temporary License
If you'd like to remove the evaluation message from the generated documents, or to get rid of the function limitations, please request a 30-day trial license for yourself.
Python: Insert Images in Word
Images in Word documents can break up large blocks of text and make the content more visually interesting. In addition, they can also effectively illustrate complex ideas or concepts that are difficult to explain solely through text. In this article, you will learn how to programmatically add images to a Word document using Spire.Doc for Python.
Install Spire.Doc for Python
This scenario requires Spire.Doc for Python and plum-dispatch v1.7.4. They can be easily installed in your Windows through the following pip commands.
pip install Spire.Doc
If you are unsure how to install, please refer to this tutorial: How to Install Spire.Doc for Python on Windows
Insert an Image in a Word Document in Python
Spire.Doc for Python offers the Paragraph.AppendPicture() method to insert an image into a Word document. The following are the detailed steps.
- Create a Document object.
- Add a section using Document.AddSection() method.
- Add two paragraphs to the section using Section.AddParagraph() method.
- Add text to the paragraphs and set formatting.
- Load an image and add it to a specified paragraph using Paragraph.AppendPicture() method.
- Set width and height for the image using DocPicture.Width and DocPicture.Height properties.
- Set a text wrapping style for the image using DocPicture.TextWrappingStyle property.
- Save the result document using Document.SaveToFile() method.
- Python
from spire.doc import *
from spire.doc.common import *

# Create a Document object
document = Document()

# Add a seciton
section = document.AddSection()

# Add a paragraph
paragraph1 = section.AddParagraph()
# Add text to the paragraph and set formatting
tr = paragraph1.AppendText("Spire.Doc for Python is a professional Word Python API specifically designed for developers to create, read, write, convert, and compare Word documents with fast and high-quality performance.")
tr.CharacterFormat.FontName = "Calibri"
tr.CharacterFormat.FontSize = 11
paragraph1.Format.LineSpacing = 18
paragraph1.Format.BeforeSpacing = 10
paragraph1.Format.AfterSpacing = 10

# Add another paragraph
paragraph2 = section.AddParagraph()
tr = paragraph2.AppendText("Spire.Doc for Python enables to perform many Word document processing tasks. It supports Word 97-2003 /2007/2010/2013/2016/2019 and it has the ability to convert them to commonly used file formats like XML, RTF, TXT, XPS, EPUB, EMF, HTML and vice versa. Furthermore, it supports to convert Word Doc/Docx to PDF using Python, Word to SVG, and Word to PostScript in high quality.")
# Add text to the paragraph and set formatting
tr.CharacterFormat.FontName = "Calibri"
tr.CharacterFormat.FontSize = 11
paragraph2.Format.LineSpacing = 18

# Add an image to the specified paragraph
picture = paragraph1.AppendPicture("Spire.Doc.jpg")

# Set image width and height
picture.Width = 100
picture.Height = 100

# Set text wrapping style for the image
picture.TextWrappingStyle = TextWrappingStyle.Square

#Save the result document
document.SaveToFile("InsertImage.docx", FileFormat.Docx)
document.Close()
Insert an Image at a Specified Location in a Word document in Python
If you wish to place the image at a specified location in the Word document, you can set its position through the DocPicture.HorizontalPosition and DocPicture.VerticalPosition properties. The following are the detailed steps.
- Create a Document object.
- Add a section using Document.AddSection() method.
- Add a paragraph to the section using Section.AddParagraph() method.
- Add text to the paragraph and set formatting.
- Add an image to the paragraph using Paragraph.AppendPicture() method.
- Set width and height for the image using DocPicture.Width and DocPicture.Height properties.
- Set the horizontal position and vertical position for the image using DocPicture.HorizontalPosition and DocPicture.VerticalPosition properties.
- Set a text wrapping style for the image using DocPicture.TextWrappingStyle property.
- Save the result document using Document.SaveToFile() method.
- Python
from spire.doc import *
from spire.doc.common import *

# Create a Document object
doc = Document()

# Add a section
section = doc.AddSection()

# Add a paragraph to the section
paragraph = section.AddParagraph()

# Add text to the paragraph and set formatting
paragraph.AppendText("The sample demonstrates how to insert an image at a specified location in a Word document.")
paragraph.ApplyStyle(BuiltinStyle.Heading2)

# Add an image to the paragraph
picture = paragraph.AppendPicture("pic.jpg")

# Set image position
picture.HorizontalPosition = 150.0
picture.VerticalPosition = 60.0

# Set image size
picture.Width = 120.0
picture.Height = 180.0

# Set a text wrapping style for the image  (note that the position settings are not applicable when the text wrapping style is Inline)
picture.TextWrappingStyle = TextWrappingStyle.Through

# Save the result document
doc.SaveToFile("WordImage.docx", FileFormat.Docx)
doc.Close()
Apply for a Temporary License
If you'd like to remove the evaluation message from the generated documents, or to get rid of the function limitations, please request a 30-day trial license for yourself.