Python: Compare Two Versions of a Word Document
Comparing two Word documents for differences is a crucial task when reviewing changes, ensuring accuracy, and collaborating on content. This process allows you to identify additions, deletions, and modifications made between different document iterations. By comparing versions, you can efficiently track alterations, verify updates, and maintain document integrity. In this article, you will learn how to compare two versions of a Word document in Python using the Spire.Doc for Python library.
- Compare Two Versions of a Word Document in Python
- Compare Two Versions of a Word Document While Ignoring Formatting in Python
Install Spire.Doc for Python
This scenario requires Spire.Doc for Python and plum-dispatch v1.7.4. They can be easily installed in your Windows through the following pip command.
pip install Spire.Doc
If you are unsure how to install, please refer to: How to Install Spire.Doc for Python on Windows
Compare Two Versions of a Word Document in Python
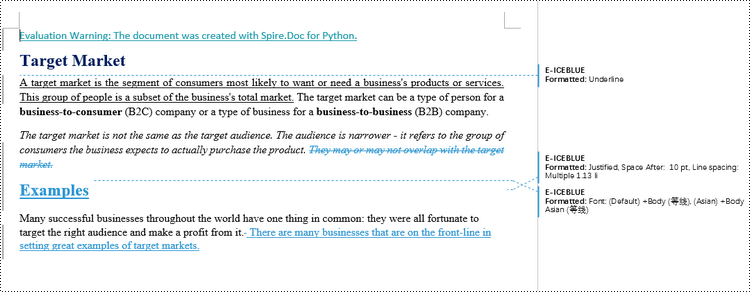
MS Word also offers a "Compare" feature that allows you to directly compare two versions of a document. This feature generates a new document that highlights the differences between the two versions.
To achieve similar results using Spire.Doc for Python, load the original and revised versions into two separate Document objects. Then, use the Compare() method to compare the revised version against the original. Finally, save the comparative document, which highlights the alterations, using the SaveToFile() method.
The steps to compare two version of a Word document using Python are as follows.
- Load the first document (original version) while initializing the Document object.
- Load the second document (revised version) while initializing the Document object.
- Call Compare() method of the first Document object to compare the revised version against the original version.
- Save the comparison results in a new Word document.
- Python
from spire.doc import *
from spire.doc.common import *

# Load the first document while initializing the Document object
firstDoc = Document("C:\\Users\\Administrator\\Desktop\\Original.docx")

# Load the second document while initializing the Document object
secondDoc = Document("C:\\Users\\Administrator\\Desktop\\Revised.docx")

# Compare two documents
firstDoc.Compare(secondDoc, "E-ICEBLUE")

# Save the comparison results in a new document
firstDoc.SaveToFile("Output/Differences.docx", FileFormat.Docx2016)

# Dispose resources
firstDoc.Dispose()
secondDoc.Dispose()
Compare Two Versions of a Word Document While Ignoring Formatting in Python
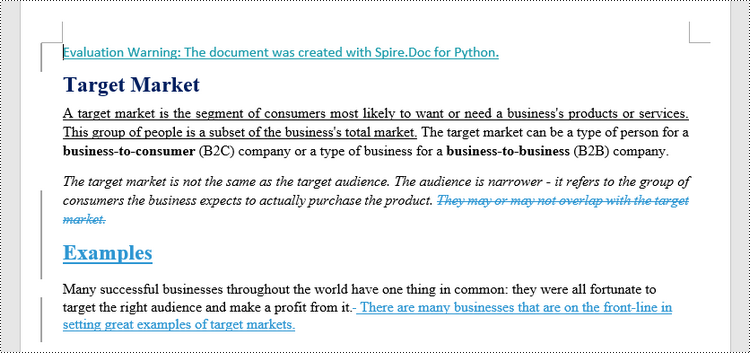
Comparing two versions of a Word document while ignoring formatting can be useful when you want to focus solely on the textual changes and disregard any formatting modifications.
To customize the comparison options in Spire.Doc for Python, use the CompareOptions class. If you want to exclude formatting from the comparison process, you can set the IgnoreFormatting property of the CompareOptions object to True. When you call the Compare() method, simply pass the CompareOptions object as an argument to achieve the desired comparison behavior.
The following are the steps to compare two versions of a Word document while ignoring formatting using Python.
- Load the first document (original version) while initializing the Document object.
- Load the second document (revised version) while initializing the Document object.
- Create a CompareOptions object and set its IgnoreFormatting property to True.
- Call Compare() method of the first Document object, passing the CompareOptions object as a parameter, to compare the revision against the original while ignoring formatting.
- Save the comparison results in a new Word document.
- Python
from spire.doc import *
from spire.doc.common import *

# Load the first document while initializing the Document object
firstDoc = Document("C:\\Users\\Administrator\\Desktop\\Original.docx")

# Load the second document while initializing the Document object
secondDoc = Document("C:\\Users\\Administrator\\Desktop\\Revised.docx")

# Set compare option to ignore formatting changes
compareOptions = CompareOptions()
compareOptions.IgnoreFormatting = True

# Compare the two Word documents with options
firstDoc.Compare(secondDoc, "E-ICEBLUE", compareOptions)

# Save the comparison results in a new document
firstDoc.SaveToFile("Output/DifferencesWithoutFormattingChanges.docx", FileFormat.Docx2016)

# Dispose resources
firstDoc.Dispose()
secondDoc.Dispose()
Apply for a Temporary License
If you'd like to remove the evaluation message from the generated documents, or to get rid of the function limitations, please request a 30-day trial license for yourself.
Python: Insert a Table of Contents into a Word Document
Efficient document organization and navigability are crucial for lengthy Word documents. One powerful way to streamline document readability and accessibility is by incorporating a table of contents (TOC) into a Word document, which allows readers to quickly locate specific sections and jump to relevant content. By harnessing the capabilities of Python, users can effortlessly generate a table of contents that dynamically updates as the document evolves. This article provides a step-by-step guide and code examples for inserting a table of contents into a Word document in Python programs using Spire.PDF for Python, empowering users to create professional-looking documents with ease.
- Insert the Default Table of Contents into a Word Document
- Insert a Custom Table of Contents into a Word Document
Install Spire.Doc for Python
This scenario requires Spire.Doc for Python and plum-dispatch v1.7.4. They can be easily installed in your Windows through the following pip command.
pip install Spire.Doc
If you are unsure how to install, please refer to: How to Install Spire.Doc for Python on Windows
Insert the Default Table of Contents into a Word Document
Spire.PDF for Python supports inserting a table of contents in a Word document based on the headings of different levels. If the document does not have heading levels set, developers can set the heading levels using the Paragraph.ApplyStyle(BuiltinStyle) method before inserting a table of contents.
By using the Paragraph.AppendTOC(lowerLevel: int, upperLevel: int) method, developers can insert a table of contents at any paragraph and specify the titles to be displayed. It is important to note that after inserting the table of contents, developers need to use the Document.UpdateTableOfContents() method to update the table of contents so that its contents are displayed correctly.
- Create an object of Document class and load a Word document using Document.LoadFromFile() method.
- Add a section using Document.AddSection() method, add a paragraph to the section using Section.AddParagraph() method, and insert the new section after the cover section using Document.Sections.Insert(index: int, entity: Section) method.
- Update the table of contents using Document.UpdateTableOfContents() method.
- Save the document using Document.SaveToFile() method.
- Python
from spire.doc import *
from spire.doc.common import *

# Create an object of Document class
doc = Document()

# Load a Word document
doc.LoadFromFile("Sample.docx")

# Create a section for the table of contents
section = doc.AddSection()

# Add a paragraph in the section
paragraph = section.AddParagraph()

# Append a table of contents in the paragraph
paragraph.AppendTOC(1, 2)

# Insert the section after the cover section
doc.Sections.Insert(1, section)

# Update the table of contents
doc.UpdateTableOfContents()

# Save the document
doc.SaveToFile("output/DefaultTOC.docx")
doc.Close()
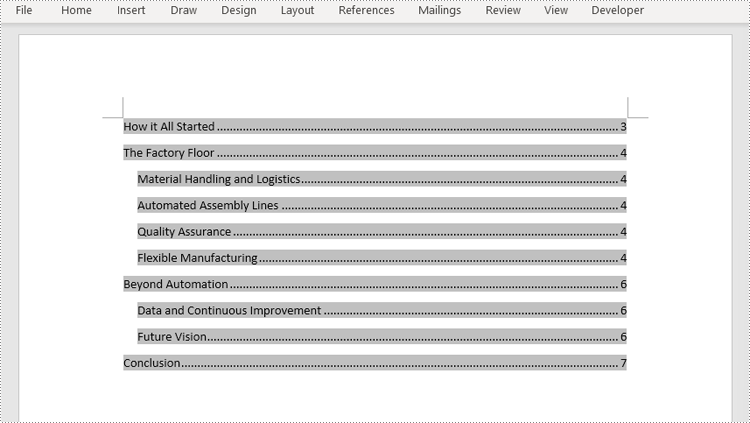
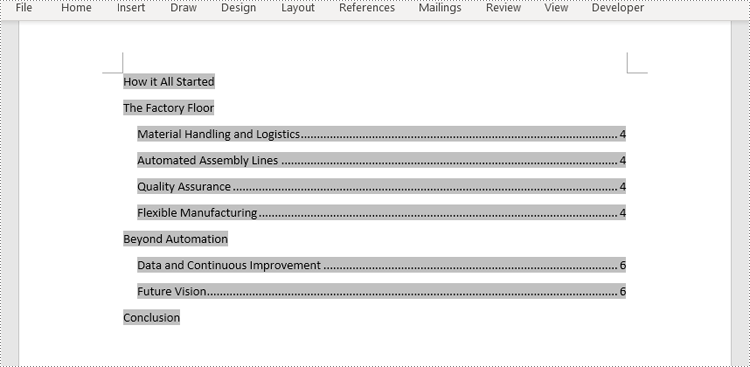
Insert a Custom Table of Contents into a Word Document
Developers can also create a table of contents by initializing a TableOfContent object, and customize it through switches. For example, the switch "{\\o \"1-2\" \\n 1-1}" indicates showing headings from level one to level three in the table of contents and omitting the page numbers of level one headings. The detailed steps for inserting a customized table of contents into a Word document are as follows:
- Create an object of Document class and load a Word document using Document.LoadFromFile() method.
- Add a section to the document using Document.AddSecction() method, add a paragraph to the section using Section.AddParagraph() method, and insert the section after the cover section using Document.Sections.Insert() method.
- Create an object of TableOfContents class and insert it into the added paragraph using Paragraph.Items.Add() method.
- Append field separator and field end mark to end the TOC filed using Paragraph.AppendFieldMark() method.
- Set the created table of contents as the table of contents of the document through Document.TOC property.
- Save the document using Document.SaveToFile() method.
- Python
from spire.doc import *
from spire.doc.common import *

# Create an object of Document class and load a Word document
doc = Document()
doc.LoadFromFile("Sample.docx")

# Add a section and a paragraph and insert the section after the cover section
section = doc.AddSection()
paragraph = section.AddParagraph()
doc.Sections.Insert(1, section)

# Customize a table of contents with switches
toc = TableOfContent(doc, "{\\o \"1-2\" \\n 1-1}")

# Insert the TOC to the paragraph
paragraph.Items.Add(toc)

# Insert field separator and filed end mark to end the TOC field
paragraph.AppendFieldMark(FieldMarkType.FieldSeparator)
paragraph.AppendFieldMark(FieldMarkType.FieldEnd)

# Set the TOC field as the table of contents of the document
doc.TOC = toc

# Update the TOC
doc.UpdateTableOfContents()

# Save the document
doc.SaveToFile("output/CustomizedTOC.docx")
doc.Close()
Apply for a Temporary License
If you'd like to remove the evaluation message from the generated documents, or to get rid of the function limitations, please request a 30-day trial license for yourself.
Python: Insert or Remove Footnotes in Word
Footnotes are a valuable tool in Microsoft Word that allows you to enhance the content of your documents by providing additional information, references, or citations at the bottom of a page. For example, you can use footnotes to provide in-depth explanations of complex concepts, cite sources to support your arguments, or offer tangential information that might be interesting to your readers. Whether you're working on an academic paper, a book, or any document that requires citations or explanations, footnotes offer a convenient way to maintain a clean and organized layout while presenting supplementary details. In this article, we will explain how to insert or remove footnotes in a Word document in Python using Spire.Doc for Python.
- Insert a Footnote for a Specific Paragraph in Word in Python
- Insert a Footnote for a Specific Text in Word in Python
- Remove Footnotes in a Word Document in Python
Install Spire.Doc for Python
This scenario requires Spire.Doc for Python and plum-dispatch v1.7.4. They can be easily installed in your Windows through the following pip command.
pip install Spire.Doc
If you are unsure how to install, please refer to this tutorial: How to Install Spire.Doc for Python on Windows
Insert a Footnote for a Specific Paragraph in Word in Python
You can use the Paragraph.AppendFootnote(FootnoteType.Footnote) method provided by Spire.Doc for Python to easily add a footnote for a specific paragraph. The detailed steps are as follows.
- Create an object of the Document class.
- Load a Word document using Document.LoadFromFile() method.
- Get a specific section in the document using Document.Section[int] property and then get a specific paragraph of the section using Section.Paragraphs[int] property.
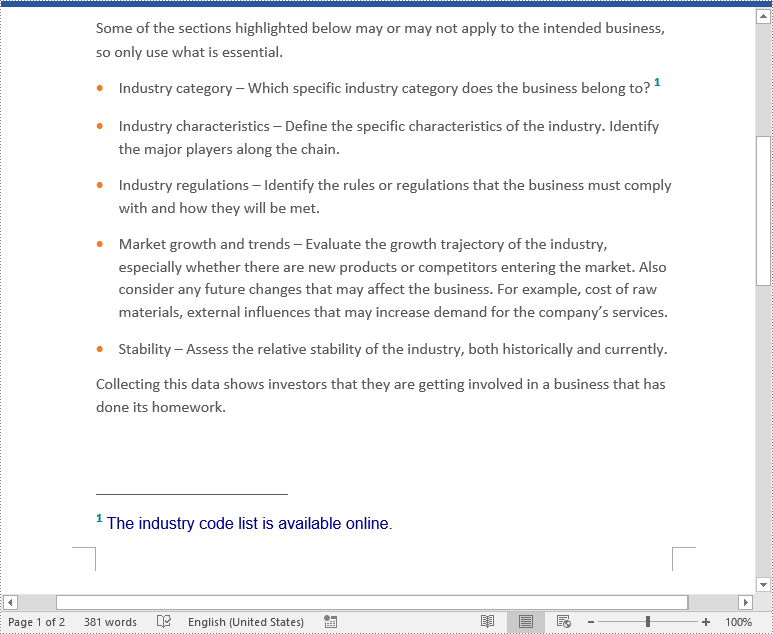
- Add a footnote at the end of the paragraph using Paragraph.AppendFootnote(FootnoteType.Footnote) method.
- Set the text content of the footnote, and then set the font and color for the footnote text and the footnote reference mark.
- Save the result document using Document.SaveToFile() method.
- Python
from spire.doc import *
from spire.doc.common import *

# Create a Document instance
document = Document()
# Load a sample Word document
document.LoadFromFile("Sample.docx")

# Get the first section
section = document.Sections[0]

# Get a specified paragraph in the section
paragraph = section.Paragraphs[3]

# Add a footnote at the end of the paragraph
footnote = paragraph.AppendFootnote(FootnoteType.Footnote)

# Set the text content of the footnote
text = footnote.TextBody.AddParagraph().AppendText("The industry code list is available online.")

# Set the text font and color
text.CharacterFormat.FontName = "Arial"
text.CharacterFormat.FontSize = 12
text.CharacterFormat.TextColor = Color.get_DarkBlue()

# Set the font and color of the footnote reference mark
footnote.MarkerCharacterFormat.FontName = "Calibri"
footnote.MarkerCharacterFormat.FontSize = 15
footnote.MarkerCharacterFormat.Bold = True
footnote.MarkerCharacterFormat.TextColor = Color.get_DarkCyan()

# Save the result document
document.SaveToFile("AddFootnoteForParagraph.docx", FileFormat.Docx2016)
document.Close()
Insert a Footnote for a Specific Text in Word in Python
To add a footnote for a specific text, you need to find the text in the document, get the location of the text in its owner paragraph, and then insert the footnote after the text. The detailed steps are as follows.
- Create an object of the Document class.
- Load a Word document using Document.LoadFromFile() method.
- Find a specific text using Document.FindString() method.
- Get the found text as a single text range using TextSelection.GetAsOneRange() method.
- Get the paragraph where the text range is located using TextRange.OwnerParagraph property.
- Get the index position of the text range in the paragraph using Paragraph.ChildObjects.IndexOf() method.
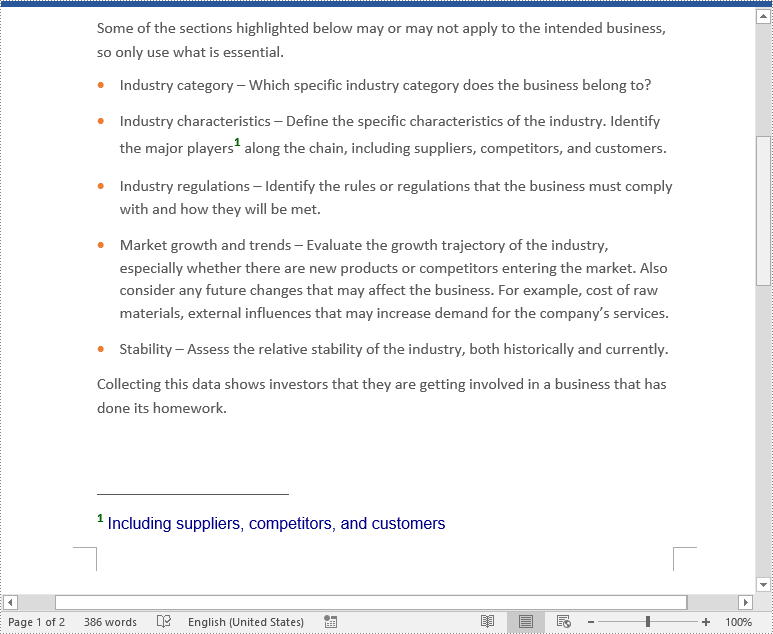
- Add a footnote to the paragraph using Paragraph.AppendFootnote(FootnoteType.Footnote) method, and then insert the footnote after the specific text using Paragraph.ChildObjects.Insert() method.
- Set the text content of the footnote, and then set the font and color for the footnote text and the footnote reference mark.
- Save the result document using Document.SaveToFile() method.
- Python
from spire.doc import *
from spire.doc.common import *

# Create a Document instance
document = Document()
# Load a sample Word document
document.LoadFromFile("Sample.docx")

# Find a specific text
selection = document.FindString("major players", False, True)

# Get the found text as a single text range
textRange = selection.GetAsOneRange()

# Get the paragraph where the text range is located
paragraph = textRange.OwnerParagraph

# Get the index position of the text range in the paragraph
index = paragraph.ChildObjects.IndexOf(textRange)

# Add a footnote to the paragraph
footnote = paragraph.AppendFootnote(FootnoteType.Footnote)

# Insert the footnote after the text range
paragraph.ChildObjects.Insert(index + 1, footnote)

# Set the text content of the footnote
text = footnote.TextBody.AddParagraph().AppendText("Including suppliers, competitors, and customers")

# Set the text font and color
text.CharacterFormat.FontName = "Arial"
text.CharacterFormat.FontSize = 12
text.CharacterFormat.TextColor = Color.get_DarkBlue()

# Set the font and color of the footnote reference mark
footnote.MarkerCharacterFormat.FontName = "Calibri"
footnote.MarkerCharacterFormat.FontSize = 15
footnote.MarkerCharacterFormat.Bold = True
footnote.MarkerCharacterFormat.TextColor = Color.get_DarkGreen()

# Save the result document
document.SaveToFile("AddFootnoteForText.docx", FileFormat.Docx2016)
document.Close()
Remove Footnotes in a Word Document in Python
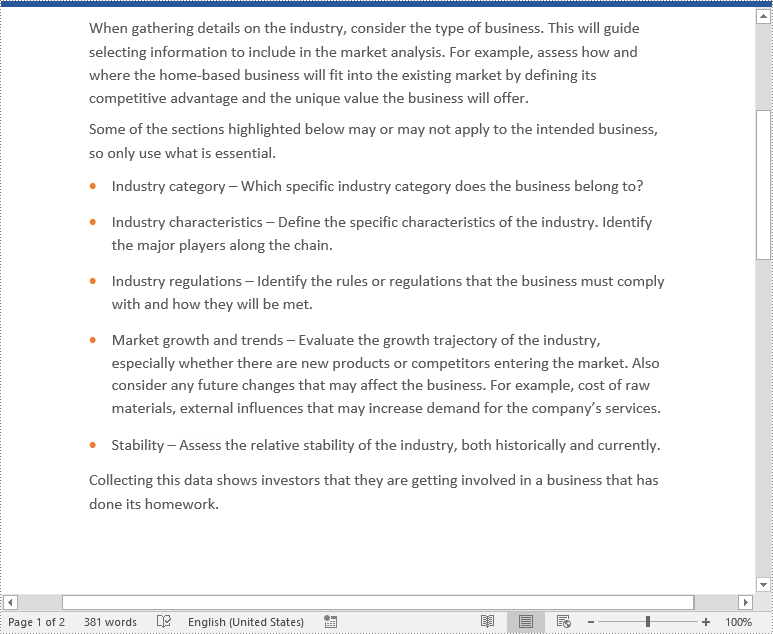
When the footnotes of a Word document are no longer needed, you can remove them to make the document neater. The detailed steps are as follows.
- Create an object of the Document class.
- Load a Word document using Document.LoadFromFile() method.
- Get a specific section using Document.Sections[int] property.
- Loop through each paragraph in the section to find the footnotes.
- Remove the footnotes using Paragraph.ChildObjects.RemoveAt() method.
- Save the result document using Document.SaveToFile() method.
- Python
from spire.doc import *
from spire.doc.common import *

# Create a Document instance
document = Document()
# Load a sample Word document
document.LoadFromFile("AddFootnoteForParagraph.docx")

# Get the first section of the document
section = document.Sections[0]

# Loop through the paragraphs in the section
for y in range(section.Paragraphs.Count):
    para = section.Paragraphs.get_Item(y)
    index = -1
    i = 0
    cnt = para.ChildObjects.Count
    while i < cnt:
        pBase = para.ChildObjects[i] if isinstance(para.ChildObjects[i], ParagraphBase) else None
        if isinstance(pBase, Footnote):
            index = i
            break
        i += 1
    if index > -1:
        # Remove the footnotes from the paragraph
        para.ChildObjects.RemoveAt(index)

# Save the result document
document.SaveToFile("RemoveFootnotes.docx", FileFormat.Docx)
document.Close()
Apply for a Temporary License
If you'd like to remove the evaluation message from the generated documents, or to get rid of the function limitations, please request a 30-day trial license for yourself.
Python: Merge Word Documents
Dealing with a large number of Word documents can be very challenging. Whether it's editing or reviewing a large number of documents, there's a lot of time wasted on opening and closing documents. What's more, sharing and receiving a large number of separate Word documents can be annoying, as it may require a lot of repeated sending and receiving operations by both the sharer and the receiver. Therefore, in order to enhance efficiency and save time, it is advisable to merge related Word documents into a single file. From this article, you will know how to use Spire.Doc for Python to easily merge Word documents through Python programs.
- Merge Word Documents by Inserting Files with Python
- Merge Word Documents by Cloning Contents with Python
Install Spire.Doc for Python
This scenario requires Spire.Doc for Python and plum-dispatch v1.7.4. They can be easily installed in your Windows through the following pip command.
pip install Spire.Doc
If you are unsure how to install, please refer to this tutorial: How to Install Spire.Doc for Python on Windows
Merge Word Documents by Inserting Files with Python
The method Document.insertTextFromFile() is used to insert other Word documents to the current one, and the inserted content will start from a new page. The detailed steps for merging Word documents by inserting are as follows:
- Create an object of Document class and load a Word document using Document.LoadFromFile() method.
- Insert the content from another document to it using Document.InsertTextFromFile() method.
- Save the document using Document.SaveToFile() method.
- Python
from spire.doc import *
from spire.doc.common import *

# Create an object of Document class and load a Word document
doc = Document()
doc.LoadFromFile("Sample1.docx")

# Insert the content from another Word document to this one
doc.InsertTextFromFile("Sample2.docx", FileFormat.Auto)

# Save the document
doc.SaveToFile("output/InsertDocuments.docx")
doc.Close()
Merge Word Documents by Cloning Contents with Python
Merging Word documents can also be achieved by cloning contents from one Word document to another. This method maintains the formatting of the original document, and content cloned from another document continues at the end of the current document without starting a new Page. The detailed steps are as follows:
- Create two objects of Document class and load two Word documents using Document.LoadFromFile() method.
- Get the last section of the destination document using Document.Sections.get_Item() method.
- Loop through the sections in the document to be cloned and then loop through the child objects of the sections.
- Get a section child object using Section.Body.ChildObjects.get_Item() method.
- Add the child object to the last section of the destination document using Section.Body.ChildObjects.Add() method.
- Save the result document using Document.SaveToFile() method.
- Python
from spire.doc import *
from spire.doc.common import *

# Create two objects of Document class and load two Word documents
doc1 = Document()
doc1.LoadFromFile("Sample1.docx")
doc2 = Document()
doc2.LoadFromFile("Sample2.docx")

# Get the last section of the first document
lastSection = doc1.Sections.get_Item(doc1.Sections.Count - 1)

# Loop through the sections in the second document
for i in range(doc2.Sections.Count):
    section = doc2.Sections.get_Item(i)
    # Loop through the child objects in the sections
    for j in range(section.Body.ChildObjects.Count):
        obj = section.Body.ChildObjects.get_Item(j)
        # Add the child objects from the second document to the last section of the first document
        lastSection.Body.ChildObjects.Add(obj.Clone())

# Save the result document
doc1.SaveToFile("output/MergeByCloning.docx")
doc1.Close()
doc2.Close()
Apply for a Temporary License
If you'd like to remove the evaluation message from the generated documents, or to get rid of the function limitations, please request a 30-day trial license for yourself.
Python: Add or Remove Textboxes in a Word Document
Textboxes are versatile tools in Microsoft Word, allowing you to insert and position text or other elements anywhere on a page, giving you the power to create eye-catching flyers, brochures, or reports. Whether you're looking to emphasize a particular section of text, place captions near images, or simply add a decorative touch, the capacity to manipulate textboxes offers a practical and aesthetic advantage in document design. In this article, you will learn how to add or remove textboxes in a Word document in Python using Spire.Doc for Python.
Install Spire.Doc for Python
This scenario requires Spire.Doc for Python and plum-dispatch v1.7.4. They can be easily installed in your Windows through the following pip command.
pip install Spire.Doc
If you are unsure how to install, please refer to this tutorial: How to Install Spire.Doc for Python on Windows
Add a Textbox to a Word Document in Python
Spire.Doc for Python provides the Paragraph.AppendTextBox() method to insert a textbox in a specified paragraph. The content and formatting of the textbox can be set through the properties under the TextBox object. The following are the detailed steps.
- Create a Document object.
- Load a Word document using Document.LoadFromFile() method.
- Get the first section and add a paragraph to the section using Section.AddParagraph() method.
- Add a text box to the paragraph using Paragraph.AppendTextBox() method.
- Get the format of the textbox using TextBox.Format property, and then set the textbox's wrapping type, position, border color and fill color using the properties of TextBoxFormat Class.
- Add a paragraph to the textbox using TextBox.Body.AddParagraph() method.
- Add an image to the paragraph using Paragraph.AppendPicture() method.
- Add text to the textbox using Paragraph.AppendText() method
- Save the document to a different file using Document.SaveToFile() method.
- Python
from spire.doc import *
from spire.doc.common import *
# Create a Document object
document = Document()
# Load a Word document
document.LoadFromFile("C:/Users/Administrator/Desktop/input3.docx")
# Insert a textbox and set its wrapping style
textBox = document.Sections[0].Paragraphs[0].AppendTextBox(135, 300)
textBox.Format.TextWrappingStyle = TextWrappingStyle.Square
# Set the position of the textbox
textBox.Format.HorizontalOrigin = HorizontalOrigin.RightMarginArea
textBox.Format.HorizontalPosition = -145.0
textBox.Format.VerticalOrigin = VerticalOrigin.Page
textBox.Format.VerticalPosition = 120.0
# Set the border style and fill color of the textbox
textBox.Format.LineColor = Color.get_DarkBlue()
textBox.Format.FillColor = Color.get_LightGray()
# Insert an image to textbox as a paragraph
para = textBox.Body.AddParagraph();
picture = para.AppendPicture("C:/Users/Administrator/Desktop/Wikipedia_Logo.png")
# Set alignment for the paragraph
para.Format.HorizontalAlignment = HorizontalAlignment.Center
# Set the size of the inserted image
picture.Height = 90.0
picture.Width = 90.0
# Insert text to textbox as the second paragraph
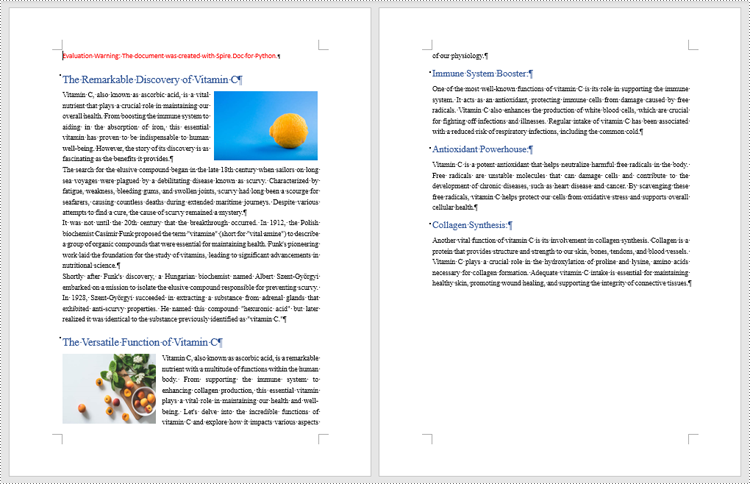
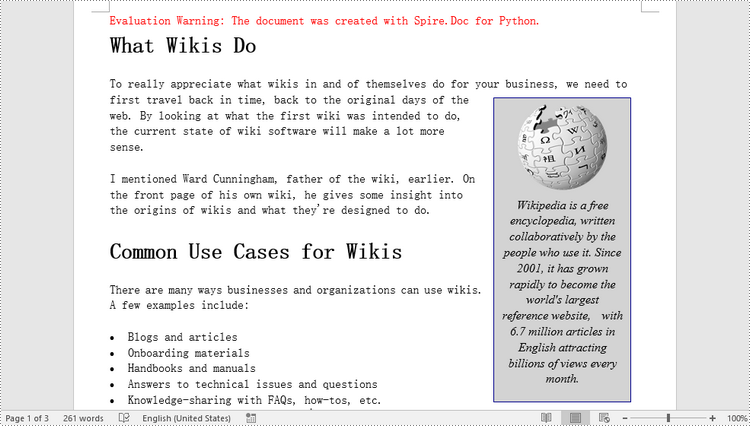
textRange = para.AppendText("Wikipedia is a free encyclopedia, written collaboratively by the people who use it. "
+ "Since 2001, it has grown rapidly to become the world's largest reference website, "
+ "with 6.7 million articles in English attracting billions of views every month.")
# Set alignment for the paragraph
para.Format.HorizontalAlignment = HorizontalAlignment.Center
# Set the font of the text
textRange.CharacterFormat.FontName = "Times New Roman"
textRange.CharacterFormat.FontSize = 12.0
textRange.CharacterFormat.Italic = True
# Save the result file
document.SaveToFile("output/AddTextBox.docx", FileFormat.Docx)
Remove a Textbox from a Word Document in Python
Spire.Doc for Python provides the Document.TextBoxes.RemoveAt(int index) method to delete a specified textbox. To delete all textboxes from a Word document, you can use the Document.TextBoxes.Clear() method. The following example shows how to remove the first textbox from a Word document.
- Create a Document object.
- Load a Word document using Document.LoadFromFile() method.
- Remove the first text box using Document.TextBoxes.RemoveAt(int index) method.
- Save the document to another file using Document.SaveToFile() method.
- Python
from spire.doc import *
from spire.doc.common import *

# Create a Document object
document = Document()

# Load a Word document
document .LoadFromFile("C:/Users/Administrator/Desktop/TextBox.docx")

# Remove the first textbox
document .TextBoxes.RemoveAt(0)

# Remove all textboxes
# document.TextBoxes.Clear()

# Save the result document
document.SaveToFile("output/RemoveTextbox.docx", FileFormat.Docx)
Apply for a Temporary License
If you'd like to remove the evaluation message from the generated documents, or to get rid of the function limitations, please request a 30-day trial license for yourself.
Python: Create Various Types of Lists in a Word Document
Lists are a powerful organizational tool that can be used to present information in a structured and easy-to-follow manner. Whether you want to create numbered lists, bulleted lists, or even custom lists with specific formatting, Word provides flexible options to suit your needs. By utilizing different list styles, you can improve the readability and visual appeal of your documents, making it simpler for readers to grasp key points and navigate through the content. In this article, you will learn how to programmatically create various types of lists in a Word document in Python using Spire.Doc for Python.
- Create a Numbered List in Word in Python
- Create a Bulleted List in Word in Python
- Create a Multi-Level Numbered List in Word in Python
- Create a Multi-Level Mixed-Type List in Word in Python
Install Spire.Doc for Python
This scenario requires Spire.Doc for Python and plum-dispatch v1.7.4. They can be easily installed in your Windows through the following pip command.
pip install Spire.Doc
If you are unsure how to install, please refer to this tutorial: How to Install Spire.Doc for Python on Windows
Create a Numbered List in Word in Python
Spire.Doc for Python provides the ListStyle class, which enables you to establish either a numbered list style or a bulleted style. Subsequently, you can utilize the Paragraph.ListFormat.ApplyStyle() method to apply the defined list style to a paragraph. The steps to create a numbered list are as follows.
- Create a Document object.
- Add a section using Document.AddSection() method.
- Create an instance of ListStyle class, specifying the list type to Numbered.
- Get a specific level of the list through ListStyle.Levels[index] property, and set the numbering type through ListLevel.PatternType property.
- Add the list style to the document using Document.ListStyles.Add() method.
- Add several paragraphs to the document using Section.AddParagraph() method.
- Apply the list style to a specific paragraph using Paragraph.ListFormat.ApplyStyle() method.
- Specify the list level through Paragraph.ListFormat.ListLevelNumber property.
- Save the document to a Word file using Document.SaveToFile() method.
- Python
from spire.doc import *
from spire.doc.common import *
# Create a Document object
doc = Document()
# Add a section
section = doc.AddSection()
# Create a numbered list style
listStyle = ListStyle(doc, ListType.Numbered)
listStyle.Name = "numberedList"
listStyle.Levels[0].PatternType = ListPatternType.DecimalEnclosedParen
listStyle.Levels[0].TextPosition = 20;
doc.ListStyles.Add(listStyle)
# Add a paragraph
paragraph = section.AddParagraph()
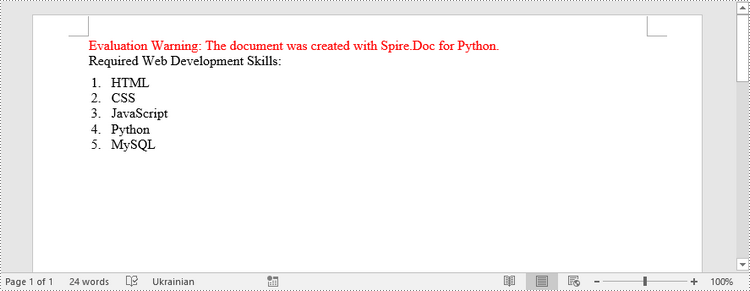
paragraph.AppendText("Required Web Development Skills:")
paragraph.Format.AfterSpacing = 5.0
# Add a paragraph and apply the numbered list style to it
paragraph = section.AddParagraph()
paragraph.AppendText("HTML")
paragraph.ListFormat.ApplyStyle("numberedList")
paragraph.ListFormat.ListLevelNumber = 0
# Add another four paragraphs and apply the numbered list style to them
paragraph = section.AddParagraph()
paragraph.AppendText("CSS")
paragraph.ListFormat.ApplyStyle("numberedList")
paragraph.ListFormat.ListLevelNumber = 0
paragraph = section.AddParagraph()
paragraph.AppendText("JavaScript")
paragraph.ListFormat.ApplyStyle("numberedList")
paragraph.ListFormat.ListLevelNumber = 0
paragraph = section.AddParagraph()
paragraph.AppendText("Python")
paragraph.ListFormat.ApplyStyle("numberedList")
paragraph.ListFormat.ListLevelNumber = 0
paragraph = section.AddParagraph()
paragraph.AppendText("MySQL")
paragraph.ListFormat.ApplyStyle("numberedList")
paragraph.ListFormat.ListLevelNumber = 0
# Save the document to file
doc.SaveToFile("output/NumberedList.docx", FileFormat.Docx)
Create a Bulleted List in Word in Python
Creating a bulleted list follows a similar process to creating a numbered list, with the main difference being that you need to specify the list type as "Bulleted" and assign a bullet symbol to it. The following are the detailed steps.
- Create a Document object.
- Add a section using Document.AddSection() method.
- Create an instance of ListStyle class, specifying the list type to Bulleted.
- Get a specific level of the list through ListStyle.Levels[index] property, and set the bullet symbol through ListLevel.BulletCharacter property.
- Add the list style to the document using Document.ListStyles.Add() method.
- Add several paragraphs to the document using Section.AddParagraph() method.
- Apply the list style to a specific paragraph using Paragraph.ListFormat.ApplyStyle() method.
- Specify the list level through Paragraph.ListFormat.ListLevelNumber property.
- Save the document to a Word file using Document.SaveToFile() method.
- Python
from spire.doc import *
from spire.doc.common import *
# Create a Document object
doc = Document()
# Add a section
section = doc.AddSection()
# Create a bulleted list style
listStyle = ListStyle(doc, ListType.Bulleted)
listStyle.Name = "bulletedList"
listStyle.Levels[0].BulletCharacter = "\u00B7"
listStyle.Levels[0].CharacterFormat.FontName = "Symbol"
listStyle.Levels[0].TextPosition = 20
doc.ListStyles.Add(listStyle)
# Add a paragraph
paragraph = section.AddParagraph()
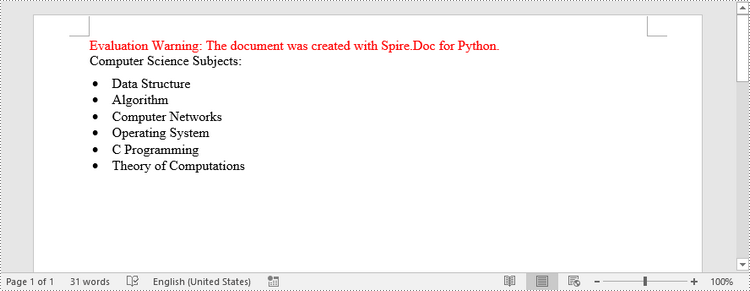
paragraph.AppendText("Computer Science Subjects:")
paragraph.Format.AfterSpacing = 5.0
# Add a paragraph and apply the bulleted list style to it
paragraph = section.AddParagraph()
paragraph.AppendText("Data Structure")
paragraph.ListFormat.ApplyStyle("bulletedList")
paragraph.ListFormat.ListLevelNumber = 0
# Add another five paragraphs and apply the bulleted list style to them
paragraph = section.AddParagraph()
paragraph.AppendText("Algorithm")
paragraph.ListFormat.ApplyStyle("bulletedList")
paragraph.ListFormat.ListLevelNumber = 0
paragraph = section.AddParagraph()
paragraph.AppendText("Computer Networks")
paragraph.ListFormat.ApplyStyle("bulletedList")
paragraph.ListFormat.ListLevelNumber = 0
paragraph = section.AddParagraph()
paragraph.AppendText("Operating System")
paragraph.ListFormat.ApplyStyle("bulletedList")
paragraph.ListFormat.ListLevelNumber = 0
paragraph = section.AddParagraph()
paragraph.AppendText("C Programming")
paragraph.ListFormat.ApplyStyle("bulletedList")
paragraph.ListFormat.ListLevelNumber = 0
paragraph = section.AddParagraph()
paragraph.AppendText("Theory of Computations")
paragraph.ListFormat.ApplyStyle("bulletedList")
paragraph.ListFormat.ListLevelNumber = 0
# Save the document to file
doc.SaveToFile("output/BulletedList.docx", FileFormat.Docx);
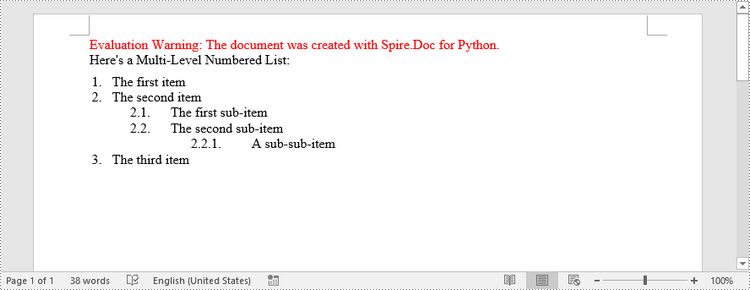
Create a Multi-Level Numbered List in Word in Python
A multi-level list consists of at least two different levels. A certain level of a nested list can be accessed by the ListStyle.Levels[index] property, through which you can set the numbering type and prefix. The following are the steps to create a multi-level numbered list in Word.
- Create a Document object.
- Add a section using Document.AddSection() method.
- Create an instance of ListStyle class, specifying the list type to Numbered.
- Get a specific level of the list through ListStyle.Levels[index] property, and set the numbering type and prefix.
- Add the list style to the document using Document.ListStyles.Add() method.
- Add several paragraphs to the document using Section.AddParagraph() method.
- Apply the list style to a specific paragraph using Paragraph.ListFormat.ApplyStyle() method.
- Specify the list level through Paragraph.ListFormat.ListLevelNumber property.
- Save the document to a Word file using Document.SaveToFile() method.
- Python
from spire.doc import *
from spire.doc.common import *

# Create a Document object
doc = Document()

# Add a section
section = doc.AddSection()

# Create a numbered list style, specifying number prefix and pattern type of each level
listStyle = ListStyle(doc, ListType.Numbered)
listStyle.Name = "levelstyle"
listStyle.Levels[0].PatternType = ListPatternType.Arabic
listStyle.Levels[0].TextPosition = 20.0
listStyle.Levels[1].NumberPrefix = "%1."
listStyle.Levels[1].PatternType = ListPatternType.Arabic
listStyle.Levels[2].NumberPrefix = "%1.%2."
listStyle.Levels[2].PatternType = ListPatternType.Arabic
doc.ListStyles.Add(listStyle)

# Add a paragraph
paragraph = section.AddParagraph()
paragraph.AppendText("Here's a Multi-Level Numbered List:")
paragraph.Format.AfterSpacing = 5.0

# Add a paragraph and apply the numbered list style to it
paragraph = section.AddParagraph()
paragraph.AppendText("The first item")
paragraph.ListFormat.ApplyStyle("levelstyle")
paragraph.ListFormat.ListLevelNumber = 0

# Add another five paragraphs and apply the numbered list stype to them
paragraph = section.AddParagraph()
paragraph.AppendText("The second item")
paragraph.ListFormat.ApplyStyle("levelstyle")
paragraph.ListFormat.ListLevelNumber = 0

paragraph = section.AddParagraph()
paragraph.AppendText("The first sub-item")
paragraph.ListFormat.ApplyStyle("levelstyle")
paragraph.ListFormat.ListLevelNumber = 1

paragraph = section.AddParagraph()
paragraph.AppendText("The second sub-item")
paragraph.ListFormat.ContinueListNumbering()
paragraph.ListFormat.ApplyStyle("levelstyle")

paragraph = section.AddParagraph()
paragraph.AppendText("A sub-sub-item")
paragraph.ListFormat.ApplyStyle("levelstyle")
paragraph.ListFormat.ListLevelNumber = 2

paragraph = section.AddParagraph()
paragraph.AppendText("The third item")
paragraph.ListFormat.ApplyStyle("levelstyle")
paragraph.ListFormat.ListLevelNumber = 0

# Save the document to file
doc.SaveToFile("output/MultilevelNumberedList.docx", FileFormat.Docx)
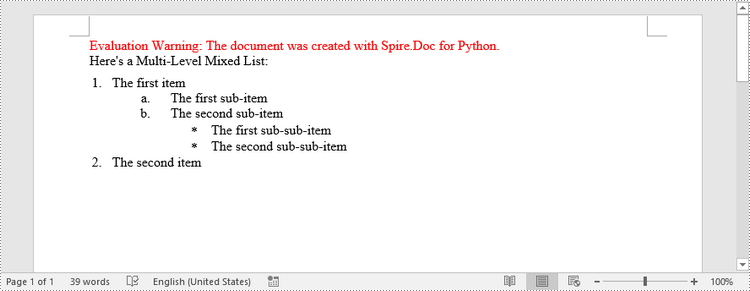
Create a Multi-Level Mixed-Type List in Word in Python
To combine number and symbol bullet points in a multi-level list, create separate list styles (numbered and bulleted) and apply them to different paragraphs. The detailed steps are as follows.
- Create a Document object.
- Add a section using Document.AddSection() method.
- Create a numbered list style and a bulleted list style.
- Add several paragraphs to the document using Section.AddParagraph() method.
- Apply different list style to different paragraphs using Paragraph.ListFormat.ApplyStyle() method.
- Save the document to a Word file using Document.SaveToFile() method.
- Python
from spire.doc import *
from spire.doc.common import *

# Create a Document object
doc = Document()

# Add a section
section = doc.AddSection()

# Create a numbered list style
numberedListStyle = ListStyle(doc, ListType.Numbered)
numberedListStyle.Name = "numberedStyle"
numberedListStyle.Levels[0].PatternType = ListPatternType.Arabic
numberedListStyle.Levels[0].TextPosition = 20
numberedListStyle.Levels[1].PatternType = ListPatternType.LowLetter
doc.ListStyles.Add(numberedListStyle)

# Create a bulleted list style
bulletedListStyle = ListStyle(doc, ListType.Bulleted)
bulletedListStyle.Name = "bulltedStyle"
bulletedListStyle.Levels[2].BulletCharacter = "\u002A"
bulletedListStyle.Levels[2].CharacterFormat.FontName = "Symbol"
doc.ListStyles.Add(bulletedListStyle)

# Add a paragraph
paragraph = section.AddParagraph()
paragraph.AppendText("Here's a Multi-Level Mixed List:")
paragraph.Format.AfterSpacing = 5.0

# Add a paragraph and apply the numbered list style to it
paragraph = section.AddParagraph()
paragraph.AppendText("The first item")
paragraph.ListFormat.ApplyStyle("numberedStyle")
paragraph.ListFormat.ListLevelNumber = 0

# Add the other five paragraphs and apply different list stype to them
paragraph = section.AddParagraph()
paragraph.AppendText("The first sub-item")
paragraph.ListFormat.ApplyStyle("numberedStyle")
paragraph.ListFormat.ListLevelNumber = 1

paragraph = section.AddParagraph()
paragraph.AppendText("The second sub-item")
paragraph.ListFormat.ListLevelNumber = 1
paragraph.ListFormat.ApplyStyle("numberedStyle")

paragraph = section.AddParagraph()
paragraph.AppendText("The first sub-sub-item")
paragraph.ListFormat.ApplyStyle("bulltedStyle")
paragraph.ListFormat.ListLevelNumber = 2

paragraph = section.AddParagraph()
paragraph.AppendText("The second sub-sub-item")
paragraph.ListFormat.ApplyStyle("bulltedStyle")
paragraph.ListFormat.ListLevelNumber = 2

paragraph = section.AddParagraph()
paragraph.AppendText("The second item")
paragraph.ListFormat.ApplyStyle("numberedStyle")
paragraph.ListFormat.ListLevelNumber = 0

# Save the document to file
doc.SaveToFile("output/MultilevelMixedList.docx", FileFormat.Docx)
Apply for a Temporary License
If you'd like to remove the evaluation message from the generated documents, or to get rid of the function limitations, please request a 30-day trial license for yourself.
Python: Change the Font of a Word Document
Modifying the font in a Word document can significantly impact its visual appearance and overall readability. Whether you want to enhance the document's style or align it with specific formatting requirements, changing the font is a straightforward process that allows you to customize your text. In this article, you will learn how to change font of a paragraph or a piece of text in a Word document in Python using Spire.Doc for Python.
Install Spire.Doc for Python
This scenario requires Spire.Doc for Python and plum-dispatch v1.7.4. They can be easily installed in your Windows through the following pip command.
pip install Spire.Doc
If you are unsure how to install, please refer to this tutorial: How to Install Spire.Doc for Python on Windows
Change the Font of a Paragraph in Python
Using Spire.Doc for Python, you can create a ParagraphStyle object which defines the font information that can be applied to a certain paragraph. The following are the steps to change the font of a paragraph.
- Create a Document instance.
- Load a Word document using Document.LoadFromFile() method.
- Get a specified section through Document.Sections[index] property.
- Get a specified paragraph that you want to change the font through Section.Paragraphs[index] property.
- Create a ParagraphStyle instance, specifying the font name, font color and font style through the properties under it.
- Add the style to the document using Document.Styles.Add() method.
- Apply the style to the paragraph using Paragraph.ApplyStyle() method.
- Save the result document using Document.SaveToFile() method.
- Python
from spire.doc import *
from spire.doc.common import *

# Create a Document instance
document = Document()

# Load a Word document
document.LoadFromFile('C:/Users/Administrator/Desktop/input.docx')

# Get the first section
section = document.Sections[0]

# Get a specific paragraph
paragraph = section.Paragraphs[2]

# Create a paragraph style
style = ParagraphStyle(document)
style.Name = 'NewStyle'
style.CharacterFormat.Bold = True
style.CharacterFormat.Italic = True
style.CharacterFormat.TextColor = Color.get_Red()
style.CharacterFormat.FontName = 'Cambria'
document.Styles.Add(style)

# Apply the style to the paragraph
paragraph.ApplyStyle(style.Name)

# Save the result document
document.SaveToFile('output/ChangeFontOfParagraph.docx', FileFormat.Docx)
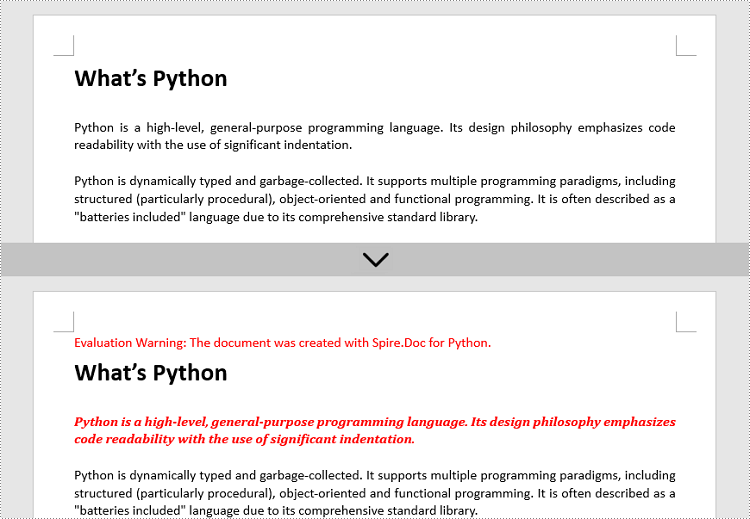
Change the Font of Specific Text in Python
To change the font of specific text (letter, phrase or sentence) in a Word document, you need first to find the text from the document and then set a different color or font style for it. The following are the detailed steps.
- Create a Document instance.
- Load a Word document using Document.LoadFromFile() method.
- Find the text that you want to change font color using Document.FindAllString() method.
- Loop through all occurrences of the searched text and change the font color or style for each occurrence through the properties under TextSelection.GetAsOneRange().CharacterFormat object.
- Save the result document using Document.SaveToFile() method.
- Python
from spire.doc import *
from spire.doc.common import *

# Create a Document instance
document = Document()

# Load a Word document
document.LoadFromFile('C:/Users/Administrator/Desktop/input.docx')

# Find the text that you want to change font
textSelections = document.FindAllString('programming language', False, True)

# Change the font style of the text
for selection in textSelections:
    selection.GetAsOneRange().CharacterFormat.TextColor = Color.get_Red()
    selection.GetAsOneRange().CharacterFormat.Bold = True

# Save the result document
document.SaveToFile('output/ChangeFontOfText.docx', FileFormat.Docx)

Apply for a Temporary License
If you'd like to remove the evaluation message from the generated documents, or to get rid of the function limitations, please request a 30-day trial license for yourself.
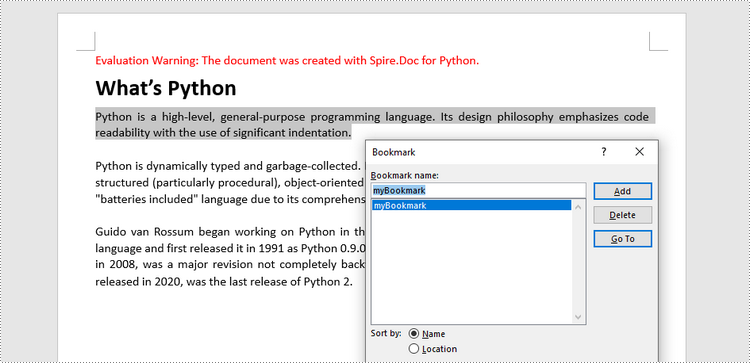
Python: Add Bookmarks to a Word Document
Adding bookmarks to Word documents is a useful feature that allows users to mark specific locations within their documents for quick reference or navigation. Bookmarks serve as virtual placeholders, making it easier to find and revisit important sections of a document without scrolling through lengthy pages. In this article, you will learn how to add bookmarks to a Word document in Python using Spire.Doc for Python.
Install Spire.Doc for Python
This scenario requires Spire.Doc for Python and plum-dispatch v1.7.4. They can be easily installed in your Windows through the following pip command.
pip install Spire.Doc
If you are unsure how to install, please refer to this tutorial: How to Install Spire.Doc for Python on Windows
Add Bookmarks to a Paragraph in Python
Spire.Doc for Python offers the BookmarkStart to represent the start of a bookmark and the BookmarkEnd to represent the end of a bookmark. To bookmark a paragraph, a BookmarkStart object is placed at the beginning of the paragraph and a BookmarkEnd object is appended at the end of the paragraph. The following are the detailed steps.
- Create a Document object.
- Load a Word file using Document.LoadFromFile() method.
- Get a specific paragraph through Document.Sections[index].Paragraphs[index] property.
- Create a BookmarkStart using Paragraph.AppendBookmarkStart() method and insert it at the beginning of the paragraph using Paragraph.Items.Insert() method.
- Append a BookmarkEnd at the end of the paragraph using Paragraph.AppendBookmarkEnd() method.
- Save the document to a different Word file using Document.SaveToFile() method.
- Python
from spire.doc import *
from spire.doc.common import *
# Create a Document object
doc = Document()
# Load a sample Word file
doc.LoadFromFile('C:/Users/Administrator/Desktop/input.docx')
# Get the second paragraph
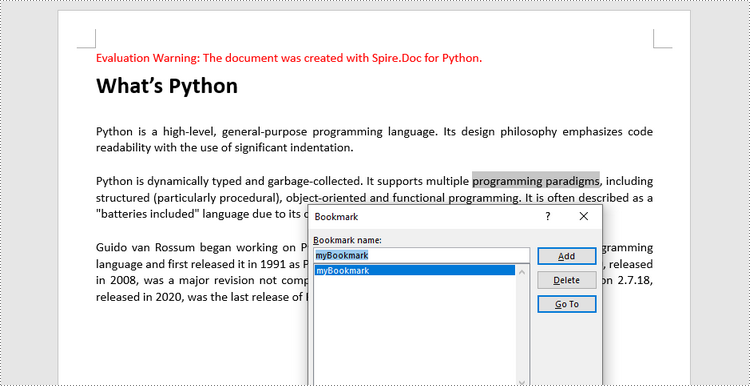
paragraph = doc.Sections[0].Paragraphs[2]
# Create a bookmark start
start = paragraph.AppendBookmarkStart('myBookmark')
# Insert it at the beginning of the paragraph
paragraph.Items.Insert(0, start)
# Append a bookmark end at the end of the paragraph
paragraph.AppendBookmarkEnd('myBookmark')
# Save the file
doc.SaveToFile('output/AddBookmarkToParagraph.docx', FileFormat.Docx2019)
Add Bookmarks to Selected Text in Python
To bookmark a piece of text, you need first to get the text from the document and get its position inside its owner paragraph. And then place a BookmarkStart before it and a BookmarEnd after it. The detailed steps are as follows.
- Create a Document object.
- Load a Word file using Document.LoadFromFile() method.
- Find the string to be marked from the document.
- Get its owner paragraph and its position inside the paragraph.
- Insert a BookmarkStart before the text and a BookmarkEnd after the text.
- Save the document to a different Word file using Document.SaveToFile() method.
- Python
from spire.doc import *
from spire.doc.common import *

# Create a Document object
doc = Document()

# Load a sample Word file
doc.LoadFromFile('C:/Users/Administrator/Desktop/input.docx')

# Specify the string to find
stringToFind = 'programming paradigms'

# Find the selected text from the document
finds = doc.FindAllString(stringToFind, False, True)
specificText = finds[0]

# Find the paragraph where the text is located
paragraph = specificText.GetAsOneRange().OwnerParagraph

# Get the index of the text in the paragraph
index = paragraph.ChildObjects.IndexOf(specificText.GetAsOneRange())

# Create a bookmark start
start = paragraph.AppendBookmarkStart("myBookmark")

# Insert the bookmark start at the index position
paragraph.ChildObjects.Insert(index, start)

# Create a bookmark end
end = paragraph.AppendBookmarkEnd("myBookmark")

# Insert the bookmark end at the end of the selected text
paragraph.ChildObjects.Insert(index + 2, end)

# Save the document to a different file
doc.SaveToFile("output/AddBookmarkToSelectedText.docx", FileFormat.Docx2019)
Apply for a Temporary License
If you'd like to remove the evaluation message from the generated documents, or to get rid of the function limitations, please request a 30-day trial license for yourself.
Python: Add or Delete Table Rows and Columns in Word
Adding or removing rows and columns in a Word table allows you to adjust the table's structure to accommodate your data effectively. By adding rows and columns, you can effortlessly expand the table as your data grows, ensuring that all relevant information is captured and displayed in a comprehensive manner. On the other hand, removing unnecessary rows and columns allows you to streamline the table, eliminating any redundant or extraneous data that may clutter the document. In this article, we will demonstrate how to add or delete table rows and columns in Word in Python using Spire.Doc for Python.
- Add or Insert a Row into a Word Table in Python
- Add or Insert a Column into a Word Table in Python
- Delete a Row from a Word Table in Python
- Delete a Column from a Word Table in Python
Install Spire.Doc for Python
This scenario requires Spire.Doc for Python and plum-dispatch v1.7.4. They can be easily installed in your Windows through the following pip command.
pip install Spire.Doc
If you are unsure how to install, please refer to this tutorial: How to Install Spire.Doc for Python on Windows
Add or Insert a Row into a Word Table in Python
You can add a row to the end of a Word table or insert a row at a specific location of a Word table using the Table.AddRow() or Table.InsertRow() method. The following are the detailed steps:
- Create a Document object.
- Load a Word document using Document.LoadFromFile() method.
- Get the first section of the document using Document.Sections[] property.
- Get the first table of the section using Section.Tables[] property.
- Insert a row at a specific location of the table using Table.Rows.Insert() method.
- Add data to the newly inserted row.
- Add a row to the end of the table using Table.AddRow() method.
- Add data to the newly added row.
- Save the resulting document using Document.SaveToFile() method.
- Python
from spire.doc import *
from spire.doc.common import *
# Create a Document object
document = Document()
# Load a Word document
document.LoadFromFile("Table1.docx")
# Get the first section of the document
section = document.Sections[0]
# Get the first table of the first section
table = section.Tables[0] if isinstance(section.Tables[0], Table) else None
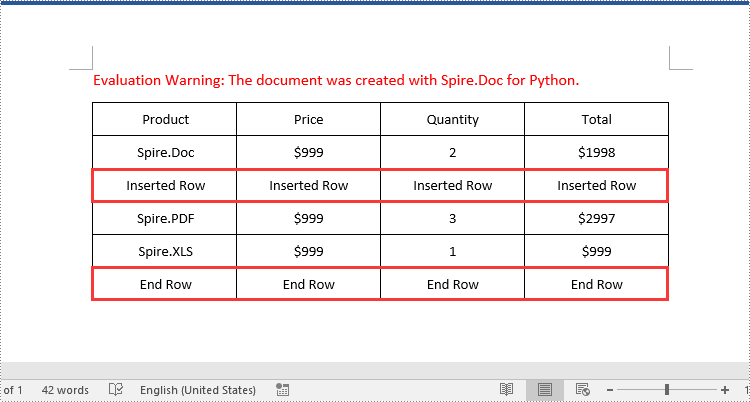
# Insert a row into the table as the third row
table.Rows.Insert(2, table.AddRow())
# Get the inserted row
insertedRow = table.Rows[2]
# Add data to the row
for i in range(insertedRow.Cells.Count):
cell = insertedRow.Cells[i]
paragraph = cell.AddParagraph()
paragraph.AppendText("Inserted Row")
paragraph.Format.HorizontalAlignment = HorizontalAlignment.Center
cell.CellFormat.VerticalAlignment = VerticalAlignment.Middle
# Add a row at the end of the table
addedRow = table.AddRow()
# Add data to the row
for i in range(addedRow.Cells.Count):
cell = addedRow.Cells[i]
paragraph = cell.AddParagraph()
paragraph.AppendText("End Row")
paragraph.Format.HorizontalAlignment = HorizontalAlignment.Center
cell.CellFormat.VerticalAlignment = VerticalAlignment.Middle
# Save the resulting document
document.SaveToFile("AddRows.docx", FileFormat.Docx2016)
document.Close()
Add or Insert a Column into a Word Table in Python
Spire.Doc for Python doesn't offer a direct method to add or insert a column into a Word table. But you can achieve this by adding or inserting cells at a specific location of each table row using TableRow.Cells.Add() or TableRow.Cells.Insert() method. The detailed steps are as follows:
- Create a Document object.
- Load a Word document using Document.LoadFromFile() method.
- Get the first section of the document using Document.Sections[] property.
- Get the first table of the section using Section.Tables[] property.
- Loop through each row of the table.
- Create a TableCell object, then insert it at a specific location of each row using TableRow.Cells.Insert() method and set cell width.
- Add data to the cell and set text alignment.
- Add a cell to the end of each row using TableRow.AddCell() method and set cell width.
- Add data to the cell and set text alignment.
- Save the resulting document using Document.SaveToFile() method.
- Python
from spire.doc import *
from spire.doc.common import *
# Create a Document object
document = Document()
# Load a Word document
document.LoadFromFile("Table1.docx")
# Get the first section of the document
section = document.Sections[0]
# Get the first table of the first section
table = section.Tables[0] if isinstance(section.Tables[0], Table) else None
# Loop through the rows of the table
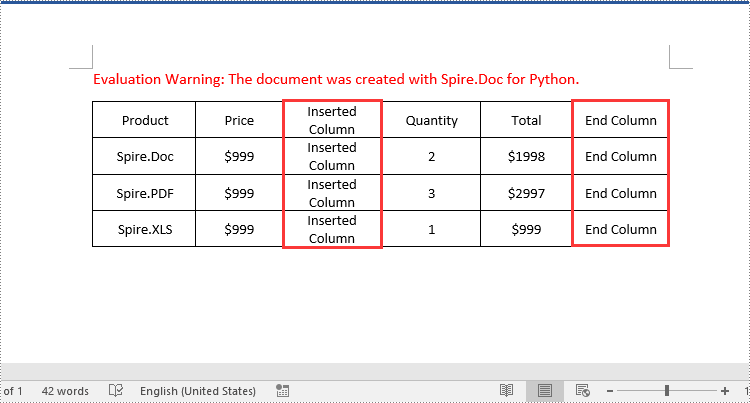
for i in range(table.Rows.Count):
row = table.Rows[i]
# Create a TableCell object
cell = TableCell(document)
# Insert the cell as the third cell of the row and set cell width
row.Cells.Insert(2, cell)
cell.Width = row.Cells[0].Width
# Add data to the cell
paragraph = cell.AddParagraph()
paragraph.AppendText("Inserted Column")
# Set text alignment
paragraph.Format.HorizontalAlignment = HorizontalAlignment.Center
cell.CellFormat.VerticalAlignment = VerticalAlignment.Middle
# Add a cell to the end of the row and set cell width
cell = row.AddCell()
cell.Width = row.Cells[1].Width
# Add data to the cell
paragraph = cell.AddParagraph()
paragraph.AppendText("End Column")
# Set text alignment
paragraph.Format.HorizontalAlignment = HorizontalAlignment.Center
cell.CellFormat.VerticalAlignment = VerticalAlignment.Middle
# Save the resulting document
document.SaveToFile("AddColumns.docx", FileFormat.Docx2016)
document.Close()
Delete a Row from a Word Table in Python
To delete a specific row from a Word table, you can use the Table.Rows.RemoveAt() method. The detailed steps are as follows:
- Create a Document object.
- Load a Word document using Document.LoadFromFile() method.
- Get the first section of the document using Document.Sections[] property.
- Get the first table of the section using Section.Tables[] property.
- Remove a specific row from the table using Table.Rows.RemoveAt() method.
- Save the resulting document using Document.SaveToFile() method.
- Python
from spire.doc import *
from spire.doc.common import *

# Create a Document object
document = Document()
# Load a Word document
document.LoadFromFile("AddRows.docx")

# Get the first section of the document
section = document.Sections[0]

# Get the first table of the first section
table = section.Tables[0] if isinstance(section.Tables[0], Table) else None

# Remove the third row
table.Rows.RemoveAt(2)
# Remove the last row
table.Rows.RemoveAt(table.Rows.Count - 1)

# Save the resulting document
document.SaveToFile("RemoveRows.docx", FileFormat.Docx2016)
document.Close()

Delete a Column from a Word Table in Python
To delete a specific column from a Word table, you need to remove the corresponding cell from each table row using the TableRow.Cells.RemoveAt() method. The detailed steps are as follows:
- Create a Document object.
- Load a Word document using Document.LoadFromFile() method.
- Get the first section of the document using Document.Sections[] property.
- Get the first table of the section using Section.Tables[] property.
- Loop through each row of the table.
- Remove a specific cell from each row using TableRow.Cells.RemoveAt() method.
- Save the resulting document using Document.SaveToFile() method.
- Python
from spire.doc import *
from spire.doc.common import *

# Create a Document object
document = Document()
# Load a Word document
document.LoadFromFile("AddColumns.docx")

# Get the first section of the document
section = document.Sections[0]

# Get the first table of the first section
table = section.Tables[0] if isinstance(section.Tables[0], Table) else None

# Loop through the rows of the table
for i in range(table.Rows.Count):
    row = table.Rows[i]
    # Remove the third cell from the row
    row.Cells.RemoveAt(2)
    # Remove the last cell from the row
    row.Cells.RemoveAt(row.Cells.Count - 1)

# Save the resulting document
document.SaveToFile("RemoveColumns.docx", FileFormat.Docx2016)
document.Close()

Apply for a Temporary License
If you'd like to remove the evaluation message from the generated documents, or to get rid of the function limitations, please request a 30-day trial license for yourself.
Python: Insert Images in Word
Images in Word documents can break up large blocks of text and make the content more visually interesting. In addition, they can also effectively illustrate complex ideas or concepts that are difficult to explain solely through text. In this article, you will learn how to programmatically add images to a Word document using Spire.Doc for Python.
Install Spire.Doc for Python
This scenario requires Spire.Doc for Python and plum-dispatch v1.7.4. They can be easily installed in your Windows through the following pip commands.
pip install Spire.Doc
If you are unsure how to install, please refer to this tutorial: How to Install Spire.Doc for Python on Windows
Insert an Image in a Word Document in Python
Spire.Doc for Python offers the Paragraph.AppendPicture() method to insert an image into a Word document. The following are the detailed steps.
- Create a Document object.
- Add a section using Document.AddSection() method.
- Add two paragraphs to the section using Section.AddParagraph() method.
- Add text to the paragraphs and set formatting.
- Load an image and add it to a specified paragraph using Paragraph.AppendPicture() method.
- Set width and height for the image using DocPicture.Width and DocPicture.Height properties.
- Set a text wrapping style for the image using DocPicture.TextWrappingStyle property.
- Save the result document using Document.SaveToFile() method.
- Python
from spire.doc import *
from spire.doc.common import *
# Create a Document object
document = Document()
# Add a seciton
section = document.AddSection()
# Add a paragraph
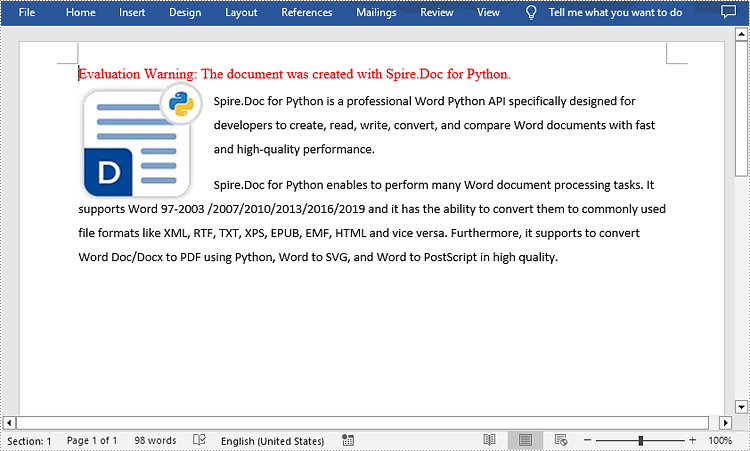
paragraph1 = section.AddParagraph()
# Add text to the paragraph and set formatting
tr = paragraph1.AppendText("Spire.Doc for Python is a professional Word Python API specifically designed for developers to create, read, write, convert, and compare Word documents with fast and high-quality performance.")
tr.CharacterFormat.FontName = "Calibri"
tr.CharacterFormat.FontSize = 11
paragraph1.Format.LineSpacing = 18
paragraph1.Format.BeforeSpacing = 10
paragraph1.Format.AfterSpacing = 10
# Add another paragraph
paragraph2 = section.AddParagraph()
tr = paragraph2.AppendText("Spire.Doc for Python enables to perform many Word document processing tasks. It supports Word 97-2003 /2007/2010/2013/2016/2019 and it has the ability to convert them to commonly used file formats like XML, RTF, TXT, XPS, EPUB, EMF, HTML and vice versa. Furthermore, it supports to convert Word Doc/Docx to PDF using Python, Word to SVG, and Word to PostScript in high quality.")
# Add text to the paragraph and set formatting
tr.CharacterFormat.FontName = "Calibri"
tr.CharacterFormat.FontSize = 11
paragraph2.Format.LineSpacing = 18
# Add an image to the specified paragraph
picture = paragraph1.AppendPicture("Spire.Doc.jpg")
# Set image width and height
picture.Width = 100
picture.Height = 100
# Set text wrapping style for the image
picture.TextWrappingStyle = TextWrappingStyle.Square
#Save the result document
document.SaveToFile("InsertImage.docx", FileFormat.Docx)
document.Close()
Insert an Image at a Specified Location in a Word document in Python
If you wish to place the image at a specified location in the Word document, you can set its position through the DocPicture.HorizontalPosition and DocPicture.VerticalPosition properties. The following are the detailed steps.
- Create a Document object.
- Add a section using Document.AddSection() method.
- Add a paragraph to the section using Section.AddParagraph() method.
- Add text to the paragraph and set formatting.
- Add an image to the paragraph using Paragraph.AppendPicture() method.
- Set width and height for the image using DocPicture.Width and DocPicture.Height properties.
- Set the horizontal position and vertical position for the image using DocPicture.HorizontalPosition and DocPicture.VerticalPosition properties.
- Set a text wrapping style for the image using DocPicture.TextWrappingStyle property.
- Save the result document using Document.SaveToFile() method.
- Python
from spire.doc import *
from spire.doc.common import *

# Create a Document object
doc = Document()

# Add a section
section = doc.AddSection()

# Add a paragraph to the section
paragraph = section.AddParagraph()

# Add text to the paragraph and set formatting
paragraph.AppendText("The sample demonstrates how to insert an image at a specified location in a Word document.")
paragraph.ApplyStyle(BuiltinStyle.Heading2)

# Add an image to the paragraph
picture = paragraph.AppendPicture("pic.jpg")

# Set image position
picture.HorizontalPosition = 150.0
picture.VerticalPosition = 60.0

# Set image size
picture.Width = 120.0
picture.Height = 180.0

# Set a text wrapping style for the image  (note that the position settings are not applicable when the text wrapping style is Inline)
picture.TextWrappingStyle = TextWrappingStyle.Through

# Save the result document
doc.SaveToFile("WordImage.docx", FileFormat.Docx)
doc.Close()
Apply for a Temporary License
If you'd like to remove the evaluation message from the generated documents, or to get rid of the function limitations, please request a 30-day trial license for yourself.